
What are the most important Google Analytics eCommerce metrics and KPIs for your store?
Tracking a specific set of ecommerce metrics and KPIs can help you see where your site needs improvement, and help you make changes that’ll bring in more revenue.
In this guide, we’ll explore some crucial eCommerce metrics and KPIs (Key Performance Indicators) to track in Google Analytics 4 that will help you boost your revenue.
How to Enable eCommerce Tracking in WordPress
Before we jump into our list of metrics, we wanted to give WordPress users a super quick and easy way to enable eCommerce tracking in GA4 in WordPress.
With the MonsterInsights eCommerce addon, you can easily enable eCommerce tracking on your WordPress site without having to touch any code.

Read our easy-to-follow guide on how to enable eCommerce tracking in Google Analytics.
Now, let’s get to it!
9 Top eCommerce Metrics to Track and Measure
What are the best eCommerce metrics and KPIs to track for measuring the performance of your eCommerce store?
Let’s take a look at the metrics you should be tracking in Google Analytics 4.
- eCommerce Revenue
- Average Order Value
- Shopping Cart Abandonment
- Website Speed
- Advertising Cost vs Revenue
- Customer Lifetime Value
- Newsletter Form Conversions
- Top Conversion Sources & Paths
- Customer Retention Rate
1. eCommerce Revenue
Your eCommerce revenue is arguably the most important metric for your store. How much revenue did you make within the time period of your report?
To find it, go to Reports » Life Cycle » Monetization » Overview:

If you’re using MonsterInsights, simply navigate to the eCommerce tab to find your revenue at the top of the report:

The reasons for the importance of your total revenue are pretty obvious – it reflects the overall health of your store. Keep an eye on it from week to week or month to month to watch the trend.
2. Average Order Value
One of the best ways to increase the revenue you make from your store is by encouraging your customers to spend more when they make a purchase.
To persuade customers to spend more on your store, you can focus on tracking and improving your Average Order Value (AOV).
This is a metric you can also find right at the top of your MonsterInsights report:

The higher the AOV, the more income your store gets from each order. The basic calculation is the total sum of money made divided by the total number of orders.
We’ll go over how to find this metric in Google Analytics 4. Read through or skip ahead to how to increase your AOV.
In Google Analytics 4, average order value is actually called average purchase revenue.
To find your average purchase revenue, head to the Reports tab, then Monetization » Overview. Scroll down to the graph that shows Average purchase revenue per user:

Now, that report is really basic and doesn’t give you any more information. If you want a better report, create a custom Exploration report.
To start, open the Explore tab and create a Blank report:

Name your report Average Purchase Revenue or something similar, then click the plus icon in the Dimensions box:

Import Device category, Session source/medium, City, and Session campaign to your report.
Then, do the same by clicking the Plus icon in the Metrics box, and import Average purchase revenue.
Now those boxes should look like this:

Now, click and drag Session source/medium from Dimensions into the Rows box, and drag Average purchase revenue into your Values box.
You should now have a report of your average purchase revenue by source/medium!
You can also play around with using the other dimensions we imported to see your average purchase revenue by city, device category or campaign.
How to Raise Your AOV
Now, there are multiple ways you can raise your store’s AOV. Here are 3 of the biggest ones:
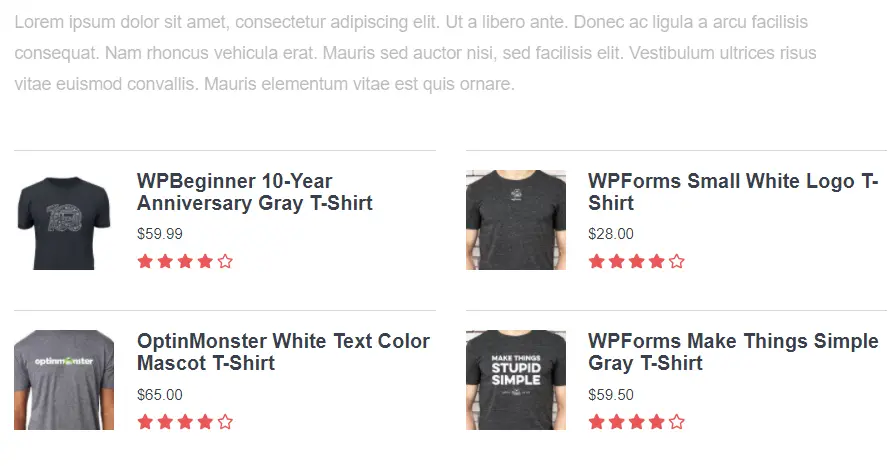
#1 Suggest Popular Products
Have you ever purchased something you weren’t planning to buy because it popped up in a popular products area? You can easily show popular products too on your own (WordPress) site with MonsterInsights Popular Posts. Just set up a few simple settings under Insights » Popular Posts » Popular Products:

Then, you’ll be ready to show your most popular products to your users:
#2 Upsell
Upselling is persuading your customers to buy more products, or something more expensive.
For example, a company that’s great at this is Best Buy. When you add a product to your cart that has an available protection plan, the offers are right there when you’re choosing your product options:

Then, during checkout, they offer their setup services as additional addons:

#3 Set a Minimum for Free Shipping
Offer free shipping at a certain amount, like Old Navy does here:

3. Shopping Cart Abandonment
On average, about 76% of people abandon their carts before completing their purchase. That’s a pretty huge number! How does your store compare?
You can view your shopping cart abandonment rate in Google Analytics 4 by setting up a custom Explore report.
To do that, start with a Blank report:
Give your report a name like Shopping Funnel, then select the Funnel exploration option in the Technique box:

Then, click on the pencil icon by Steps:

Now it’s time to create 3 steps.
On the screen where you create steps, you’ll find three fields you’ll need to update: the name, add new condition dropdown, and Add step button.

Name Step 1 “Add to Cart” and choose add_to_cart as the condition.
Name Step 1 “Begin Checkout” and choose begin_checkout
Name Step 3 “Purchase” and choose purchase as the condition.
Here’s what you should have now:

Finally, click the blue Apply button in the upper right to see the shopping funnel report you just created. You’ll find Abandonment rate right there in your report:

A few reasons customers abandon their cart are:
- Seeing unexpected costs at checkout, such as high shipping rates
- Slow shipping
- No security badges or trust seals
- Form is too long or there’s forced account creation
Want more on how to improve your cart abandonment rate? Read 11 smart tactics to reduce shopping cart abandonment.
4. Website Speed
According to an Unbounce study, nearly 70% of consumers admit that a website’s speed influences how likely they are to buy, and how likely they are to return to the website again later.
What good are all these other metrics if your slow website is causing would-be buyers to leave?
Plus, Google’s page experience update gives a bump up in their search results to webpages that are faster than others.
You have to make sure your website is running fast enough. With MonsterInsights, you can access your speed report right from your WordPress dashboard. See all the most important site speed metrics, along with tips for how to improve them.

Google Analytics 4 does not include a site speed report, but you can also find site speed details in Search Console.
5. Advertising Cost vs. Revenue
Are you running ads through Google Ads? Are you bringing in more revenue than what you’re spending to advertise?
There’s a great custom report you can make in Google Analytics 4 to see these specific numbers.
Start with a Blank report:
To the Dimensions box, add Google Ads campaign.
To the Metrics box, add Purchases, Google Ads cost per click, Google Ads cost, and Ecommerce revenue.

Then, click and drag your Dimension to the Rows box, and click and drag your Metrics into the Values box.
Now, you should have a report that gives you a super easy way to see exactly how much each ad campaign costs and how much revenue it brings in.

Simple ideas to improve your return on ad spend:
- Disable or improve low-performing ad campaigns
- Run more ads to higher-cost products
- Refine keyword targeting and use geo-targeting where relevant
- Optimize your landing pages and overall site user-friendliness
6. Customer Lifetime Value
Customer Lifetime Value (CLV) is the total amount that an average customer might spend at your store during their lifetime.
Calculating your customers’ lifetime value helps you decide how much to spend on marketing to them.
You can find the lifetime value report in Google Analytics 4 by using their built-in user lifetime explore report.
To access it, head to your Explore tab. Once there, scroll all the way to the right to find User lifetime:

Once you click that, you’ll have a report that’s already set up:

Note that the report is broken down by first user medium. Try the other Dimensions out by clicking and dragging them over to the Rows box (and removing the one that’s there).
Once you know your average customer lifetime value, you can make good decisions on how much you should spend to bring in new customers (and keep them coming back) to make your business profitable.
7. Newsletter Form Conversions
Your email list is one of your biggest assets.
Growing an email list helps you connect with your leads and customers, drive repeat sales, improve your onboarding experience, and engage customers with your brand.
Keeping track of how many people are submitting your forms and getting added to your email list is important. That data can help you make better decisions that’ll increase your revenue.
Using the MonsterInsights Forms addon is the easiest way to track form submissions in Google Analytics. With the Forms addon, you don’t have to go through any setup in Google Analytics or Google Tag Manager to track your forms.
When you activate the addon, it automatically tracks form submissions as a Google Analytics event without any further setup. Open your report to see impressions, conversions, and conversion rate for each form:

If you want to track form submissions without using MonsterInsights, that gets a bit too involved to go through here. Your best bet is to follow this form tracking tutorial.
8. Top Conversion Sources & Paths
Which referral sources are bringing in revenue (conversions)? Is social media sending buyers to your site? Find out how much revenue you’re making from each source in your MonsterInsights eCommerce report.

To view Google Analytics eCommerce sales (purchases) and revenue data organized by channel, navigate to Acquisition » Traffic acquisition:

Then, scroll to the right in the table to find Conversions and Total revenue. Click the All Events drop-down arrow under Conversions and select purchase:

Now, the table is showing total purchases and revenue by traffic channel.

Now, how are all of your users making it to checkout? Do they check out on their first visit via referral? Do they find you via organic, then come back via the direct channel to make a purchase? Find out in your Top Conversion Paths report.
Navigate to the Advertising tab, then Attribution » Conversion paths.
For instructions on how to use and read this report, follow this tutorial.
Or, If you’re using OptinMonster to build popups and other marketing campaigns on your site, you can use the revenue attribution feature to see how much each campaign is earning.
9. Customer Retention Rate
It’s cheaper to keep a customer than to get a new one, but many customers won’t return to make another purchase.
Most customers are in the process of filling a need and aren’t interested in a long-term relationship with your brand. If you have a retention strategy in place, you have a better chance of nurturing your first-time buyers and persuading them to make repeat purchases.
To access this data in Google Analytics 4, go back to the funnel report you created up in the Shopping Cart Abandonment section. To that report, add a Dimension: New/established. Then, drag that dimension into the Breakdown box:

Now, take a look at your report. In our example, you can see that new users are abandoning their carts 83.91% of the time, whereas “established” (returning) users are abandoning their carts 66.41% of the time.

Use MonsterInsights for Quick, At-a-Glance eCommerce Metrics
It’s important to keep tabs on your analytics daily when you’re running an eCommerce website.
But really, who has time to be scouring Google Analytics every day? Once you create all the exploration reports we went through above, you’ll at least get to access them over and over without recreating them. But it still takes time to look at even the basic reports!
MonsterInsights puts your most needed reports right there inside your WordPress dashboard, so you can see at-a-glance how everything is performing every day.

Plus, it sets up eCommerce reporting for you with a few simple clicks. No coding needed, and no messing with the code on your website. Set it up for easy access to some of your top eCommerce KPIs, such as conversion rate, revenue, top products, average order value, adds and removals from cart, and more.

Not using MonsterInsights yet? What are you waiting for?
If you enjoyed this article, you may also want to check out:
The Most Important Google Analytics Metrics Every Business Should Track
6 Best eCommerce Plugins for WordPress (+ BONUS Picks)
Google Analytics 4 eCommerce Tracking Tutorial [WordPress]
7 Best eCommerce Analytics Tools to Grow Your Business
10 Critical SEO KPIs to Track Now
You can also follow us on Twitter, Facebook and YouTube for more free tutorials.