Do you want to create a landing page in WordPress to get more traffic and leads or conversions? Well-designed landing pages can help you build more effective marketing campaigns, drive more traffic to your site, and convert more of your traffic into customers and leads.
In this article, we’ll walk through a step-by-step tutorial on how to create a landing page in WordPress.
What Is a WordPress Landing Page?
A landing page is a webpage that’s designed to achieve one single goal. Often that goal is to make a sale or to collect email addresses. Landing pages should focus on encouraging people to take action.
Broadly speaking, a landing page is a powerful marketing technique that serves both as a traffic-generating tool and a conversion machine.
To drive traffic to your landing pages, you can create marketing campaigns using paid ads, emails, social media, QR codes, or another platform to reach your audience, with links that lead to your landing page.
If you make great landing pages, you’ll convert a higher percentage of the traffic into leads or customers. Landing pages do a much better job of converting than your home page or some other unfocused page on your site.
Since the goal of a landing page is to convert more of your website traffic into leads or customers, you’ll need to make it look attractive and engaging. Above all, you’ll need to properly design and organize the various call-to-action elements like the buy button, signup forms, play media button, etc. in an appealing way.
How to Create a Landing Page in WordPress
Creating a landing page in WordPress is fairly easy when using a WordPress landing page plugin. Even if you’re not a developer, you can create beautiful, high-converting landing pages in WordPress and boost your website traffic and sales.
There are several WordPress landing page plugins on the market. However, not all plugins are created equal.
That’s why we’re going to use our favorite landing page builder plugin, SeedProd, for this tutorial. It’s the best WordPress landing page plugin on the market.
It has an easy-to-use drag-and-drop builder, hundreds of professionally designed templates, and ready-made landing page blocks to boost conversions.
Let’s get started.
Step 1: Install the SeedProd Plugin on Your Site
First, you’ll need to visit the SeedProd website and purchase the plugin. Then, you can download the plugin file to your computer and copy the plugin license key. Or, if you’d like to try the lite version of SeedProd first, you can download it from wordpress.org.
Next, you’ll have to log into your WordPress dashboard and install the plugin. If you need detailed instructions, here’s our step-by-step guide to installing a WordPress plugin. After it’s installed, don’t forget to activate it.
Then, you’ll need to enter the plugin license key on the welcome page. Enter the license key you’ve copied from earlier via your account on SeedProd’s website and click the Verify Key button.

After the license key is verified, scroll further down the page and click on the Create Your First Page button.
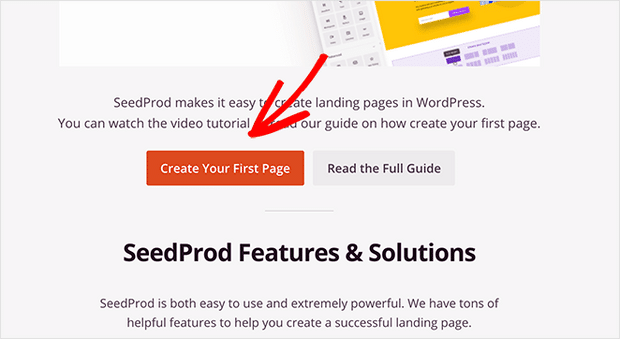
After clicking the button, you’ll be redirected to the SeedProd dashboard where you can start to create a new landing page.
Step 2: Create a Landing Page with SeedProd
On the SeedProd dashboard, you’ll see 5 different pages you can create. At the top of the page, you’ll see options for coming soon mode, maintenance mode, login page, and 404 page.
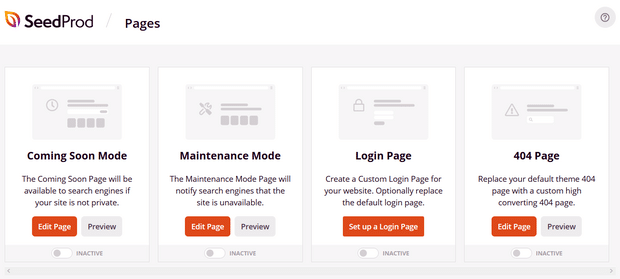
Just below that, you can see the option for creating a landing page.
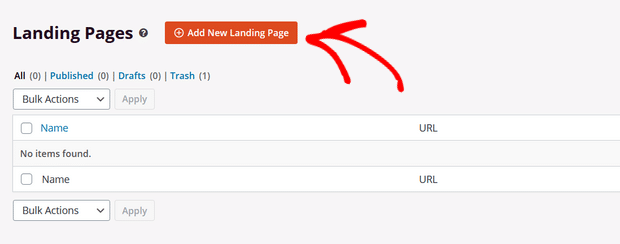
Click the + Add New Landing Page button to get started.
After clicking the button, you’ll be prompted to choose a landing page template. SeedProd offers many beautiful landing page templates to choose from. If you’re making a landing page for sales and marketing, check out the Sales, Webinar, and Lead Squeeze template categories.
Or, you can select the blank template to start from scratch.

To use a template, simply hover over it and click the Checkmark button.
The next step is to customize the template with your own content.
Step 3: Customize the Landing Page Template
After choosing your landing page template, you’ll be redirected to SeedProd’s visual drag-and-drop builder where you can customize your landing page.
There are landing page blocks and sections you can add to the template on the left side of the builder. And on the right side, you can see how your landing page looks with the live preview.
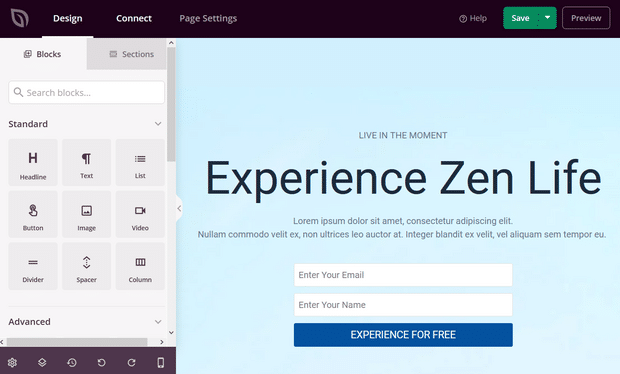
Customizing the landing page template is very easy as you can tweak each and every element simply by pointing and clicking on it.
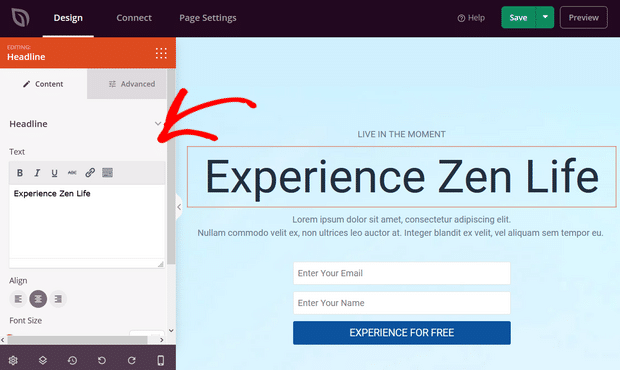
You can change the text, its style, color, alignment, layout, etc. to fit your product or overall brand. Similarly, you can change the background color or images used within the template with your product-related standard colors and images. To do this, click on the Global Settings button in the bottom left corner.
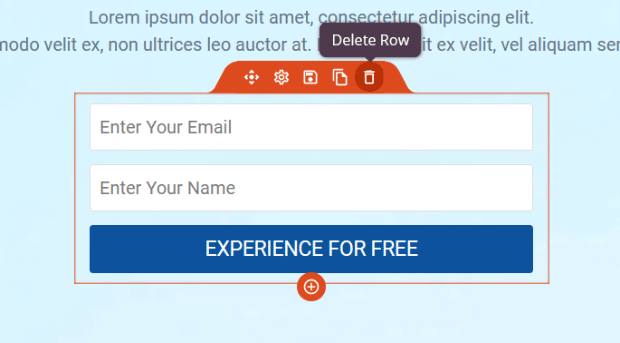
If there are landing page blocks that aren’t useful to your landing page, you can delete them by simply clicking the trash can icon on mouse hover. You can also duplicate a content block, move it, change the block settings, or save the block.
Additionally, you can easily add new blocks like buttons, opt-in forms, contact forms, social profiles, and more to your landing page template.
To add new content, drag a landing page block from the left side of the screen and drop it onto your landing page template wherever you want it placed.
For example, you can add a countdown timer to increase urgency.
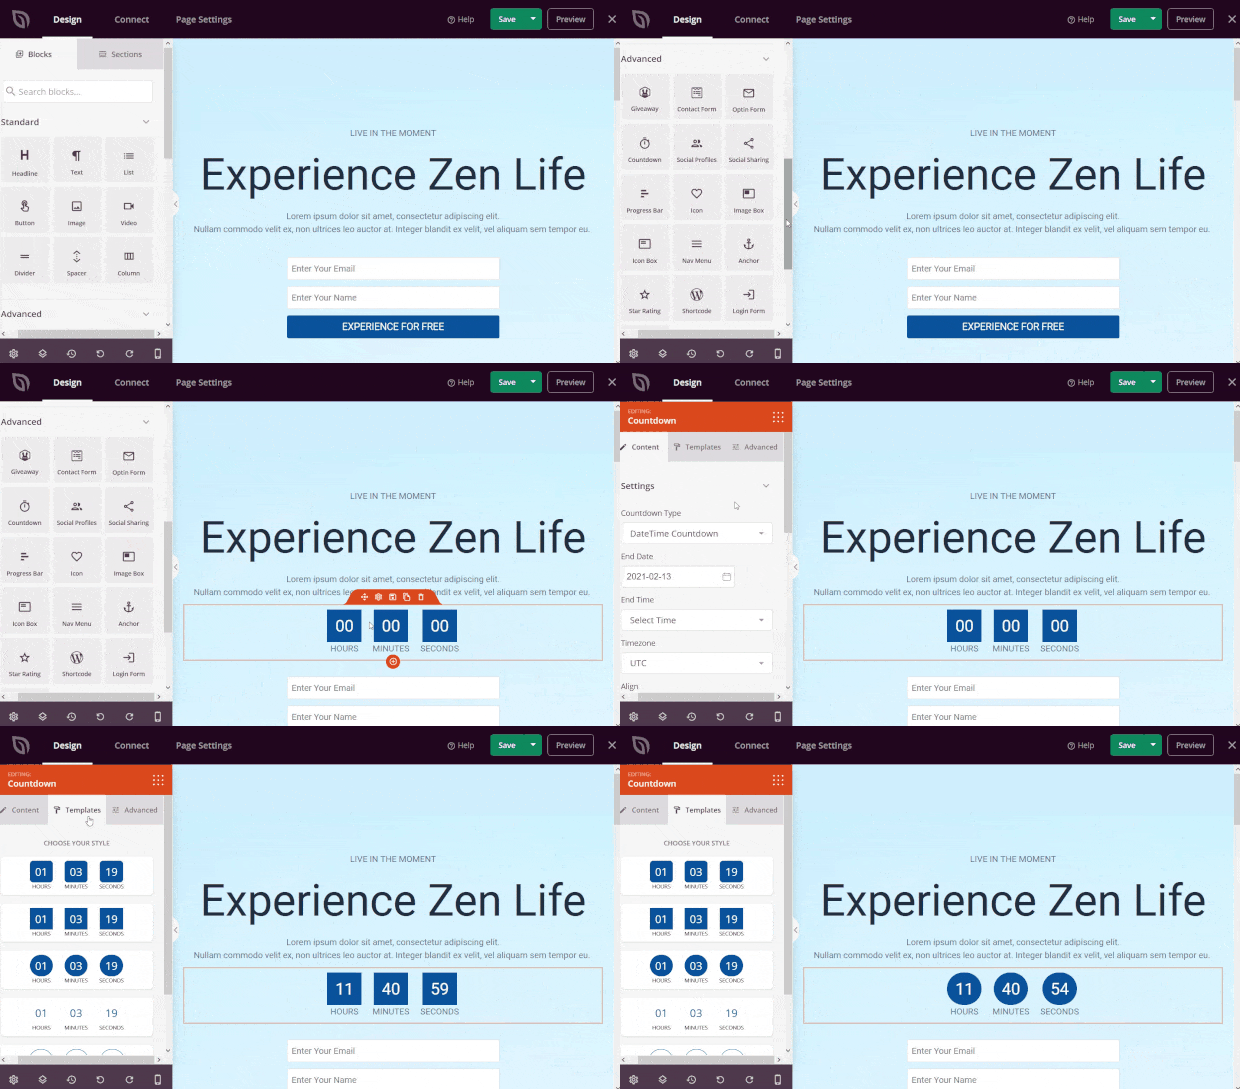
Again, to customize any new block you add to your page, simply click on it to change the text, style, alignment, and more.
Once you’re satisfied with how your landing page looks, click the Save button on the top right corner.
Step 4: Connect Your Email Marketing Service
If you’ve added an opt-in form to your landing page to capture leads and grow your email list, you need to connect your email marketing service.
To do that, click on the Connect tab at the top of the screen. SeedProd integrates with popular email marketing providers like Constant Contact, Mailchimp, and more.
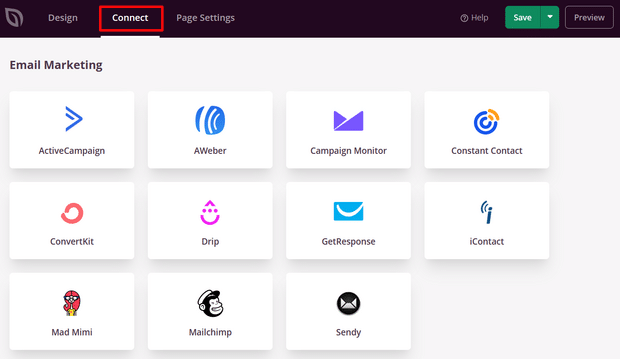
Find your email service in the list and click Connect New Account. Simply follow the instructions to connect and verify your account.
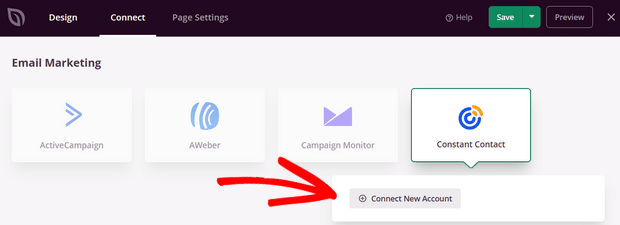
Now, every time someone provides their email address via your landing page optin, it will be automatically added to your email list.
Step 5: Publish Your Page
Lastly, it’s time to make your landing page live on your WordPress site. To publish your landing page, all you have to do is click on the dropdown arrow next to the Save button and hit Publish.

SeedProd will show a success message to let you know your page is now live.

You can click on the See Live Page button to view your landing page.

That’s all! It’s an effortless 5-step process to create a WordPress landing page using SeedProd. This plugin is the best WordPress landing page builder you can get.
Track Your WordPress Landing Page Performance
Now that you’ve published your landing page on WordPress, you can start building marketing campaigns to drive traffic to that page. Then, your landing page will work to turn more visitors into customers or subscribers.
You’ll need to monitor how your landing page is actually performing. MonsterInsights will help you do that by tracking your landing page visitors and their interactions on your site.
MonsterInsights is the best Google Analytics plugin for WordPress. It allows you to install Google Analytics in WordPress easily without having to edit your theme file to insert the Analytics tracking code.
After it’s set up, it automatically tracks your site’s analytics and provides you with easy-to-understand reports inside your WordPress dashboard. A quick summary of the website analytics report is available in MonsterInsights’ dashboard widget.
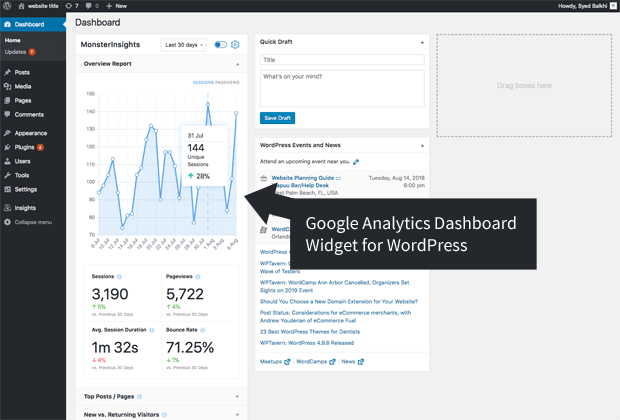
To view the full reports, you’ll need to visit Insights » Reports from your dashboard. There, you’ll see the overview report first.
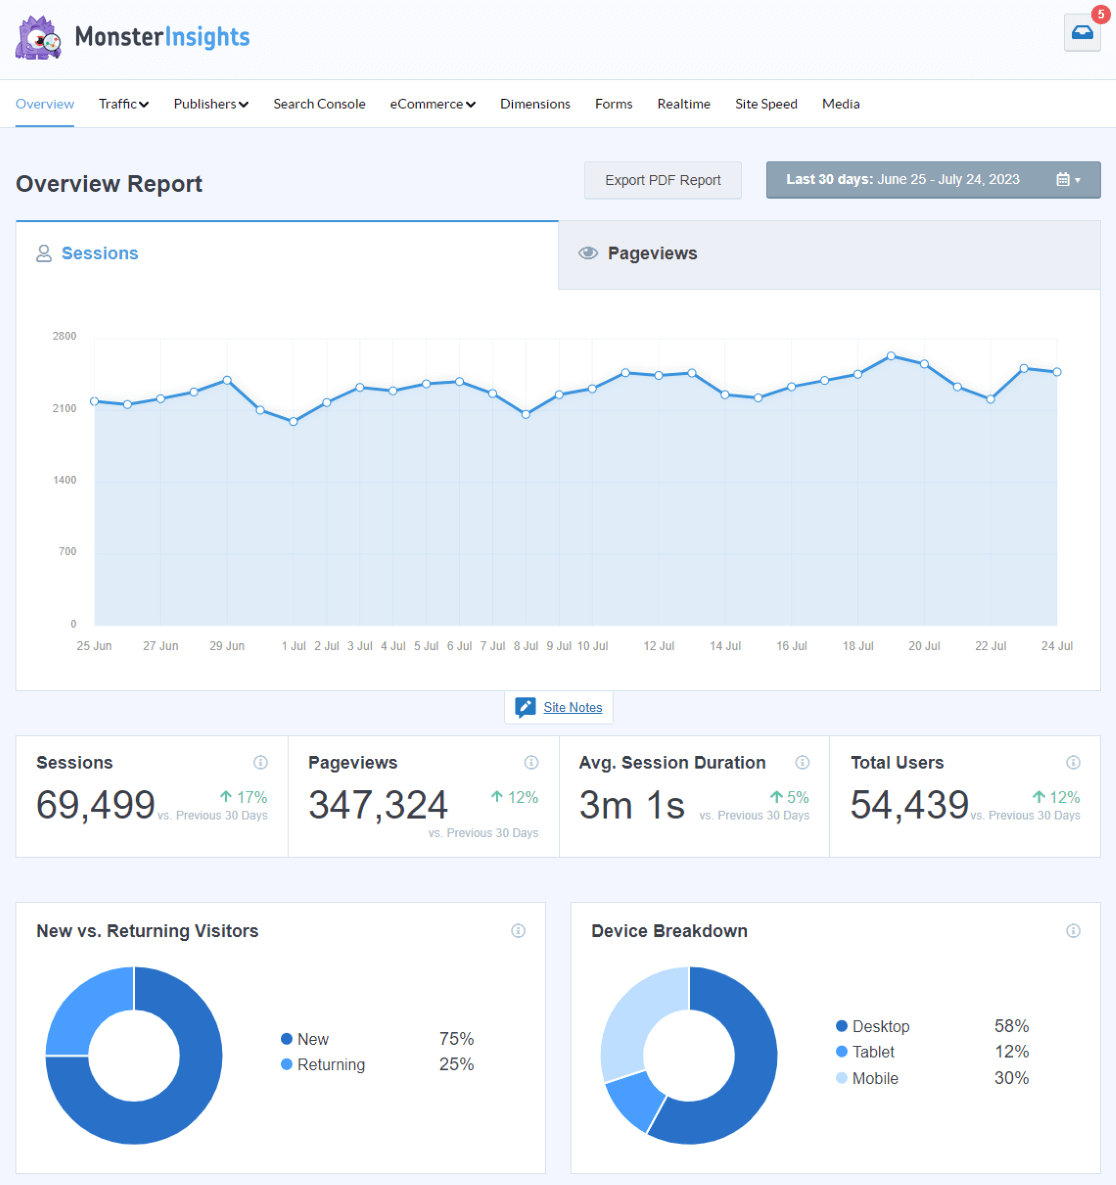
Then, you can view all the other reports by clicking on the tabs/links at the top of the report. These are a few types of data you can track using MonsterInsights:
- Top landing pages: Which landing pages are most popular on your site
- Link and button click tracking: Which links and buttons are getting the most clicks
- Search Console report: What keywords people are using to come to your site
- Forms tracking: Which forms are getting the most impressions and submissions
In addition, you can track advanced metrics like downloads, eCommerce transactions, custom dimensions, video plays, and more.
So, if you want to track the stats that matter to your business or brand, download the plugin today! If you’re still conflicted, check out all of its features before making your purchase.
If you need more tools to grow your website, see our handpicked list of best WordPress plugins.
We hope this article helped you to learn how to create a landing page in WordPress easily.
You might also want to check out our guides to How to Use the Google Analytics Landing Pages Report and 5 Great Landing Page Headline Formulas to Boost Conversions.
And don’t forget to follow us on Twitter, Facebook and YouTube for more helpful Google Analytics tips.


hi sunita
this is a really useful article to make a landing page in such an easy way . I also used beaver builder. It is really very useful and very fast page builder. I want to add one more page builder plugin named Elementor pro. I liked these two page builder to work. These two both are very fast builder plugin and easy to customize.
Your step by step instructions will be very helpful to use Beaver Builder.
Thanks, Ehsan!
Great to know you found it useful. We agree with you. We’ve featured Elementor on our list of best WordPress landing page plugins.
Thanks for the very useful information. As a Wordpress user but not a programmer, it is daunting… this step by step guide has made it easy to understand. I’m looking forward to having a go 🙂
HI dear
I am a newbie in the WordPress web developer
Your article is very knowledgeable and useful
Thanks for your best work