Have you ever wanted to know what your customers did before they clicked Buy or Join Now? Set up customer journey tracking in MemberPress to discover all the steps that led up to their decision to buy.
It’s easy when you use MemberPress with the MonsterInsights User Journey addon. And you get access to a new level of knowledge about buyer behavior.
This information helps you not only create a better user experience for buyers, but can also improve your ability to convert visitors into paying customers. This post will show you how to enable and view customer journey tracking in MemberPress in the simplest way possible, using MonsterInsights.
What Is Customer Journey Tracking?
Customer journey tracking is simply a way to see what buyers do online before completing a purchase. Customer journey tracking in MemberPress shows you what page your online buyers originally landed on, which other pages they navigated through, and how long they spent on each of these steps.
Benefits of Tracking Customer Journeys in MemberPress
You’ll discover how long it takes for customers to get through your sales and checkout pages, and what content did best at converting visitors into into buyers or new subscribers.
Seeing how people navigate your site gives you clues to what an ideal customer journey looks like. Then you can revise your website menus, content, and sales flow to get more users to convert.
Tracking Customer Journeys Step-by-Step
The fastest and simplest way to set up customer journey tracking for MemberPress is to use the MonsterInsights plugin. Let’s walk through the process of setting up your WordPress site to track customer journeys the quickest way possible.
Step 1: Install MonsterInsights
First, we’ll download and install MonsterInsights on your WordPress site.
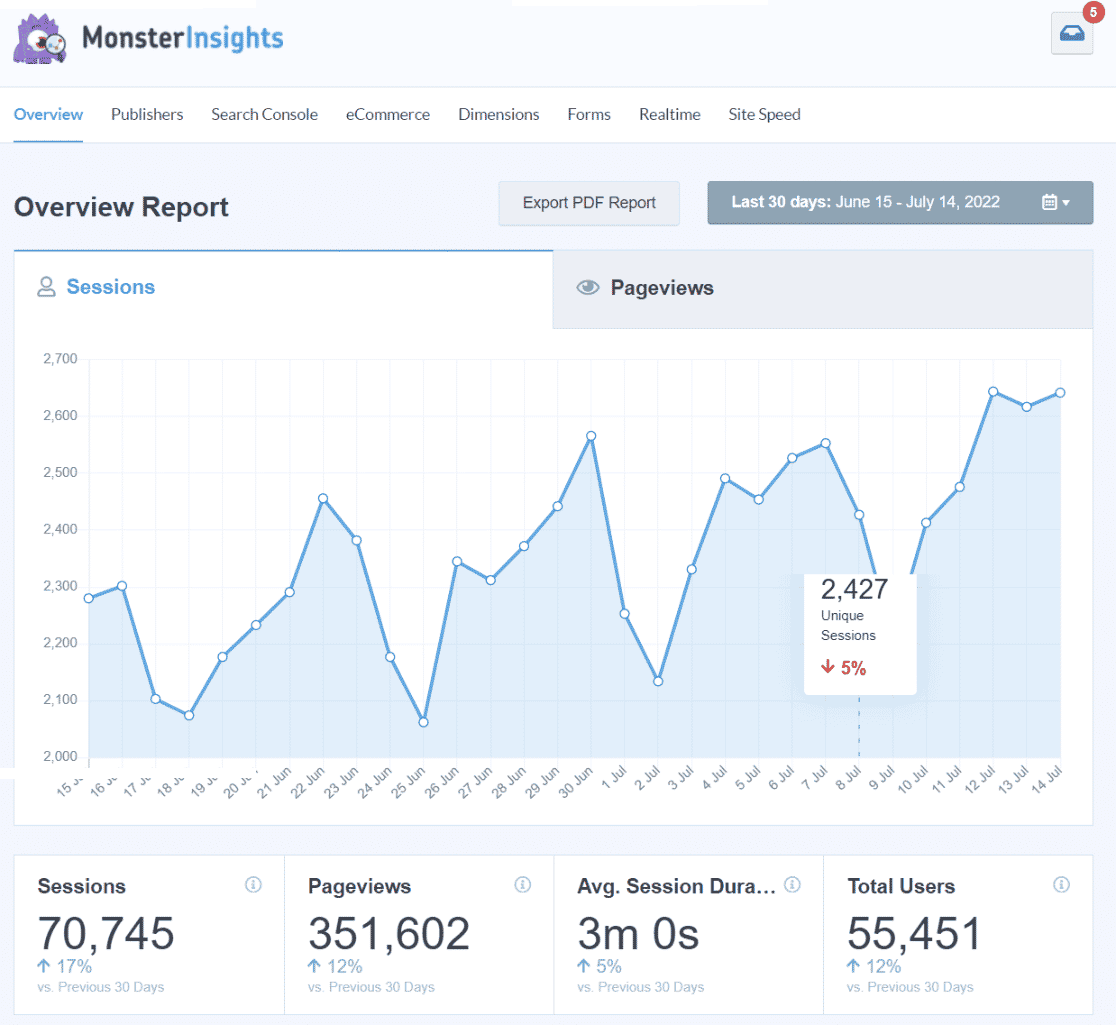
MonsterInsights is the top WordPress plugin for Google Analytics. It connects your WordPress website with Google Analytics so you can view the most important statistics on traffic and site visitors directly in your dashboard.
But MonsterInsights goes beyond the basic metrics to give you more advanced tracking features, all with no coding or programming. Even beginners can set up one-click tracking for eCommerce, online forms, videos, outgoing links, and much more.
In order to get all the advanced tracking capabilities, including the User Journey addon, you’ll need to download MonsterInsights Pro or above. Go ahead and get your license and download the plugin.
After you download the MonsterInsights .zip file, log in to WordPress and click the Plugins » Add New link.

Now, we’ll install MonsterInsights by clicking Upload Plugin on the Add Plugins screen. Choose the .zip file you downloaded earlier and then click Install Now.
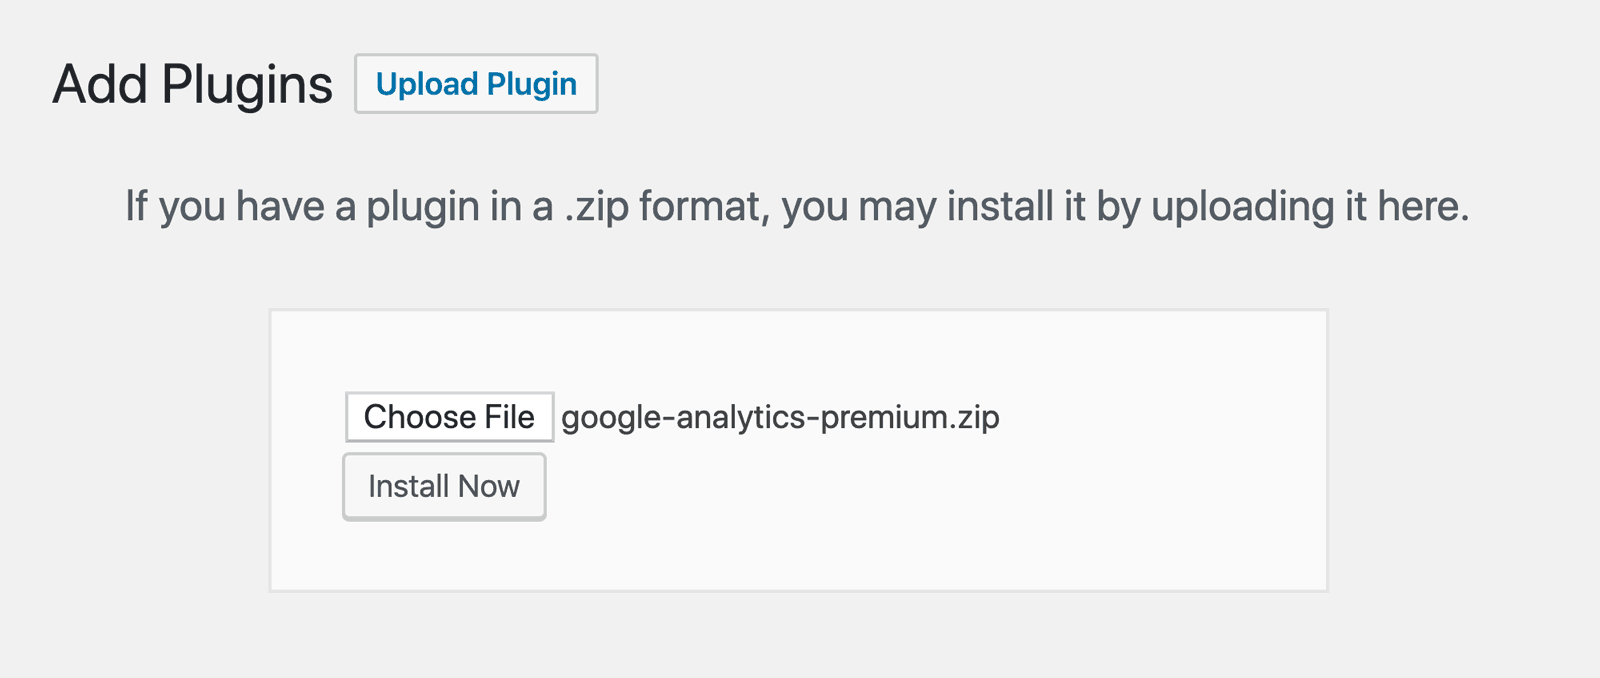
At this point, the plugin will take a few seconds to install. After it’s finished, click the Activate Plugin button.
That’s all there is to installing MonsterInsights!
Now, follow the Setup Wizard to connect your website to Google Analytics.
MonsterInsights uses data from Google and other sources to give you the most useful and up-to-date website traffic stats, right in your WordPress dashboard.
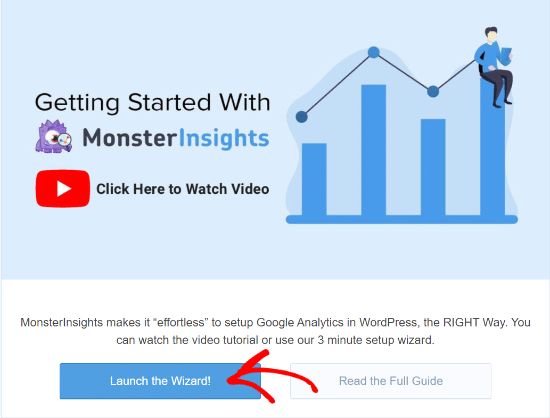
If you’d like more detailed instructions on setting up Google Analytics with MonsterInsights, check out this tutorial on how to get Google Analytics set up properly.
Step 2. Install the eCommerce Addon
Setting up customer journey tracking in MonsterInsights requires the eCommerce addon. This powerful addon automatically sets up tracking for critical eCommerce stats and shows you that information at a glance inside WordPress.
First, click Insights » Addons in the MonsterInsights menu in WordPress. Then you’ll click Install to install and activate the addon.
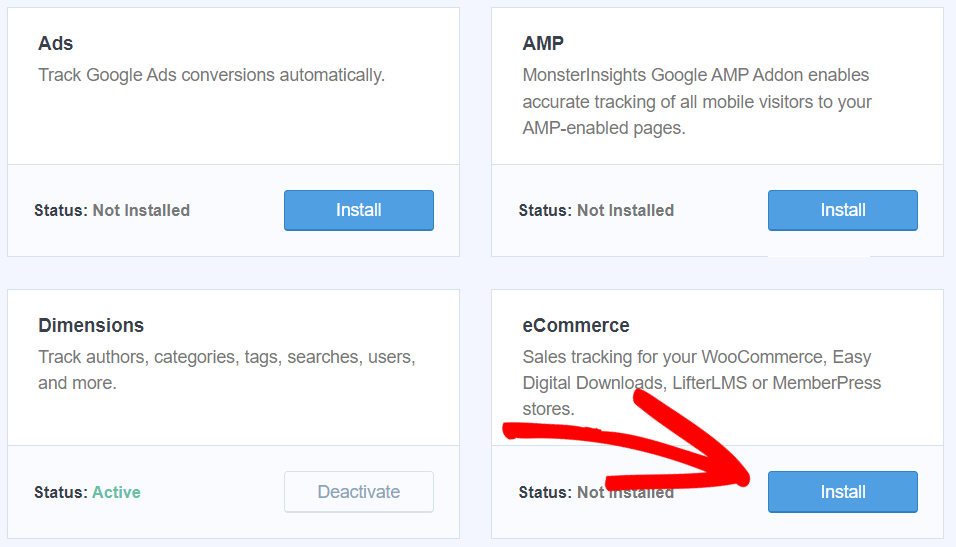
After you activate the eCommerce addon, you may need to wait for 24 hours for Google Analytics to gather data. Then, when you want to see your top eCommerce stats, go to Insights » Reports and click on the eCommerce tab.
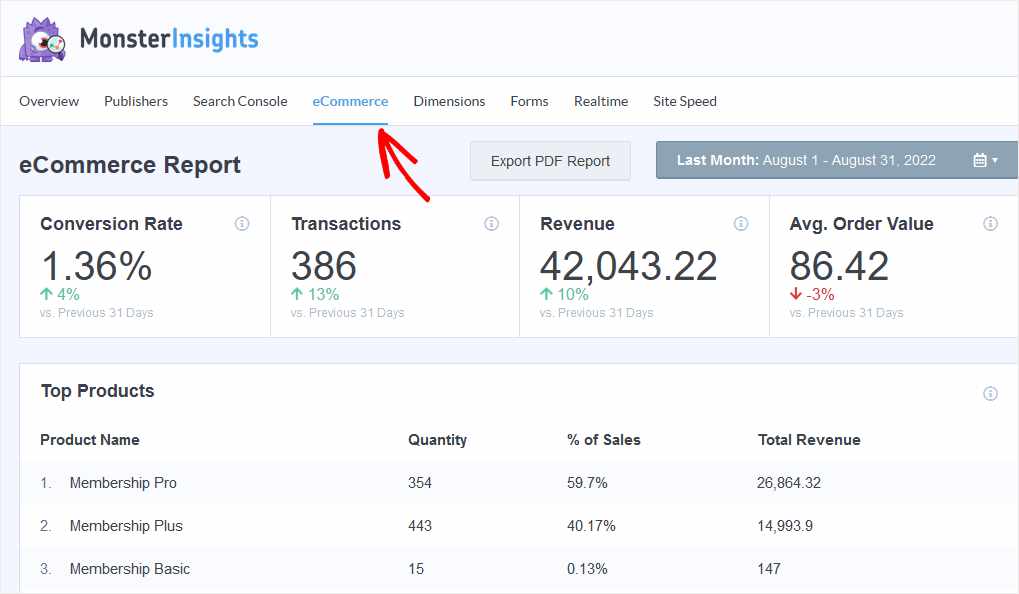
Here, you’ll see an overview screen with your top eCommerce metrics like conversion rate, revenue, and average order value. Under that you’ll find sales numbers and revenues generated by your top products, top referral sources in terms of revenue, and stats related to checkouts and cart abandonment.
Okay, that wasn’t too difficult! It’s time to install one more addon to MonsterInsights, then we’re almost done.
Step 3. Install User Journey Addon for MonsterInsights
MonsterInsights created a User Journey addon for WordPress sites that sell products online. The User Journey addon gives users of eCommerce plugins like MemberPress a new way to look at customer journeys.
Like the eCommerce addon, User Journey requires a MonsterInsights Pro level account or above.
To install the User Journey addon, go to Insights » Addons in the MonsterInsights menu in WordPress. Once you’re there, simply click Install in the User Journey tile and the plugin will install and activate.
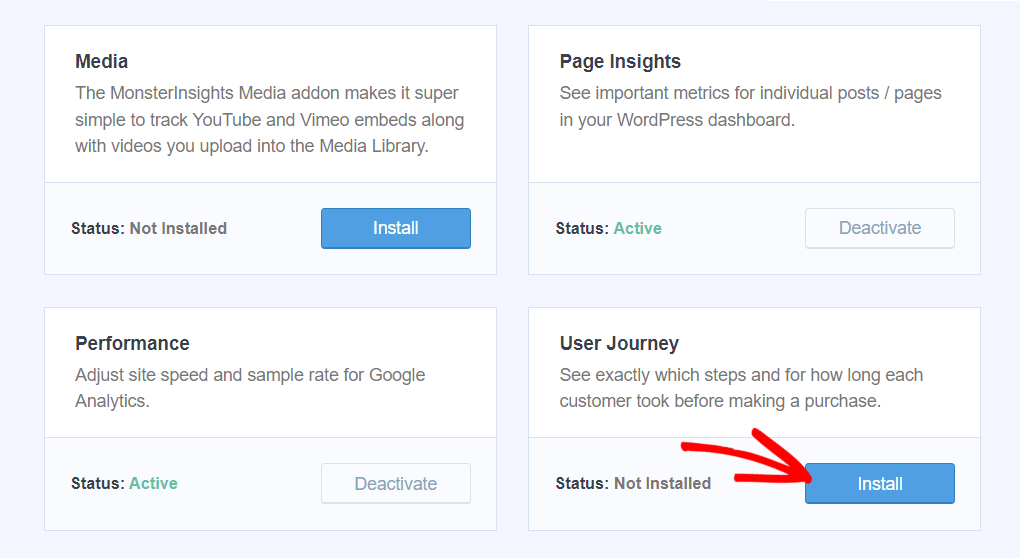
And that’s all there is to it! The User Journey addon is now active. You’re almost ready to start viewing customer journey info in MemberPress.
Step 4. How to See a Customer Journey in MemberPress
Now that you’ve set up your site to track customer journeys in MemberPress, we’re done with most of the hard work.
As soon as your site completes a sale, you’ll be able to view that person’s customer journey for their purchase.
You can start by viewing your overall User Journey report in MonsterInsights. Head to Insights » User Journey in your WordPress sidebar. There, you’ll find a report with not only each of your purchases, but you’ll also see any UTM parameters attributed to the sales, the order total, and how many steps the purchase took.
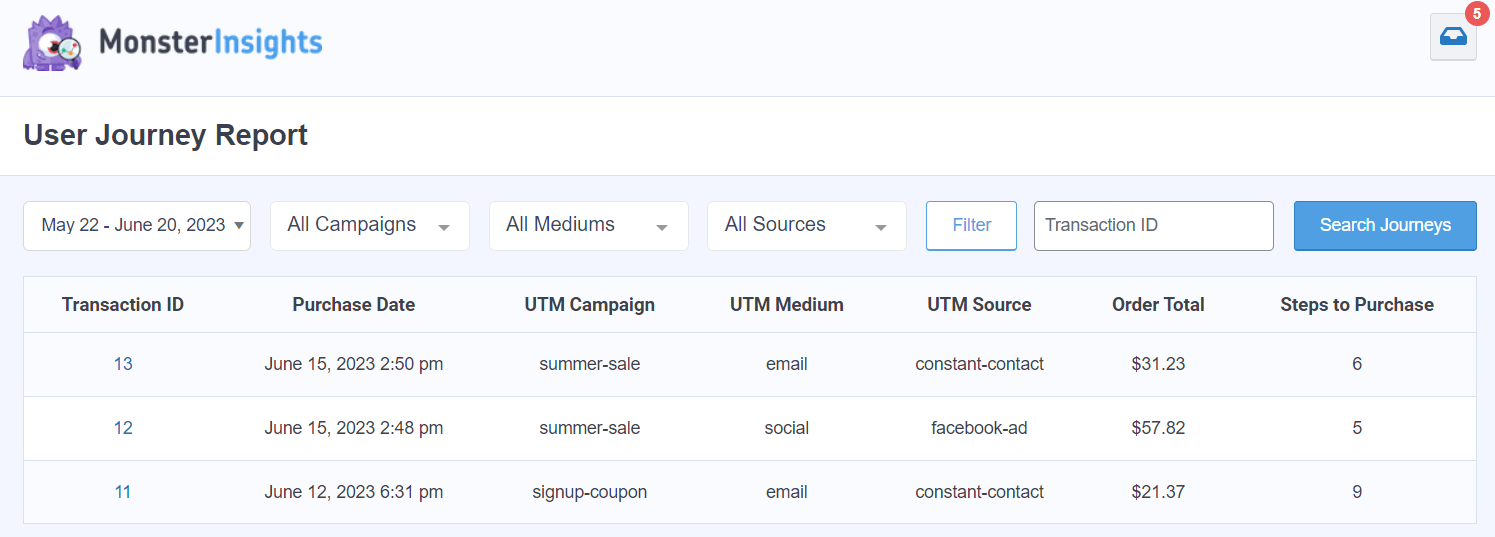
To see each customer’s user journey report, click on a transaction in the MonsterInsights report or look in the WordPress dashboard under the MemberPress menu. Click MemberPress » Transactions and a list of your MemberPress orders is displayed.

When you click on a transaction number, you’ll go to the details page for that transaction. Scroll down to the bottom of the transaction details to see the User Journey by MonsterInsights table.
Now, you can view the entire sequence of steps that this buyer took on their way to buying a course or signing up for a membership.
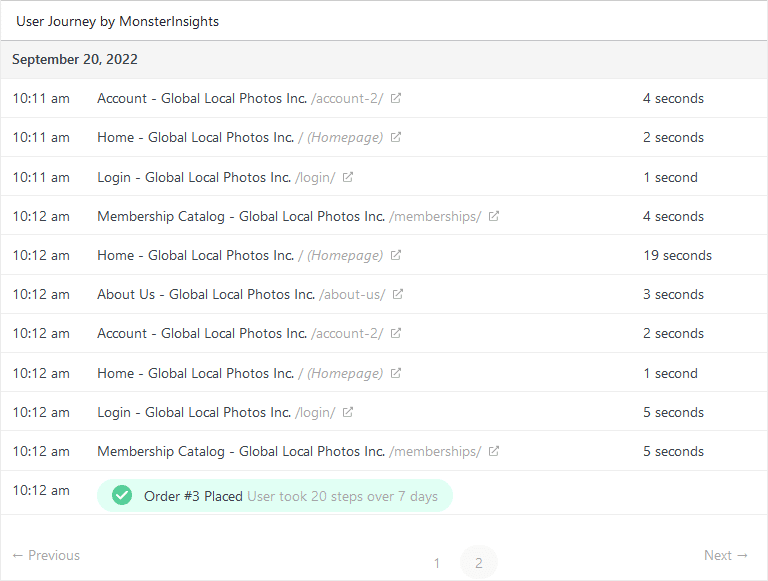
The User Journey report in MemberPress provides the following information:
- Time stamp for when the customer arrived at each page
- The title and URL for each visited page, including a link
- The amount of time this visitor spent on each page
- Total elapsed time from first entry on your site to completed purchase
- The number of steps the buyer took between entering and purchasing
Now that you have this incredible level of detail about your buyers’ activity and online behaviors, what can you do with it?
How to Use Customer Journey Tracking in MemberPress
After you start collecting customer journey data, you’ll learn a lot about your members and subscribers and how they arrived on the purchase page. Then you can find different ways to use this information.
You might look for common behaviors among people who converted. Like, do many of them read the same or similar content before buying? Can you drive more traffic to those content pieces to increase sales and conversion rates?
Another tactic might be to look for a group of customers who take a shorter path to purchase than most, using fewer steps in their journeys. Try to find something these buyers have in common, like demographic traits or a shared referral source. Then you can target more people that match this profile.
All in all, learning more about your members’ unique customer journeys in MemberPress will give you in-depth knowledge about your online sales process that most sellers don’t get. And that’s a huge benefit!
All right, that wraps up our quick tutorial on setting up customer journey tracking in MemberPress. Thanks for following along!
If you enjoyed this piece, you might want to read our guide to eCommerce hacks to increase conversions.
Not using MonsterInsights yet? What are you waiting for?
And don’t forget to follow us on Twitter, Facebook and YouTube for more reviews, tutorials, and helpful Google Analytics tips.
