As an eCommerce store owner, you need to gather all of the most important data from your website so that you can understand your visitors, cater to their needs and wants, and grow your business. To do that, one of the important metrics to track is the add to cart event. It’s that critical moment when browsing turns into buying intent!
That said, it can be a little bit of a struggle to set up the add to cart event in Google Analytics. The standard setup process can be complicated and often requires coding knowledge that most store owners simply don’t have time to learn.
Thankfully, there’s an easier way!
In this article, I’ll walk you through the easiest method to set up add to cart event tracking in Google Analytics for your WordPress website. You’ll be collecting this valuable data in no time, even if you’re not technically inclined.
Add to Cart Tracking Video Walkthrough
Why do you need to track add to cart events?
In order to tailor your store to your customers’ wants and needs, it’s important to track the metrics that give you the most insight into their shopping behavior!
When someone adds a product to their cart, they’ve moved beyond casual browsing. They’re showing serious interest in what you’re selling. It’s like when someone picks up an item in a physical store, it means they’re considering a purchase.
Here’s why I always make sure this crucial event is tracked for eCommerce stores:
- It uncovers your real conversion funnel – You can see exactly how many people go from viewing your products to adding them to cart to checking out. This shows you where potential customers might be getting stuck.
- It helps identify abandoned cart opportunities – Knowing when customers add products but don’t complete checkout gives you a chance to recover those almost-sales. Using abandoned cart recovery tactics can increase your revenue by even more than you might think!
- It shows which product pages need work – If you notice a product gets lots of views but few add-to-carts, that’s a clear signal that something on that page isn’t convincing customers. Maybe it’s the product description, the images, or even the price point.
- It powers your eCommerce decision-making – This data helps you calculate critical metrics like cart abandonment rate and add-to-cart conversion rate.
I was shocked when I first learned that the average cart abandonment rate is a whopping 70%. That means for every 10 shoppers who add items to their cart, 7 leave without buying! Tracking add to cart events is the first step toward improving this number.
Now, let’s look at how you can set this up without diving into any complicated code.
How to Set Up Google Analytics Add to Cart Events
There are several ways to track add to cart events in Google Analytics, but using MonsterInsights is by far the easiest method, especially if you’re using WordPress.
MonsterInsights is the best Google Analytics plugin for WordPress, and it allows you to set up eCommerce tracking (and track your eCommerce metrics in your WordPress dashboard) with just a few clicks.
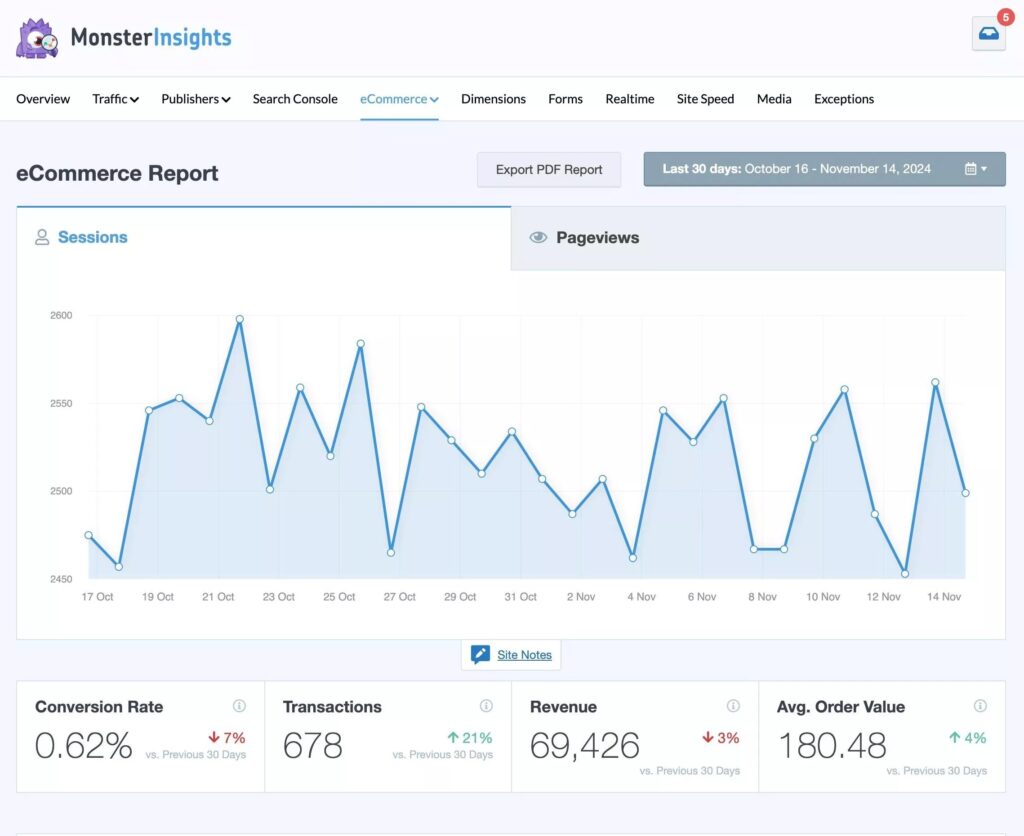
The best part? It automatically configures add to cart event tracking in Google Analytics. No need to edit code or create custom events.
Let’s get started!
Step 1: Install MonsterInsights and Add Google Analytics
The first step you’ll need to take is to install and activate the MonsterInsights plugin on your website. Make sure you’re using the MonsterInsights Pro license to use its eCommerce tracking features and other advanced tracking options.
Once the plugin is ready to use, you’ll have to add Google Analytics to your WordPress site. Using the MonsterInsights setup wizard, it’s very easy to add Analytics.
You won’t have to touch a single line of code and the plugin will connect Google Analytics for you.
For a full tutorial on setting up MonsterInsights and connecting to Google Analytics, check out How to Add Google Analytics to WordPress the Right Way.
Step 2: Install eCommerce Addon
In the next step, we’ll install the MonsterInsights eCommerce addon. It automatically detects your eCommerce store and starts tracking its performance in Google Analytics.
To install the addon, log in to WordPress and go to Insights » Addons, and then to the eCommerce tile. Now click Download & Activate and the addon will activate.
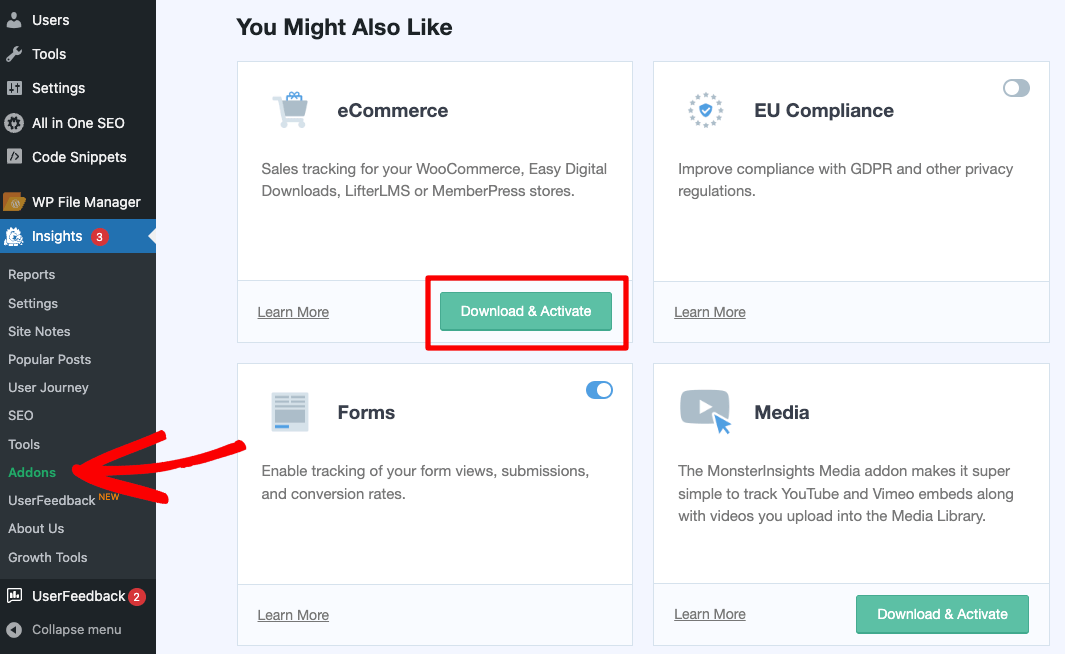
That’s it! You’ve successfully set up eCommerce tracking in WordPress. Now, are you ready to view add to cart events?
Step 3: View Add to Cart Events in WordPress
One of the benefits of using MonsterInsights is that you can view Google Analytics reports inside your WordPress dashboard.
This way, you don’t have to navigate through the complex web of Google Analytics reports finding the data you need to make decisions.
To view Add to Cart, go to Insights » Reports » eCommerce » Overview:
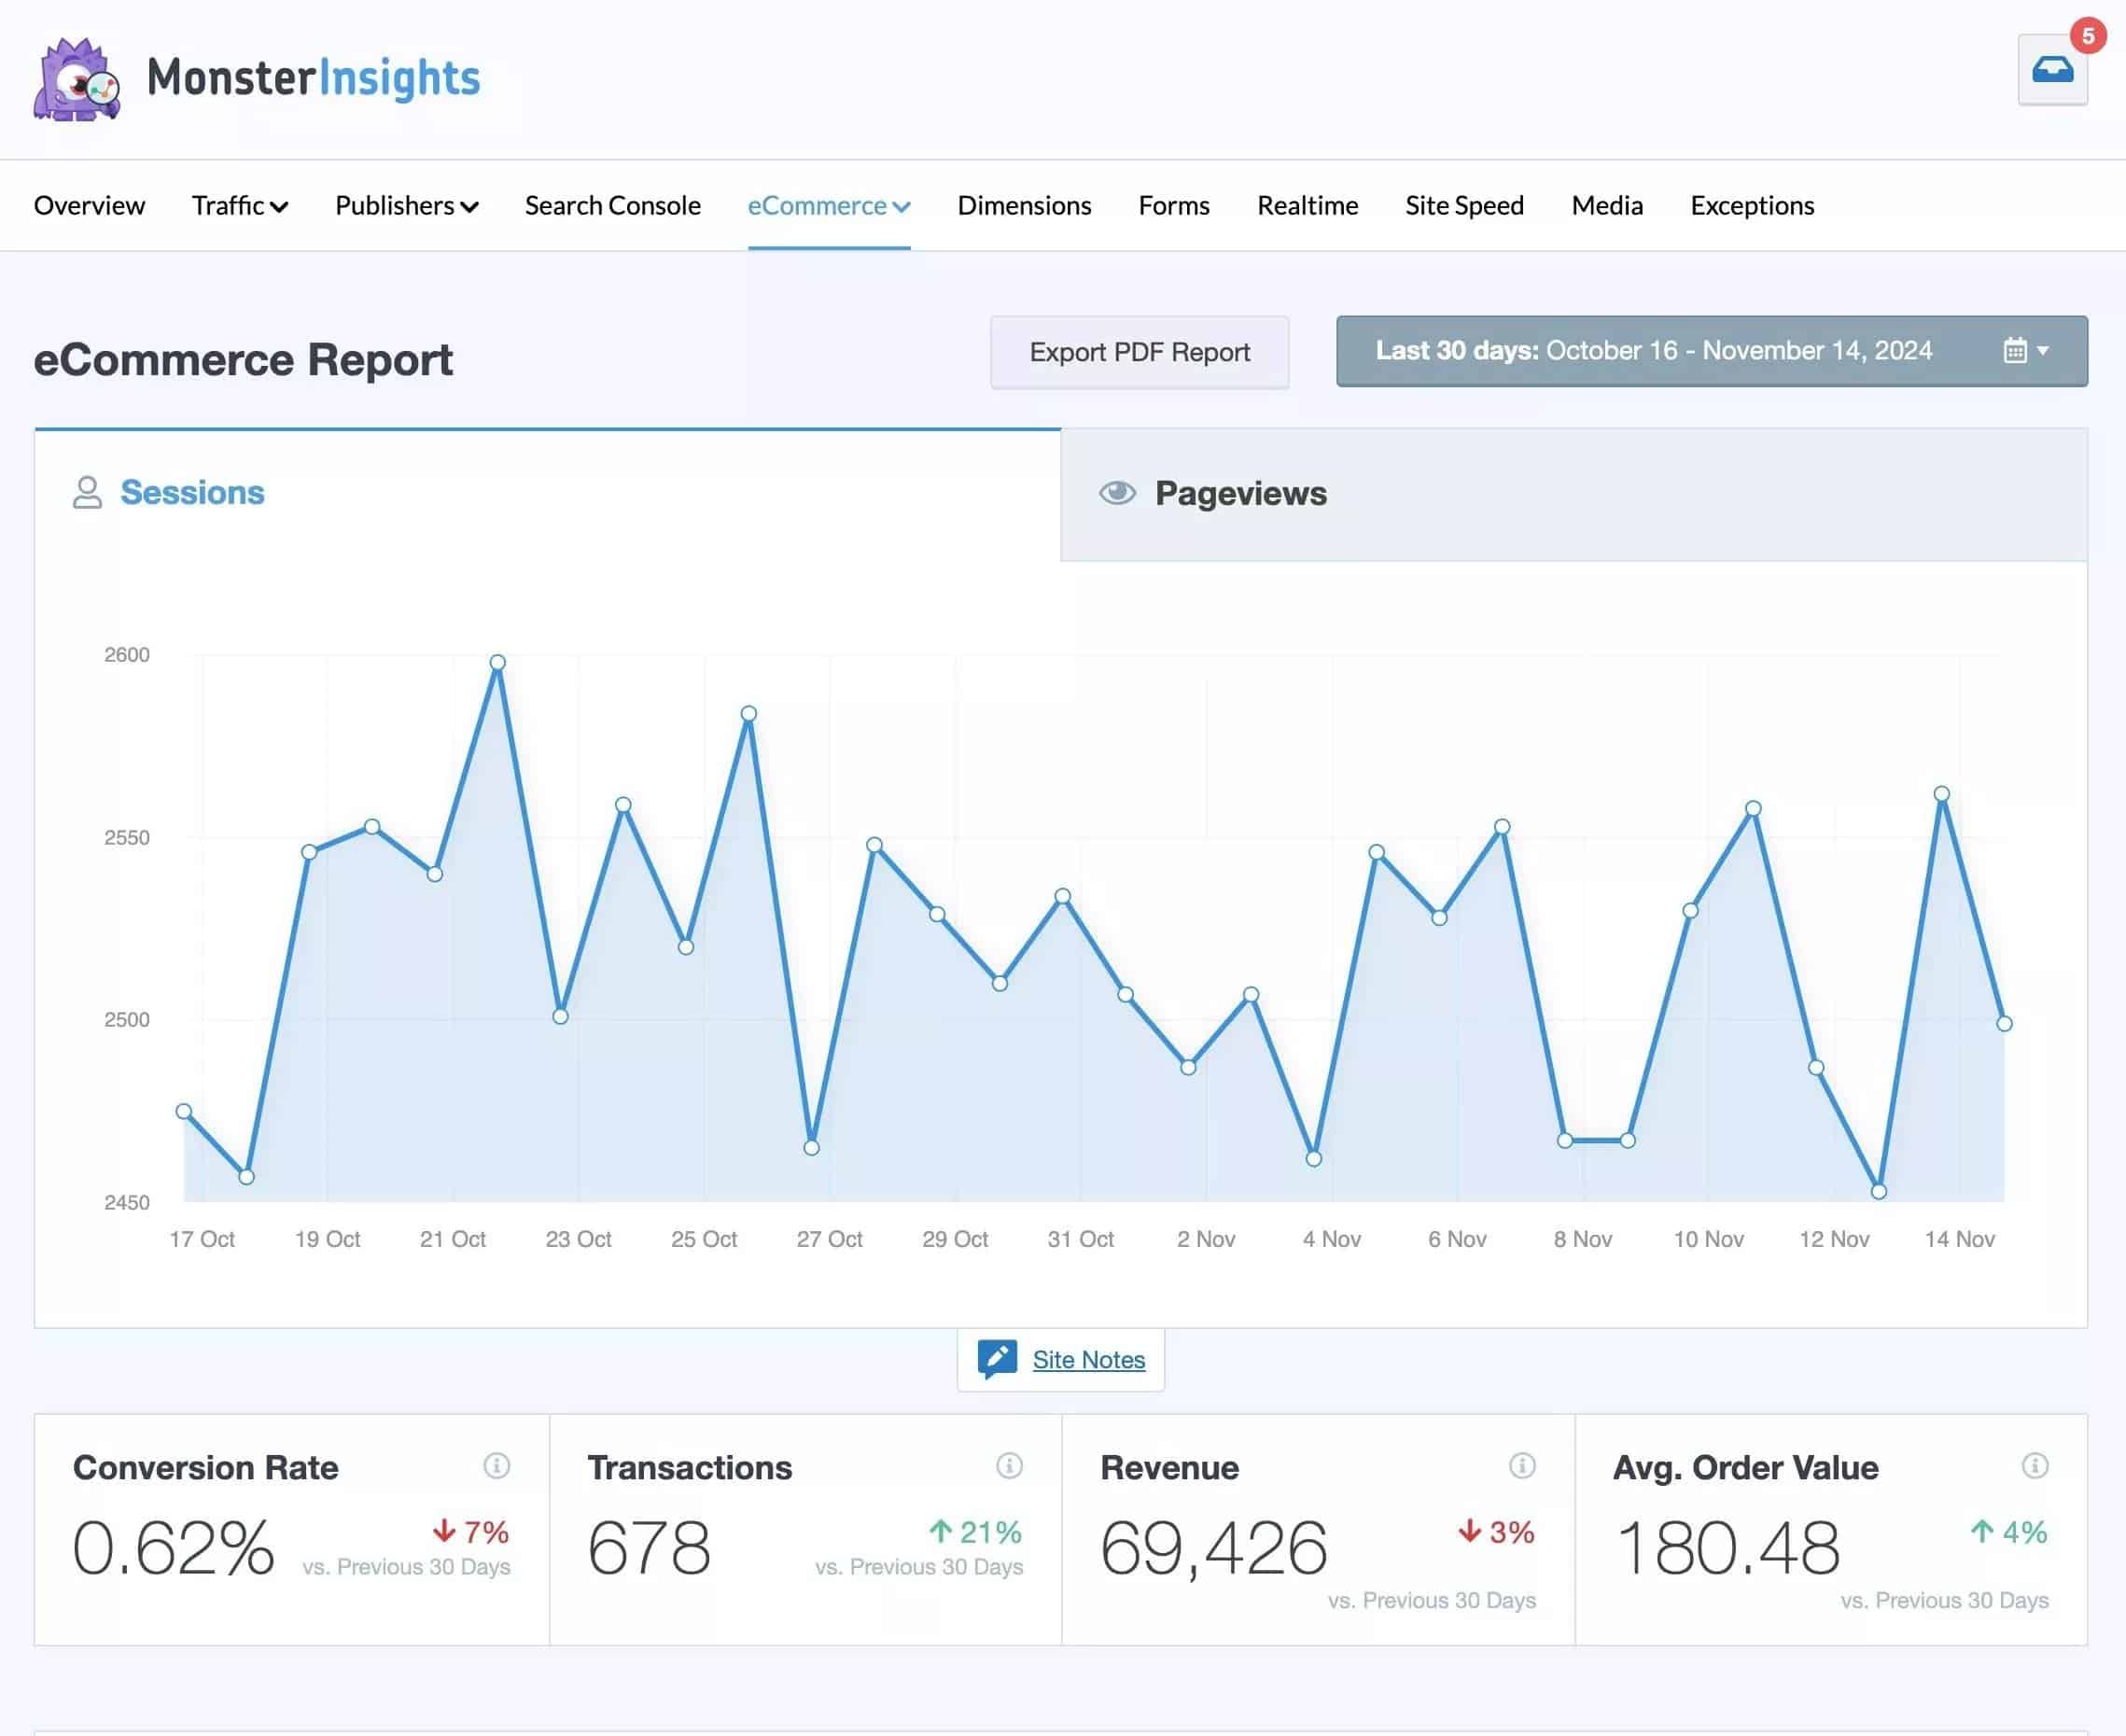
Here you can see how your online store is performing. Find out the conversion rate, number of transactions, revenue, and average order value for whatever time period you choose.
Plus, you get to see your top-selling products, their order quantity, percentage of sales, and total revenue. The report shows which products are getting the most sales.
MonsterInsights also reports top conversion sources, so you know where your customers are coming from and which sites bring the best traffic.

And if you scroll down, you can see the Total Add to Carts report. This is where you can see the number of products people added to their carts.
Next to this, there’s another report for Total Removed from Cart, which shows the number of products people removed from their cart.

As you can see, MonsterInsights also gives you a percentage of abandoned checkouts, one of the stats you should pay attention to when optimizing your eCommerce site.
For another look at add to cart events, head to Insights » Reports » eCommerce » Funnel. Here, you’ll see your eCommerce funnel report:
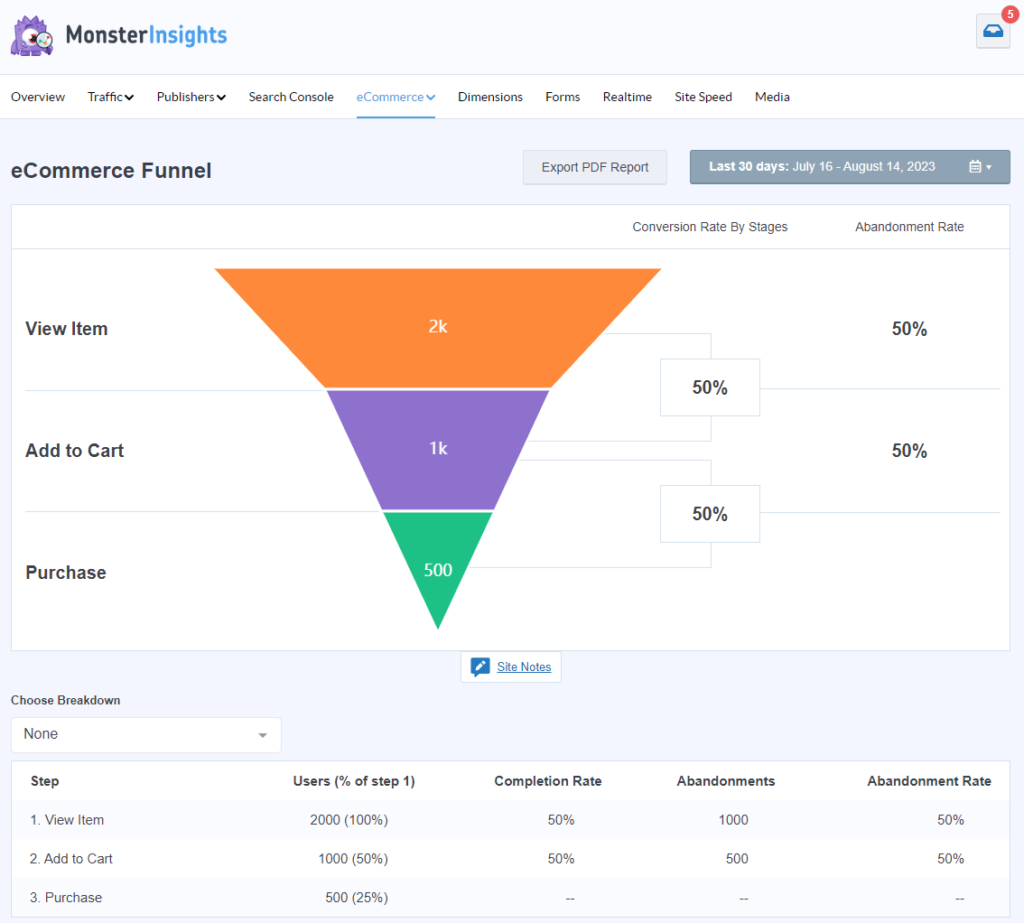
There you go, that’s all there is to set up and view your add to cart events using Google Analytics and MonsterInsights.
How to View Add to Cart Events in Google Analytics
As we mentioned, the add to cart metric is required to figure out other valuable eCommerce stats like cart abandonment and product page conversion rates.
When you connect Google Analytics to your WordPress site with MonsterInsights, you’ll be able to see advanced reports that show how well your sales funnels are working. Find out how many people are leaving items in their carts, and how many site visitors convert into sales.
Let’s take a look at how you might create a custom report using the add to cart event to see how your sales funnel is working.
First, log in to Google Analytics 4 and select the Explore tab from the left sidebar to open the Explorations screen. Now, click the + sign to start creating your custom report.
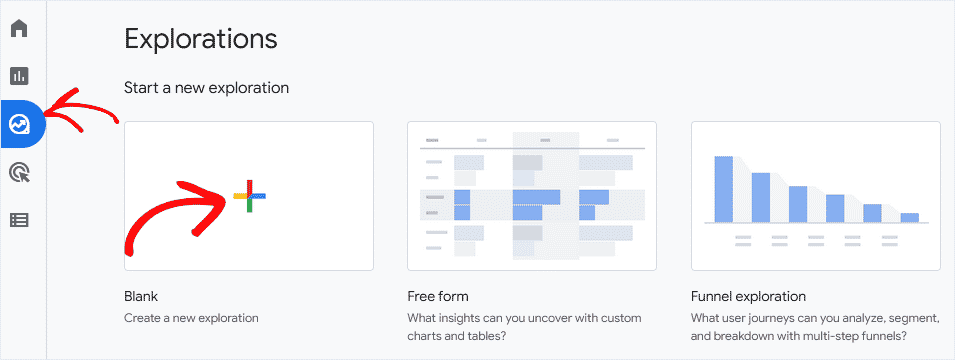
In the Explorations screen, type in a name for your custom exploration. Let’s call ours “Simple Sales Funnel.”
We’ll go ahead and select Funnel exploration from the Technique list, and we’ll call this report Shopping Funnel.

Now, type in a name for your first step. We’ll call the first step of our funnel exploration “Add item to cart.”
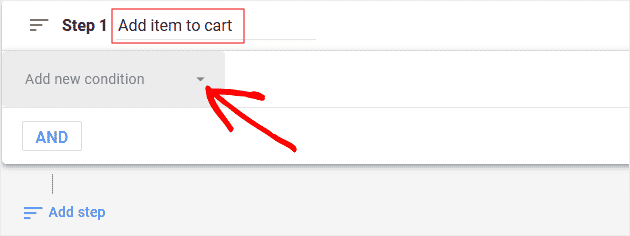
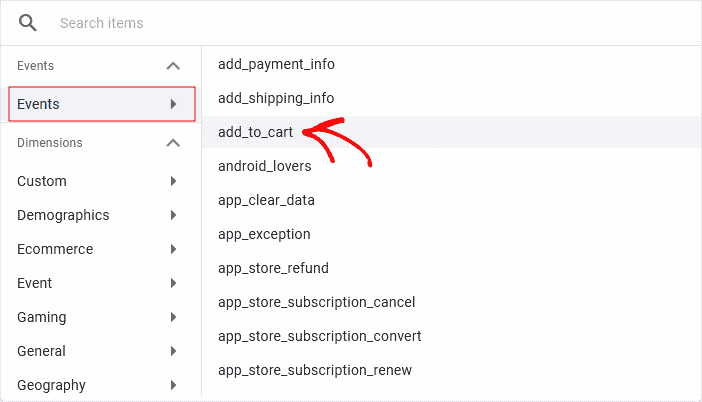
Click on Add new condition and choose Events » add_to_cart. This is going to show you the number of website visitors that added an item to their online shopping cart.
Add Steps to Track Add to Carts
We need to add more steps to our funnel exploration at this point. Your checkout process might be a little different if it’s custom, but most will follow these same steps. Let’s add two more steps to our example.
All you need to do is repeat the process above for as many steps as you’d like to track. Buyers abandon carts at different stages of the checkout, so each step will give you a little more detailed information.
To add a step, click the Add step button below the Step 1 box.
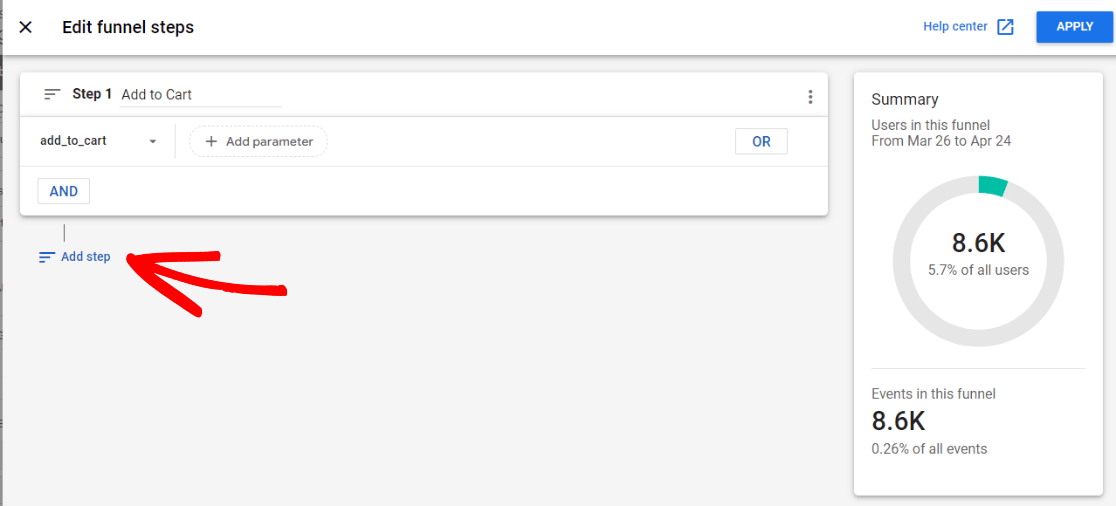
Now, we’ll name our steps and select the matching events like we did above.
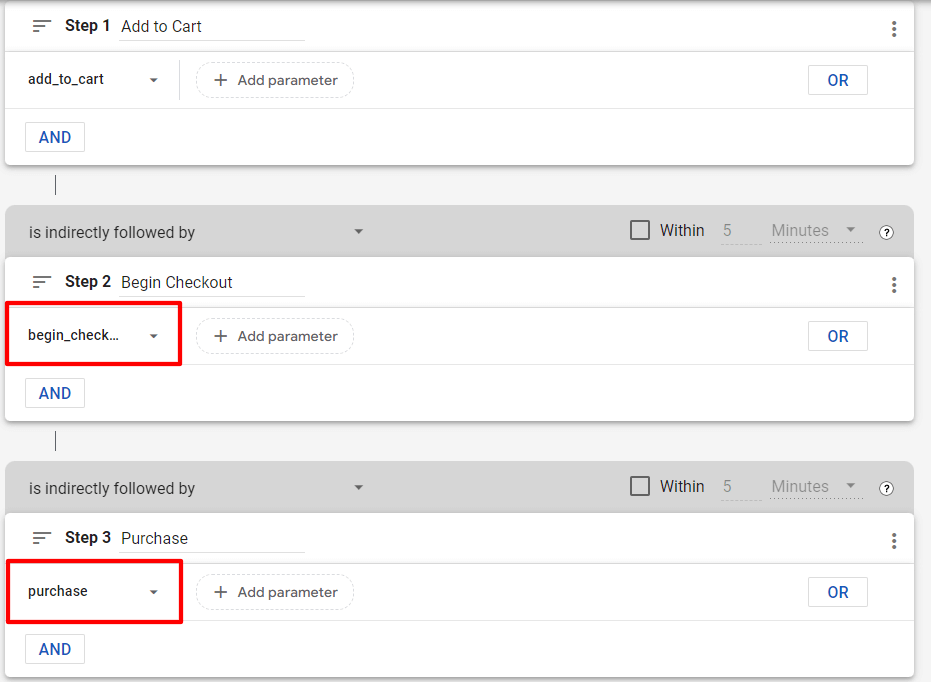
In this case, we want to find out how many people added items to the cart, how many of those moved on to begin checkout, and finally how many actually completed a purchase.
So, we named the second step “Begin Checkout” and chose the event begin_checkout, and we named the third step “Purchase” and chose the event purchase:
We’re done with our funnel, so click the Apply button to see your add to cart data.
How to Use Add to Cart Event Tracking Data
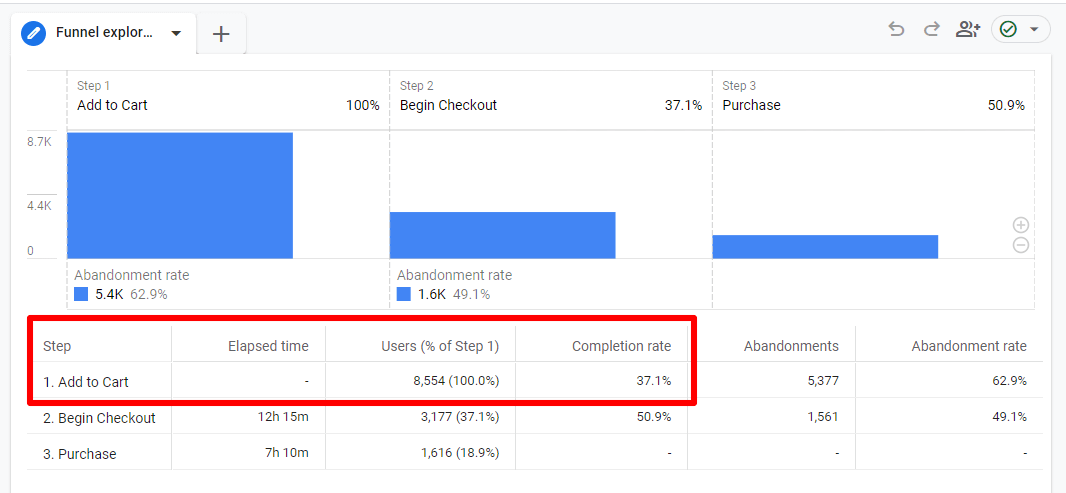
What does the funnel exploration table show? It shows each of your funnel steps and the percentage of visitors who completed that step. And it shows how many abandoned the process at each step, and didn’t move on to the next step.
In my example, 62.9% of the users who added an item to their cart continued on to begin checkout. If this was your eCommerce website, you might decide you need to optimize product pages to convince more visitors to click the Buy button.
Or, maybe you need to target a different audience with your marketing campaigns, or change your product offerings. The more data you have, the better you can make these kind of decisions.
That wraps up the tutorial on how to track add to cart events with Google Analytics!
If you liked this article, you may also want to check out our post on how to set up WooCommerce conversion tracking.
Not using MonsterInsights yet? Get started today!
Finally, stay connected with us on YouTube for the latest Google Analytics and WordPress tips and tutorials.

There is no add_to cart event in my events, while other events like purchase exist. Is the add_to_cart event tracking free, or do i have to buy the pro version?
Hi George – MonsterInsights Pro is required for our eCommerce tracking. It sets up certain events for you (like add_to_cart) and connects them with your website’s purchase funnel.