How do you measure success in your email marketing campaigns? Do you know which email messages and links drive the most traffic and the most conversions? With Google Analytics email tracking, you can figure that out.
To track your emails in Google Analytics, you’ll create a unique tracking link for each of your URLs. Using these trackable URLs will allow you to view detailed information about your email traffic in Google Analytics. You’ll be able to see exactly how your email campaigns are performing and measure the overall return on investment (ROI) for your email marketing.
In this guide, I’ll show you how to set up Google Analytics email tracking in 4 simple steps.
What is email traffic in Google Analytics?
Email traffic in Google Analytics is when Google Analytics tracks users who arrive at your website through links in emails, such as newsletters or promotional campaigns. This traffic is typically tagged with UTM parameters, allowing you to see performance metrics, like engagement rate and conversions, specifically for visits from email links.
Benefits of Email Tracking in Google Analytics
Google Analytics helps you measure how profitable or successful your email marketing campaigns are. Once you’re able to identify which of your site visitors come from email, then you can analyze the steps they took on your site after clicking the email link.
For example, did they complete a purchase, submit a form, watch a video, download a file, or abandon a shopping cart? This information is incredibly valuable and can help you optimize your future emails and website user experience.
Using UTM Codes to Create Custom Tracking URLs
In order for Google Analytics to track your email traffic correctly, you need to add some extra bits of code called UTM parameters to the links in your emails.
Let’s say your home page URL is https://LeonardosNursery.com/. You could use this exact URL in an email link to send traffic right to your home page. However, Google Analytics won’t properly assign these visitors to the email or campaign they clicked from.
If you use plain, non-customized URLs in your email messages, the traffic you get from them will show up as direct or referral traffic in Google Analytics.
To make Google Analytics see that your traffic is from an email, you need to make special hyperlinks that include strings of text called UTM codes.
You can then use those links in your email newsletter to drive subscribers to any page on your website. Then, you’ll be able to see exactly which email and campaign sent that traffic to your site in Google Analytics.
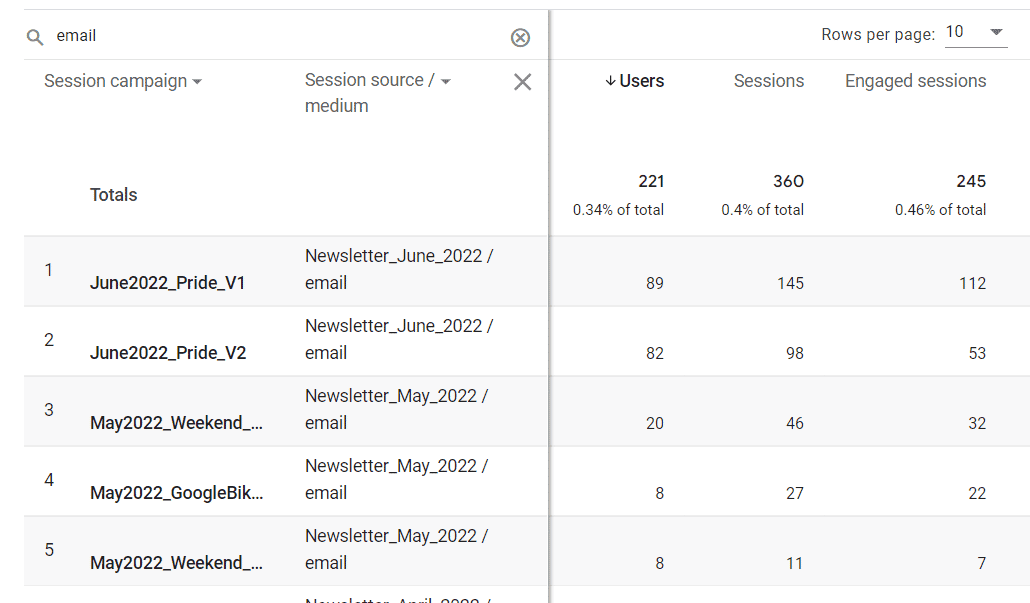
Once you discover which emails generate the most clicks and conversions, you can use that information to make improvements to all of your email messages going forward.
How to Set Up Google Analytics Email Tracking
Now, I’ll guide you through setting up email tracking in Google Analytics. I’ll start with instructions for WordPress users.
Don’t have WordPress? Skip to step three and use a different URL builder tool to create your trackable URL.
Step 1: Install the MonsterInsights Plugin
To start tracking your email campaigns right in your WordPress dashboard, install the MonsterInsights plugin at the Plus level or above.
MonsterInsights is the best Google Analytics plugin for WordPress. It lets you easily connect your WordPress site to Google Analytics so you can see all the data that matters most right in your WordPress dashboard.
Plus, with the click of a button, you can set up sophisticated tracking features such as event tracking, form tracking, custom dimension tracking , outbound link tracking , and more.
You can even chat with your analytics using AI!
To get started, you’ll need to install MonsterInsights and authenticate it with your Google Analytics account. To use the URL builder, grab MonsterInsights at the Plus level or above.
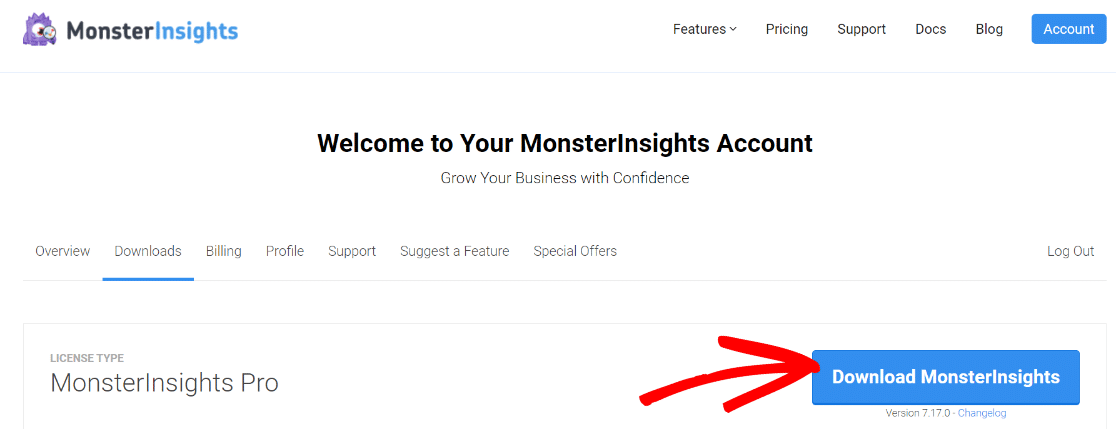
Then, download the ZIP files from your account area under the Downloads tab.
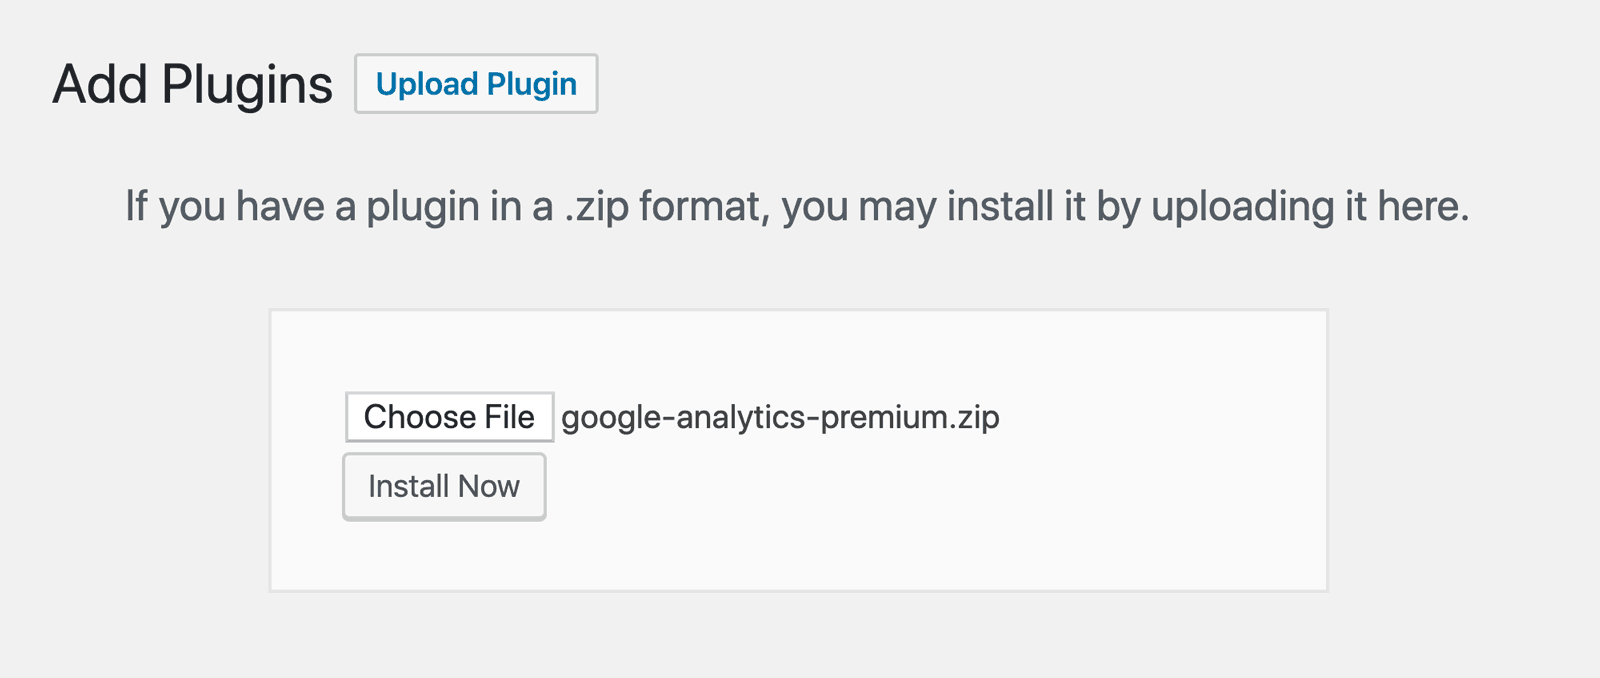
Next, upload the plugin to your WordPress website. You can do that by going to Plugins » Add New » Upload Plugins and clicking the Install Now button.
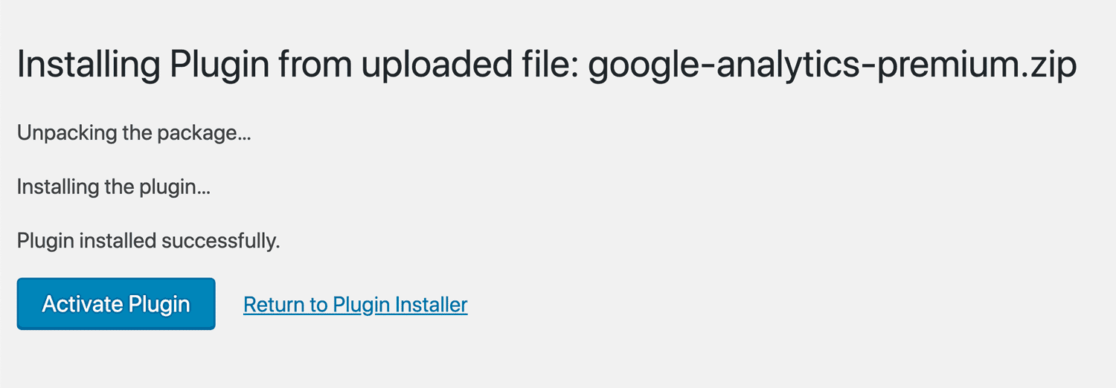
After that, click the Activate Plugin button.
Note: If you operate an online store or eCommerce site, you’ll want a MonsterInsights Pro license so you can use the MonsterInsights eCommerce addon . Check out this quick tutorial to learn how to install and activate the eCommerce addon .
Step 2: Connect MonsterInsights to Google Analytics
After successfully installing and activating the plugin, you’ll need to connect MonsterInsights with your Google Analytics account. The simplest way to do this is to use the MonsterInsights Setup Wizard that appears when you activate the plugin.
You’ll select the Google Analytics property that you want to connect to your site:
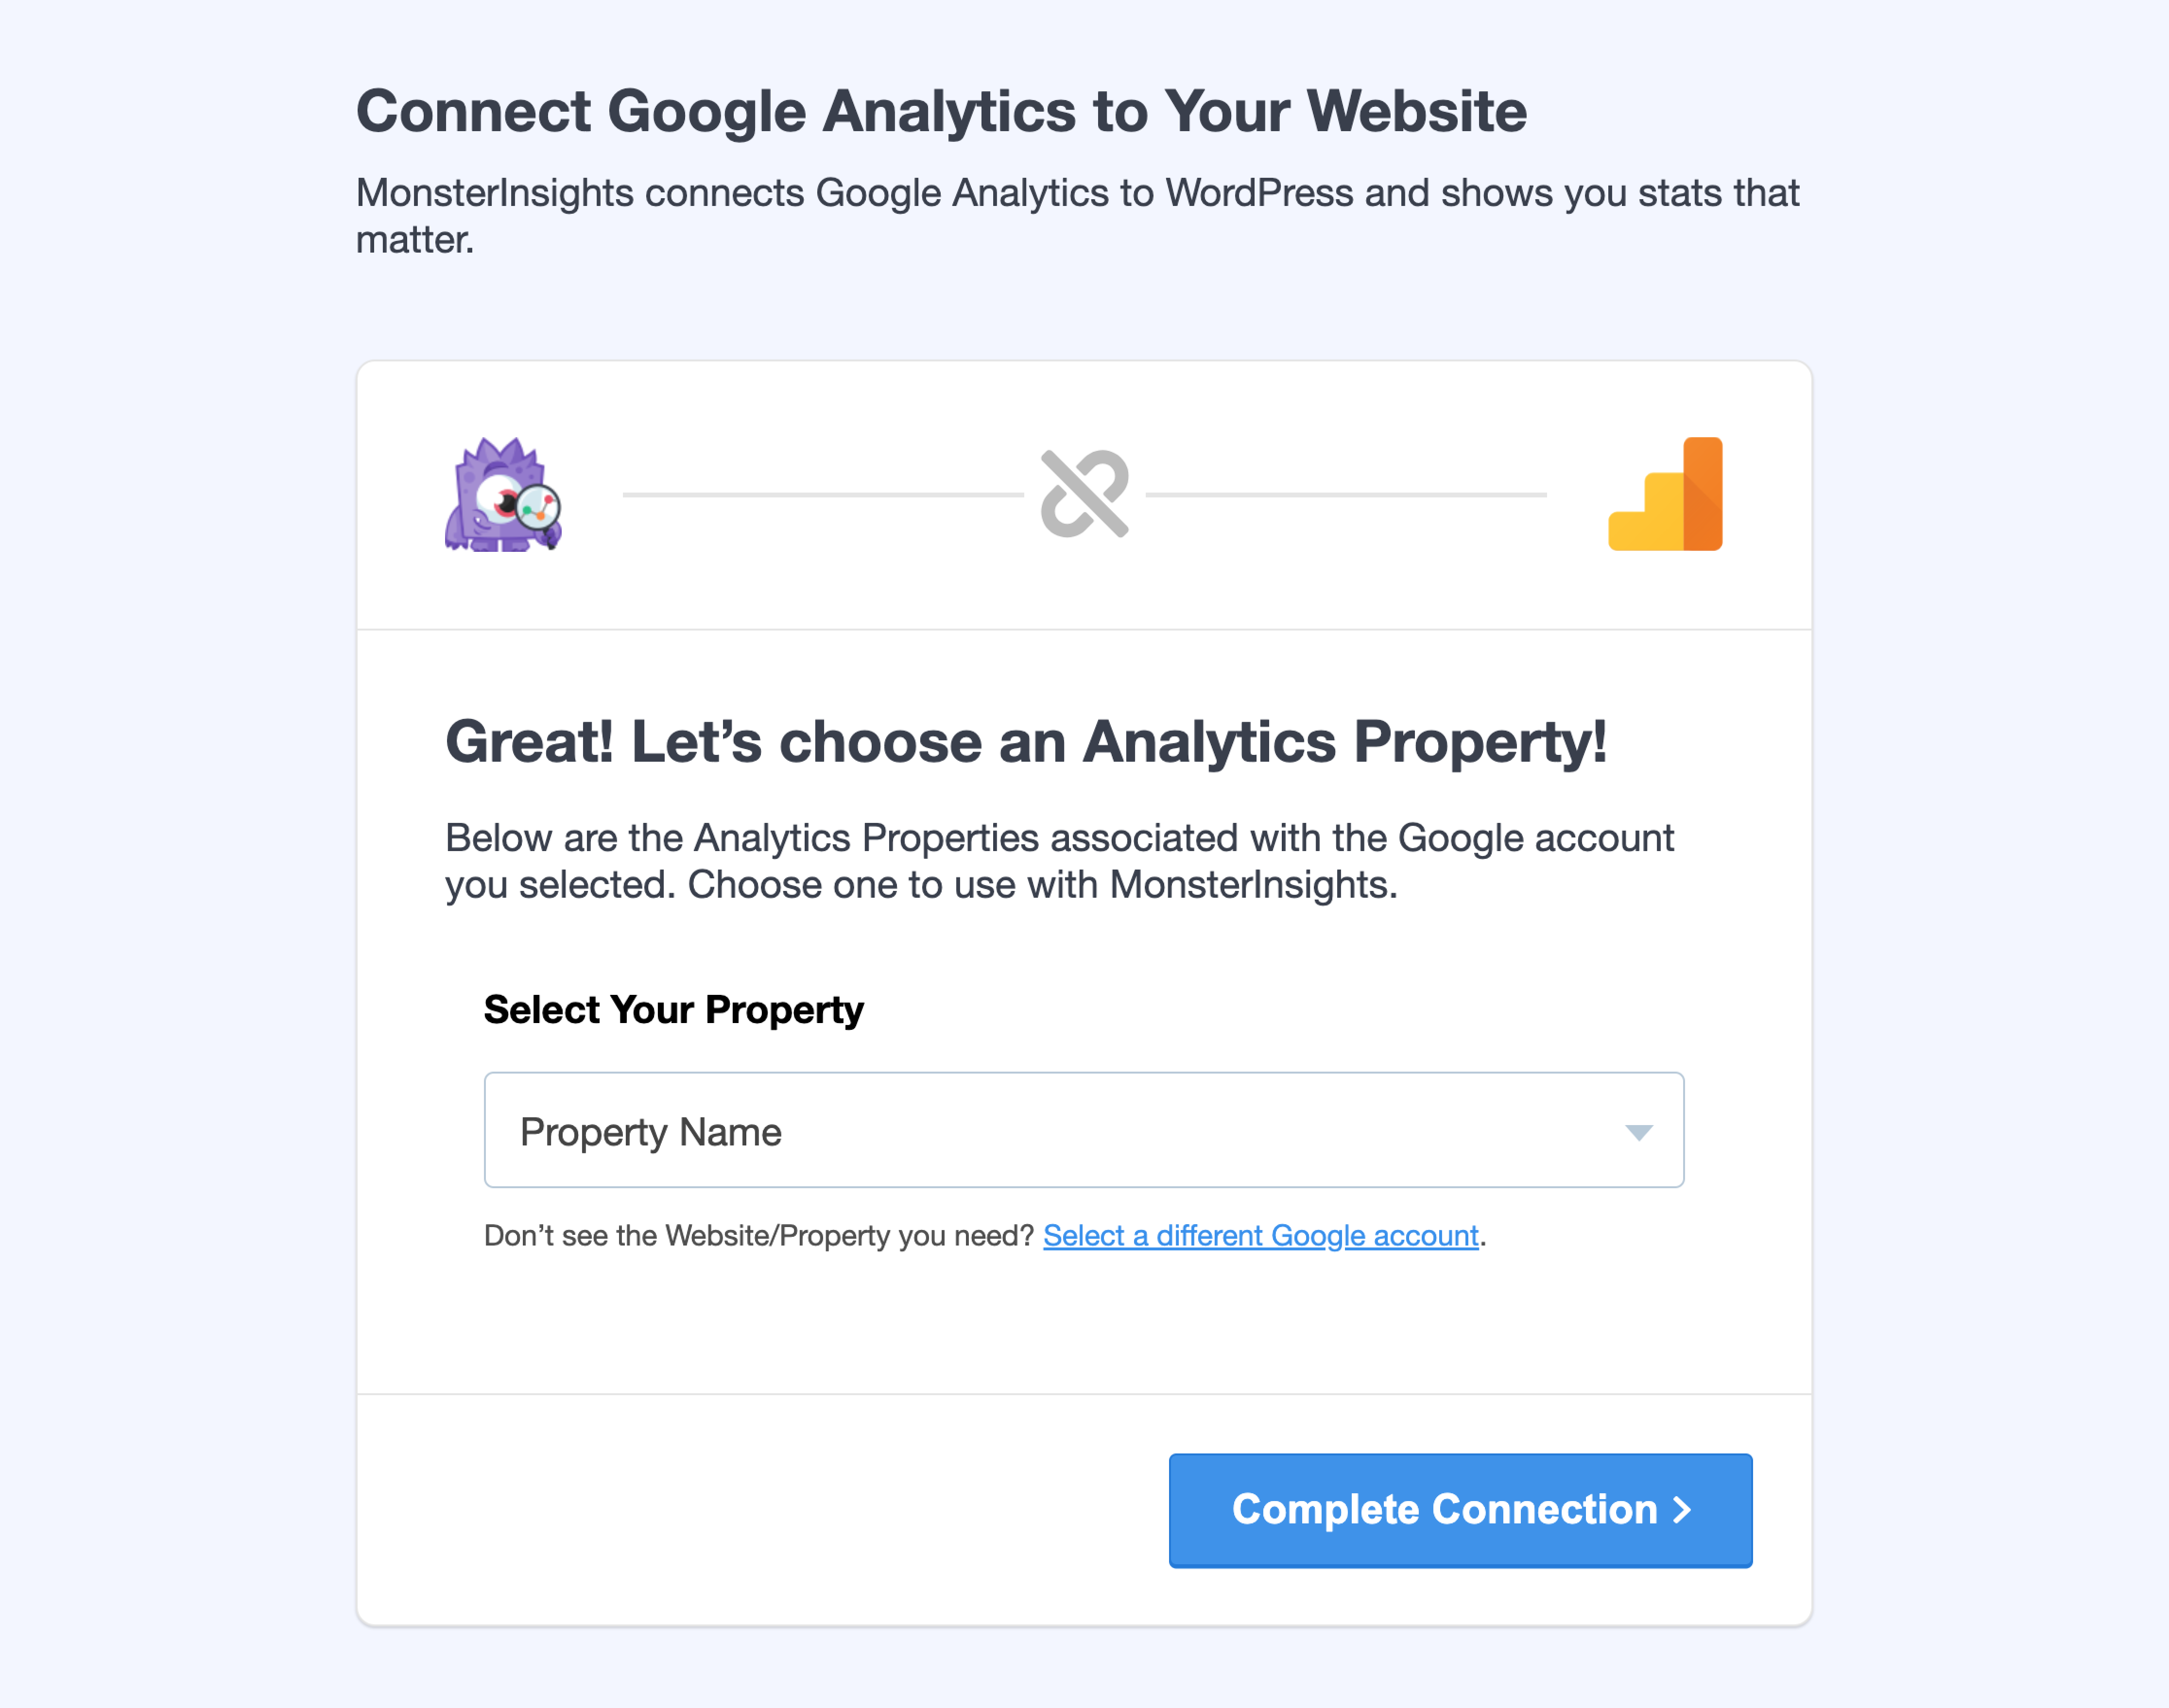
That’s all there is to it! If you have any doubts, you can use our easy step by step guide to connect Google Analytics to your WordPress site with the MonsterInsights plugin.
Step 3: Create a Trackable URL
Now, we’ll use the MonsterInsights URL Builder to create a custom URL that tells Google Analytics exactly where your email visitors are coming from.
To build a custom URL with a UTM code, log in to your WordPress website and navigate to Insights » Tools.
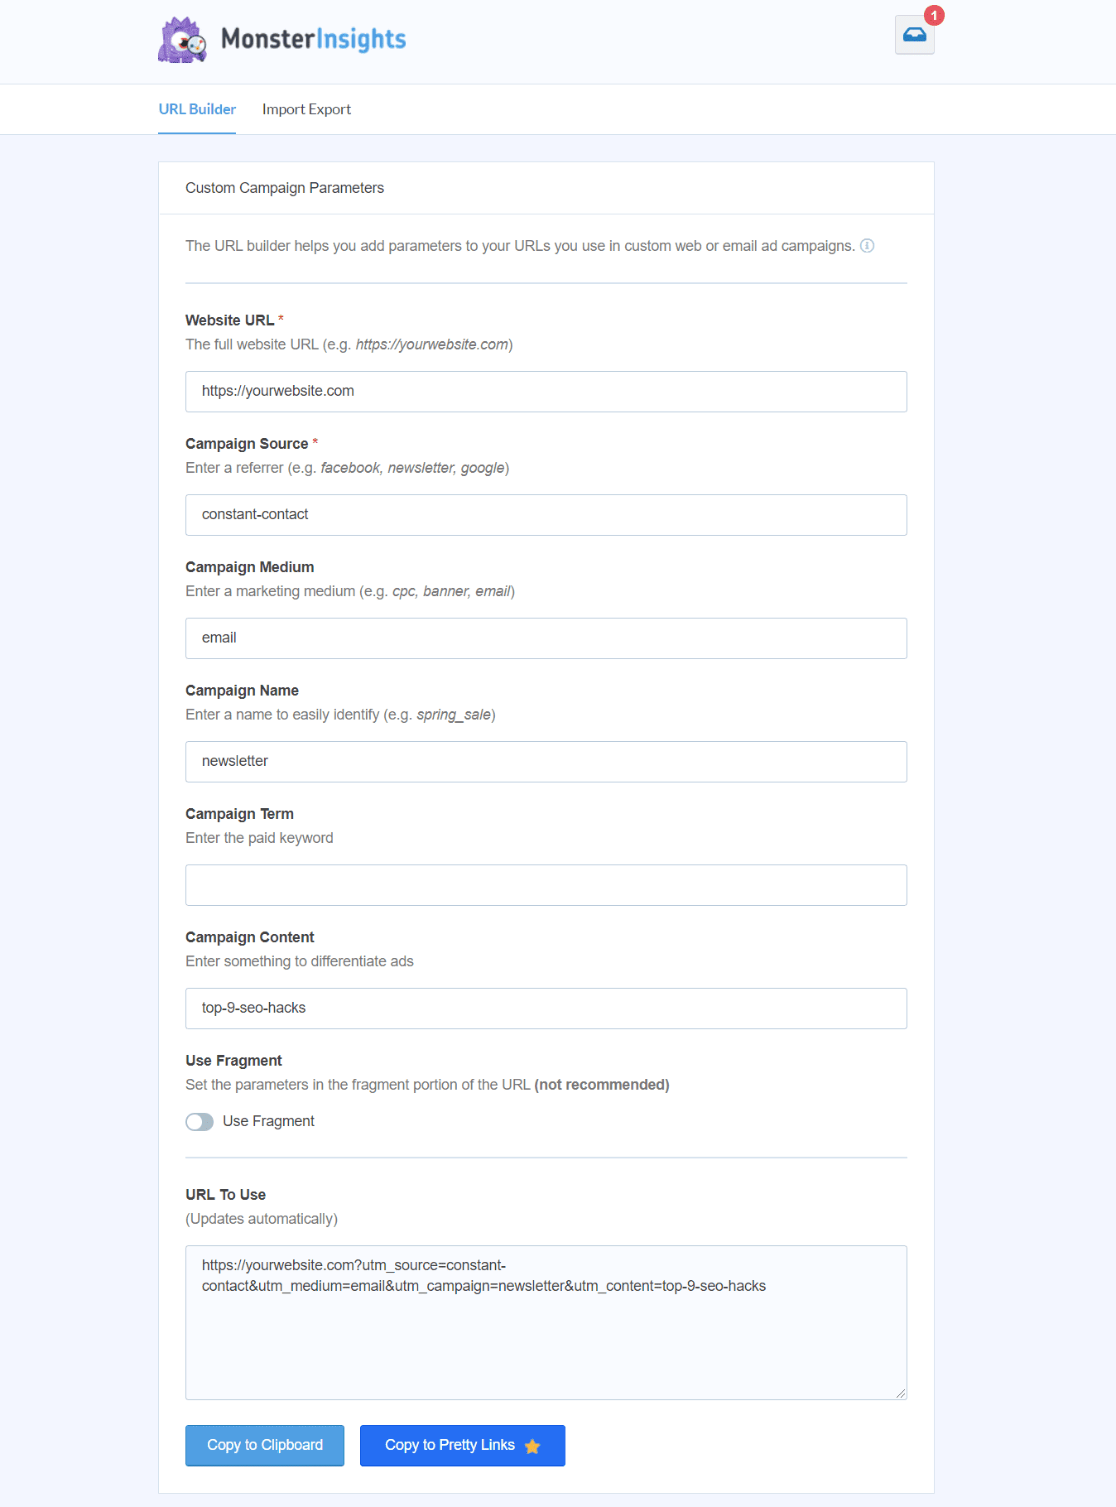
You’ll see the URL Builder form shown above. First, enter the URL of the web page where you want to send site visitors, in this case LeonardosNursery.com. Then fill out the remaining fields with whatever campaign parameters you’d like to see in Google Analytics. Note that the only required fields are the URL and the Campaign Source.
Tip: Use a + (plus), – (dash), or _ (underscore) to separate terms if you use more than one word in a parameter field. You should also know that UTM codes are case-sensitive, so be consistent.
For email, here’s an example of UTM codes I use:
- utm_source: newsletter
- utm_medium: email
- utm_campaign: spring-sale
Here’s an example generated using our example site URL, with a UTM code added to tell you and Google Analytics exactly where this visitor originated from:
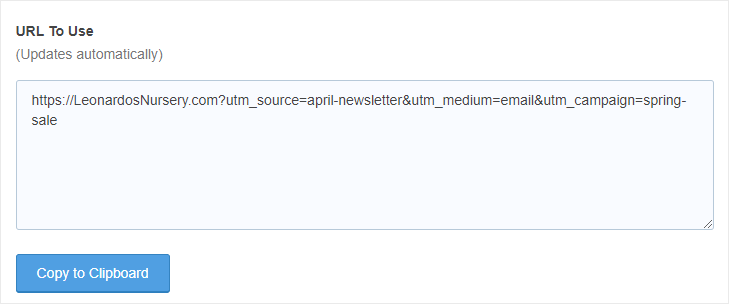
At this point, you can click the “Copy to Clipboard” button to copy the link text and then paste it into your email campaigns as needed. Your email links are now fully trackable by Google Analytics!
For a full guide to UTM codes, check out A Beginners Guide to UTM Parameters (And How to Use Them).
Now, if you’re using MonsterInsights, you’ll be able to see your email traffic in your WordPress dashboard. If you’re not using MonsterInsights, skip to step 5.
Step 4: See Your Email Traffic in WordPress
To see your email campaign traffic in WordPress, head to Reports » Traffic » Campaigns:
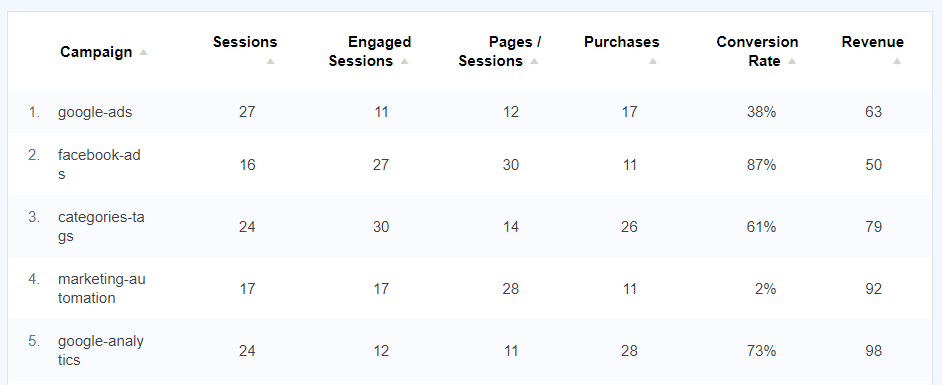
Whatever you used in your email URLs for your campaign tag will show up in this report.
For more data, let’s look in Google Analytics.
Step 5: How to Find Email Traffic in Google Analytics 4
In your Google Analytics 4 account, you can identify visitors who arrived from your email links in the Reports » Acquisition area.
First, click the Reports » Acquisition » Traffic Acquisition menu item to see a summary of traffic from all channel sources.
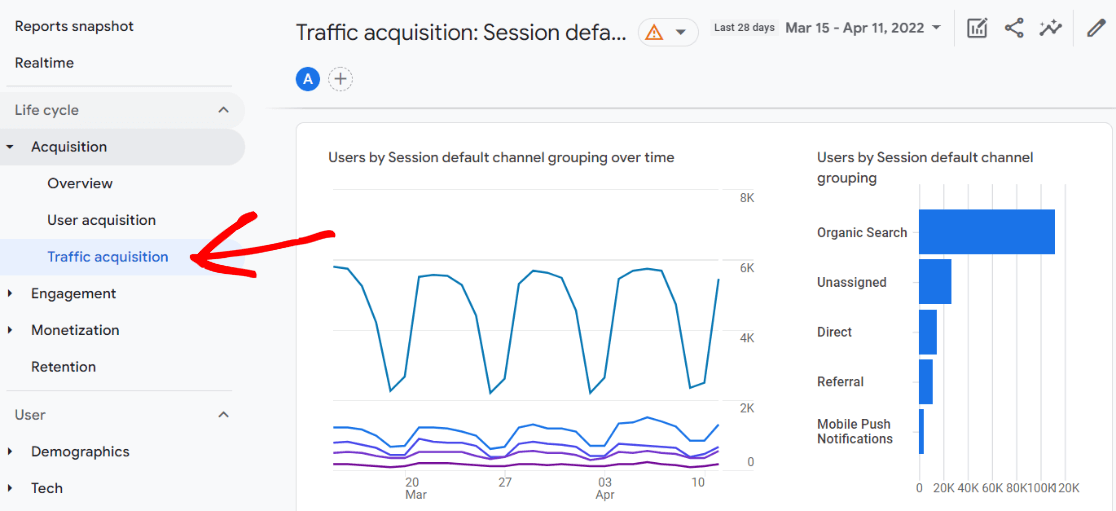
This overview screen shows all traffic from all sources, including direct, organic search, and so on.
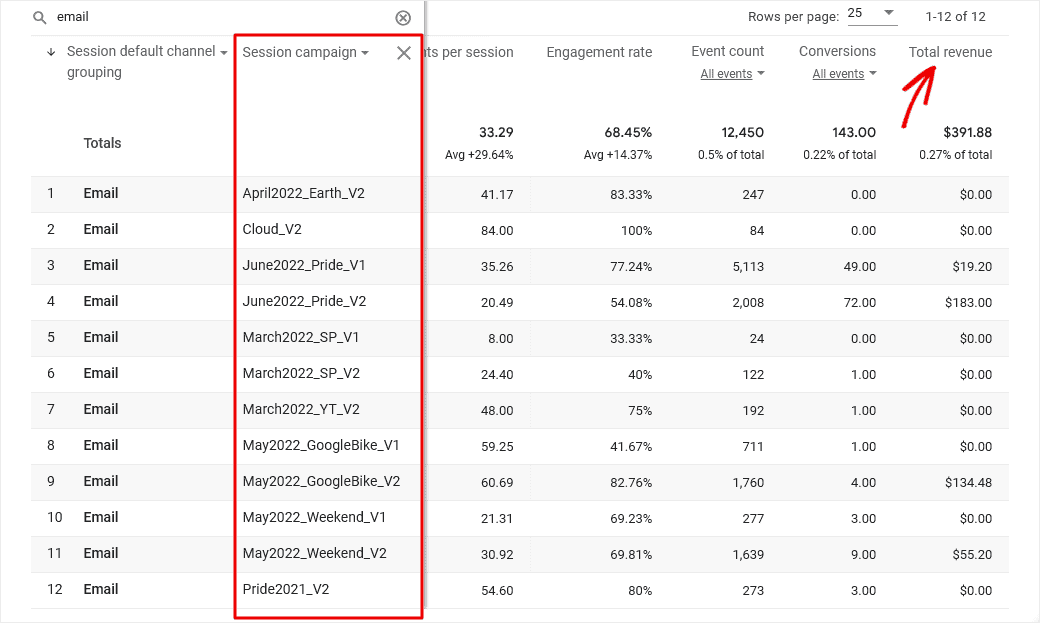
In order to see users who arrived via email, type “email” into the search bar, and you’ll see stats for only email traffic.

Now, click the blue plus symbol.

Then select Session Acquisition » Session campaign from the dropdown list.

Now you can see how many of your total site visitors arrived from an email link, which email campaign drove them to the site, how much revenue each campaign earned during the reporting period, and more.
For more in-depth information, check out 9 Email Marketing Metrics and KPIs to Watch.
That’s it!
I hope you like this guide on how to set up Google Analytics email tracking.
You might also want to check out:
How to Set up Google Analytics Social Media Tracking
How to Build an Email List: 16 Highly Effective Ways
How To Set Up QR Code Tracking With Google Analytics
Not using MonsterInsights yet? What are you waiting for?
Finally, don’t forget to follow MonsterInsights on YouTube for more helpful reviews, tutorials, and Google Analytics tips.
Google Analytics for Email Tracking FAQ
Can Google Analytics track emails?
Yes, Google Analytics can track certain types of user behavior related to email, from email opens (see below) to link clicks. You may find more accurate data on email open rates from an email provider like Mailchimp or Constant Contact.
How does Google Analytics track email open rates?
Google Analytics can be used to track email opens by using a special image file called a tracking pixel. You can insert tracking pixels inside marketing emails to see how many mail recipients actually opened a particular email. But the data collected from this tactic is becoming less meaningful. Email providers and users concerned about privacy have developed countermeasures that deter the use of personal tracking data and lead to inaccurate reporting of email open rates.
Can I add UTM codes to a URL that doesn’t point to my home page?
Yes, you can append UTM parameters to any URL, not just your main domain or home page. For example, you could send visitors to a sub-page on your site that displays a specific product category, like https://LeonardosNursery.com/Cacti .
Can Google Analytics track email addresses?
No, Google Analytics does not track user email addresses by default. For security and personal privacy reasons, Google Analytics avoids collecting data that can be used to identify any individual user.

Hello!
I created an email Newsletter with UTM Parameters added to all the links in it such as my Social media accounts, links to two of my Campaigns and etc. I will send my email through Gmail to recipients.
How do I set up my Google Analytic account to track those links?
With Regards,
Hi Anwar,
Sounds like you’re ready to send! If you’ve got the UTM links in your email, there’s nothing further you need to do to set up Analytics. Just send the email, then refer to step 4 in the article above to find the click data.
Let us know if you have any more questions!