Google Analytics has two different levels of organization: accounts and properties. Adding a website to Google Analytics is essential for tracking visitor behavior, understanding your audience, and making data-driven decisions for your online presence. In this guide, I’ll walk you through the step-by-step process of adding a new property to your Google Analytics 4 account.
Google Analytics is a powerful tool that gives you insights into user engagement, traffic sources, conversion rates, and much more. By properly setting up a new property, you’ll be able to start collecting valuable data about your website or app.
In this article:
Understanding Accounts and Properties in Google Analytics
Your Google Analytics profile consists of 2 different components: Account and property.
Here’s a closer look at each of them:
- Account: The account is the highest level. You’ll need a Google Analytics account before you can add any properties.
- Property: A property can be a website or a mobile app. Your account can consist of up to 2,000 properties. So if you’re a business with a website and an app or multiple websites, you’d have a property for each of those within your business’s account.
Now let’s take a look at how to add a new website and property to Google Analytics.
Add a Website/Property to Google Analytics in 4 Steps
Let me guide you through the process of adding a new website property to your Google Analytics account:
- Sign in and Choose an Account
- Set New Property Settings
- Enter Property Details
- Install Your Tracking Code
Step 1: Sign in and Choose an Account
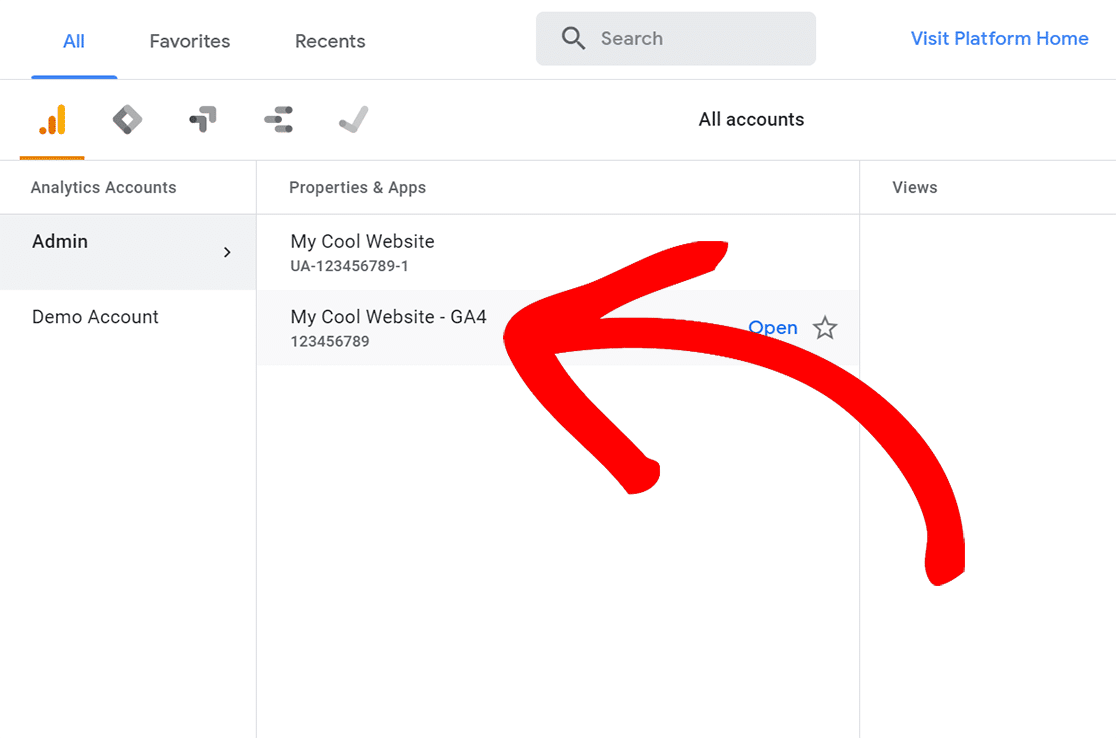
First, log in to your Google Analytics account and select the website in which you’d like to add a new property.
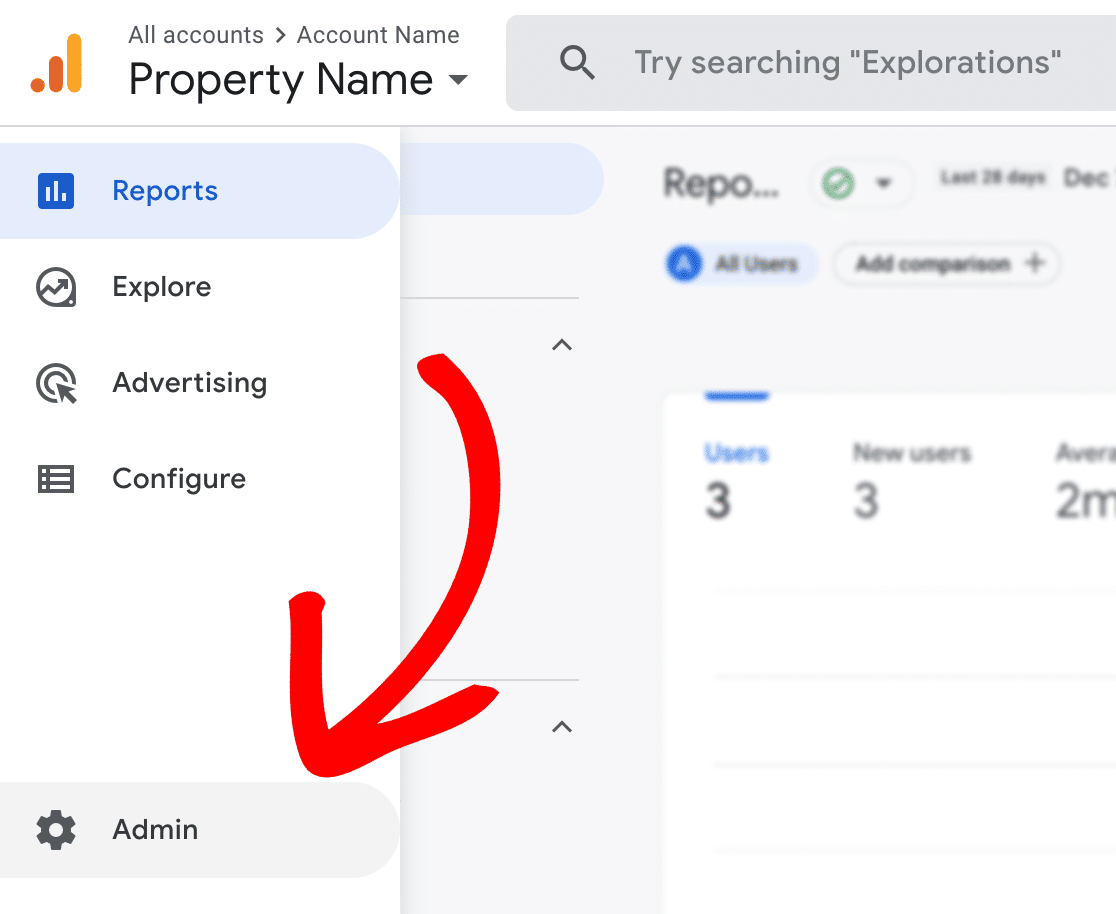
Then, click on Admin in the left taskbar.
Step 2: Set New Property Settings
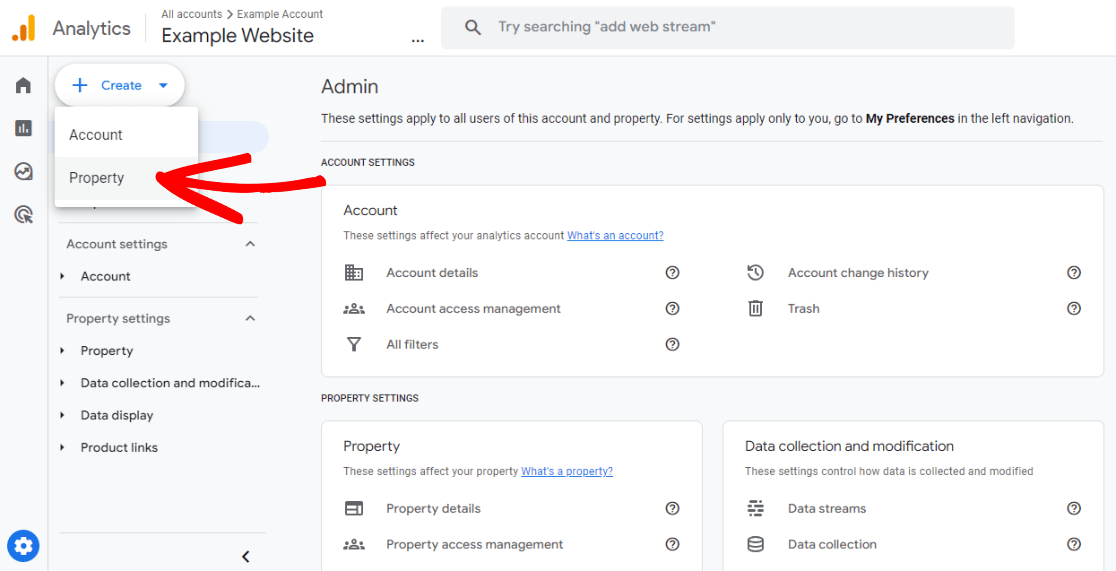
Click the Create dropdown and select Property:
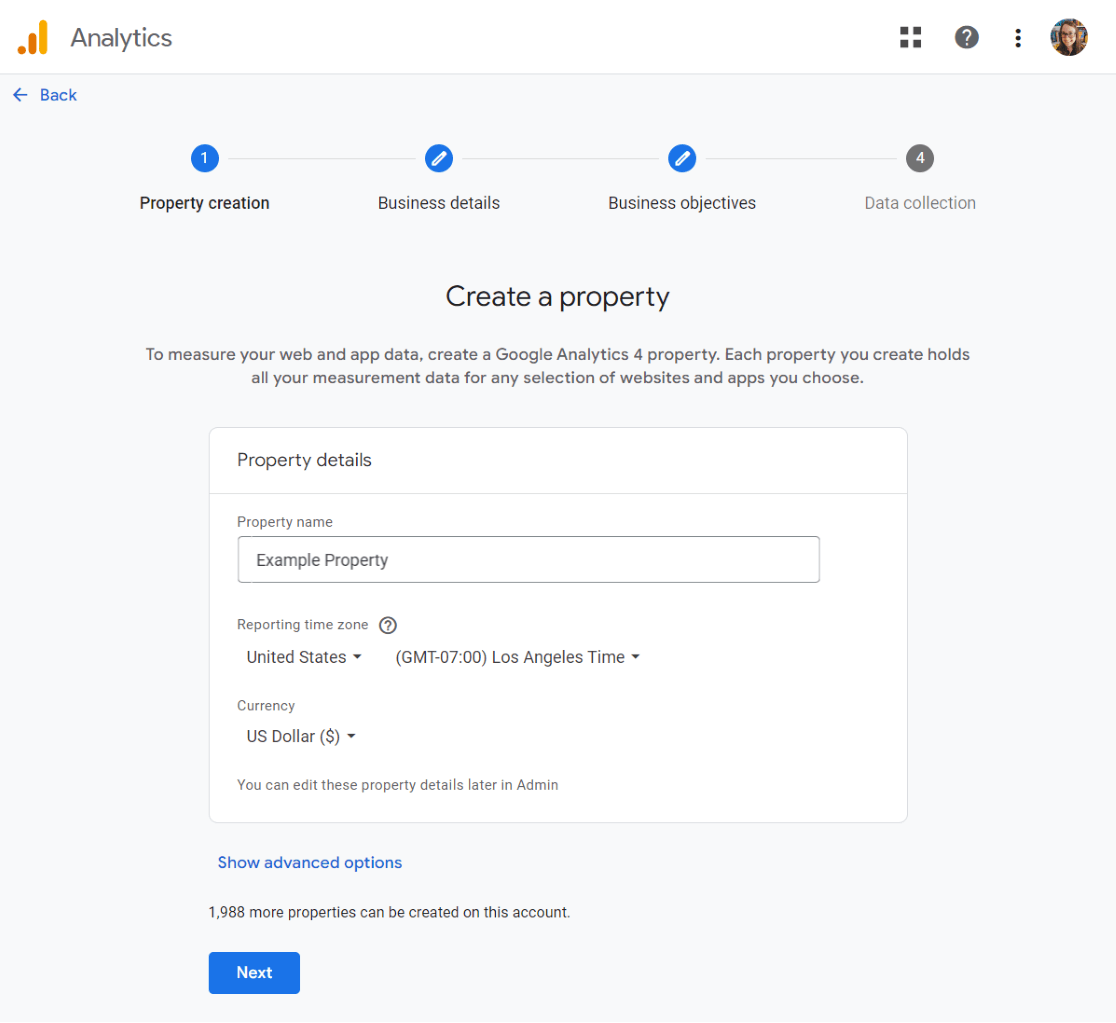
Next, you’ll need to enter your website’s property details. Start by entering a name, selecting a reporting time zone, and choosing your currency.
Step 3: Enter Property Details
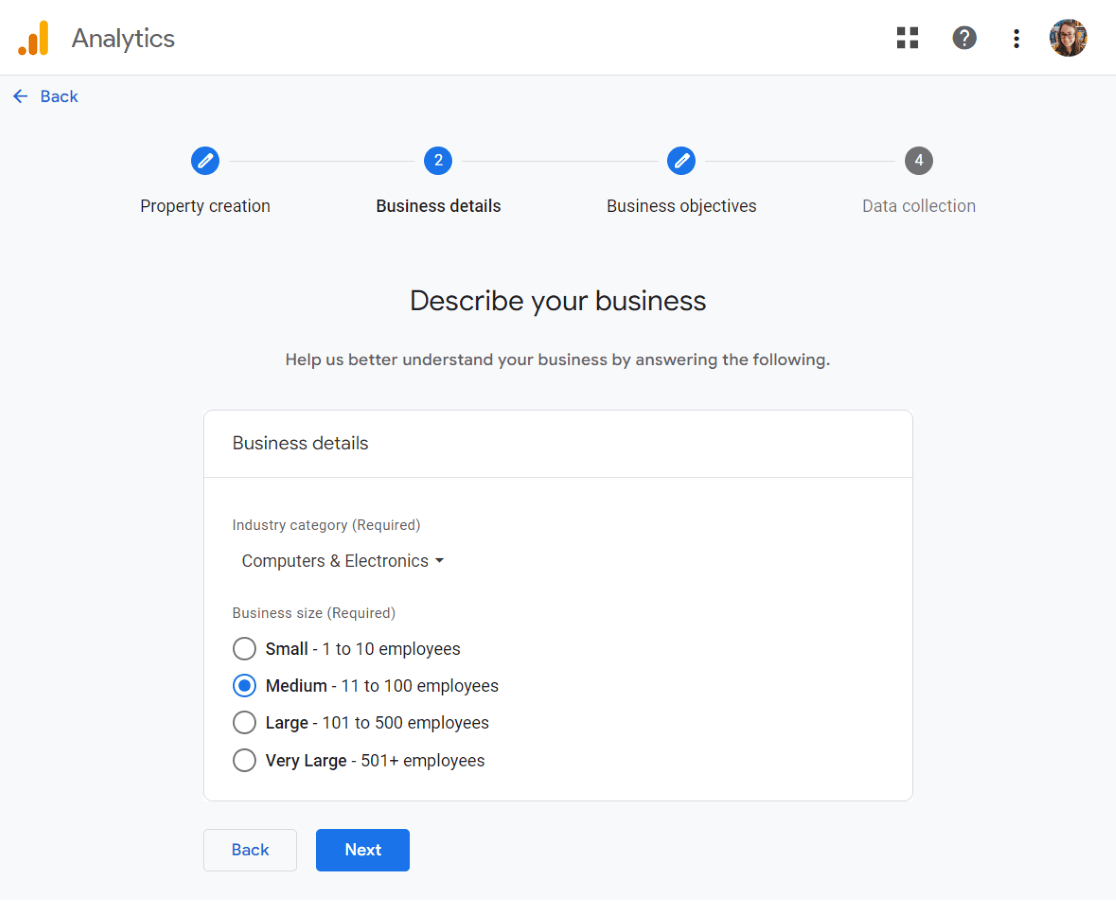
Choose your industry category and your business size, then click Next.
Finally, choose your business objectives. We suggest choosing Other so that you get all of the standard Google Analytics reports in your account.
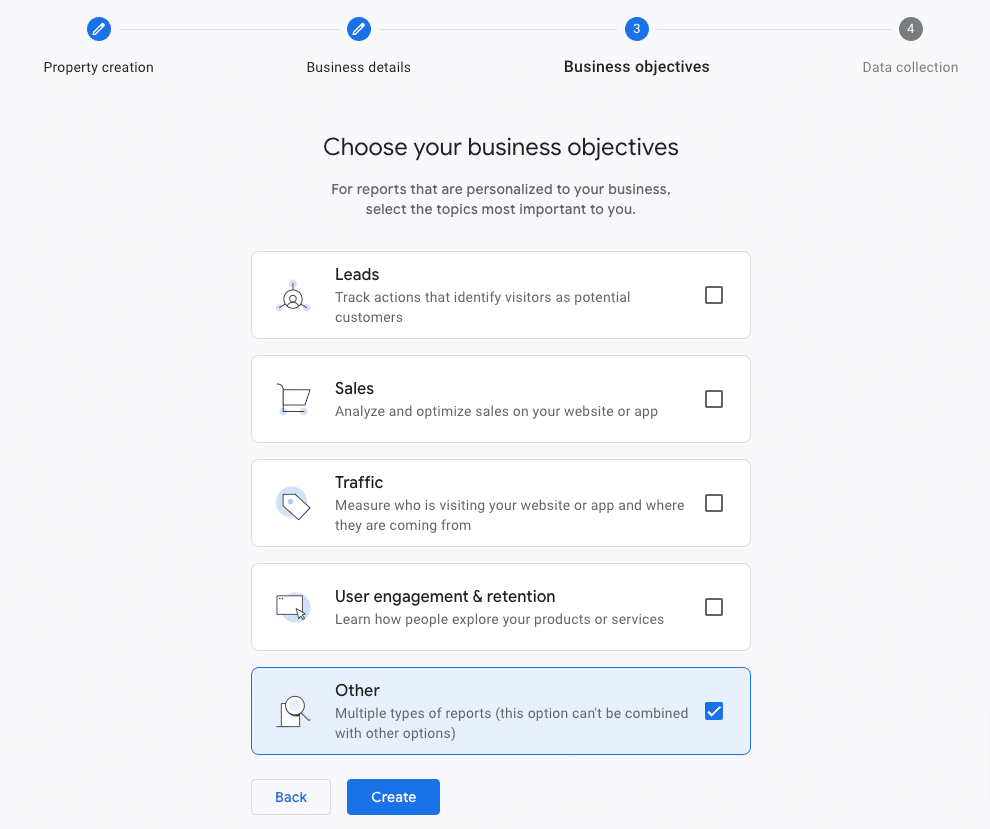
Click Create.
Step 4: Install Your Tracking Code
If you’re using a website platform other than WordPress, please refer to the instructions for installing Google Analytics.
To install Google Analytics tracking on your WordPress website, your best option is to use MonsterInsights.
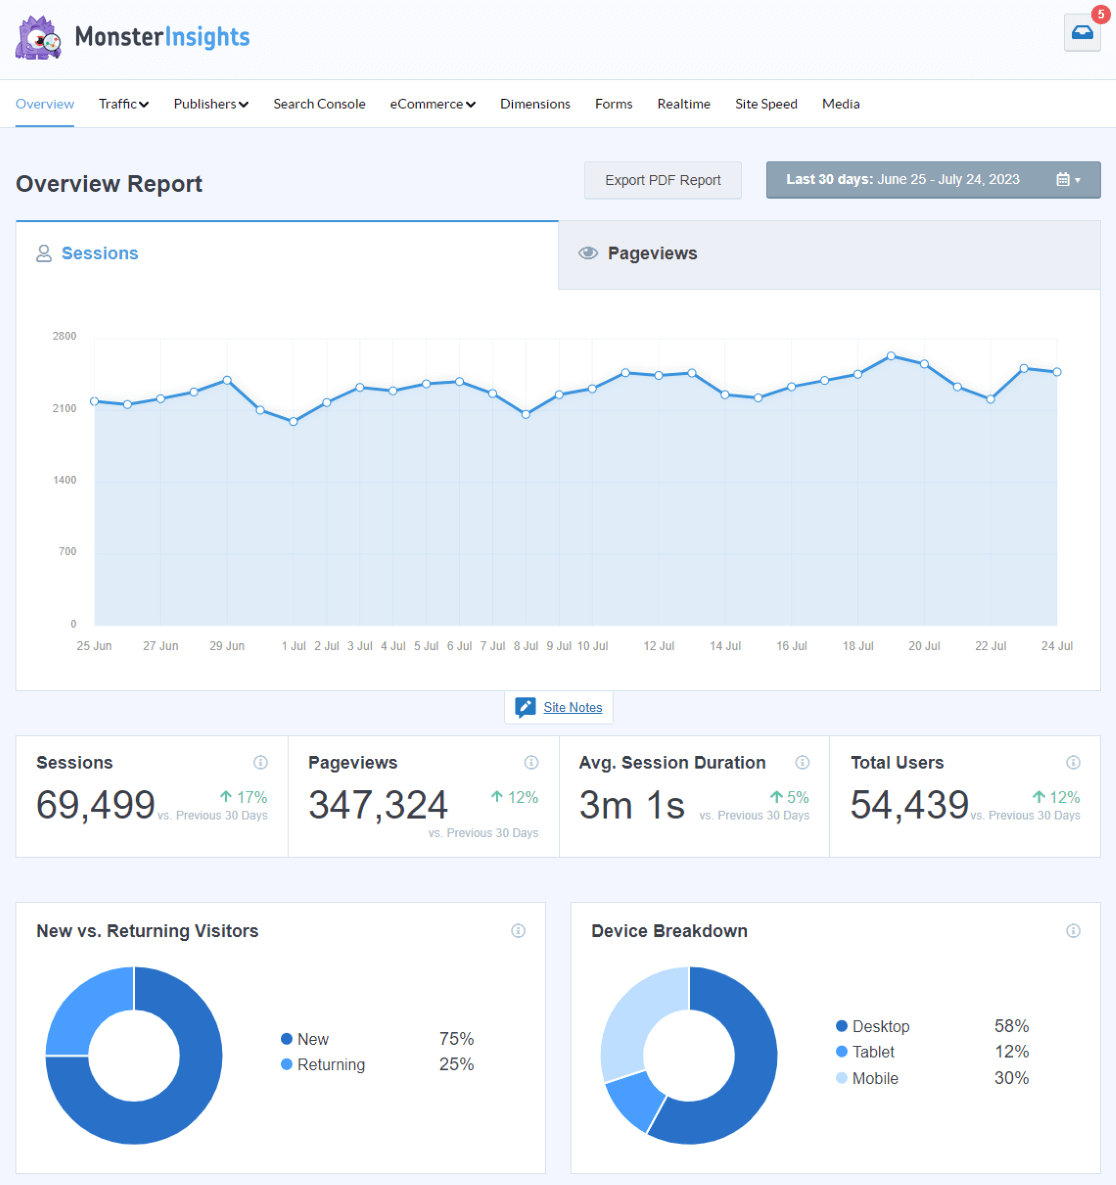
MonsterInsights is the best Google Analytics plugin for WordPress. Add your Google Analytics tracking code quickly and easily without having to touch any code. Plus, you’ll get a set of easy-to-read reports right inside your WordPress dashboard:
You can start by downloading and installing the plugin for free (or grab a license for tons of extra features like eCommerce tracking, PPC ad tracking, media tracking, and so much more).
To start for free, go to your WordPress admin area and navigate to Plugins » Add New. Next, search MonsterInsights in the search bar and click Install Now.
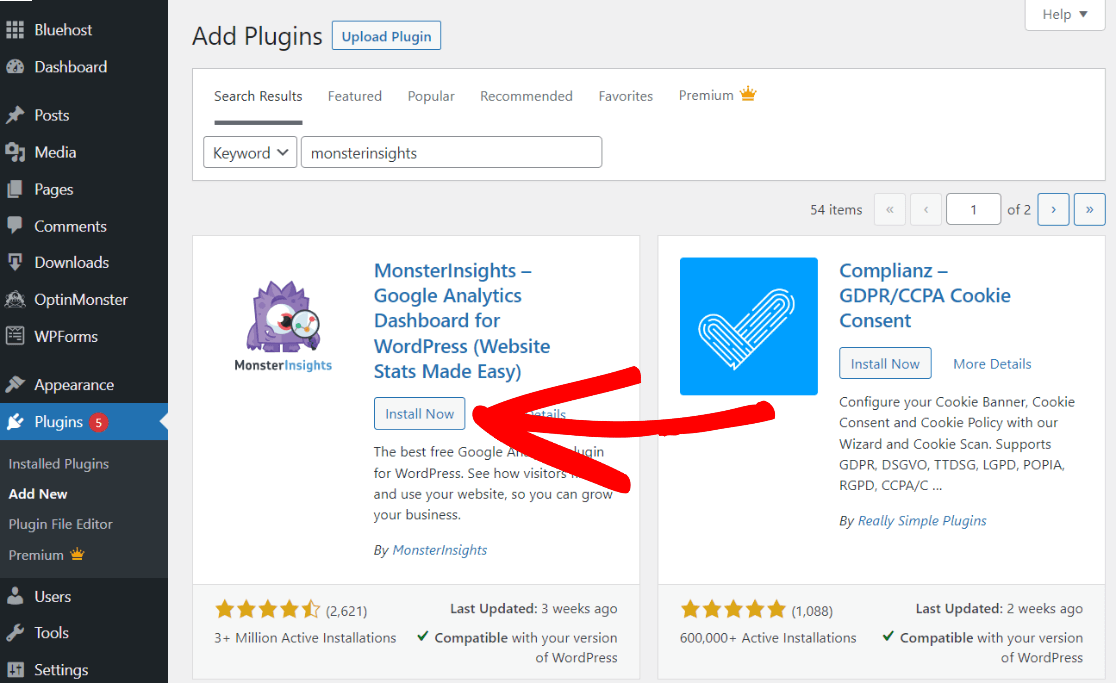
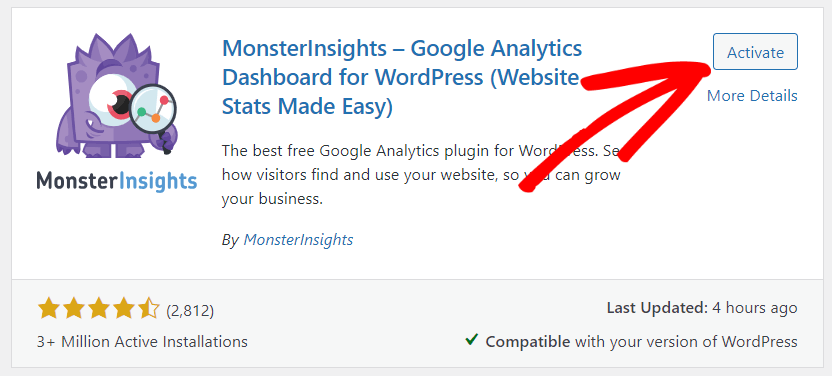
Once the plugin installs, click Activate.
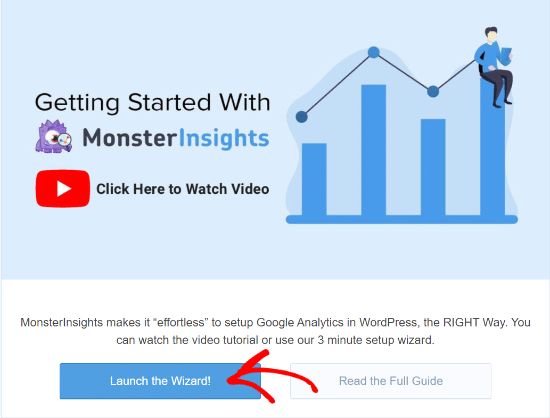
Upon activating the plugin, you will be taken to the MonsterInsights welcome screen. Click on Launch the Wizard! button.
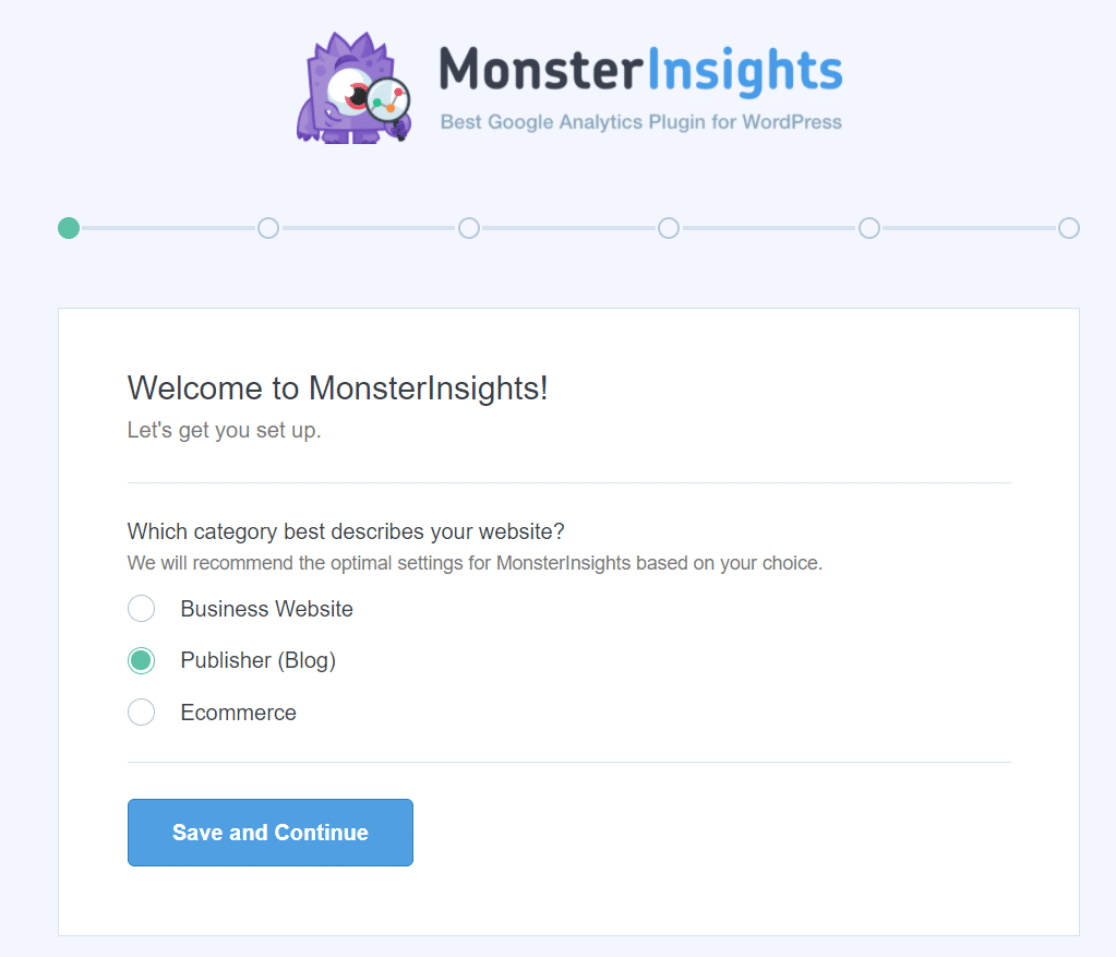
Now select the category that describes your website and then click Save and Continue.
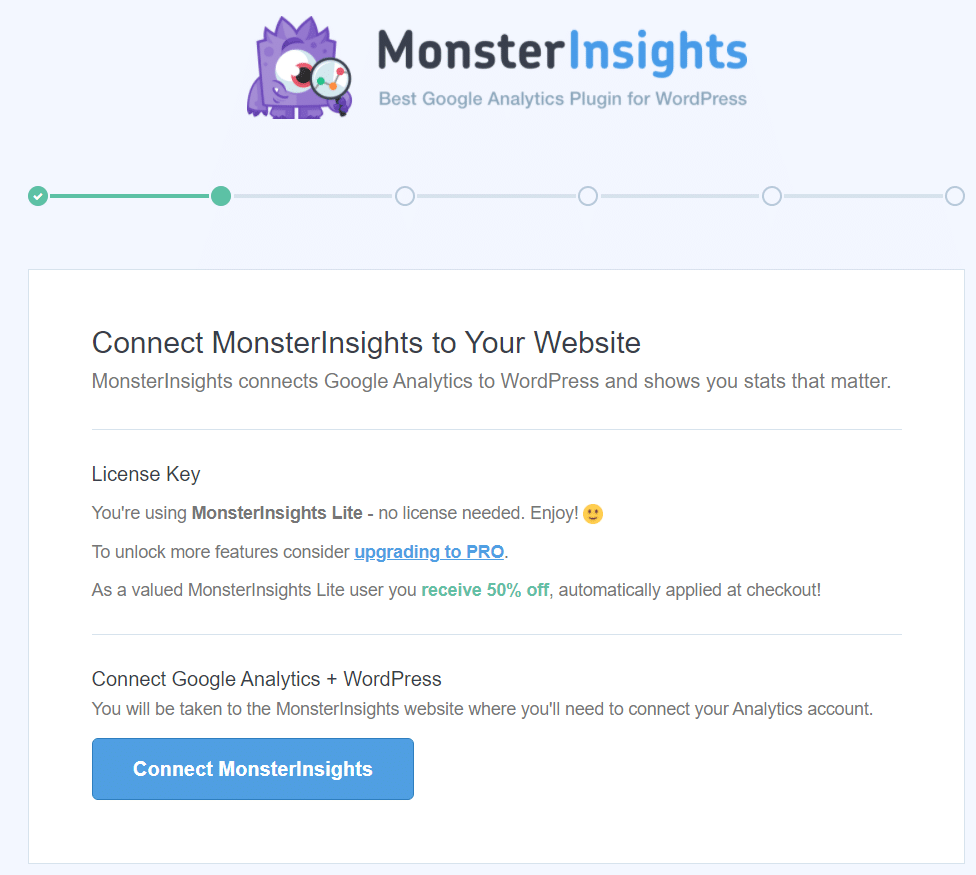
Next, you’ll have to connect MonsterInsights to your website. To do that, click the Connect MonsterInsights button.
After that, choose your Google account. In the first step, make sure you select the account you used to create your new property.
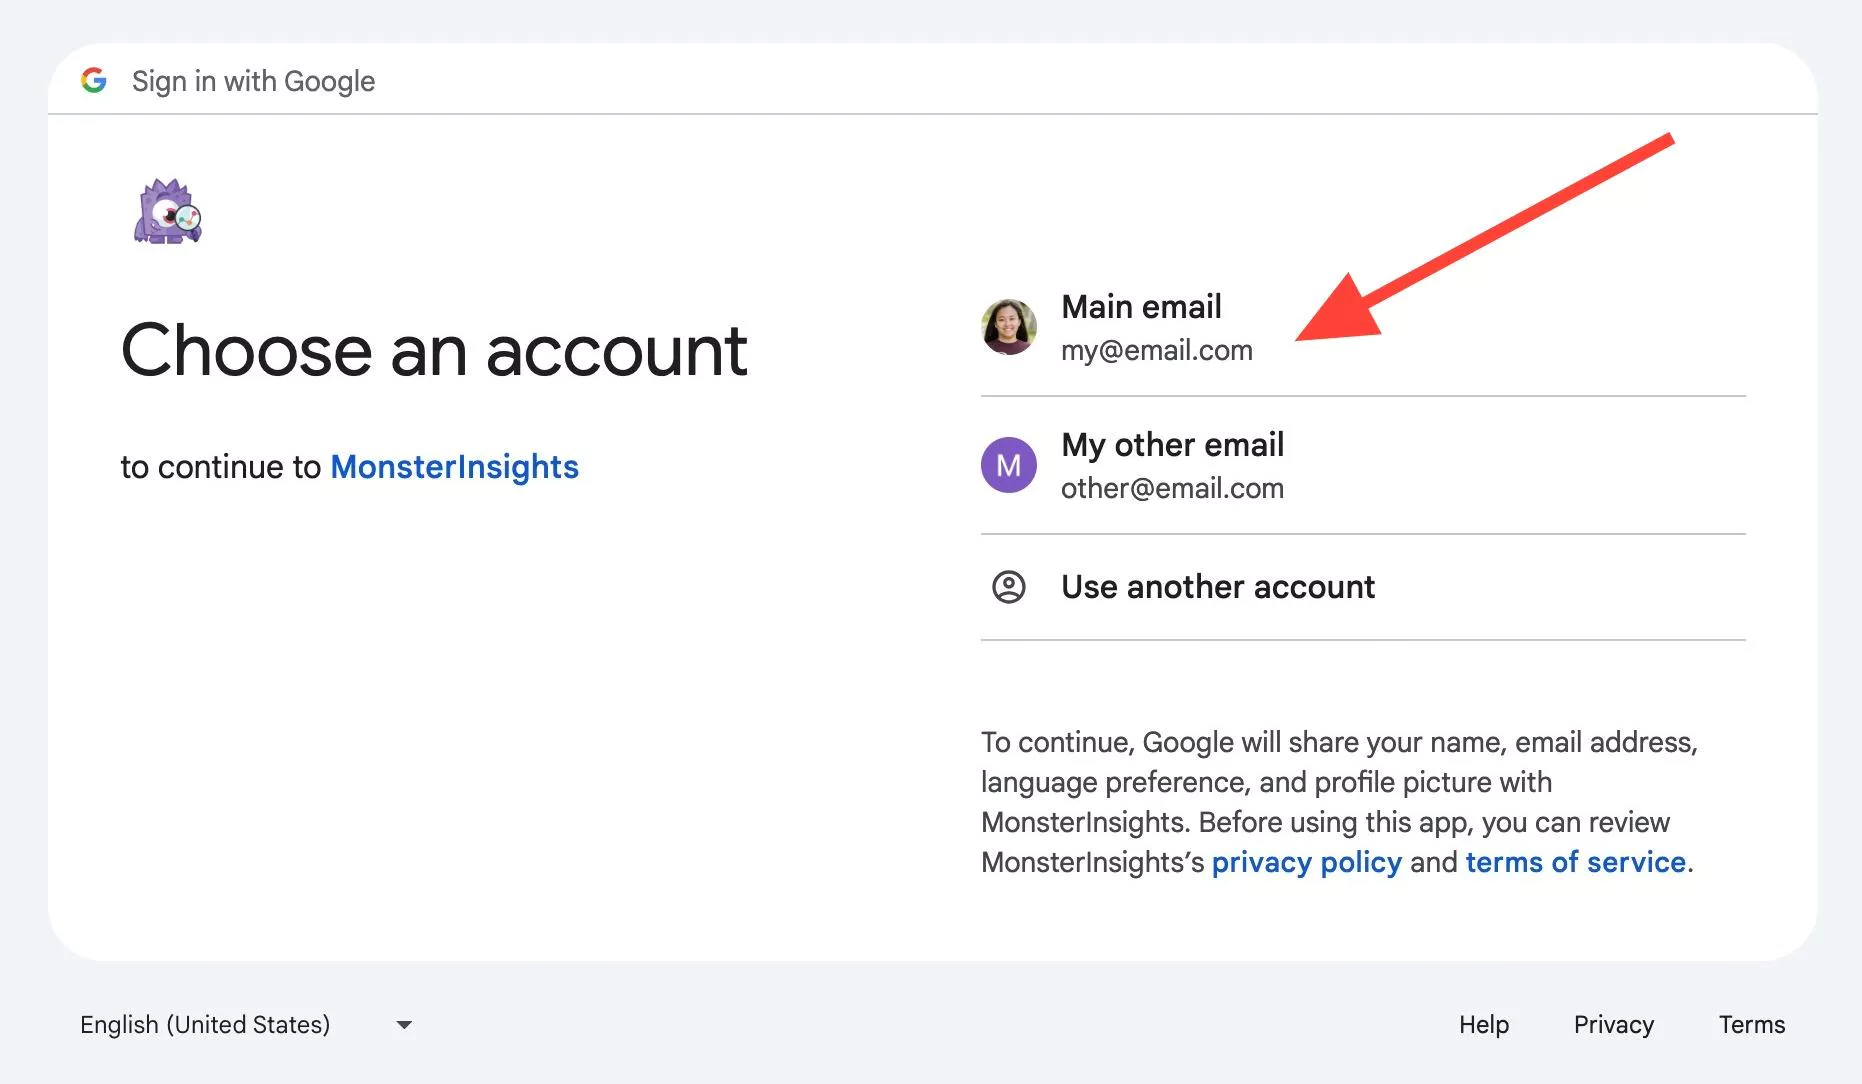
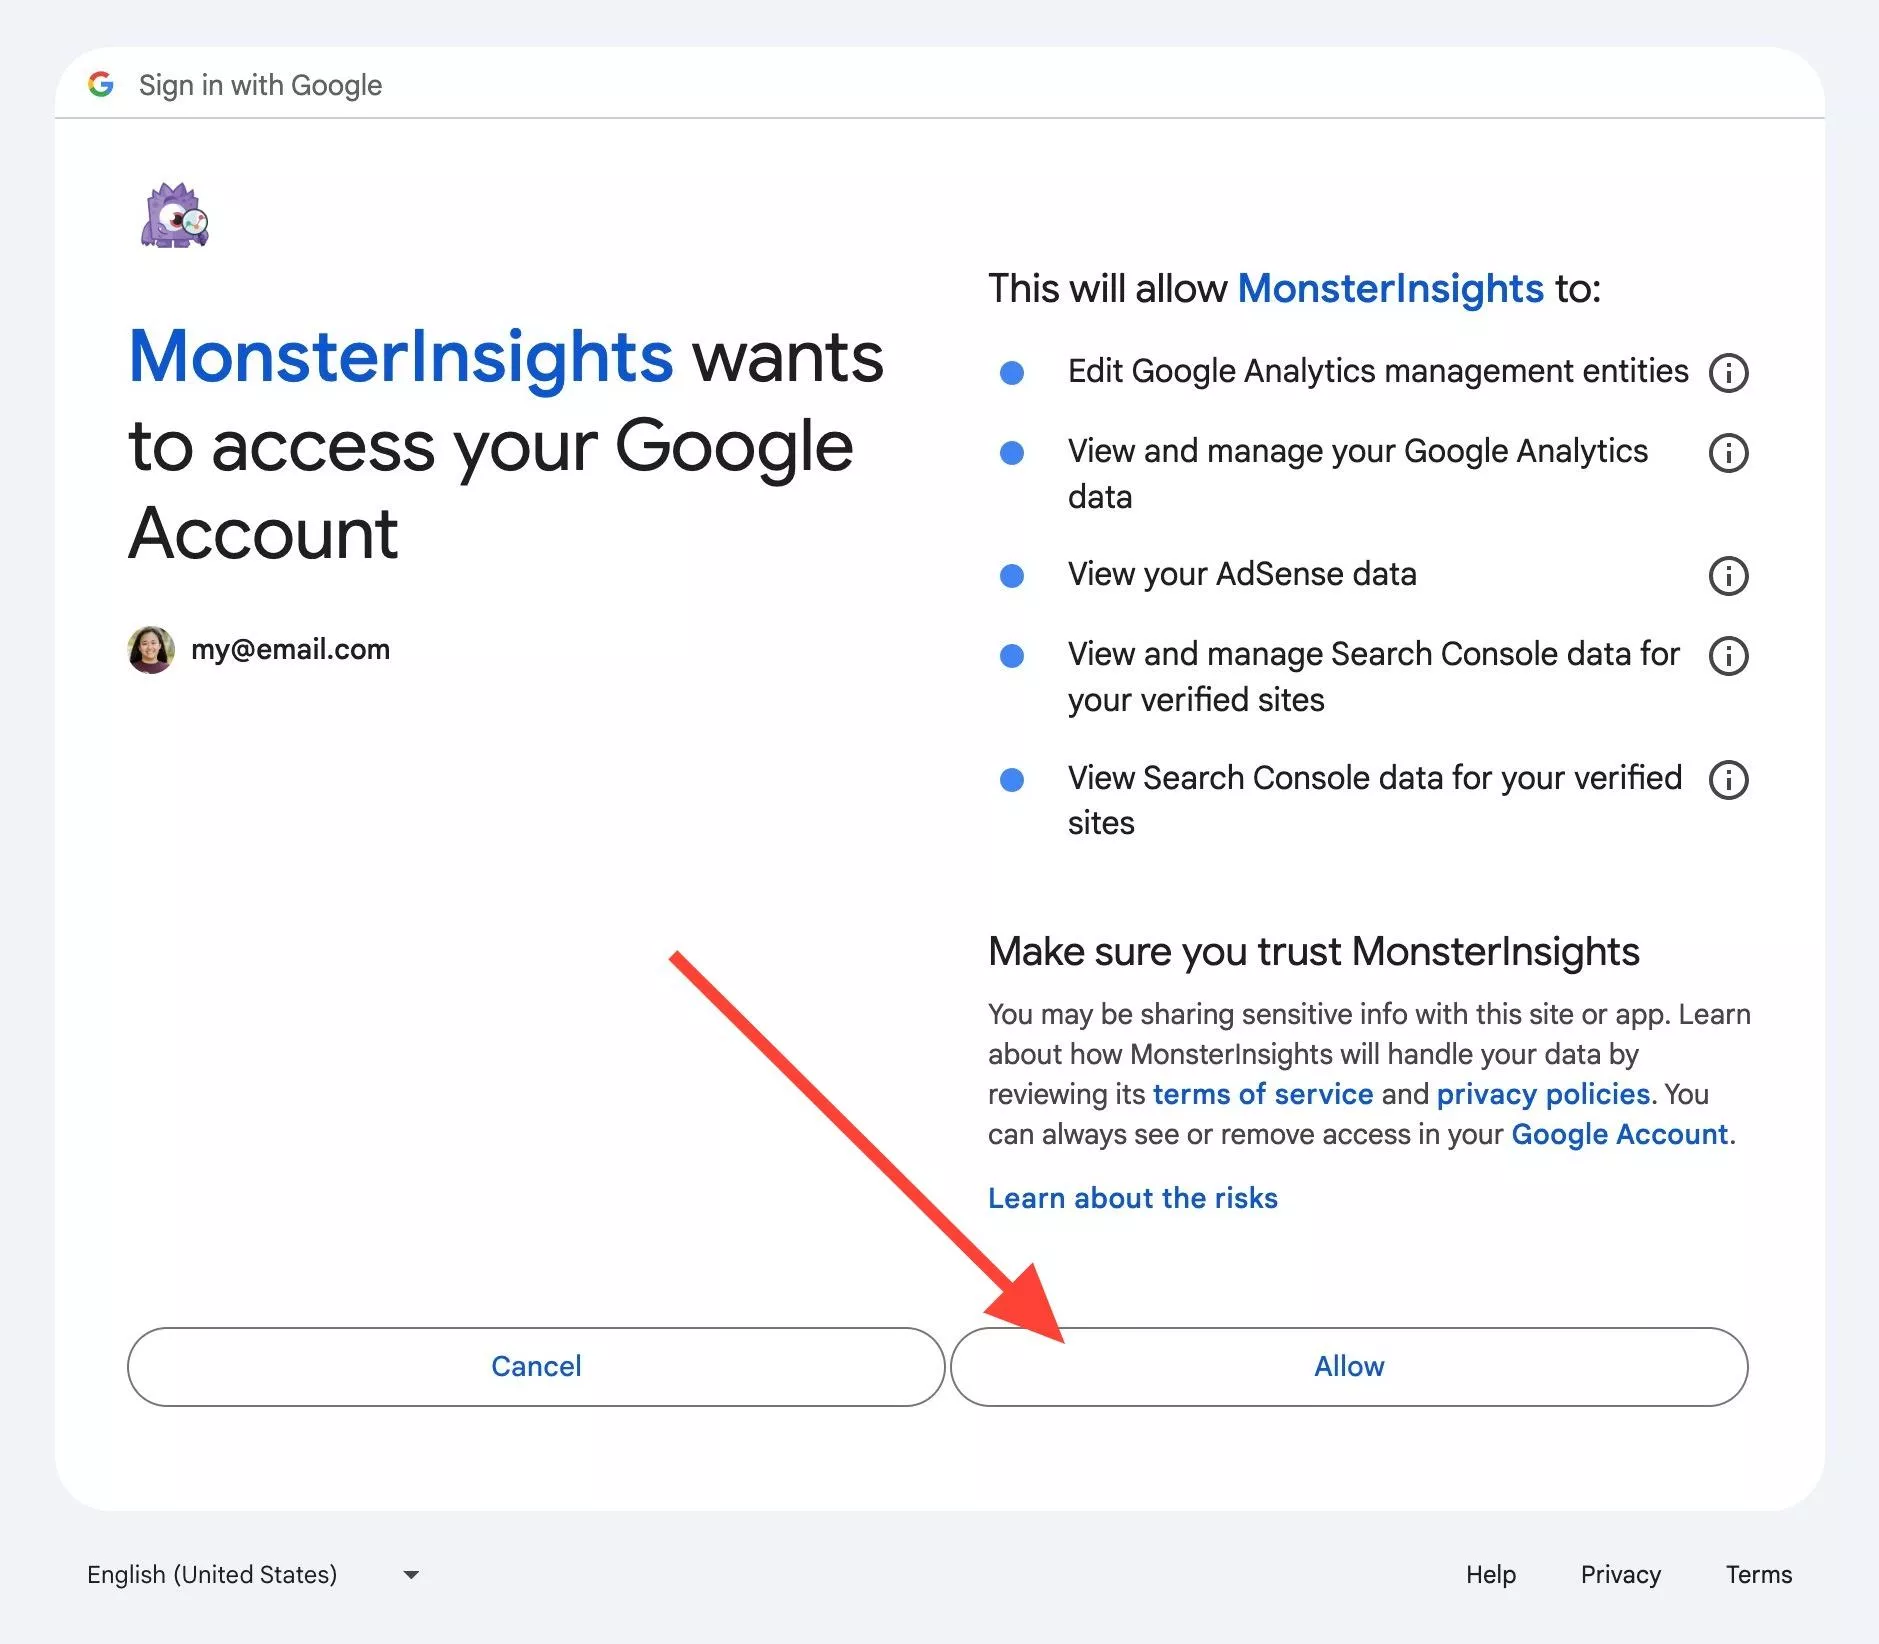
Next, click Allow to give MonsterInsights access to your Google Account.
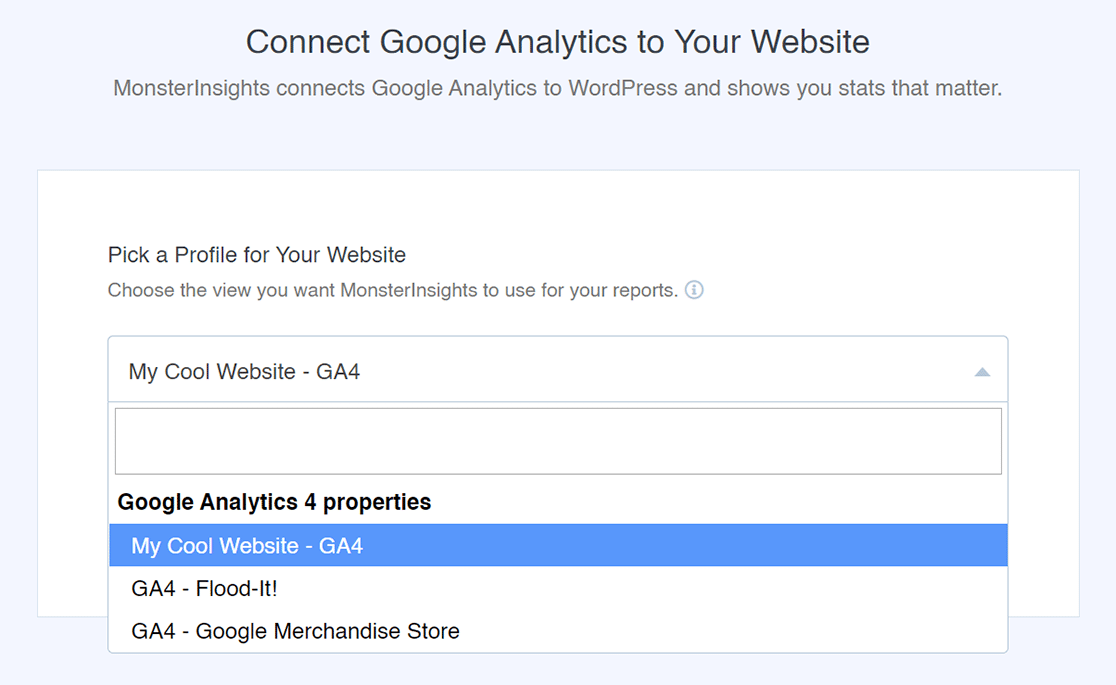
Now select your newly created property and click the Complete Connection button.
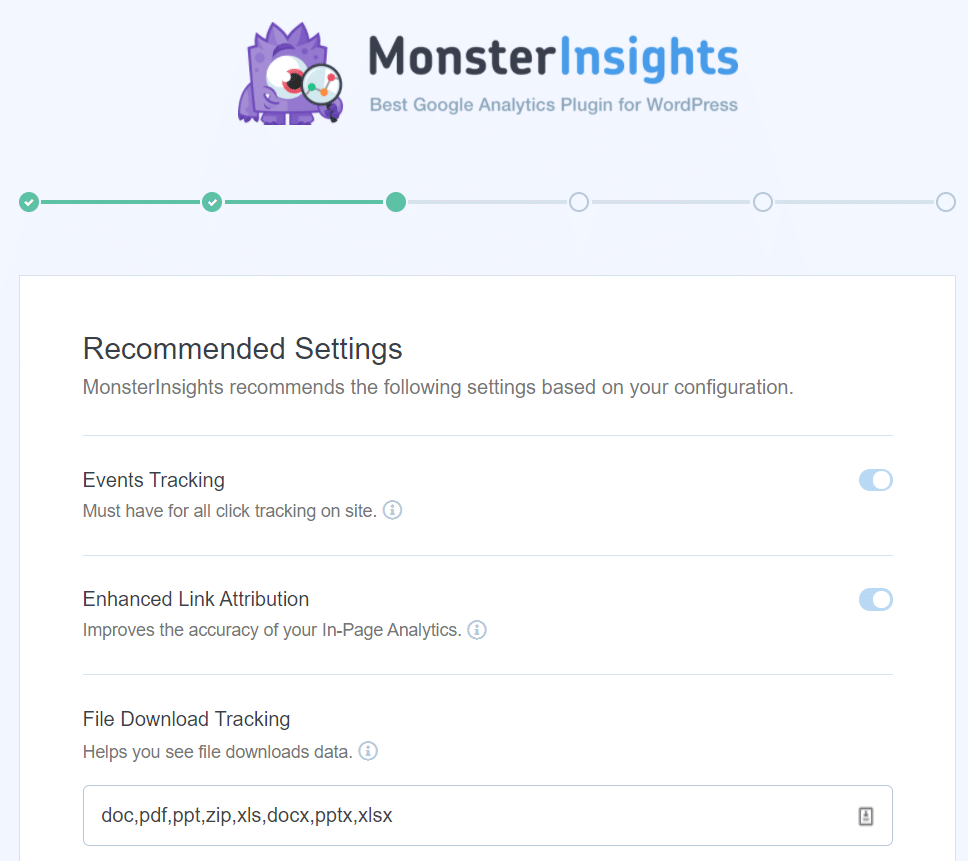
MonsterInsights will show you some recommended settings. For instance, you can select the file download tracking extensions, set up affiliate link tracking, and choose which user roles can see the reports.
As you scroll down, you’ll see more settings.
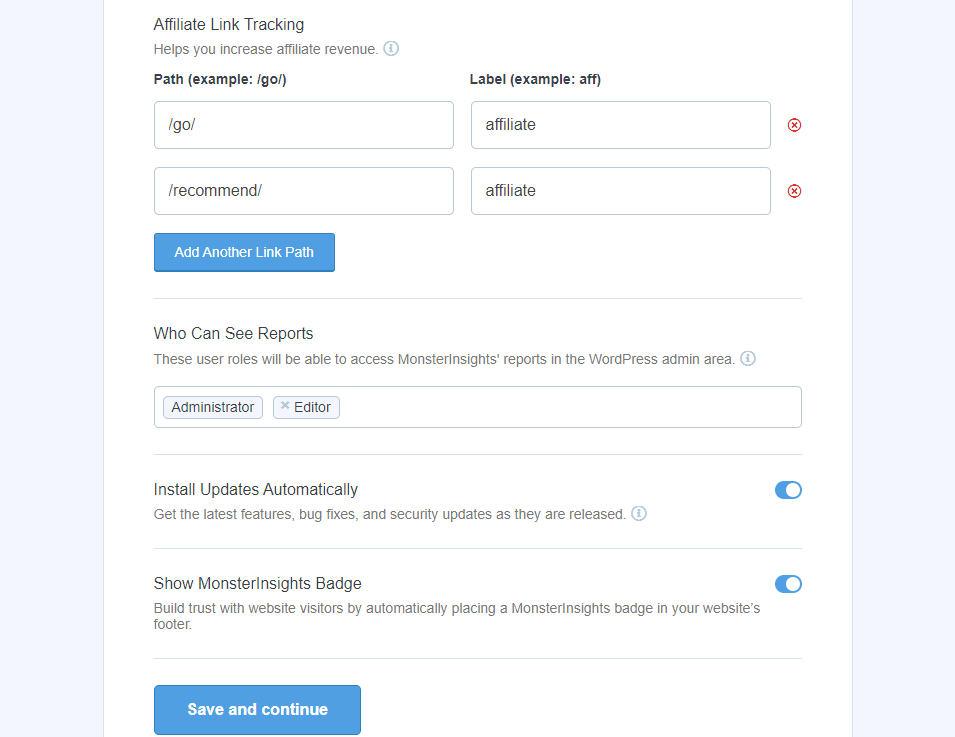
- Affiliate Link Tracking – It adds 2 affiliate link paths by default and lets you add more.
- Access to MonsterInsights Reports – You can choose who can see the MonsterInsights reports.
- Automatic Plugin Updates – You can enable or disable the option to install updates automatically.
- Show MonsterInsights Badge – Choose whether or not you want to show a MonsterInsights badge in your website’s footer. You’ll be able to access a few options for how this looks later.
Review and configure these recommended settings, and then click the ‘Save and Continue’ button at the end.
On the next screen, you’ll see options for even more tracking options, addons, and helpful plugins.
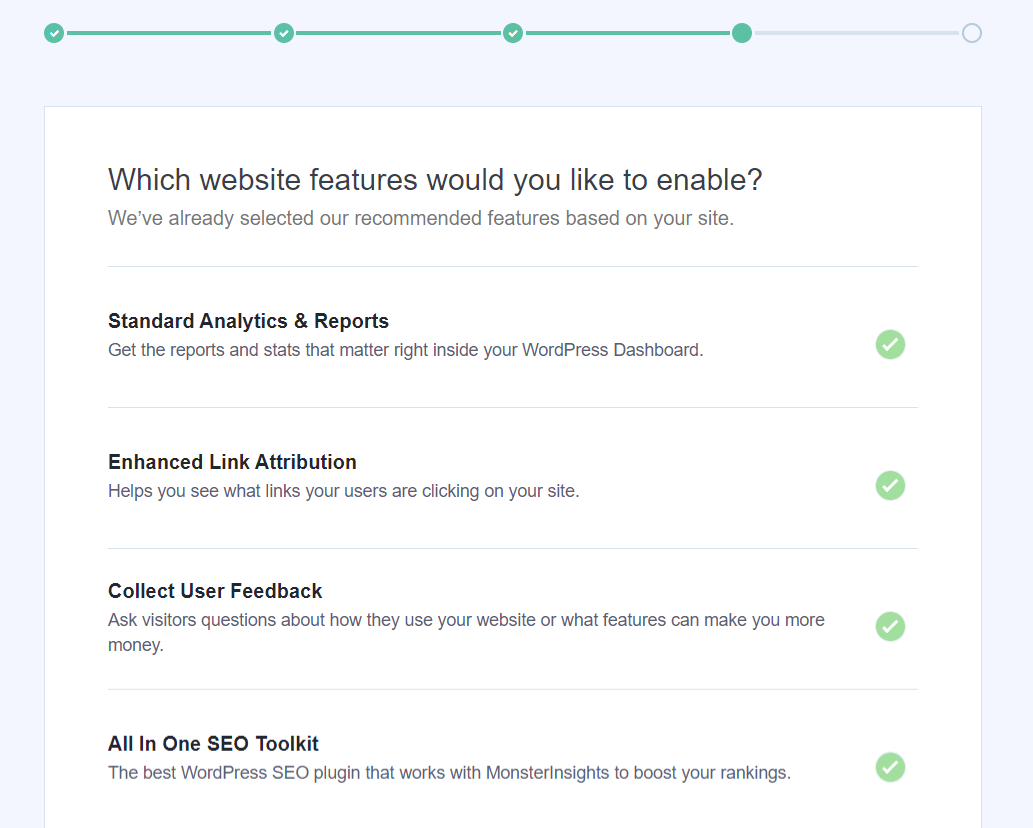
The first ones are:
- Standard Analytics & Reports – The standard MonsterInsights reports you’ll get in your WordPress dashboard.
- Enhanced Link Attribution – This can help you see where users are clicking on your site.
- Collect User Feedback – Ask visitors questions about how they use your website or what features can make you more money with the UserFeedback plugin.
- All in One SEO Toolkit – The best WordPress SEO plugin that integrates with MonsterInsights
When you scroll down, you’ll find even more options:
- Conversion Tools – Get the #1 conversion optimization plugin to convert your growing website traffic into subscribers, leads and sales: OptinMonster.
- Smart Form Builder by WPForms – The most popular WordPress form builder plugin
- Privacy Compliance Addon – Helps Google Analytics become compliant for GDPR, CCPA, and more
- Advanced Reports – Get access to advanced reports inside MonsterInsights, such as search keywords, a real-time report, publishers and eCommerce reports, and more
- eCommerce Tracking – Instantly enable eCommerce tracking
- 20+ Advanced Tracking – Even more advanced tracking, such as author tracking, form conversion tracking, scroll tracking, and more
- Advanced Growth Tools – Get access to our campaign URL builder, popular posts addon, and A/B testing integration.
- Media Tracking – Track how your users interact with videos on your website with the MonsterInsights Media addon.
After that, you’ll see a new screen with this message ‘Awesome, You’re All Set!’. This means that the setup process is complete and that you’ve successfully installed Google Analytics on your WordPress site.
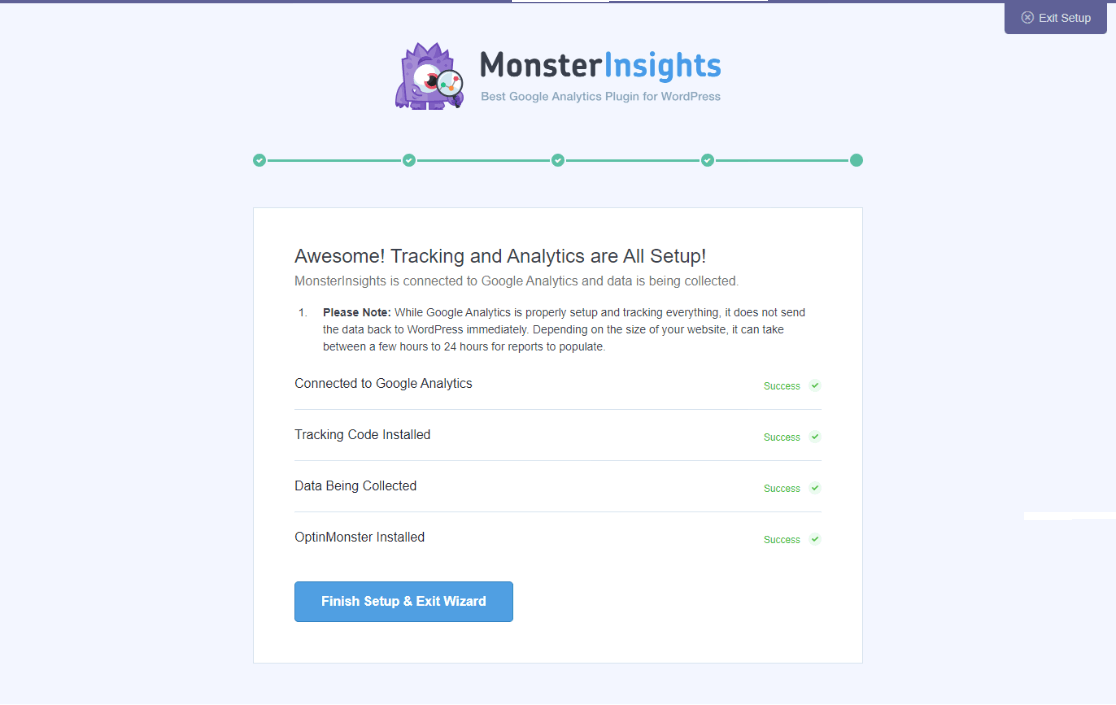
This screen also notifies you about when you can start seeing your website reports. Depending on the size of your website, it can take between a few hours to 24 hours.
Don’t forget to click on the Finish Setup & Exit Wizard button.
That’s it! You’re all set.
It can take a few hours for Google Analytics to start collecting data and show it in the reports.
Besides setting up Google Analytics, MonsterInsights Pro offers lots of other benefits. It automatically sets up advanced tracking right out of the box. For example, it will set up affiliate link tracking, outbound link tracking, file download tracking, and much more.
With its addons, you can track your eCommerce store, make your site GDPR compliant, track form conversions, and so much more.
Take a full tour of the MonsterInsights reports dashboard to learn more.
Recap: How to Create a New Property in Google Analytics
To recap, here’s a quick rundown of the steps you’ll take to create a new property:
- Sign into Google Analytics and choose the account you want to create the new property under.
- Click on the Admin cog, then the Create button. Select Property from the dropdown.
- Enter your business details and choose your business objectives. We recommend selecting Get baseline reports in the business objectives step.
- Click Create.
- Install your tracking code. If you have a WordPress website, try out MonsterInsights for this step.
I hope this tutorial helped you to add a website to Google Analytics. You might also want to check out:
How to Log in to Google Analytics (Step by Step)
Add Google Analytics to WordPress Without a Plugin
How to Set Up Google Analytics: Step-by-Step Tutorial
Finally, don’t forget to follow us on YouTube for more helpful Google Analytics tips and tutorials.
FAQ
How do I add new properties in Google Analytics?
On the Admin page, click the Create button in the upper left of your screen. Then, select Property. Follow the setup wizard to enter your website’s details, including name, reporting time zone, and currency. After creating the property, you’ll need to install the tracking code on your website.
Can you have more than one property in Google Analytics?
Yes. Google Analytics 4 allows up to 2,000 properties per account. This means you can track multiple websites, mobile apps, or both under the same Google Analytics account, making it perfect for agencies or businesses with multiple online properties.
How do you add a website to Google Analytics?
To add a website to Google Analytics, sign in to your account and go to the Admin section. Click Create, then Property, and follow the prompts to enter your website information. After creating the property, you’ll need to add the tracking code to your website. For WordPress users, the easiest method is using the MonsterInsights plugin.
Can I add another website to my Google Analytics account?
Yes! Every Google Analytics account allows up to 2,000 websites (also called properties) per account. To add another website, simply go to the Admin section, click Create, select Property, and follow the same setup process. Each property will have its own tracking ID and separate data collection.
How long does it take for Google Analytics to start collecting data?
After adding a new property and installing the tracking code, Google Analytics typically begins collecting data immediately. However, it may take 24-48 hours for all reports to populate with data. The exact time depends on your website’s traffic volume and the complexity of the tracking setup.

Thank you for explaining! It would have been impossible to do this task without your article and I am grateful.
wow gracias por explicarlo paso a paso me he servido de muchismo estaba realmente perdida
Thank you! This was a fantastic help. I had a Google Analytics account already, but did not understand the difference between account, property, and view. This how-to was so simple and make setup really easy. Wish I had started here!!
Thank you very much for this guide! This was a real headache for my website. I like the UA-reporting a lot better than the new reporting in Google Analytics. I would never have discovered the way to create the good, old UA-property without this guide. So thanks a lot!
Log into google Analytics – Checked
Select a website in which you’d like to add new property – Umm.. ok how? totally confused, article needs to be more detailed.
Hi Gera, thanks for the feedback! I’m sorry for the trouble here. If you haven’t resolved this yet, could you contact our Support team at the following links? They’d be happy to help!
If you have a MonsterInsights account please go to https://www.monsterinsights.com/my-account/support to submit a priority ticket.
If you are using MonsterInsights Lite please go to https://monsterinsights.com/lite-support to submit a ticket (MonsterInsights account not required).
OMG! I’ve been trying to link MonsterInsights with Google Analytics and thanks to this post I did it! Thank you so much for the information, it’s been really useful!
thank you so much! I was struggling all day trying to find out why my stream wasn’t working.
Thank you for this information. When will you support G4 data streams?
Hi Tom, glad you found the article useful!
We’ll be adding support for G4 data streams for our users once Google finishes rolling out the developer APIs needed, and also fix the bugs we’ve reported with the new v4 style accounts. When ready, we’ll be reaching out to users with a simple, seamless upgrade. 🙂
Hi, do you have an update on this? It’s been 6 months now
Big thanks
SEO LADY UK
Hey Nina,
Thanks for reaching out! Yes, Google has been slowly releasing the APIs we need. We’re excited to launch an update with GA4 support and will do so as soon as we can.
It’s not working anymore. Apparently Analytics removed the “View” tab.
Nevermind, it works if you create a new property.
This worked on AWS hosting – it just plain doesn’t work on Bluehost. I have re-authenticated several times. I have followed this set of instructions – as much as I could, since the program seems to skip over some of the screens you show. I have added three different streams that seem to go nowhere. I have deleted the plugin completely, re-downloaded, and re-installed. I have tried to connect with both of my email addresses. I have spent a total of AT LEAST 12 hours trying to get this to work over the last three months, and I still get “The API returned a 403 response with this message: The key or token used is invalid. Please authenticate/re-authenticate with MonsterInsights on the MonsterInsights settings panel.” EVERY TIME!!! I am so over trying to make this work….
Hi Scheherazade,
We’re really sorry that you had to go through such trouble. Please drop us a line in support and we’d be happy to help you troubleshoot the issue.
Hi, thank you for this article. Somehow, I can see “Create account” and “Create Property” but There is no tab voor view. I can’t seem to setup or create a new view, how’s that possible?
Hi Rick,
The ‘Create View’ tab is available in the Universal Analytics Property. If you’re using Google Analytics 4, you’ll only see Create Account and Create Property tabs.
You can follow the steps given in this guide to set up a Universal Analytics Property. Let us know if you require further assistance 🙂
Increíble tu explicación, muchas gracias. Llevaba tiempo tratando de configurar Analytics y con este tutorial ha sido realmente sencillo. Ya estoy lista para empezar con mis métricas. Mil y mil gracias
Tahnk you for this article , iam using plugin monsterinsights.
Thank you for this article, I am using this article free
me parece un excelente servicio el que prestan
this tool is just horrible it doesn’t work for nothing I can’t link my account for nothing
Hi Luan, the support team can help you! Please reach out to our support team, so we can further investigate the issue you’re facing and help resolve it. 🙂
I have already created a property and there is no advanced section to turn on universal analytics. The advanced section is only there when you select the new property which I don’t want to do as I have already created one. Please help!
Hey Rachel! Yes, unfortunately you can’t change a property from GA4 to Universal. To connect with MonsterInsights, you’ll have to create a new property that’s Universal. Just make sure to keep the GA4 one (with all your data) and, as soon as MonsterInsights supports GA4 (soon!) you’ll be able to connect to your GA4 property. Does that make sense? Both of them will collect data for the time being. For more help, please reach out to our support team any time.
This is mind blowing, thanks for sharing this valuable information with us.
Thank you. It helped me solve a cache issue other than its intended purpose.
Property option in drop down menu is disable in my account (not clickable) then what should I do?
It sounds like maybe you don’t have the right user access level in your Google Analytics account. Did someone else create the account? Here’s more information on permissions levels: https://www.monsterinsights.com/beginners-guide-to-user-permissions-in-google-analytics/