Do you want to track the return on investment (ROI) for paid advertising on your online store? Setting up eCommerce Google Ads conversion tracking for your website is essential if you want to measure the ROI from your ad campaigns.
In this article, we’ll show you how to set up Google Ads conversion tracking on your WordPress eCommerce sites that use one of the following plugins: WooCommerce, Easy Digital Downloads, MemberPress, LifterLMS, or GiveWP.
To track conversions from Google Ads, we’re going to use the best Google Analytics plugin for WordPress, MonsterInsights.
Why Set up Google Ads Conversion Tracking on WordPress?
Setting up conversion tracking for Google Ads (formerly AdWords) that point to your WooCommerce, Easy Digital Downloads, MemberPress, LifterLMS, or GiveWP store tells you how much revenue you earn from people who click on your Google ads.
You track the return on investment of your ads by measuring if an ad click leads to a conversion on your website (such as purchasing a product or signing up for a newsletter).
If the value of the sales or signups is greater than what you spend on an ad campaign, you earn a positive ROI.
When you can accurately track eCommerce conversions and revenues against your ad spend, you can stop guessing about which ads are the most successful. Ads that bring in the most traffic don’t necessarily bring in the most revenue!
With Google Ads, you can track different types of conversions, such as:
The Best eCommerce Google Ads Conversion Tracking Plugin
Before we dive into conversion tracking, let’s go over the tool we’re going to use to make it all happen.
For this tutorial, we’re going to use the MonsterInsights plugin.
MonsterInsights allows you to easily connect your WordPress site with Google Analytics, so you can view all the data that matters most right in your WordPress dashboard.
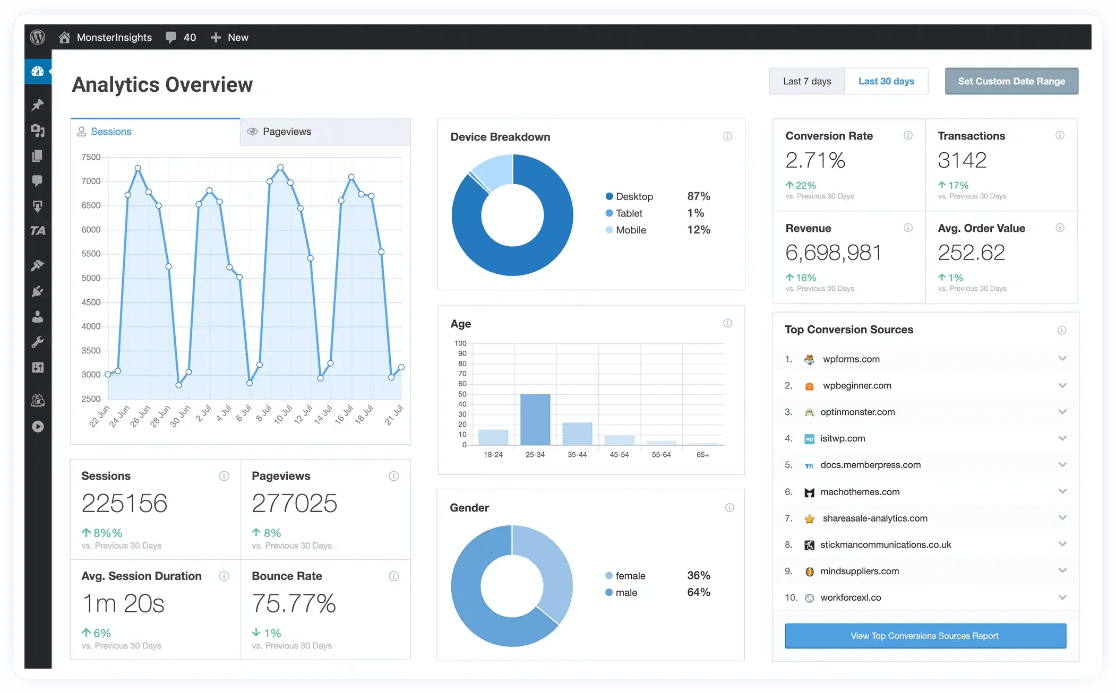
Plus, with the click of a button, you can set up sophisticated tracking features such as event tracking, enhanced eCommerce tracking, form tracking, custom dimension tracking, outbound link tracking, and more.
As an added bonus for WooCommerce, Easy Digital Downloads, MemberPress, LifterLMS, and GiveWP users, MonsterInsights allows you to connect WordPress with Google Ads and track eCommerce conversions using Google’s enhanced conversions technology, all without messing with code at all.
If you’re not yet a MonsterInsights user, follow these instructions to get set up: How to Add Google Analytics to WordPress (The RIGHT Way).
Then, make sure to install the MonsterInsights eCommerce addon and the MonsterInsights PPC Ads Tracking addon on your site. That will enable automatic tracking of all WooCommerce, Easy Digital Downloads, MemberPress, LifterLMS, and GiveWP interactions and metrics like:
- Transactions
- Revenue
- Average order value
- Top products
- Adds & removals from cart
- And more!
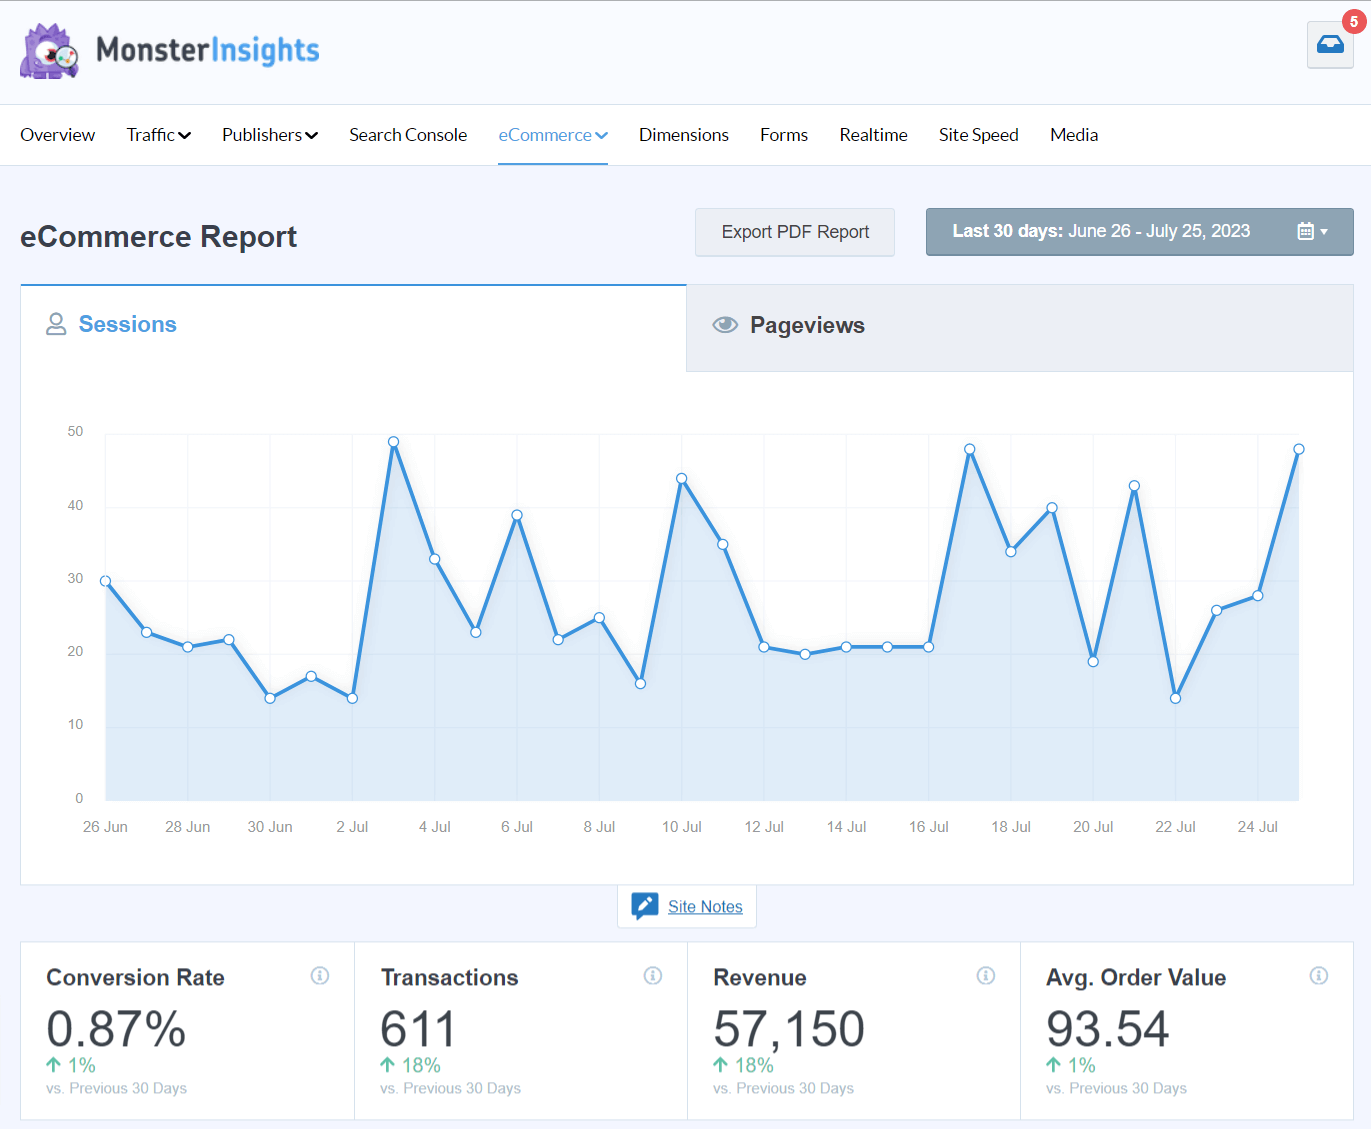
Plus, you’ll be able to track Google Ads conversions without any programming or technical experience.
Google Ads + WordPress eCommerce Tracking Tutorial
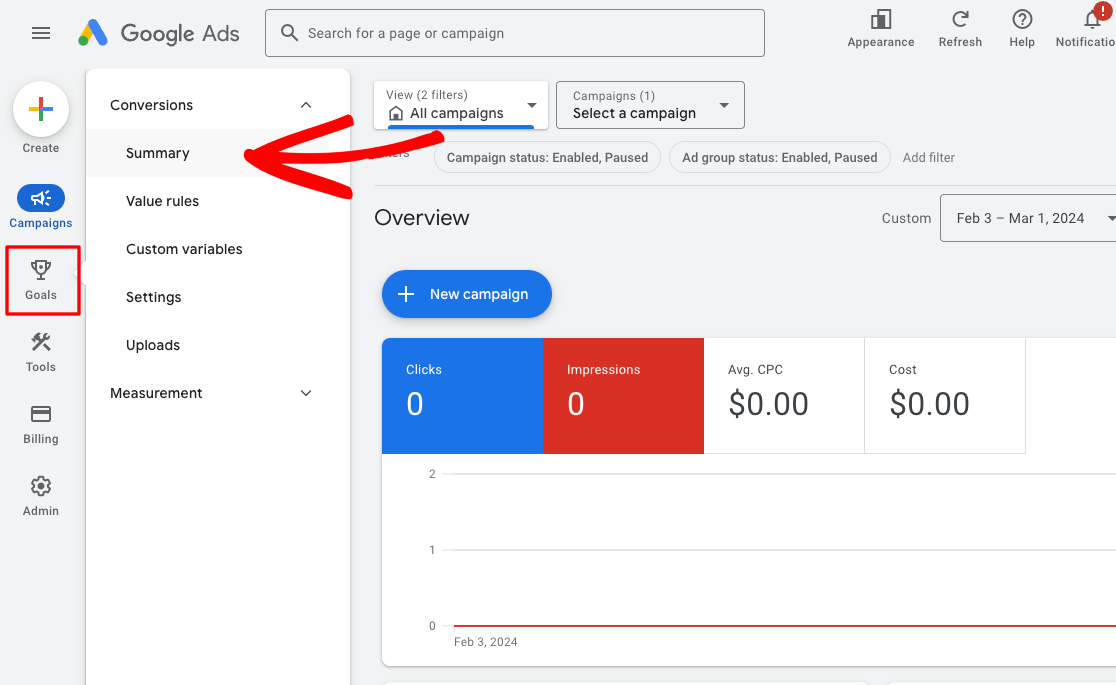
To start, sign in to your Google Ads account. In the navigation on the left side, hover over Goals, expand Conversions, and click Summary. NOTE: If you don’t see this option, go to Settings » Switch to expert mode (see screenshot).
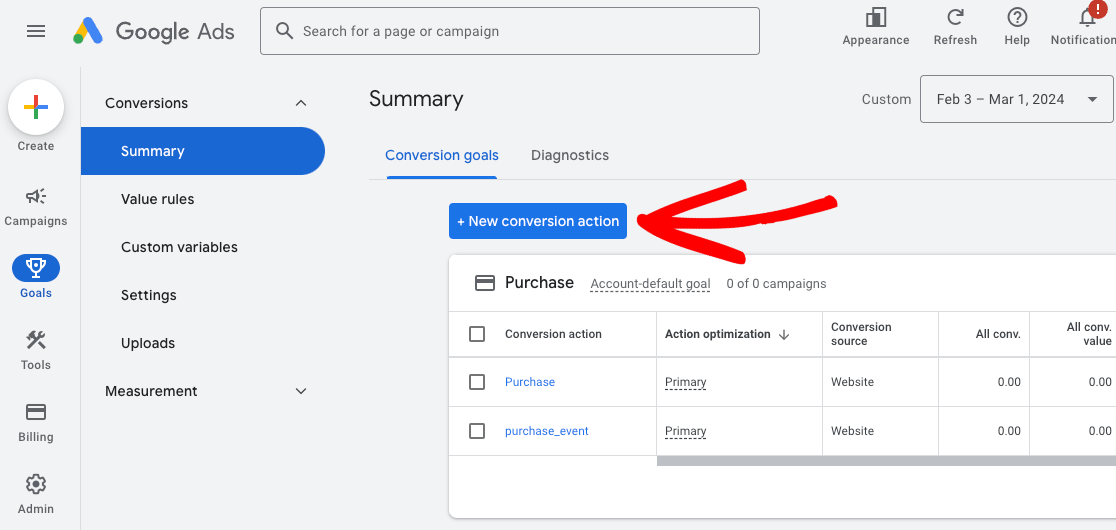
Then, click the + New conversion action button.
Next, click Website.

Now, Google will scan your website to see if it’s configured for conversion tracking. Enter your site domain and click Scan.
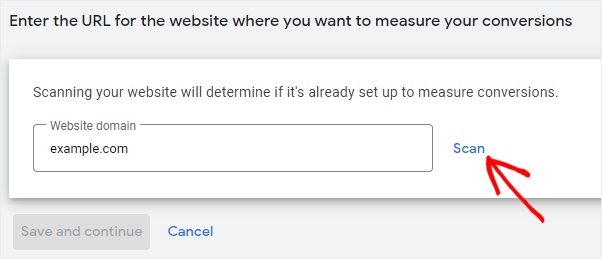
Then, Google Ads will ask whether you want to create a conversion action Automatically or Manually. NOTE: If you see an option that says “Measure in Google Analytics,” do not click it. Continue with a manual conversion action. You need to select the manual option by clicking + Add a conversion action manually

Now, you’ll select a Goal, enter a Conversion name, and specify a Value for that conversion.
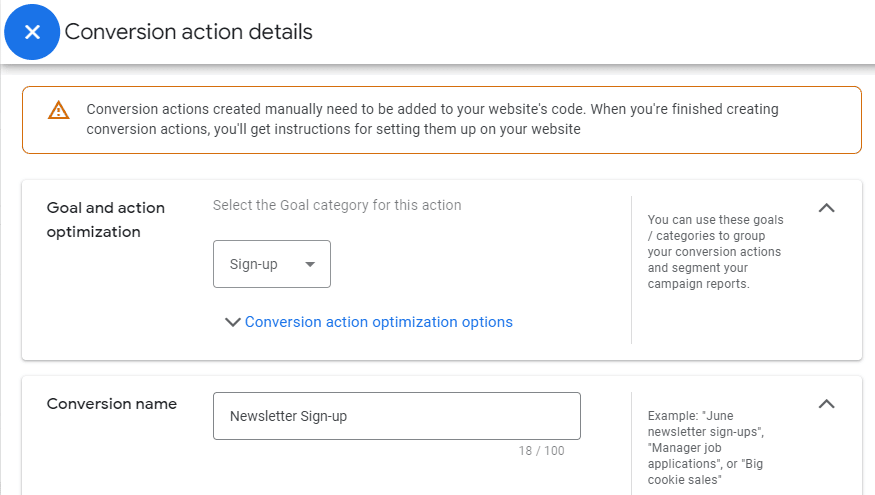
We’re going to use the same conversion value for each conversion, and set our Count to One so that a subscriber is only counted as a conversion once. For purchase conversions you’ll normally want to set this to Every in order to count each purchase as a conversion.
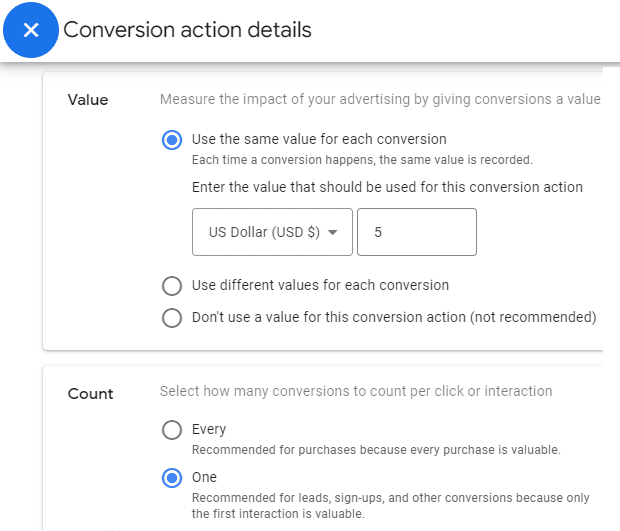
Then, click Done. Now, we’ve created a new conversion in Google Ads named Newsletter Sign-up. This should track everyone who signs up for our newsletter and assign a value of $5 to each of these sign-ups.
At this point, click the Save and continue button to get instructions to add the tracking tag for this conversion to your website. Then you’ll click on the Use Google Tag Manager option.
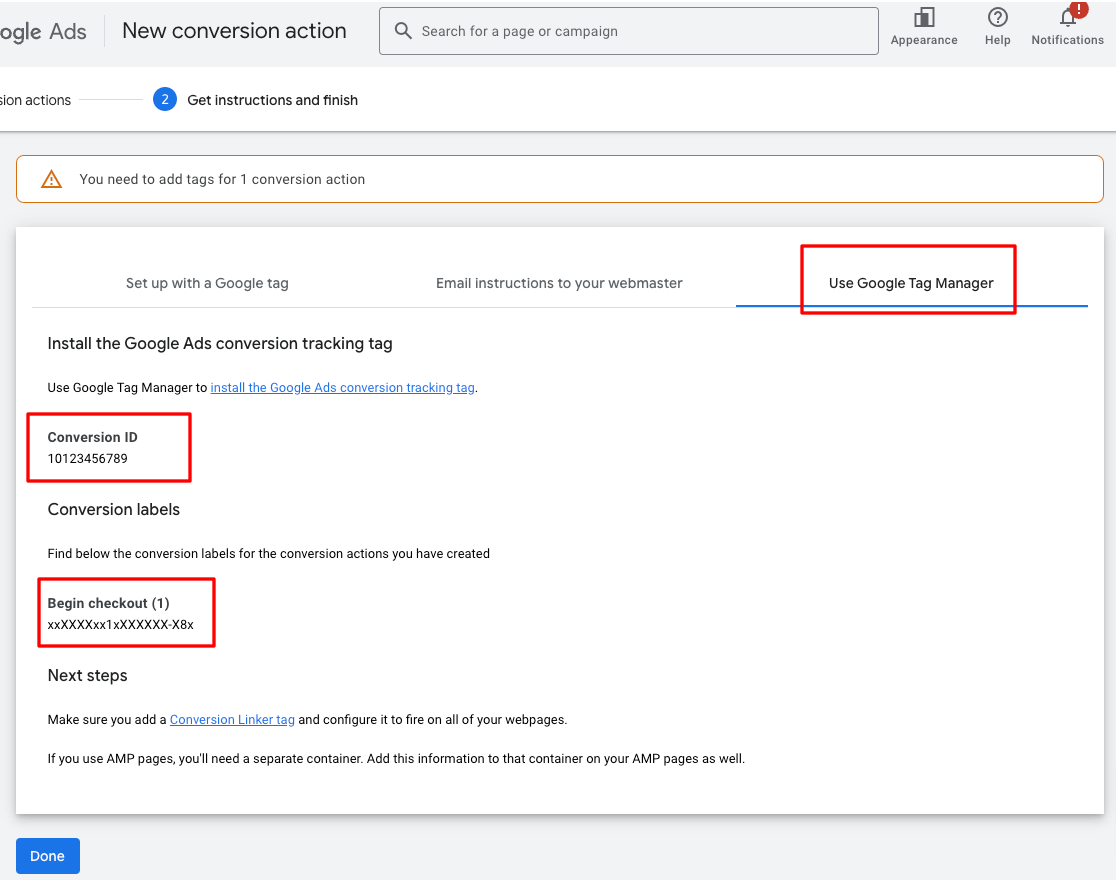
You will now see the Conversion ID and Conversion Label that you’ll need to finish setting up tracking. Copy and save these, or just leave this window open and move onto the next step.
After copying the Conversion ID, go to Insights » Settings » Conversions in MonsterInsights and navigate to Ads Tracking. Then, enter the ID under the Conversion ID field.
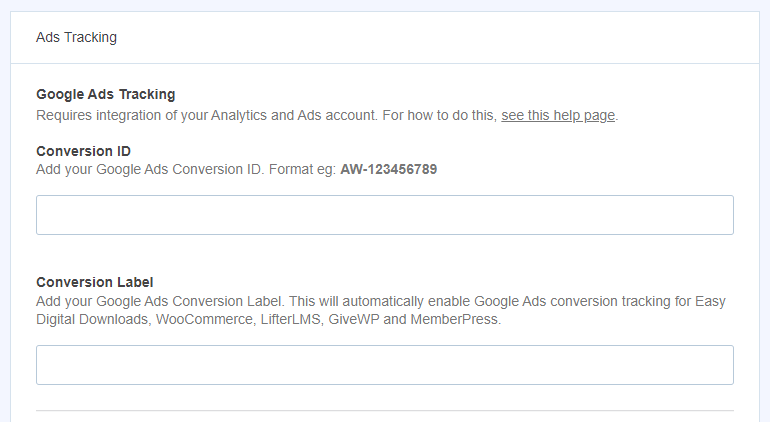
Without the MonsterInsights plugin, you’d need to add the event snippet to the landing page where your ad points to next.
However, MonsterInsights users can simply copy and paste your Google Ads Conversion Label from the previous step into the box, and you’re done!
Congrats! You’ve successfully set up eCommerce conversion tracking for Google Ads on your site using MonsterInsights, the best Google Analytics WordPress plugin.
For more WordPress eCommerce guides and tutorials, check out these articles:
How to Set Up Google Analytics eCommerce Tracking on WordPress
How to Set Up WooCommerce Google Analytics (the Right Way)
11 WooCommerce SEO Tips to Increase Search Rankings Today
29 Best WooCommerce Plugins (UPDATED)
How to Sell Videos Online With WordPress (5 Easy Steps)
Are you using MonsterInsights yet? If not, get started now!
Finally, follow us on YouTube for more helpful Google Analytics tips and tutorials.


Very helpful for my site, I am stuck with setup the GA in my WooCommerce site. Just solved the problem.
Where are the instructions for Meta ads?
Hey Andrew – check out our post on Meta Ads tracking here: https://www.monsterinsights.com/how-to-track-facebook-ads-in-google-analytics-the-easy-way/