Do you want to earn money by selling video content from a website? In this article, we’ll show you how to sell videos online with WordPress in a few basic steps.
There are other ways to sell video content and courses online besides using your own website. However, selling videos on your own WordPress site gives you the most control over your content and earnings.
You can display your products exactly the way you want on your website, and you don’t pay any commissions or platform fees when you make a sale.
Ready to find out the easiest ways to sell video content online? Let’s get started….
Selling Videos Online the Easy Way
In this tutorial, we’ll show you how to sell video downloads through a website built on the WordPress platform.
WordPress is the most popular site building tool in the world. Much of its popularity is due to the fact that people with limited tech knowledge can create full-featured websites.
In fact, just about anyone can make a great looking website, without coding, and do things like sell downloadable videos and video courses.
With a WordPress website and some extra software pieces called plugins, you’ll be able to sell video files and process credit card transactions automatically, 24 hours a day!
In this tutorial, we’ll assume you don’t have a website yet. If you already have a WordPress website, skip to step #3 below, installing Easy Digital Downloads (EDD).
5 Steps to Selling Your Videos Online
- Select a WordPress Hosting Provider
- Install WordPress and Log In
- Install the Easy Digital Downloads Plugin
- Upload Video Content to Your Site
- Display and Sell Your Videos
1. Select a WordPress Hosting Provider
Do a web search for a WordPress hosting company, and you’ll find many companies that offer this service. If you’re a first-time buyer, these are the most important factors to keep in mind:
- Look for a web host that specializes in WordPress hosting and site management. Your hosting company should offer automated or “one-click” installation of WordPress, without any complicated set up process.
- You can always start with a lower-tier level of service and scale up as your business grows. However, WordPress hosting is so affordable that you shouldn’t simply choose the lowest-priced company. You should be able to find a hosting provider that is low cost AND provides top-level service.
- Make sure you select a company with a track record of great customer support. You’re bound to run into a technical issue from time to time, so you want a web host who will help you fix things quickly and reliably.
One company that we know meets these criteria is Bluehost. We’ll use them as an example in the next couple steps.
Our Preferred WordPress Host to Sell Video Online
We recommend Bluehost as the best web hosting company for beginning WordPress users for several reasons.
First, they have one of the simplest processes for signing up and installing WordPress. As a matter of fact, Bluehost is recommended at WordPress.org as one of the top hosting providers for WordPress sites.
Second, they offer 24/7 professional support for all accounts. So, they’re happy to help beginners and first-timers with hosting and WordPress questions.
Finally, Bluehost provides this high-quality technical service and support at a very competitive price. You can find cheaper alternatives, but they likely won’t match Bluehost’s abilities or customer service.
How to Sign Up With Bluehost
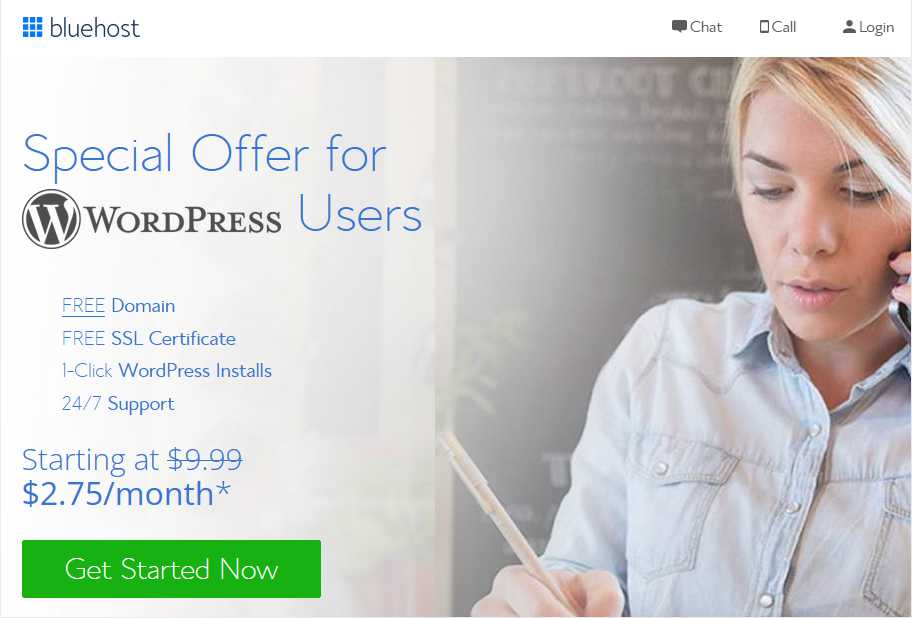
In order to see Bluehost’s different hosting plans, click Get Started Now on Bluehost’s sign-up page to get discounted pricing on WordPress hosting for the first year.
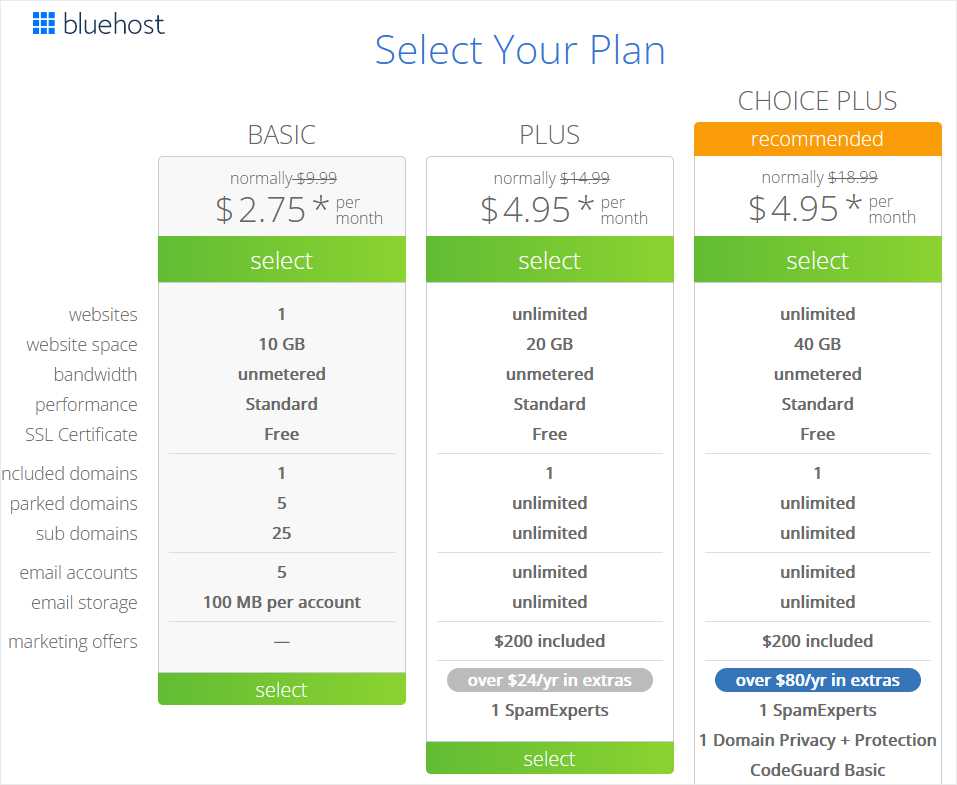
Choose any of Bluehost’s hosting packages, from Basic to Choice Plus. They all include WordPress software and installation as part of the hosting service.
If you need to build more than one website, choose the Plus or Choice Plus package and you’ll be able to manage as many sites as you want with your hosting account.
After you choose a hosting package, you’ll have an opportunity to search for and choose a new domain. The cost of purchasing the domain for the first year is included in Bluehost’s fee, so there’s no extra charge. Once you find and choose a domain name, click Next.
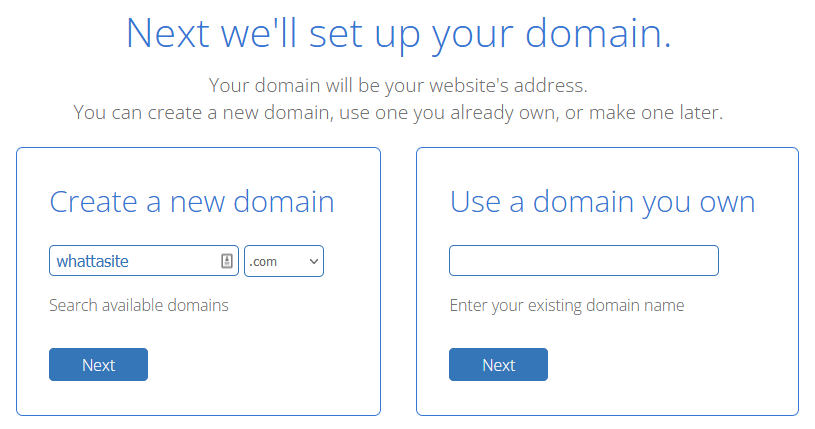
If you already have a domain that you’d like to use, you can enter that in the appropriate box and click Next.
Now, you’ll fill in some basic info about your account and your business, along with payment information.
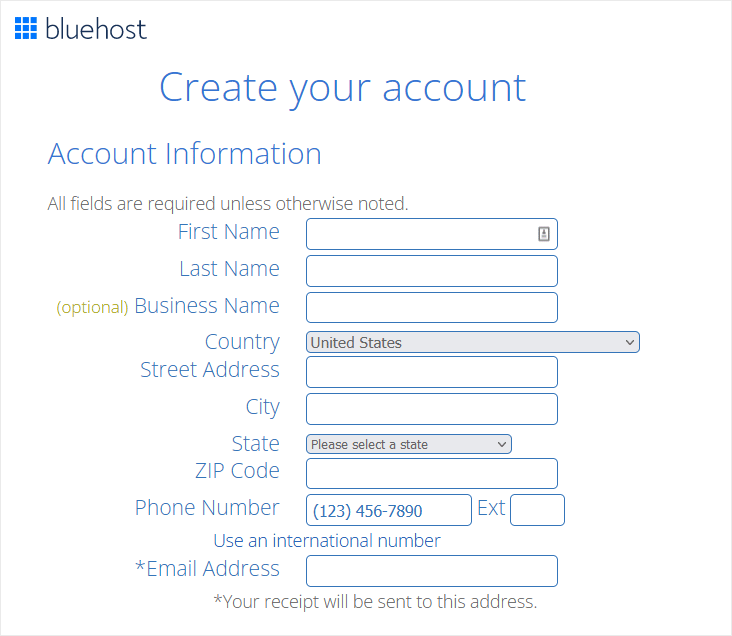
Once you complete this form, click Submit and you’re done! You’ve successfully created your own web hosting account. Bluehost will send you a confirmation email with your login information.
Next, let’s get WordPress installed and create a new website!
2. Install WordPress and Log In
Bluehost makes it extremely quick and simple to install and log in to WordPress for the first time. The first step is to log in to your hosting account with the credentials you received from Bluehost.
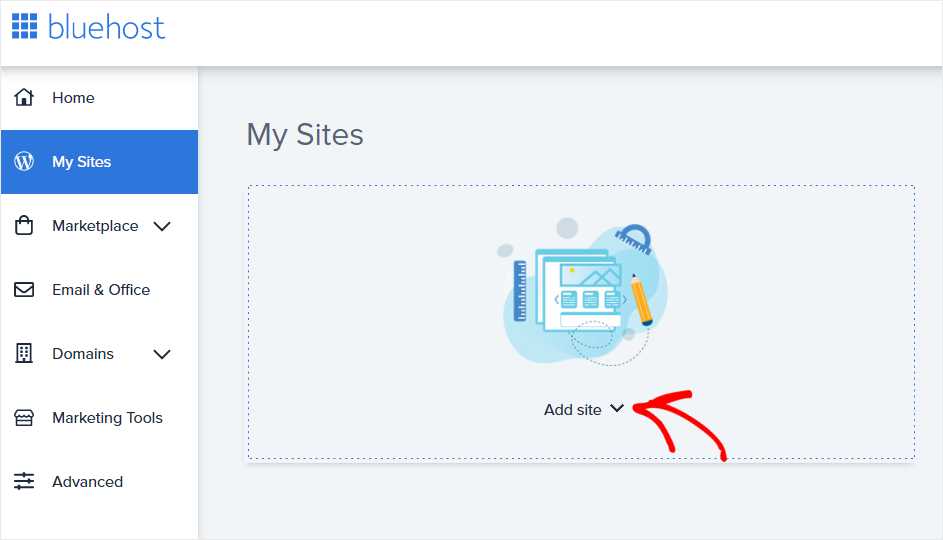
Once you’re logged in to Bluehost, click the My Sites link in the left menu. Then, click the Add site button to start creating your new WordPress site.
Next, you’ll fill in the name and a tagline for your site. Don’t worry about getting these exactly right, it’s easy to change them later in the WordPress admin area.
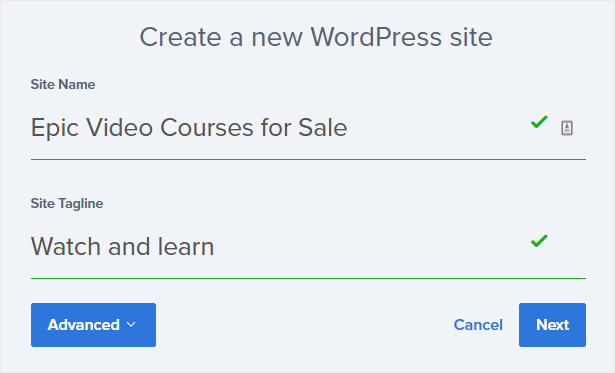
Once again, click Next to move to the next screen. Here, you’ll confirm your domain and Bluehost will ask if you want to install some basic plugins on your WordPress site. You can leave all the defaults as is and click Next.
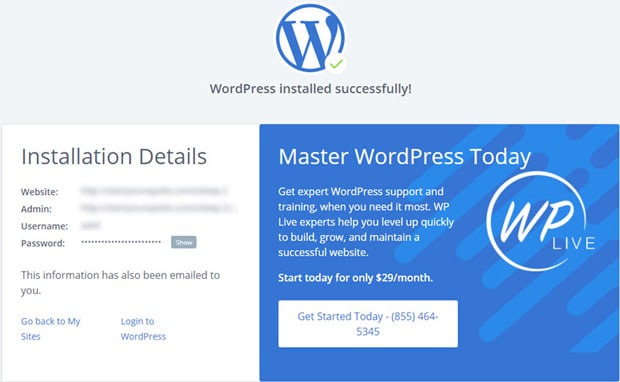
You should see a confirmation screen to let you know WordPress is correctly installed and working. Save your username and password from this screen, these are your WordPress login credentials. You’ll receive an email that contains your WordPress login information as well.
NOTE: Be sure you understand the difference between your hosting account login and your WordPress login. These are two different things, and it’s easy to get them confused.
Okay, let’s go ahead and log in to WordPress using your new login credentials. You can use the link in the confirmation email sent by WordPress to get to the login screen, which looks like this:
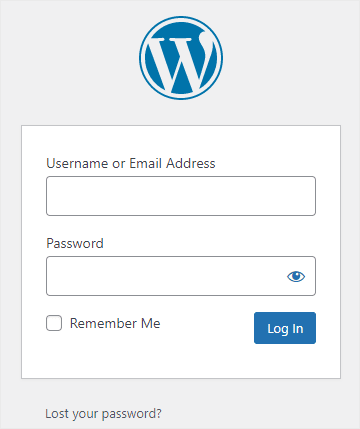
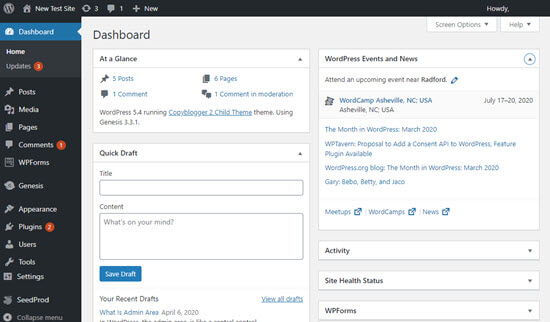
So, now you can enter your username and password and click Log In to go to the WordPress dashboard.
If you’re using another WordPress hosting company, don’t worry. Other WordPress hosting companies will have similar processes to get set up, and the WordPress software basically works the same with all web hosts.
3. Install the Easy Digital Downloads Plugin
Once you have WordPress installed, it’s very easy to add plugins to boost your site’s ability to attract and engage visitors.
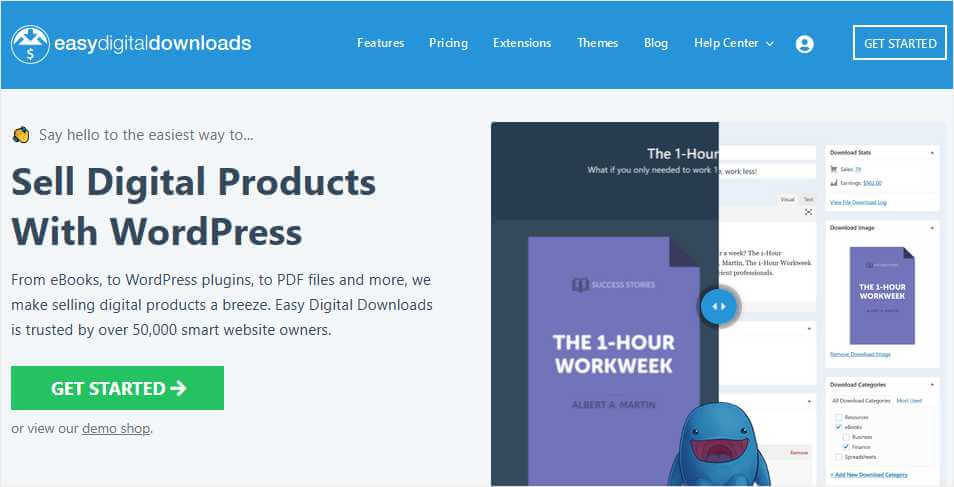
We’re going to install Easy Digital Downloads (EDD), a WordPress plugin that makes selling downloadable files easy. It has built-in eCommerce functions like payment processing and order management that you can set up without programming.
How to Download and Install Easy Digital Downloads
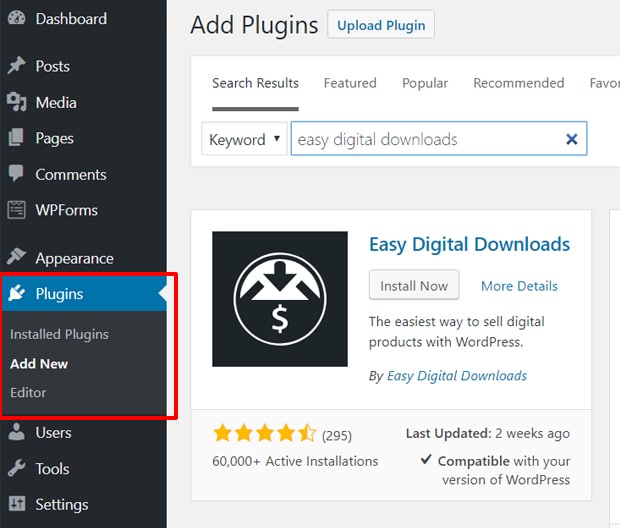
First, you’ll go to the WordPress dashboard and click the Plugins » Add New link in the main menu.
Then, use the search box to find “easy digital downloads.” Click Install Now to install and activate the EDD plugin.
The free version of EDD has built-in payment processing for credit cards through Stripe and PayPal. That makes it easy for you to start taking online payments without a lot of effort.
You’ll need to adjust a few simple settings before you can start selling products in EDD. Go to the EDD menu in the WordPress dashboard and click Downloads » Settings.
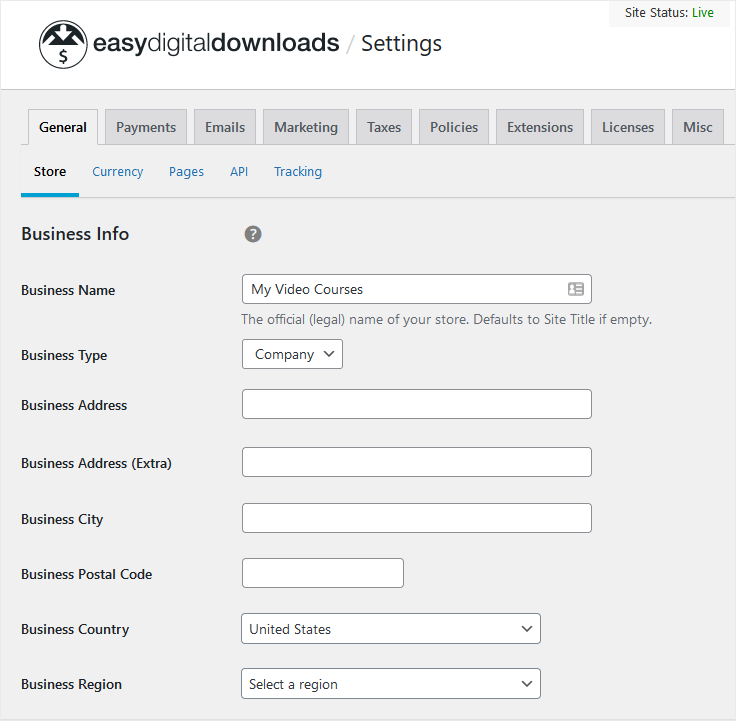
Now, enter your business info in the General » Store tab area. If you use a different currency than USD, go to the Currency tab and choose the correct one.
Set Up a Payment Method
Before you can sell a video download, you need to set up at least one payment gateway.
To do that, click on the Payments tab in the Settings screen.
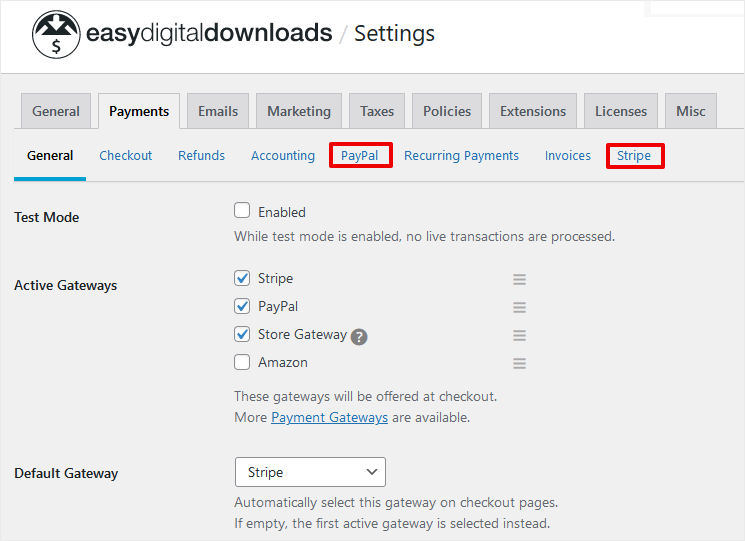
You must have at least one of these boxes checked for transactions to work properly.
Test Mode – Check this box only when you are testing the checkout process. Make sure it is unchecked when you’re ready to sell videos online to real customers.
Active Gateways – You can check any of these boxes for which you’ve enabled the gateway. To set up your free PayPal or Stripe gateway, first click on the respective tab and you’ll be guided to connect your account. Use the Store Gateway for in-person or other offline payments.
You can review the other tabs on the Settings screen and adjust as needed. Most of the default settings should work as is with no further set up.
That’s all there is to it, Easy Digital Downloads is now ready to use on your WordPress website to sell videos online!
If you’d like to pay lower transaction fees on credit card payments, upgrade to the Extended version of EDD or better in order to enable Pro Payment gateways for Stripe and PayPal.
4. Upload Video Content to Your Site
You’ve got a working WordPress website with Easy Digital Downloads installed. Now, you simply need to create downloadable products in EDD and upload the video files associated with your products.
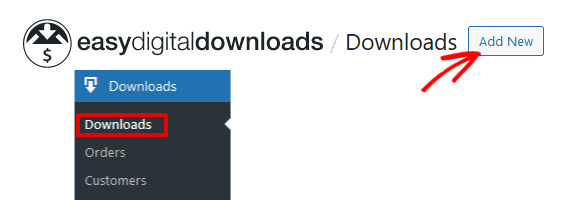
Click Downloads » Downloads link in the EDD menu in WordPress. On the next screen, click Add New.
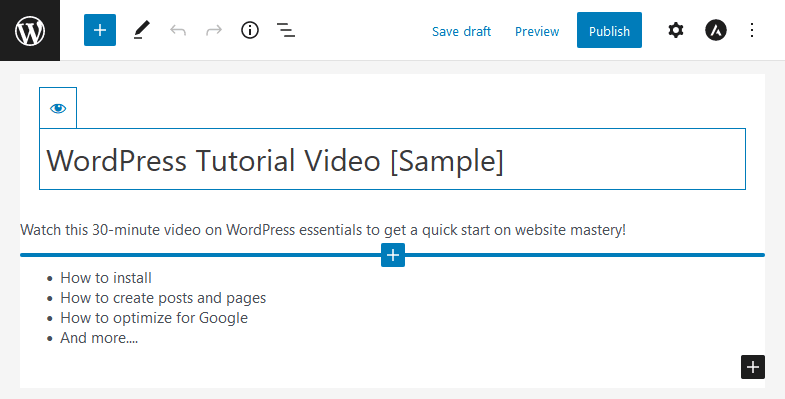
A new page will open with two sections. In the top part, you’ll enter your product details and description using the WordPress block editor. The lower part of the screen contains additional settings for this particular video product.
Using the block editor, enter a title and a description, a bullet list, and whatever else you need to fully describe and sell your video product.
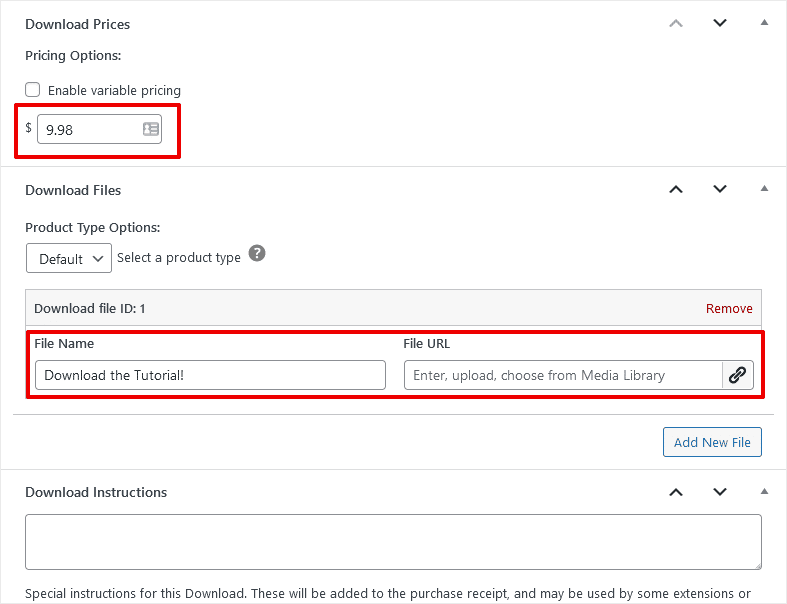
In the bottom part, fill in the price field and the file name field.
Click the link icon in the File URL field to add a video file from the media library or upload a video from your computer. This is the product you’re selling that customers will download. You can also paste a link from another file storage site.
Now, before we publish our product, let’s add an image for the product page so people can see what they’re buying.
Add a Download Image
In the right sidebar of the download editor screen, you’ll find some other settings related to Easy Digital Downloads. You can create categories and tags for products, set download limits and timers, and add a feature image for each product.
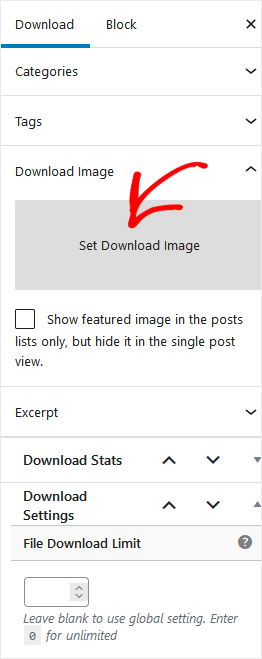
Click the Set Download Image link to open the WordPress media library. There you can select an image or upload a new one from your computer.
Choose an image for your download image and save, then click the Publish button to publish your video product.
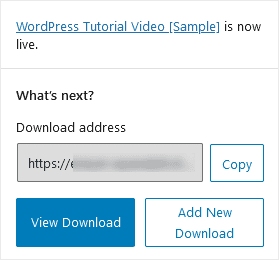
You’ll see a confirmation in the sidebar, with a URL that you can use as a link to this product. Copy and save this URL, we’ll use it in the next step!
Click the View Download button to see what your finished product looks like to a site visitor. This is your product landing page.
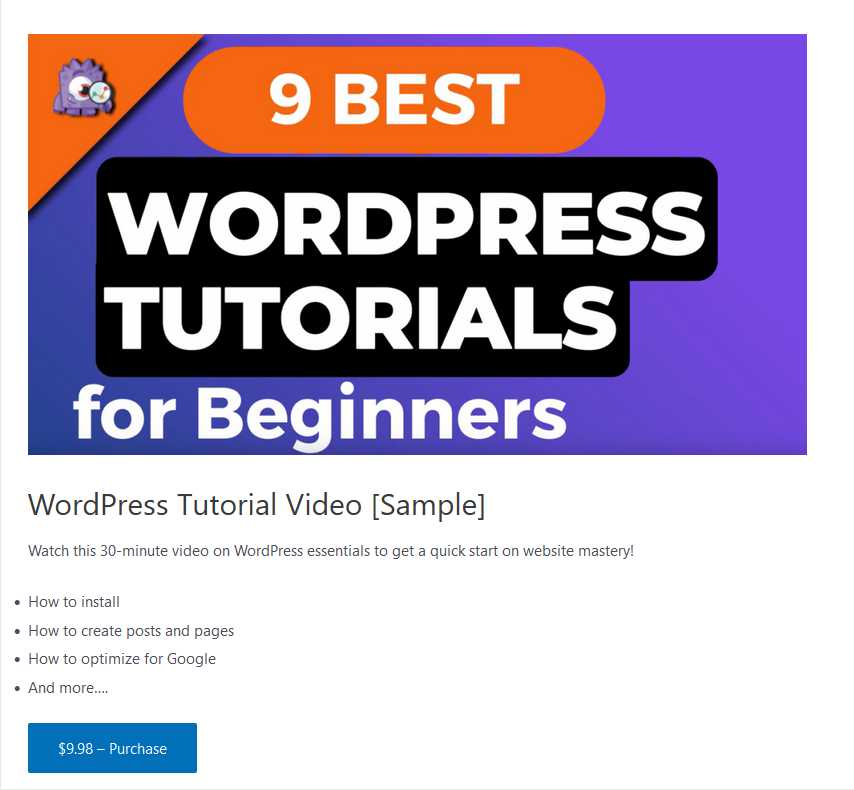
When a customer clicks on the purchase button, the video item is added to their shopping cart. The text on the button changes to Checkout. When the user clicks on that button they’ll see the following checkout page.
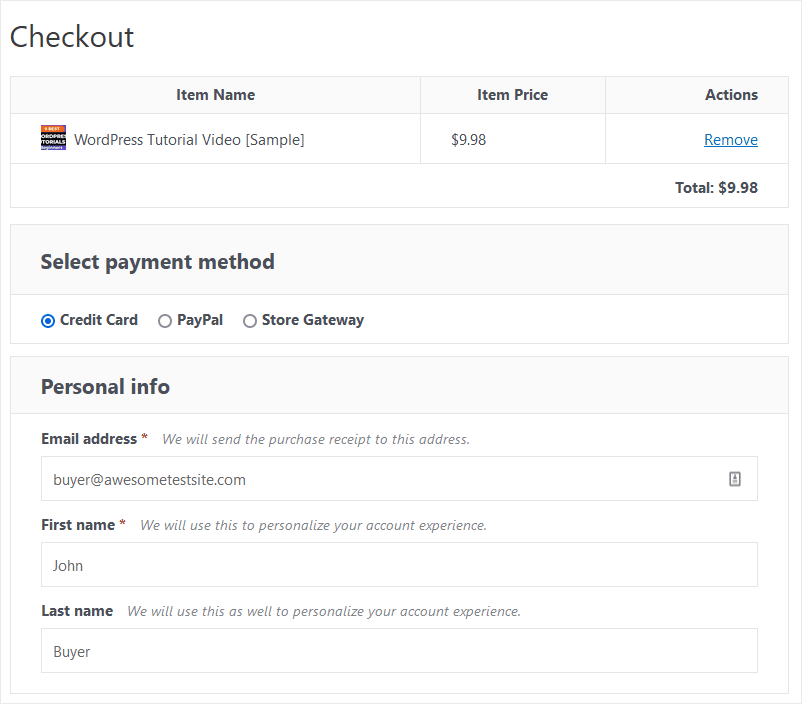
After the buyer enters payment information and completes the checkout, a confirmation page displays. Your customer can now immediately download the video from a link on the confirmation page. They’ll also receive an email with the download link.
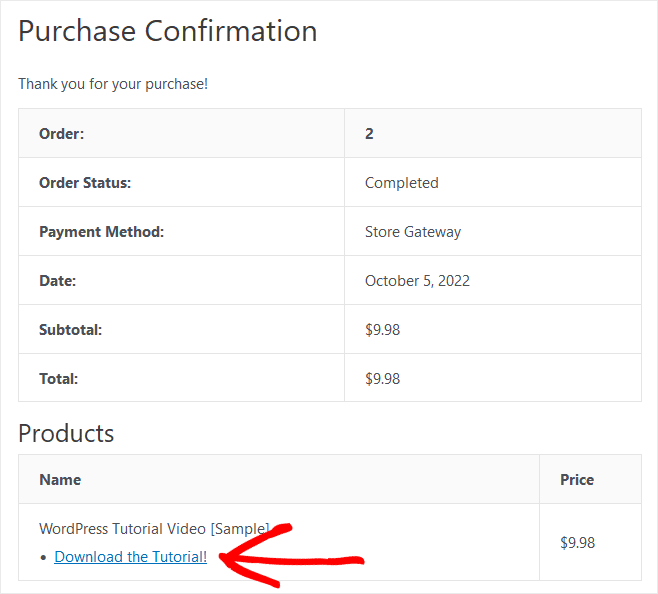
That’s all there is to it! We just created a website using WordPress, uploaded our video file to Easy Digital Downloads, and completed our first sale!
How to Manage Large Video Files
Video files can be very large. And web hosting services usually limit the size of files you can store and download from your WordPress site. So, if your video files are larger than a few hundred megabytes (MB), you need to store those files somewhere else.
Fortunately, Easy Digital Downloads has a couple solutions for this. As you saw above, you can place a link to a file stored anywhere online when you create a downloadable product in EDD. For example, Google Drive or Dropbox.
Easy Digital Downloads also offers a Dropbox extension that lets you view and manage Dropbox files right in WordPress. Go to the Downloads » Extensions page to download the File Store for Dropbox extension.
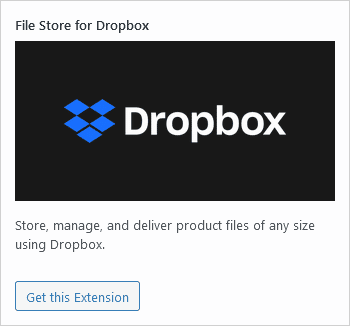
Once you install this powerful extension, your Dropbox storage will be automatically connected to the WordPress media library. You’ll be able to view the files in your Dropbox account and upload new files to Dropbox from the media library.
Alternatively, you could try to increase the file size allowed by your web host. Here’s an article that explains how to increase the maximum file size you can upload to WordPress.
However, if you’re going to sell a lot of large video downloads, you’ll probably want to store those files outside of your WordPress hosting account.
5. Display and Sell Videos Online
All right, you’ve created at least one video product for sale in Easy Digital Downloads. Let’s see how to display your videos in WordPress so that your site visitors can view and purchase them.
When we published our sample product above we also generated a URL for a product page, or a landing page for that product. The URL is your domain name, with the addition of /downloads/[download title].
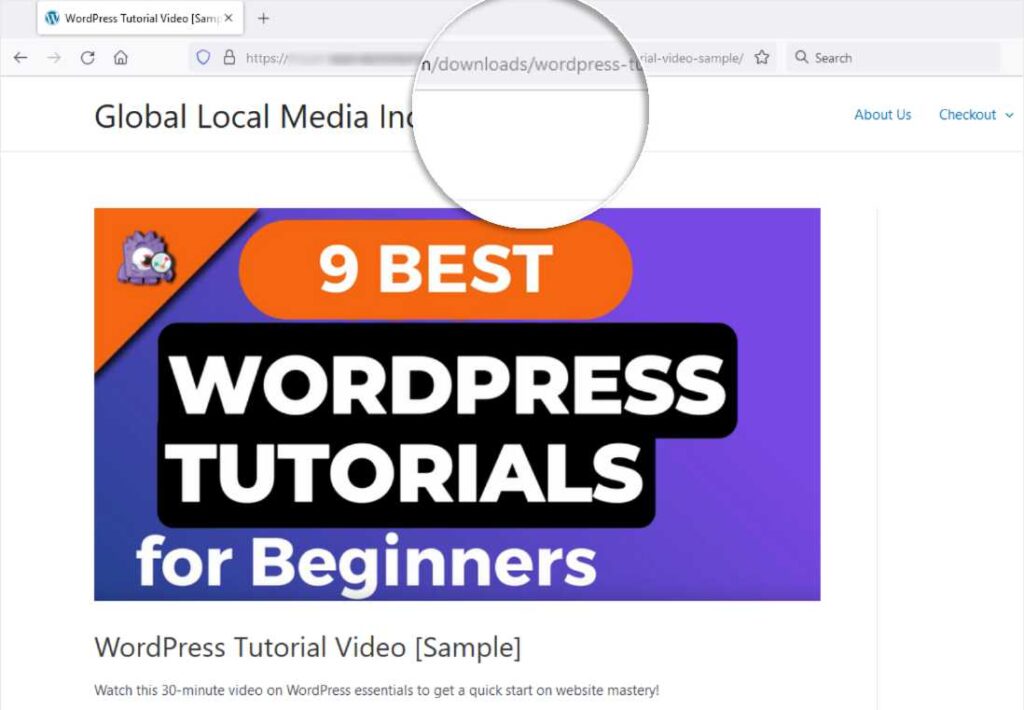
So, in our example, our product page URL is www.my-test-site.com/downloads/wordpress-tutorial-video-sample/, because the download title was WordPress Tutorial Video Sample.
Now, you can use this URL anywhere to send people to your product landing page. Send it in email marketing campaigns, or use it in social media posts. It’s up to your imagination and your marketing strategy.
How to Track Your Online Video Sales
Once you start selling your video content on your WordPress site, you’ll want to track some stats on your sales.
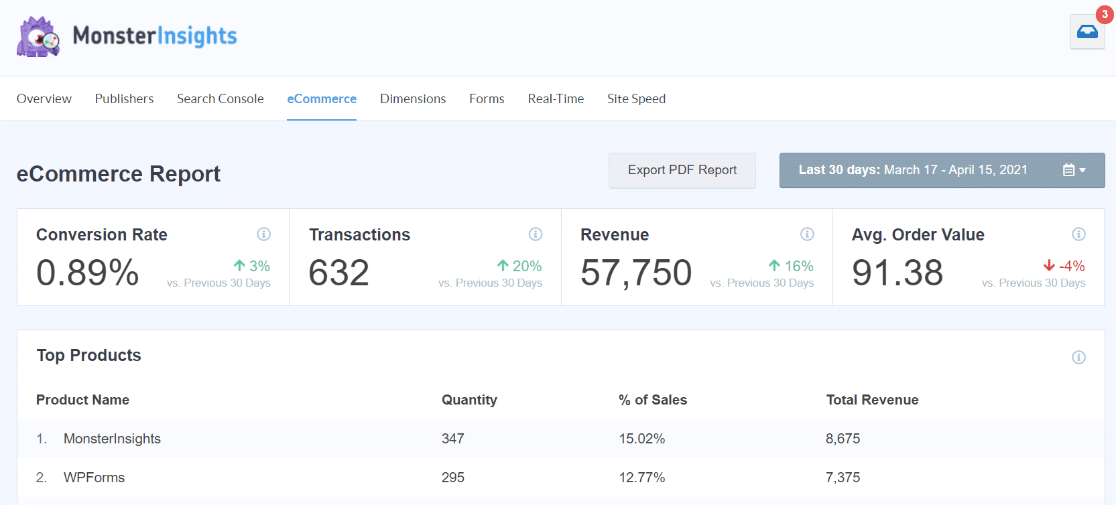
A few important metrics you may want to track are conversion rates, number of downloads, revenues, and average order value. You can also track your customers’ journey through your site before they decided to purchase.
The easiest way to track eCommerce statistics like these in WordPress is with MonsterInsights, the best plugin for Google Analytics.
MonsterInsights has an eCommerce addon that connects automatically to Easy Digital Downloads, with no programming or coding. The addon gets all your critical eCommerce stats from video sales and displays them right in the MonsterInsights report screen.
MonsterInsights also offers a User Journey addon that will show you customer behavior on your site prior to making a purchase. That data gives you valuable clues about how buyers navigate your site and helps you optimize conversion rates.
Okay, that’s all for our quick tutorial on how to sell videos online with WordPress and Easy Digital Downloads. If you liked this article, check out this piece on how to track all your traffic sources using Google Analytics.
Not using MonsterInsights yet? What are you waiting for?
And don’t forget to follow us on Twitter, Facebook and YouTube for more helpful Google Analytics tips.
