Do you use the LifterLMS WordPress plugin to manage online courses? Want an easy way to see how customers navigate your website? Turn on customer journey tracking in LifterLMS to get an inside look at their user experience.
All you need is the MonsterInsights User Journey addon to automate customer journey tracking in minutes, with no special skills needed! You’ll see how customers use your site, from their first visit through to purchase.
In this article, we’ll find out how customer journey tracking helps LifterLMS users, and how to set it up using MonsterInsights.
What Is Customer Journey Tracking in LifterLMS?
LifterLMS customer journey tracking is a way of seeing how online visitors go through your website before purchasing a course. This info helps you optimize and streamline the buying process, so you can improve conversion rates for your web traffic.
A customer journey report will show you which pages a customer visited, from first entering your site to completing the checkout process. It also shows how long the user stayed on each page before continuing to the next step.
Customer journey tracking in LifterLMS will reveal hidden obstacles in your checkout flow. You’ll be able to see if buyers are following the path you expected and make adjustments to keep people on track.
For example, do you see pages where visitors only stay for a second or two before hitting the back button? You may want to revise or remove that content if people aren’t engaging.
LifterLMS Customer Journey Tracking Tutorial
Here’s how to quickly and easily set up user journey tracking for LifterLMS in WordPress.
Step 1: Install MonsterInsights
The first step is to download and install MonsterInsights.
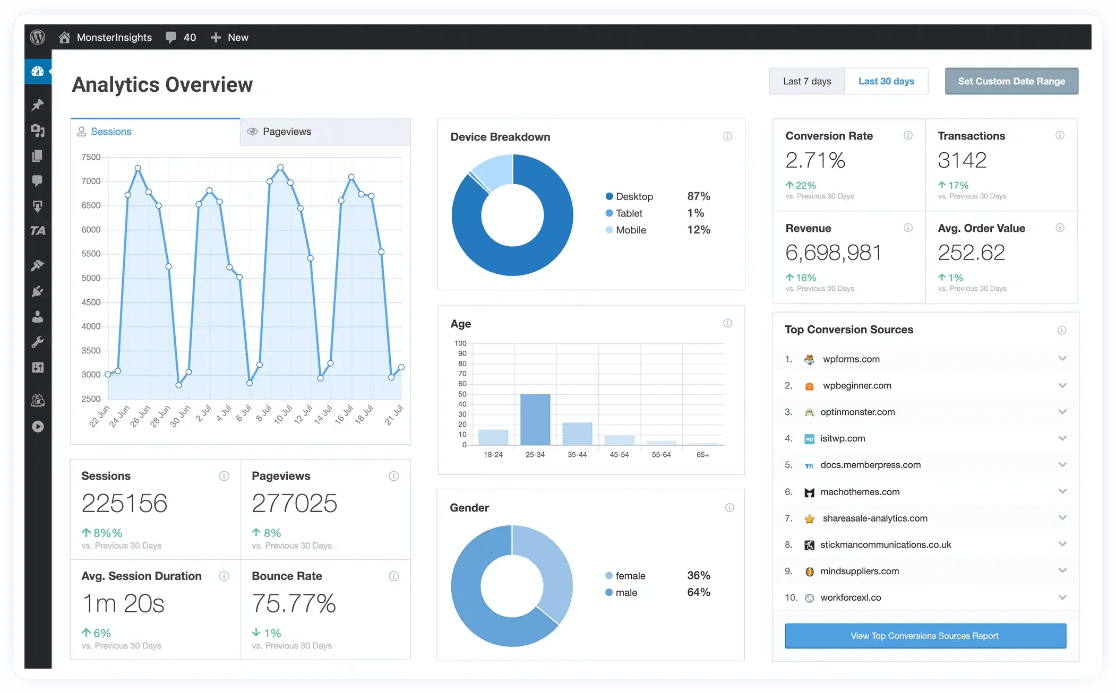
MonsterInsights is the best Google Analytics plugin for WordPress. It allows you to easily connect your WordPress site with Google Analytics so you can view all the data that matters most right in your WordPress dashboard.
Plus, with the click of a button, you can set up sophisticated tracking features such as event tracking, eCommerce tracking, form tracking, custom dimension tracking, outbound link tracking, user journey tracking, and more.
Make sure to get the MonsterInsights Pro license, which includes the eCommerce and User Journey addons.
After you download the plugin .zip file in your account, go to your WordPress dashboard and click the Plugins » Add New link.

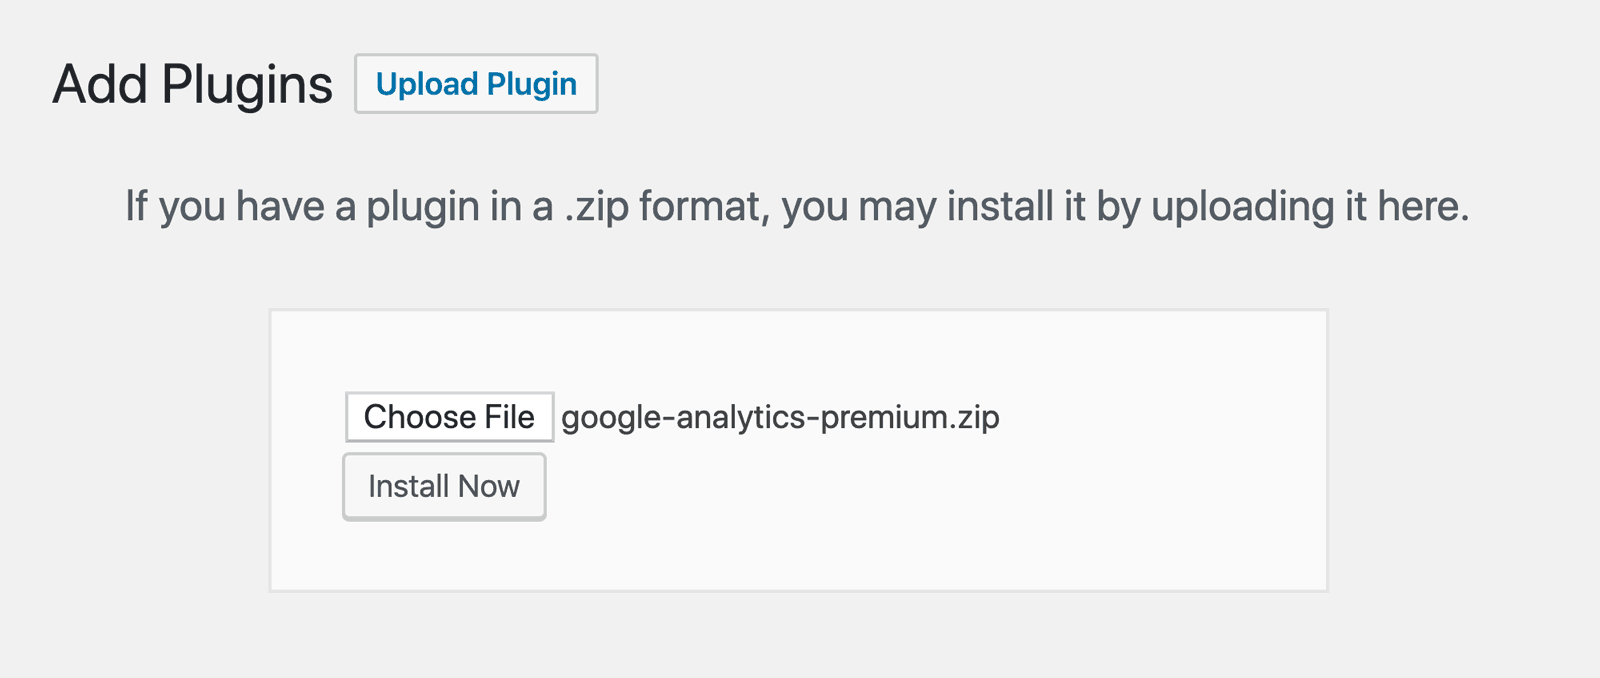
Now, click Upload Plugin, select the file you downloaded from MonsterInsights and click Install Now.
At this point, the plugin takes a minute to install itself, then you can click the Activate Plugin button.
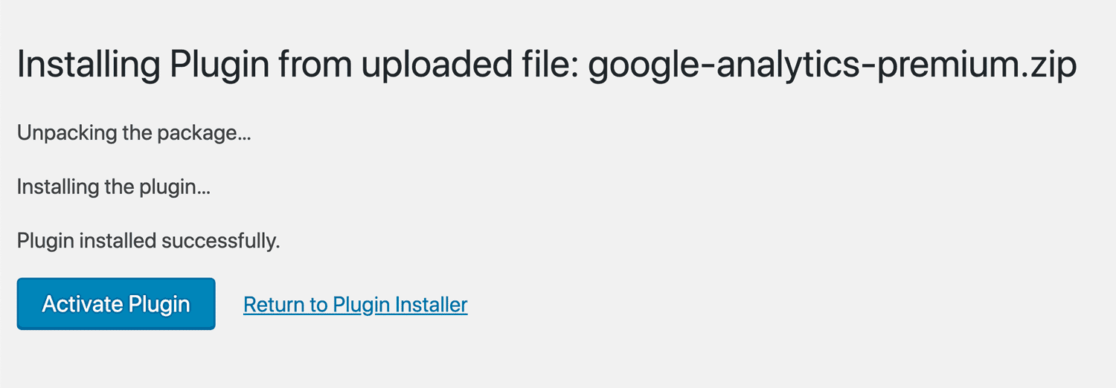
Good job, MonsterInsights is installed and activated! Finish configuring your account by completing the Setup Wizard, which launches when you activate the plugin.
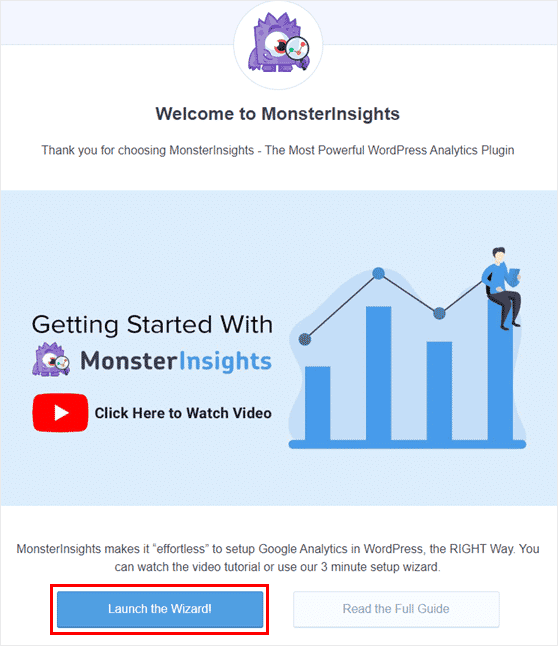
The Setup Wizard connects your site to Google Analytics without any coding or technical knowledge necessary. If you need a full tutorial on setting up MonsterInsights and Google Analytics, read this guide to setting up Analytics the easy way.
Step 2. Install the eCommerce Addon
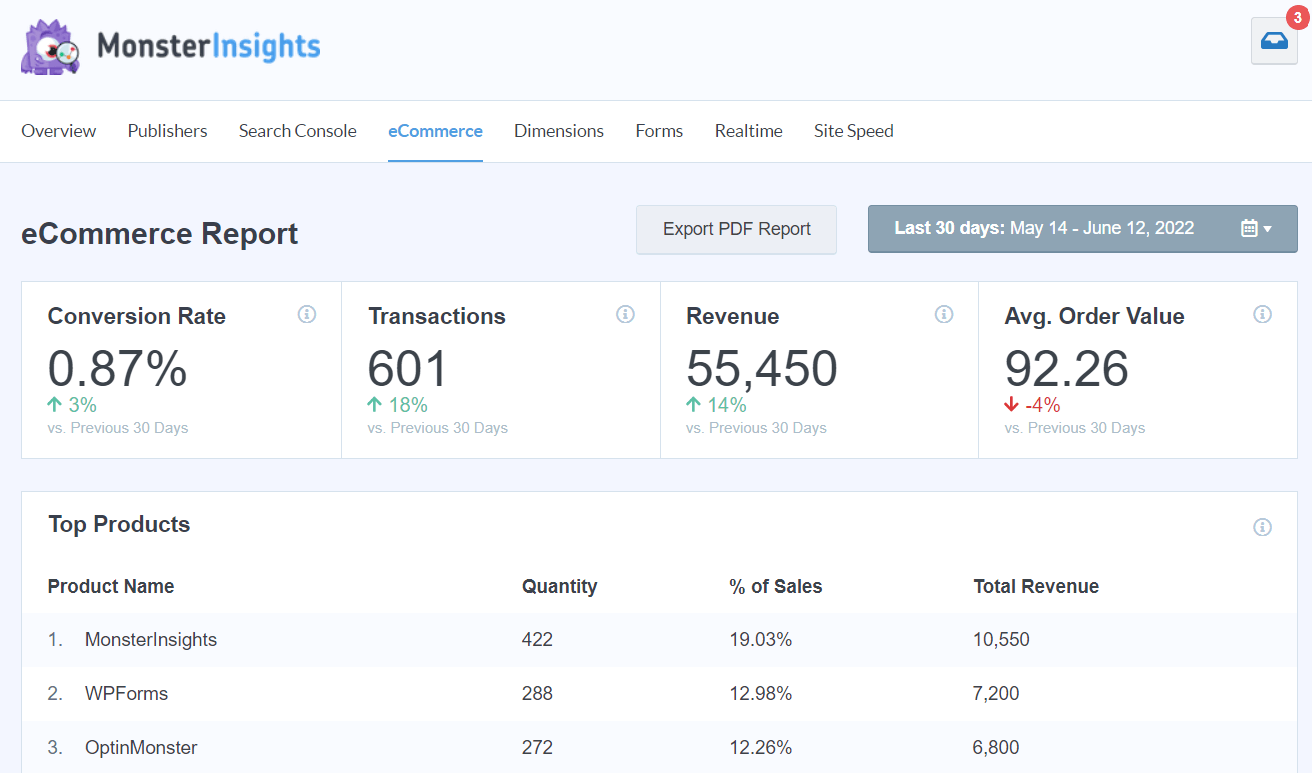
The eCommerce addon for MonsterInsights makes it easy to track statistics for your online sales on LifterLMS. You get detailed info on conversion rates, revenue, top-selling products, average order value, and more!
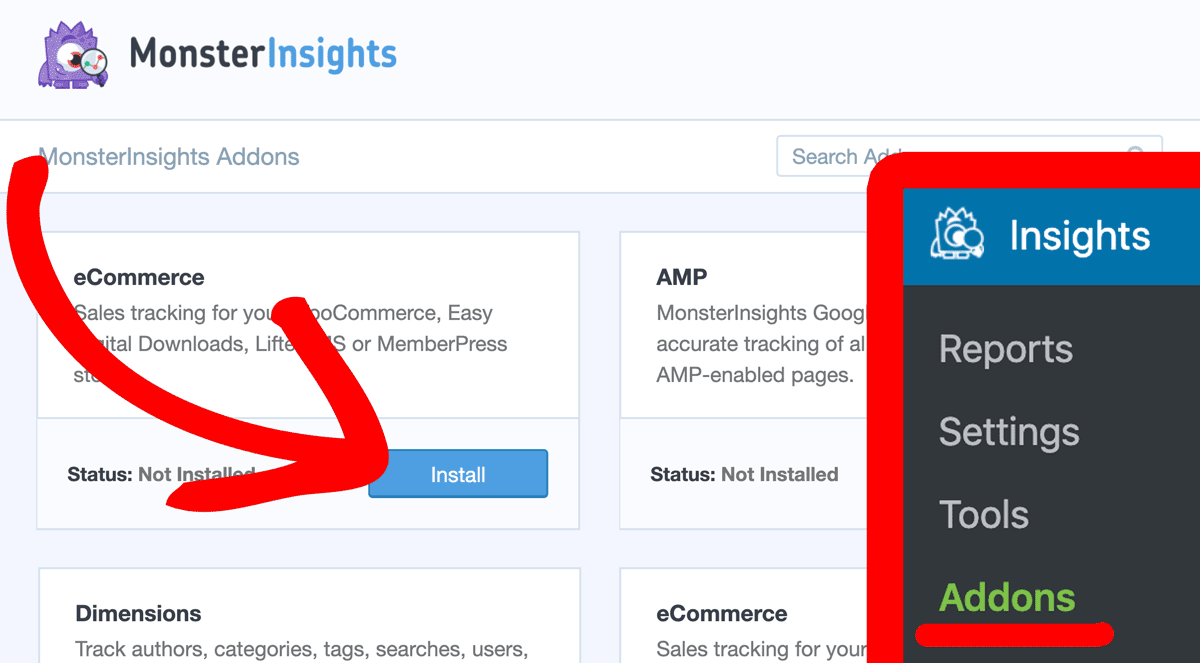
To install the addon, click Insights » Addons in the MonsterInsights menu in WordPress. Then you’ll click Install to install and activate the addon.
If you want to see all the eCommerce metrics included in your MonsterInsights report, just go to Insights » Reports and check the eCommerce tab.
That was easy, let’s move on to the next step!
Step 3. Install the User Journey Addon
The User Journey addon for MonsterInsights drills down even deeper into customer behavior. It shows you in detail how individual buyers navigate through your site before making a purchase.
Like the eCommerce addon, User Journey is included with a MonsterInsights Pro license. To install, simply follow the process we took to install the eCommerce addon.
First, go back to Insights » Addons in the WordPress dashboard. Now, install and activate the User Journey addon by clicking Install.
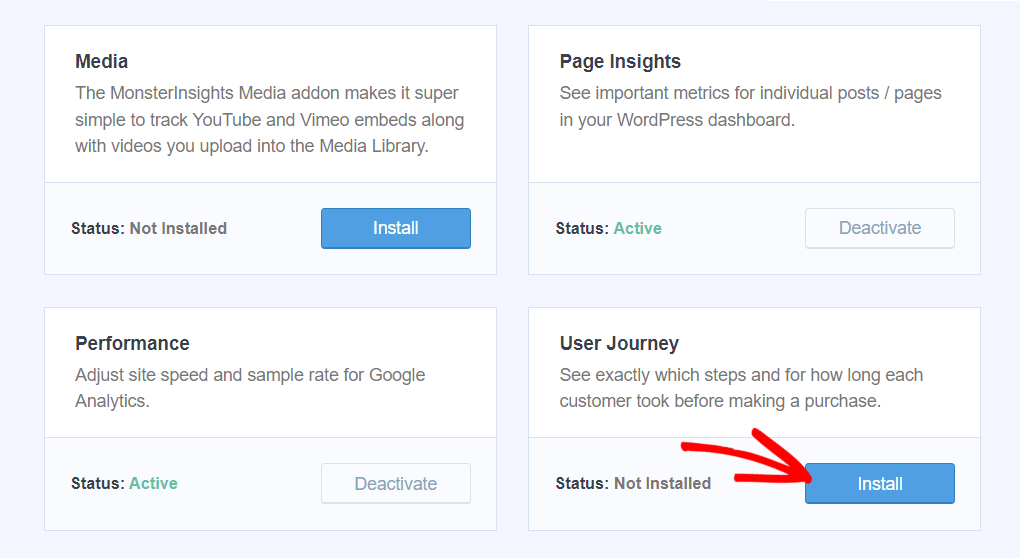
That’s really all you have to do. It takes just a few seconds for MonsterInsights to set up your Google Analytics account, and the Status will change to Active.
Awesome, your site is now tracking customer behavior and you can start viewing it right in WordPress!
Step 4. View Customer Journey Data in LifterLMS
Once you’ve completed the first 3 steps, your site will immediately start tracking customer journey data. As soon as a new customer buys a product on your site, you’ll be able to view the details of their path to purchase.
To access the User Journey report, head to Insights » User Journey in your WordPress sidebar. There, you’ll find a report with not only each of your purchases, but you’ll also see any UTM parameters attributed to the sales, the order total, and how many steps the purchase took.
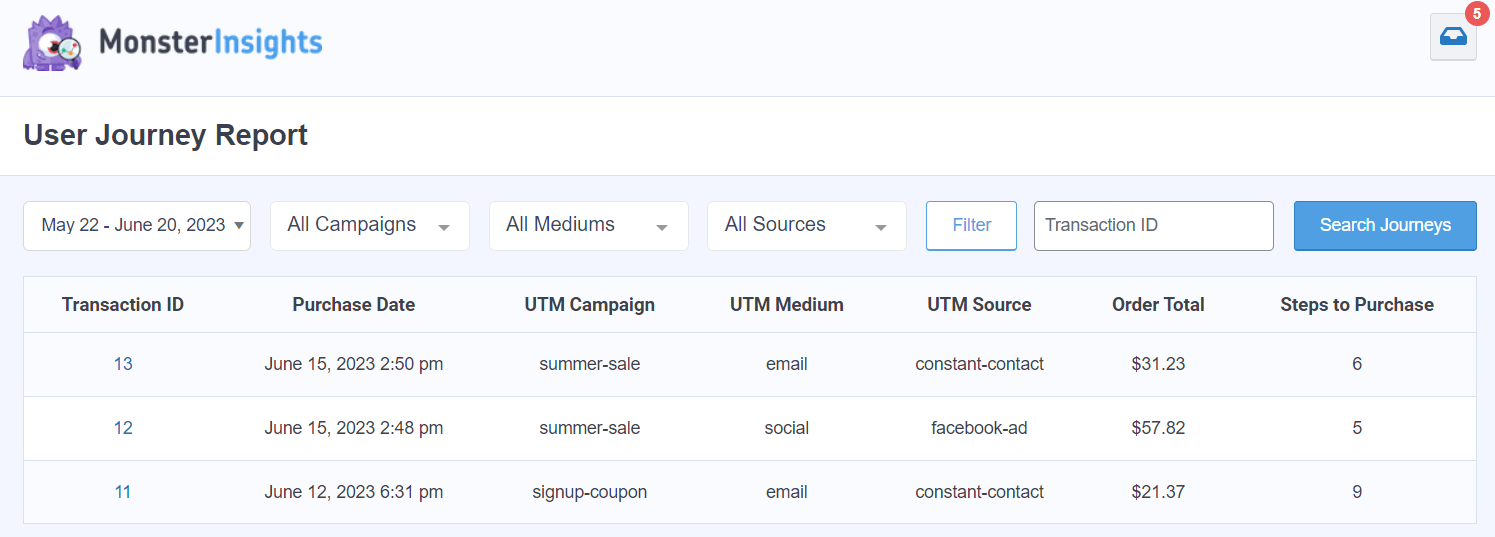
To see the full detailed user journey report for each transaction, you can either click on a transaction in the MonsterInsights report or look in the WordPress dashboard under the LifterLMS menu for the Orders menu. Click Orders » Orders to see a list of all your LifterLMS orders.
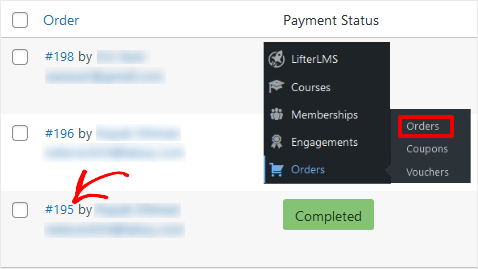
When you click an order number, the order details page is shown. Toward the bottom of the order details page you’ll find a table named User Journey by MonsterInsights.
Here’s where you can see the path that this customer took on their way to making a purchase and checking out.
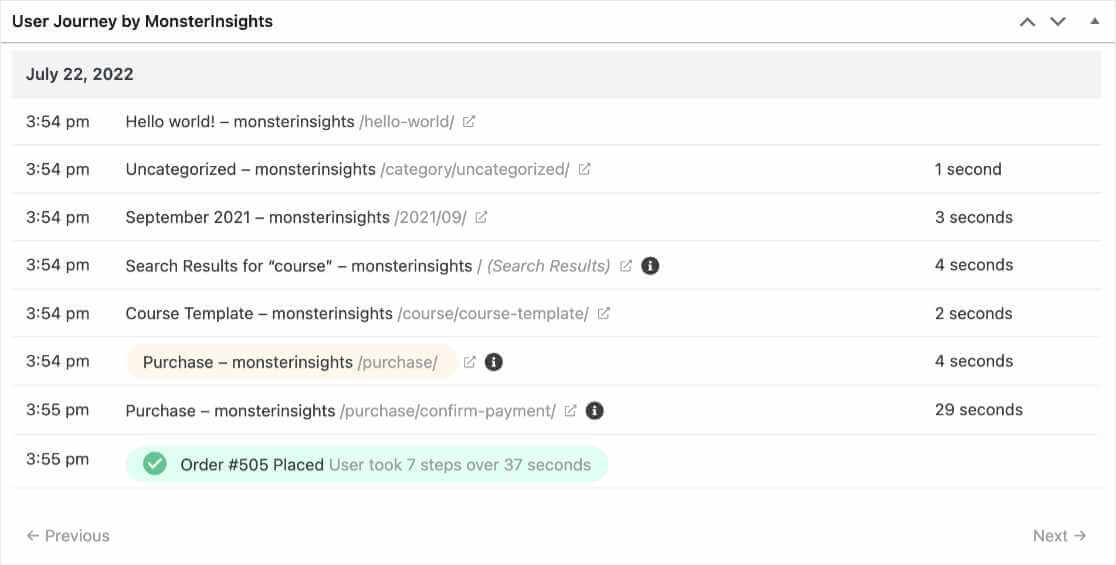
The left column shows the time of day, the center column shows the page that your customer was on, and the third column records the time that they spent on each page.
In the last row, the total elapsed time and number of steps is automatically calculated for you.
Another cool feature of User Journey tracking is that it works even if a customer leaves your site and comes back the next day!
How Do You Use Customer Journey Data?
After you’ve set up customer journey tracking in LifterLMS, you’ll start collecting a ton of new information about your users. Once you have enough data, you’ll start seeing patterns in user behavior that tell you what your top customers want.
When you understand what your paying customers like, you can modify the navigation and content on your site to create a better user experience. That leads to more sales and higher conversion rates for new users, as well as existing customers.
Okay, that wraps up our easy step-by-step guide to setting up customer journey tracking in LifterLMS.
If you enjoyed reading this article, you might want to read this complete guide to conversion tracking in Google Analytics.
Not using MonsterInsights yet? What are you waiting for?
And don’t forget to follow us on Twitter, Facebook and YouTube for more reviews, tutorials, and helpful Google Analytics tips.
