Are you wondering how to set up author tracking in Google Analytics to track the pageviews and other analytics of your blog authors?
Google Analytics doesn’t set up author tracking by default. You’d have to edit the tracking code and manually set it up.
But if your website is on WordPress, there’s an easier way!
To sort by author in Google Analytics, you’ll need to add Author as a custom dimension. MonsterInsights is the perfect tool to help you out!
In this article, we’ll show you how to set up author tracking in Google Analytics using MonsterInsights.
Video Tutorial
Why Should You Enable Author Tracking?
Author tracking in Google Analytics gives you valuable insights into the performance of your blog authors. You can:
- Discover the most popular authors of your blog
- See total sessions for each author
- See which author’s posts keep visitors on your site by analyzing the engagement rate
- See which author’s posts are driving conversions
- And more!
Ready to find out your own blog author stats? Let’s get started.
How to Set Up Author Tracking in Google Analytics & WordPress
To set up author tracking in Google Analytics and WordPress, follow these steps:
Step 1: Install MonsterInsights
In order to enable author tracking, you need to set up custom dimensions both in your WordPress site and in your Google Analytics account.
For that, we’ll use MonsterInsights.
MonsterInsights is the best Google Analytics plugin for WordPress. It allows you to easily connect your WordPress site with Google Analytics, so you can view all the data that matters most right in your WordPress dashboard.
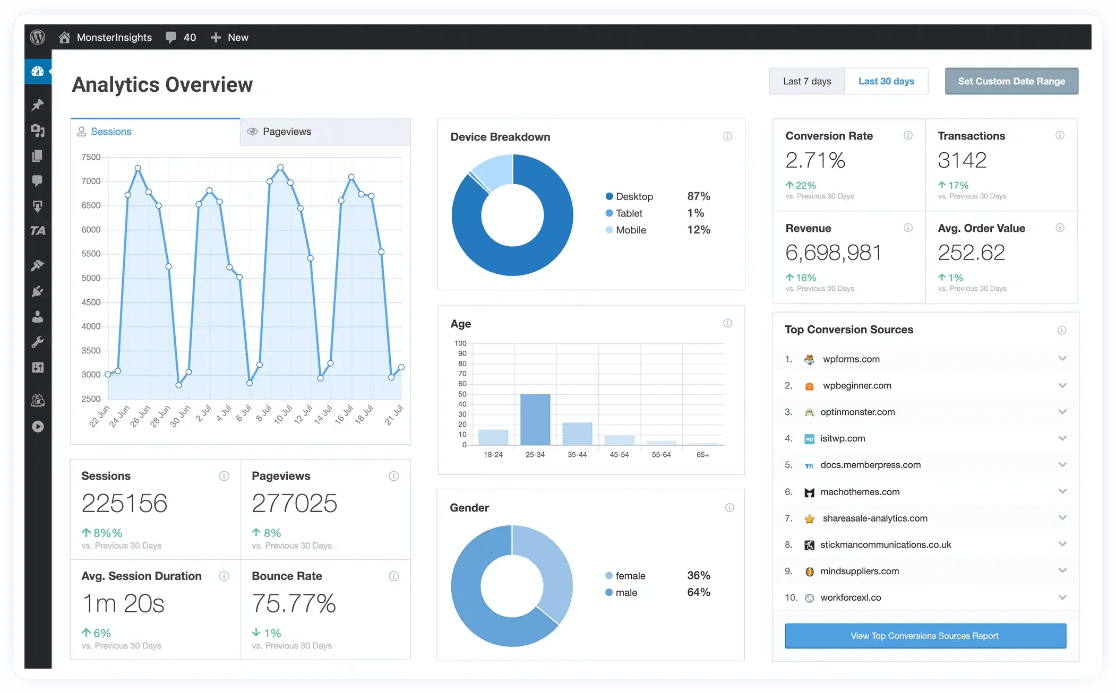
Plus, with the click of a button, you can set up sophisticated tracking features such as event tracking, eCommerce tracking, form tracking, custom dimension tracking, outbound link tracking, and more.
To set up Author as a custom dimension in WordPress, you’ll need the Dimensions addon. And to access the addon, you must have the Pro license.
Once you’ve signed up for a MonsterInsights account, make sure to connect the plugin with Google Analytics.
Using the setup wizard, you can add the tracking code to your WordPress site in just a few clicks. No coding required or the need to hire a developer.
Step 2: Install MonsterInsights Dimensions Addon
Next, you’ll have to install the Dimensions addon.
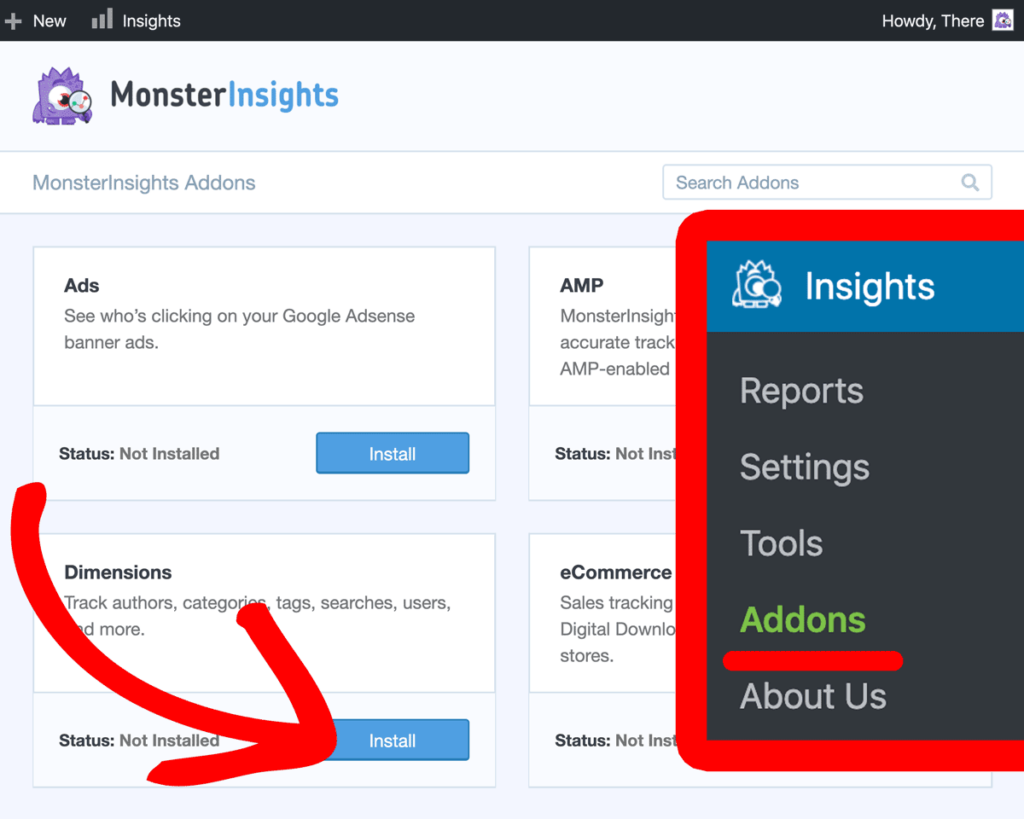
To do that, go to Insights » Addons and navigate to Dimensions. Now click the Install button. The addon will automatically activate on your website.
Step 3: Add Custom Dimensions in MonsterInsights
Now, you can navigate to Insights » Settings in your WordPress dashboard. Then, click on the Conversions tab:

Then scroll down to find the Custom Dimensions box.
Now click into the dropdown and select Author as the dimension type.
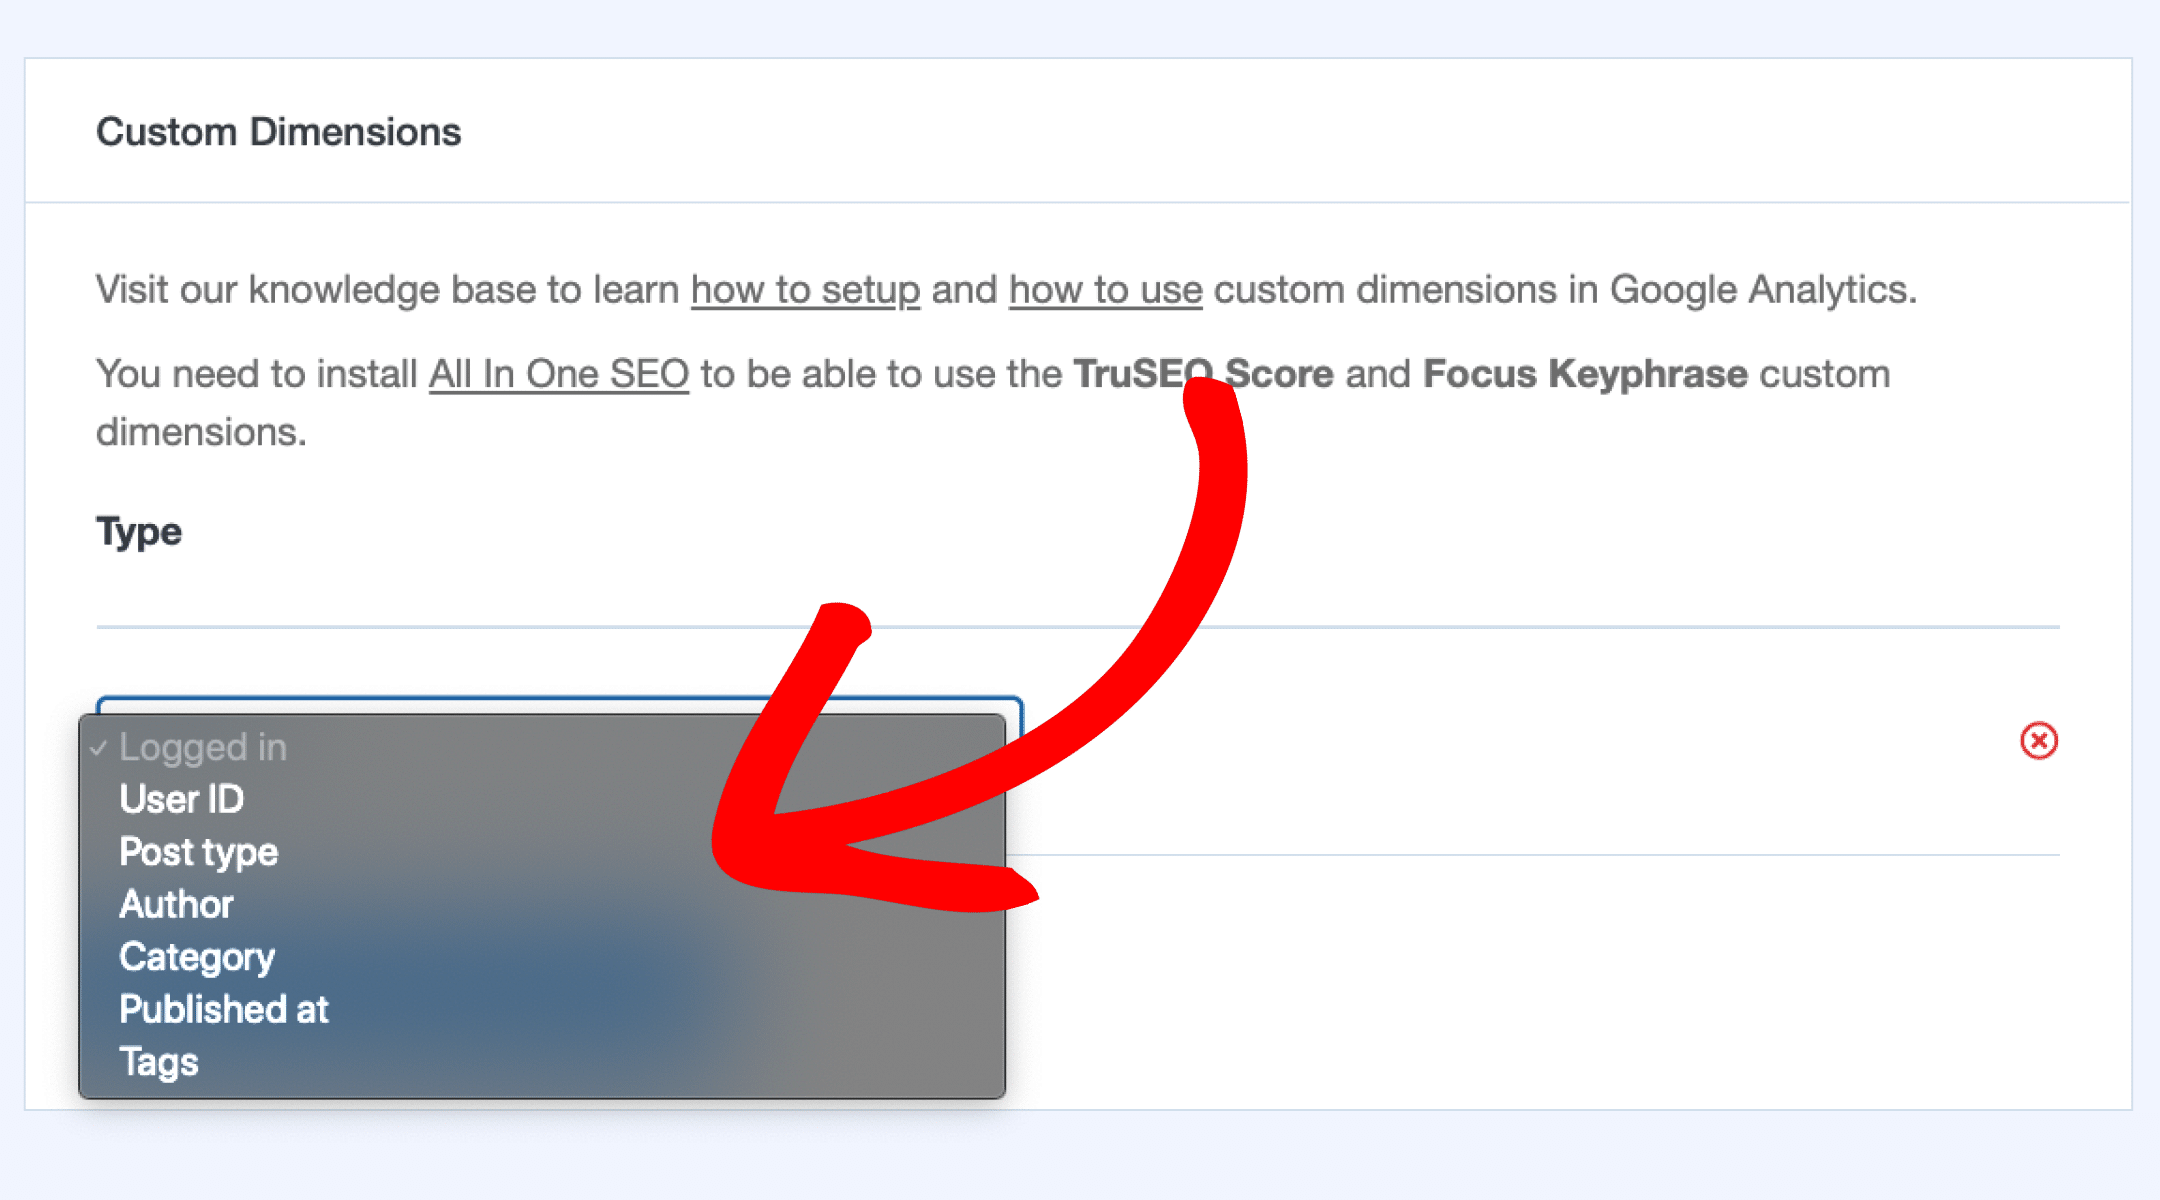
MonsterInsights will then automatically save your changes.
How to View Author Performance in MonsterInsights
After saving the changes, you can now track author performance using the MonsterInsights custom dimension report.
MonsterInsights automatically tracks different authors on your site and displays a sessions report right inside your WordPress dashboard. To view the report, go to Reports and then select Dimensions.
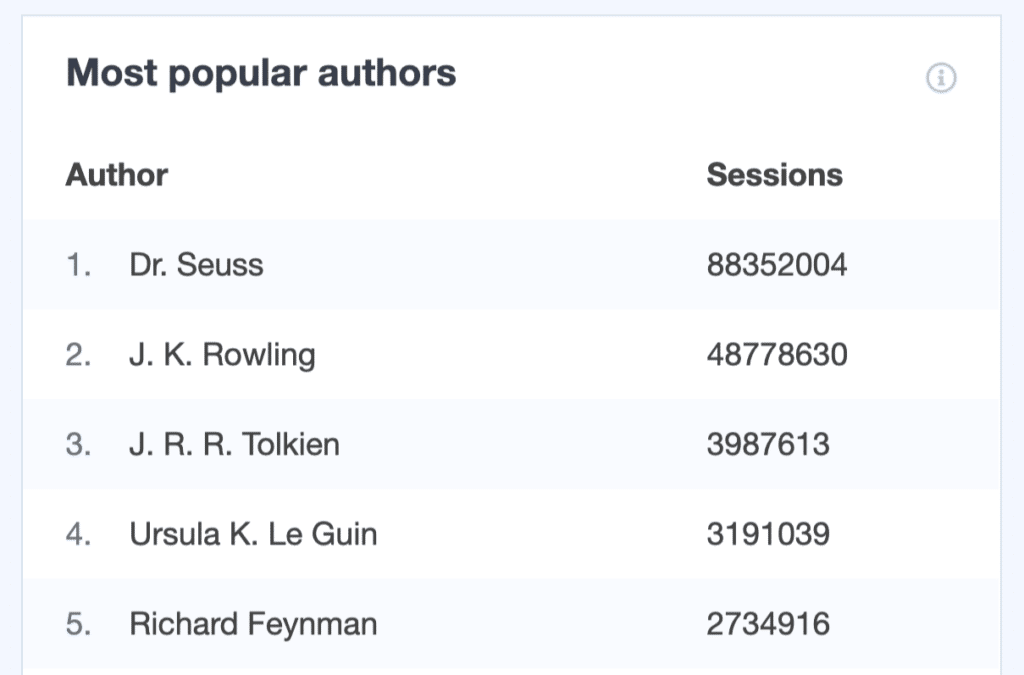
Now you can see your most popular authors that generate the most traffic on your site.
Now, let’s take a look at how you can get more data by tracking authors in Google Analytics.
How to See Author Data in Google Analytics 4
To get more data about your authors, you can use Google Analytics 4. MonsterInsights sets up a custom dimension for you, so you’ll be able to use the Author dimensions in custom reports.
To create a custom report about your authors, start by going to the Explore tab and choosing a blank report:
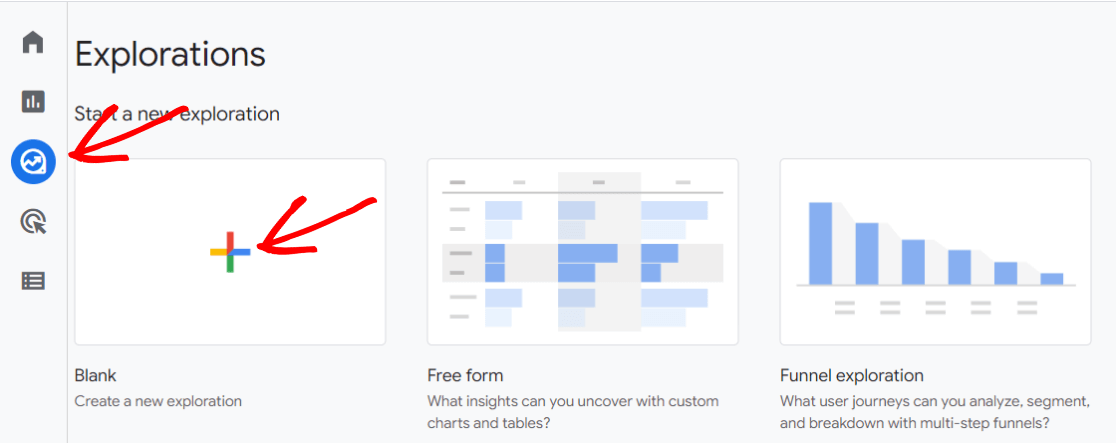
Now, click the plus sign in the Dimensions box:
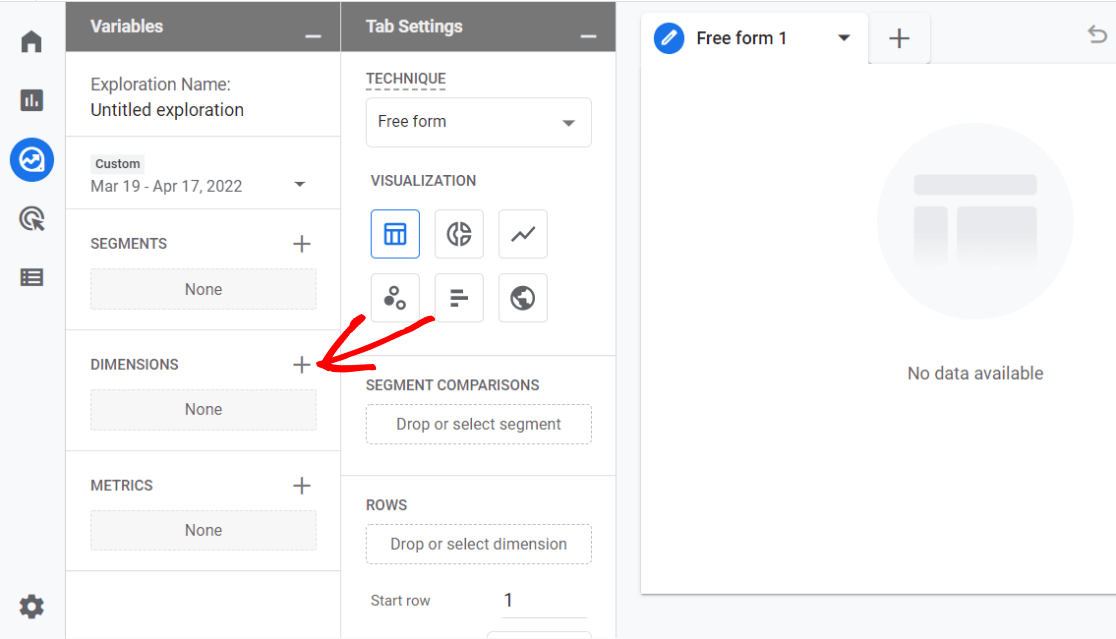
Next, search for and check Author and Page title, then click the Import button.

Then, click the plus sign in the Metrics box and add Views and Conversions. Your report should now look like this:
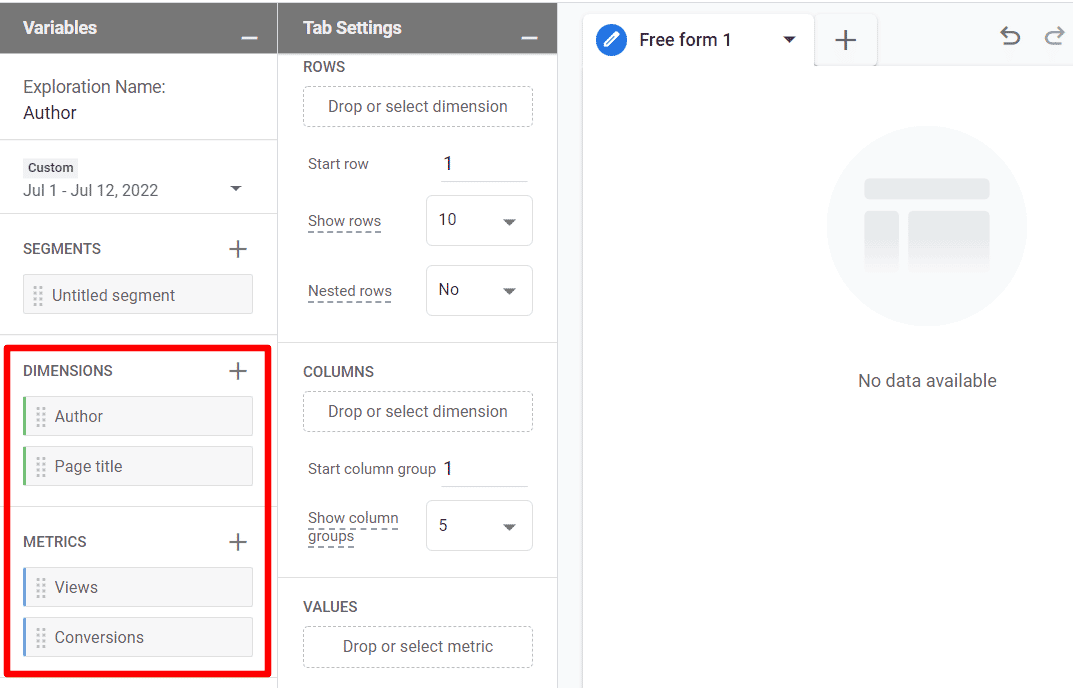
Finally, click and drag the Author dimension into the Rows box, and click and drag the Views metric into the Values box:
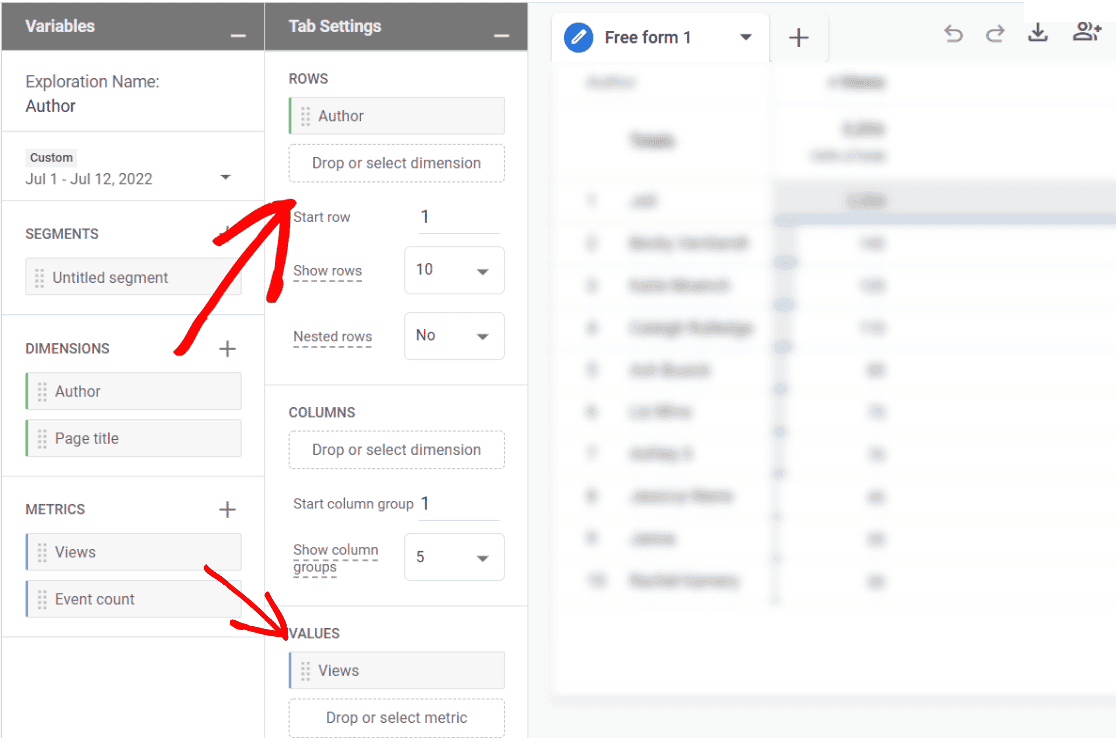
That’s it! You now have a report of authors sorted by pageviews.
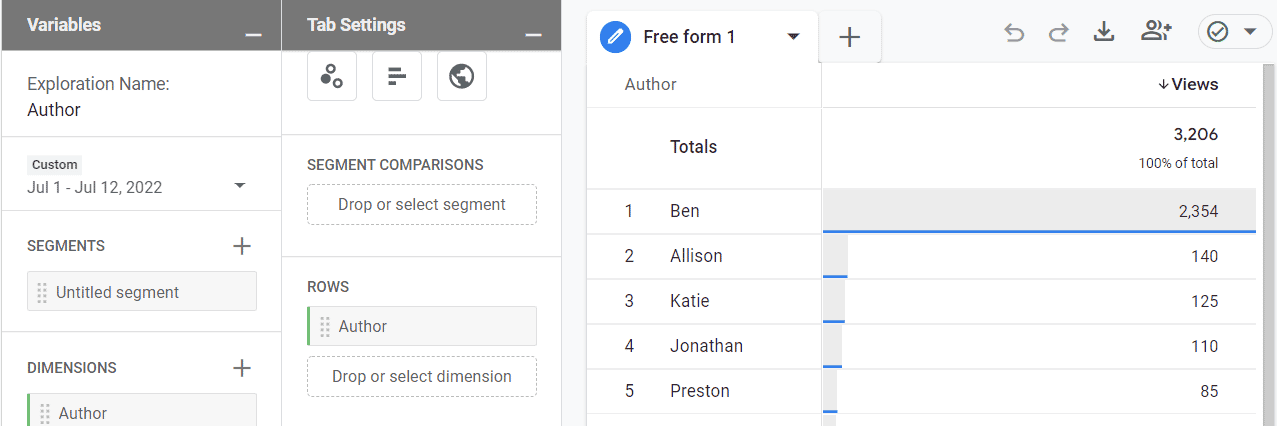
To break down the report further, try dragging the Page title dimension into Rows, and drag the Conversions metric into Values. You’ll then be able to see which pages belong to each author, and whether those authors and pages led to any conversions.
That’s it!
We hope this guide helped you to set up author tracking in Google Analytics.
Not using MonsterInsights yet? What are you waiting for?
If you enjoyed this article, you might also like How to Set up Google Analytics Social Media Tracking.
And don’t forget to follow us on Twitter, Facebook and YouTube for more helpful Google Analytics tips.

Cannot find Author in Dimension Drilldowns in GA at the moment.
Hi Anh, thanks for stopping by the blog. Can you please reach out to our support team, so we can further investigate the issue you’re facing and better assist you? 🙂
is it using google tag manager feature? cause i see some tutorial using it
Hi Fajri, thanks for your question. If you’re using MonsterInsights, you do not need Google Tag Manager to set up author tracking. If you don’t have MonsterInsights, you’ll have to use Google Tag Manager.
hi
I want to see page views of author instead of session in monster.
is it possible ?
Hi alireza,
The MonsterInsights report will only show sessions, but you can set up this report in Google Analytics 4 to see Views instead: https://www.monsterinsights.com/how-to-set-up-author-tracking-in-google-analytics/#ga4.
hi,
I am only seeing ten authors and their page views/sessions. these are writers who used to work with us. How can I see the page views/sessions of new authors who are working with us now? Can i specify the name of the author whose content performance i want to see? i don’t see that option here. We cannot merge or delete author names because they are using the links for their portfolio.
Hi Rakesh – The MonsterInsights report shows top authors, so you’ll just see the top 10 with the most sessions there for the time period you have selected. To see more of your authors, use the “How to See Author Data in Google Analytics 4” directions in our article and, in the “Show Rows” dropdown, choose more than 10: https://a.supportally.com/i/q2hslV