Do you want to know how to track Thrive Leads with Google Analytics?
Setting up Google Analytics tracking for Thrive Leads allows you to track your opt-in forms, see conversion rates, and gauge the success of your campaigns.
In this article, we’ll show you how to add set up Thrive Leads to track your forms with Google Analytics to Thrive Themes and how you can track Thrive Leads in Google Analytics.
- What Is Thrive Themes?
- Thrive Themes + Google Analytics
- How to Track Thrive Leads with Google Analytics
- View Thrive Leads Form Metrics in Google Analytics
Beginner Tip: If you want a super simple way to create and track opt-in forms in Google Analytics, we recommend using OptinMonster. It automatically integrates with WPForms and has much more beginner-friendly Google Analytics integration. Plus, you can use MonsterInsights’ one-click automatic forms tracking with WPForms, so you never have to touch any code.
For a step-by-step tutorial, check out How to Create an Opt-In Form in WordPress.
What Is Thrive Themes?

Thrive Themes is a great suite of products that makes building a high-converting website in WordPress much easier. Two of the main plugins in the Thrive Suite that we’ll be focusing on are Thrive Architect, a popular page builder plugin, and Thrive Leads, a lead generation plugin for opt-in forms.
Thrive Architect helps you build and design custom web pages and forms using an easy drag-and-drop builder. Meanwhile, Thrive Leads is specifically designed to help you grow your email list with high-converting opt-in campaigns like lightbox popups, sticky ribbons, scroll mats, and more like this example:

Thrive Themes + Google Analytics
Like any typical WordPress theme, you can add Google Analytics to your website by inserting tracking code manually or using a plugin like MonsterInsights that automatically sets up Google Analytics and advanced tracking features in only a few clicks.
If you’re using Thrive as your WordPress theme, the theme does provide an insert location for you to paste the code instead of having to manually edit your website’s core files, which can be challenging for beginners and risky if anything goes even slightly wrong.
Having said that, if you want to track any Thrive Architect / Leads forms in Google Analytics, we highly recommend using a plugin like MonsterInsights to set up Google Analytics tracking.
It’s a much simpler process and we’ll show you step-by-step how to do it.
Note: If you would like to manually set up Google Analytics and form conversions for Thrive Themes, we recommend you check out Thrive Theme’s instructions for adding analytics along with the Thrive Leads documentation for conversion tracking.
How to Track Thrive Leads with Google Analytics
1. Install MonsterInsights

MonsterInsights is the best Google Analytics plugin for WordPress. You can connect your Google Analytics account to your site and set up advanced tracking without editing any code or hiring a developer.
You’ll get advanced form tracking, integration with popular form builders, and the insights that matter, right inside your WordPress dashboard.
Plus, you get access to tons of other Google Analytics features and sophisticated tracking in only a few clicks, such as:
- One-click Google Ads, Microsoft (Bing) Ads, and Facebook Ads conversion tracking
- Custom dimensions and custom event tracking
- Social media and referral tracking
- One-click eCommerce tracking
- Advanced content and author tracking
- Outbound and affiliate link tracking
- EU Compliance Addon
- Video play tracking
- And more…
To get started, head to MonsterInsights’ pricing page and purchase the Pro license or above to access form tracking features.
Next, you’ll need to install and activate the plugin on your WordPress site. Then, follow the setup wizard steps to connect Google Analytics to your WordPress site in a few clicks.
If you don’t have a Google Analytics account yet or need help with these steps, follow our detailed instructions for setting up MonsterInsights.
Step 2: Activate the Forms Addon
From your WordPress admin, navigate to Insights » Addons and find the MonsterInsights Forms addon. Click on Install and then Activate.
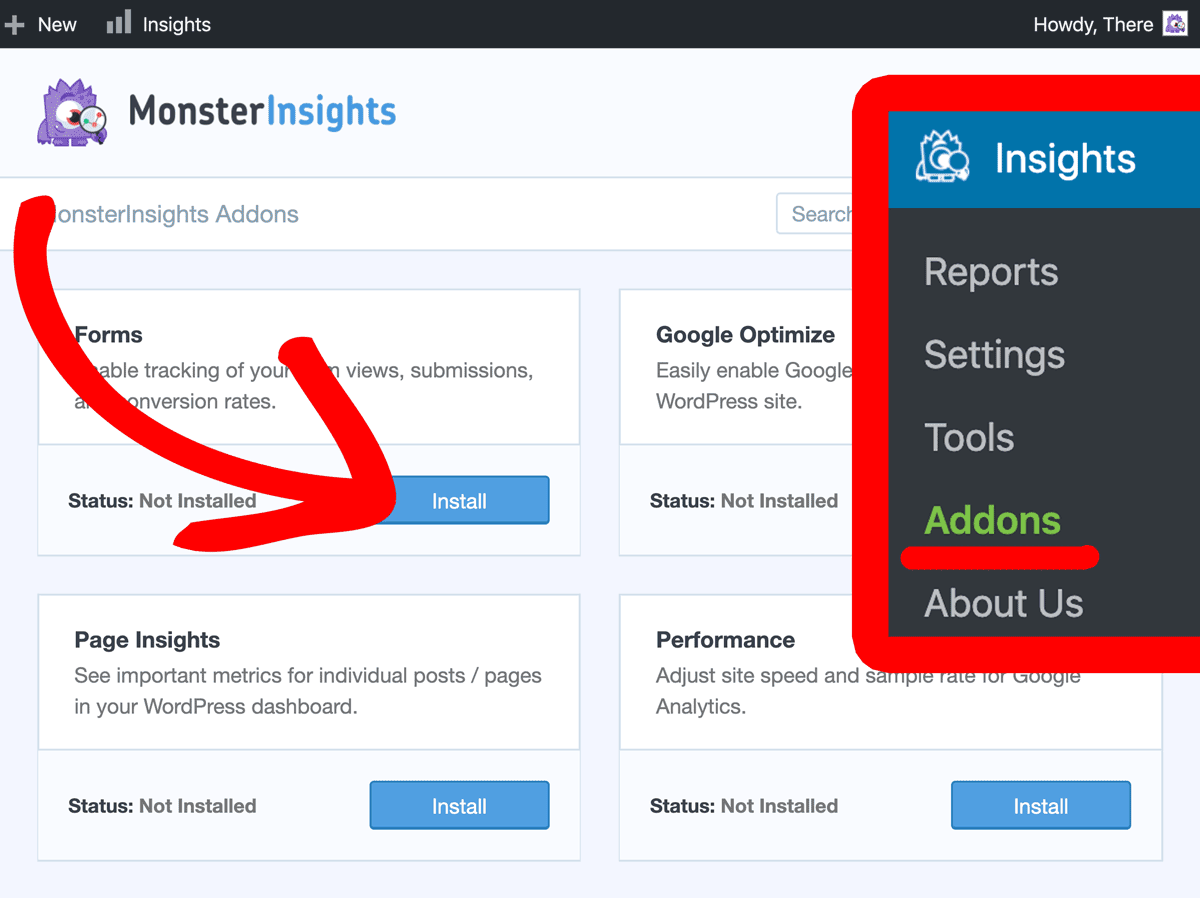
The MonsterInsights Forms addon is designed to work straight out of the box. In fact, it starts tracking form conversions immediately following activation. So, with most other popular form builders, you would be finished at this step.
However, for tracking Thrive Leads / Architect forms, you will need to complete a few extra steps in order for Google Analytics to properly track all of your form conversions. This is because, unlike OptinMonster’s lead generation software, Thrive Leads does not give each form you create a unique form ID.
As a result, Google Analytics cannot properly distinguish between the different forms on your website and provide accurate conversion metrics for each. So, we’ll show you how to add IDs manually.
Step 3: Create a New Thrive Leads Form
You’ll need to manually add a unique form ID on each Thrive Leads form you create. To do this, create or edit the form that you would like to add to your website.
Note: We’ll be using Thrive Leads for our tutorial, but the steps are very similar and can be followed for Thrive Architect forms as well.
Need a quick refresher? Here are the steps to create a new form after you have installed Thrive Leads:
- Navigate to Thrive Dashboard » Thrive Leads
- Click Add New under the Lead Groups section
- Name your new lead group
- Click on the button labeled Add New Type Of Optin Form and choose the type you want to add to your site
- Select the green button with the plus sign to add a new form to your lead group and click on the Create Form button
- Name your form
- Select the blue Edit Design icon
- Choose your form’s template
Now, you should be in the editor with whichever campaign template design you chose.

Go ahead and edit your newly created form to meet your design and functionality needs.
Step 4: Add a Form ID
When you are done customizing your form, click on the Settings cog icon » Advanced Settings in the right bar. Then, click View Page Source (HTML).
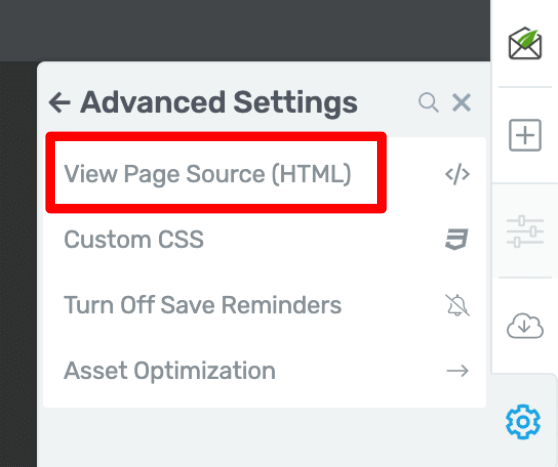
A full-screen overlay with your form’s source code will now pop up. It looks intimidating, but don’t worry, the change you need to make to assign a unique form ID is actually quick and easy.
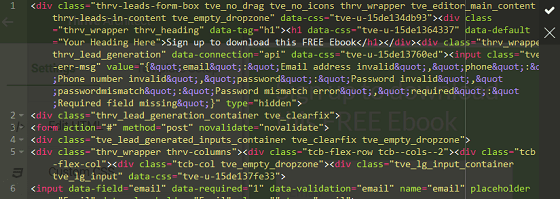
Look through the code and find the tag that starts with <form.
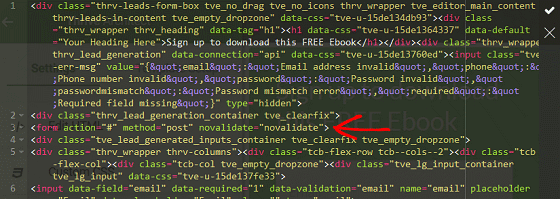
At the end of this line (inside the >) enter a unique ID name. In our example, we will use the form ID “lead-gen”. It should be typed like this: id=”lead-gen” (Do not remove the quotations).
Added to the end of the form tag, it will look like this:
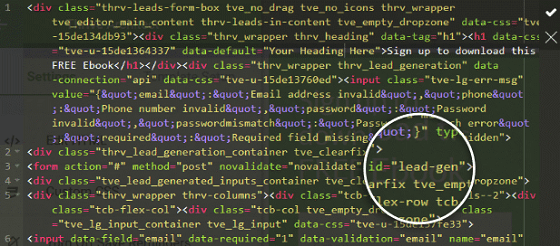
The key here is to remember that in order for Google Analytics to properly track your Thrive Leads conversions, each form you create must have a different, unique name, so you’ll want to be specific with your ID.
When finished, click on the white checkbox near the top of the screen. This will ensure your form saves the unique ID you have assigned it.
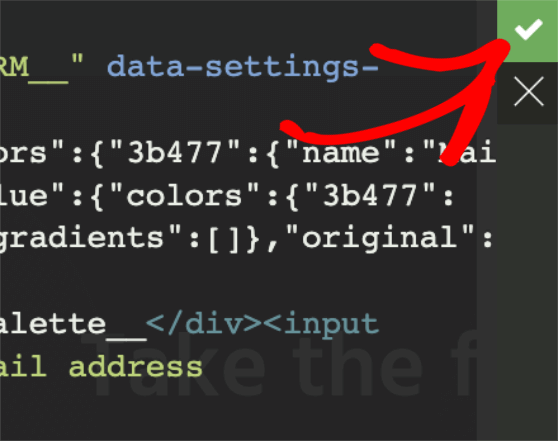
Continue editing your form as you see fit. When you’re all done, remember to click the Save button.
And there you have it. You have successfully set your website up to track Thrive Leads using Google Analytics. Now that a form ID has been assigned, MonsterInsights will automatically start tracking form conversions without any additional setup.
View Thrive Leads Form Metrics in Google Analytics
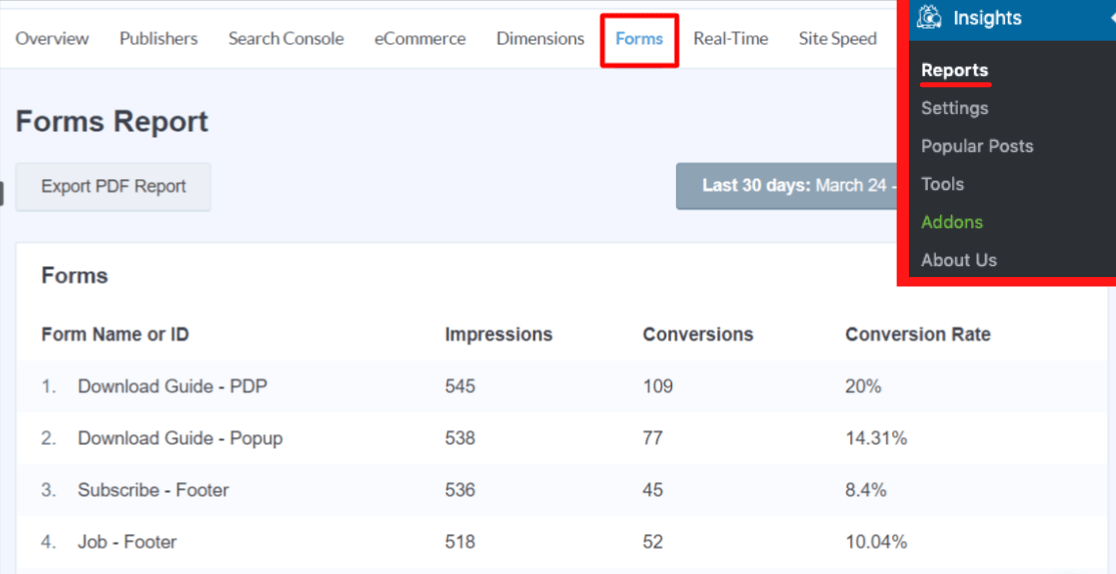
To see your top form conversions in WordPress, you can navigate to Insights » Reports and click the Forms tab at the top. Here, you can see every form on your site with impressions, conversions, and conversion rates.
If you’d like to see your Thrive Leads form metrics in Google Analytics, go to Reports » Life cycle » Engagement » Events.
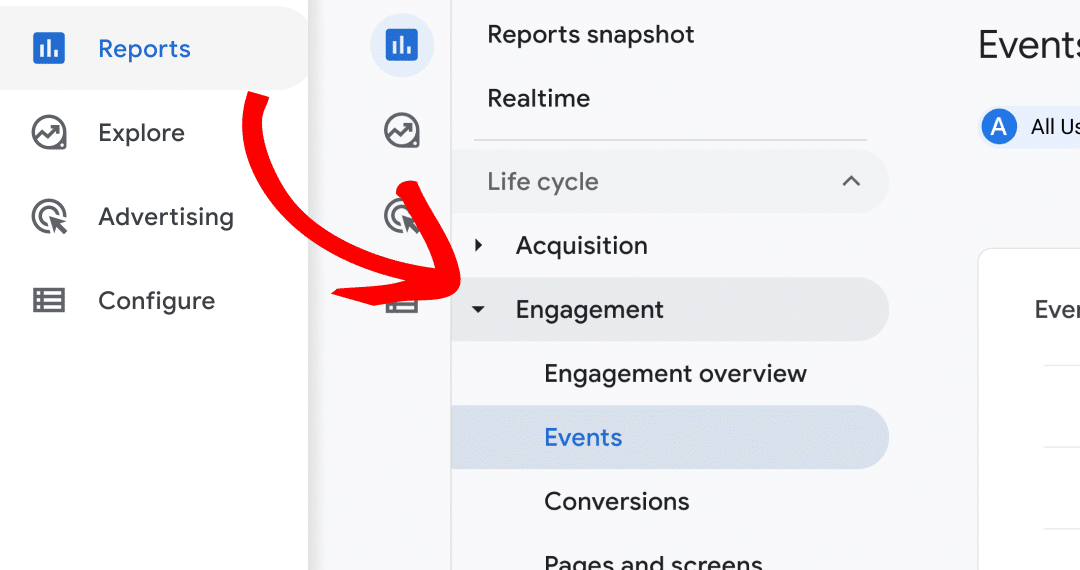
In the table, you’ll see form_impression and generate_lead. The generate lead event is all form submissions on your website.
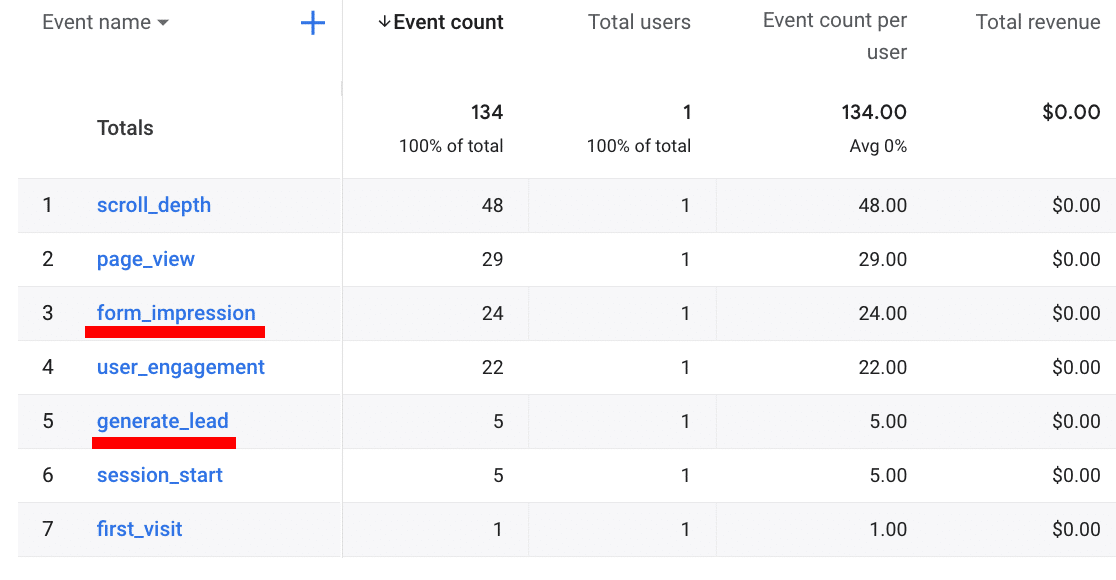
If you click on generate_lead, you can see the metrics for each form by the unique form ID you assigned them.
Once some data has been built up, you can also follow the second half of this tutorial to create a custom exploration report for your Thrive Lead forms to see referral sources, device type, and more for your form submissions.
That’s it, you’re all done. You successfully set up lead generation Google Analytics tracking for Thrive Leads!
If you enjoyed this article, you’ll definitely want to check out How to Find Out Where Your Email Subscribers Are Coming From.
Not using MonsterInsights yet? What are you waiting for?
Don’t forget to follow us on Twitter, Facebook, and Youtube for the best WordPress tutorials and Google Analytics updates.
