Running Google Ads campaigns without proper Google Ads conversion tracking is like driving blindfolded – you’ll burn through your budget without knowing what’s actually working.
But it gets even worse: 80% of businesses worldwide rely on Google Ads for their PPC campaigns, but many still struggle with accurate conversion tracking.
The good news? I’ll walk you through exactly how to set up Google Analytics for Google Ads conversion tracking, including the game-changing Enhanced Conversions feature that’s become essential.
In this guide, I’ll show you two proven methods: the easy WordPress solution using MonsterInsights and the manual setup for those who want complete control.
Ads Conversion Tracking Video Walkthrough
What Is Google Ads Conversion Tracking?
Google Ads conversion tracking tells you what visitors do on your site after clicking your ads. It measures whether people completed valuable actions you’ve defined, like making a purchase, signing up for your newsletter, or requesting a quote.
Think of conversion tracking as your campaign’s report card. Without it, you’re essentially throwing money at keywords and hoping something sticks.
The data speaks volumes: Businesses make $2 for every $1 spent on Google Ads, but only when they track conversions properly. 65% of industries saw better conversion rates in 2025, proving that smart tracking strategies beat cheap clicks every time.
Key Benefits I’ve Observed
After setting up conversion tracking, here’s what consistently happens:
- Better ROI visibility: You’ll know exactly which keywords and ads generate profit
- Smarter budget allocation: Stop wasting money on underperforming campaigns
- Enhanced bidding accuracy: Google’s algorithms optimize better with conversion data
- Cross-device insights: See how customers interact across multiple devices
By setting up conversion tracking on your WordPress site, you can identify how effective your ad clicks are at leading customers to a conversion on your website, such as product purchases, form submissions, and more.
Why Google Ads Conversion Tracking Is Essential
The digital advertising environment has transformed dramatically. Privacy regulations like GDPR and iOS updates have made traditional tracking methods less reliable.
That’s where Enhanced Conversions comes in – Google’s privacy-safe solution that uses hashed first-party data to improve tracking accuracy.
Without proper tracking, you can’t optimize for these benchmarks or improve your performance.
Tracking Challenges I’m Seeing
In my recent work, I’ve noticed three major tracking obstacles:
- Cookie restrictions: Browsers block more tracking each year
- Privacy regulations: GDPR and CCPA require compliant measurement
- Cross-device journeys: Customers research on mobile, buy on desktop
Enhanced Conversions solves these issues by using privacy-safe, hashed customer data like email addresses to connect the dots between ad clicks and conversions.
Don’t worry if all of this sounds overwhelming. In the next few sections, I’ll show you the bulletproof and up-to-date methods for tracking Google Ads conversions.
How to Add Google Ads Tracking to Your WordPress Site
Just follow these steps to add Google Ads conversion tracking to WordPress.
Step 1: Install and Activate MonsterInsights
MonsterInsights is the best Google Analytics plugin for WordPress, and it can set up Google Ads and track conversions for you in just a couple of clicks. Plus, you get tons of other advanced Google Analytics tracking features like form tracking, Meta Ad tracking, video tracking, outbound link click tracking, and so much more.
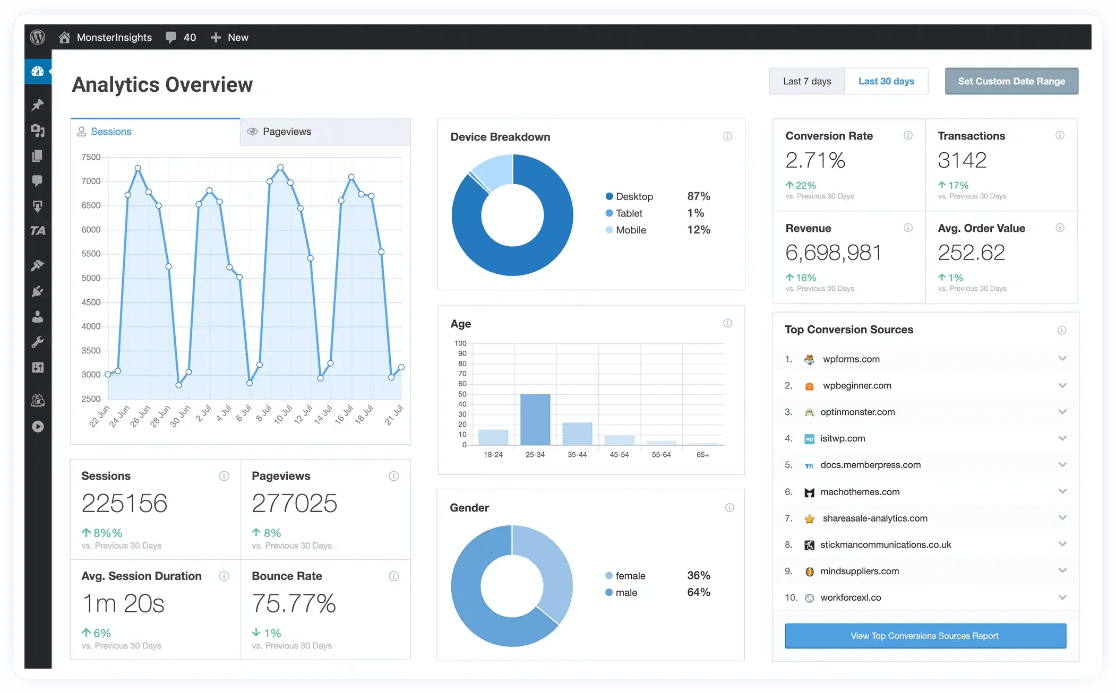
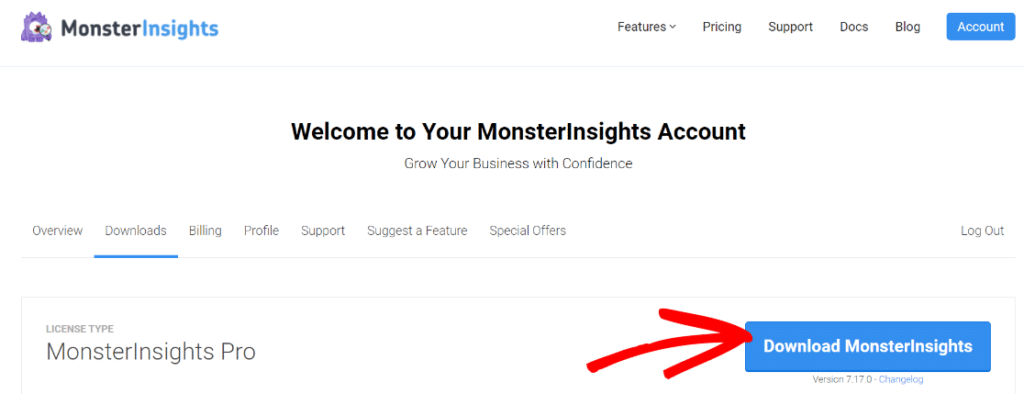
Start by installing MonsterInsights at the Pro level on your website. After you get the license, you can download the plugin from your Account area, under the Downloads tab.
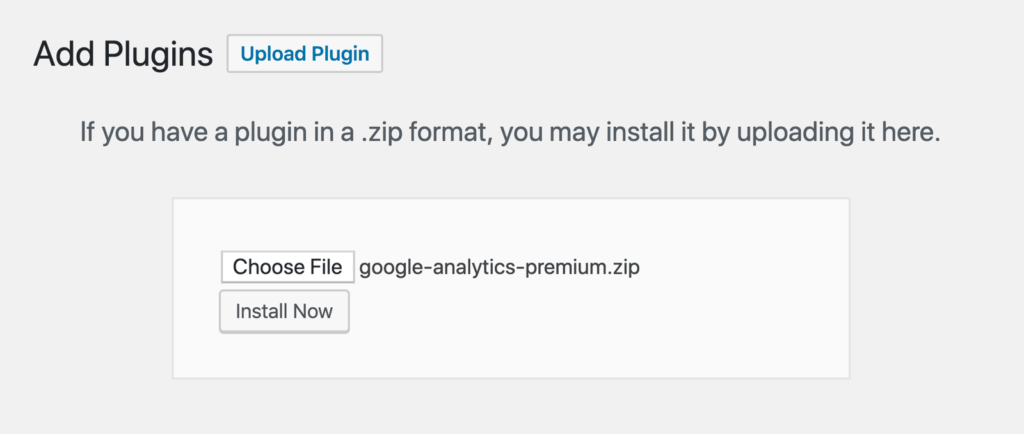
Next, go to your WordPress website and upload the plugin by going to Plugins » Add New » Upload Plugin.
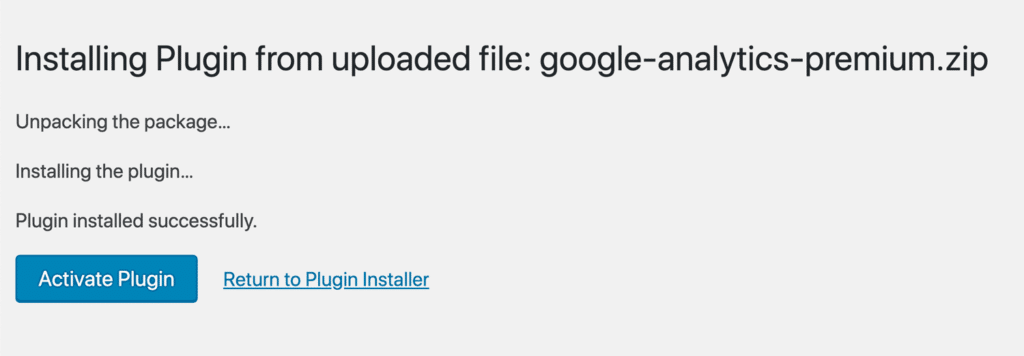
Once that’s done, install and activate MonsterInsights on your website.
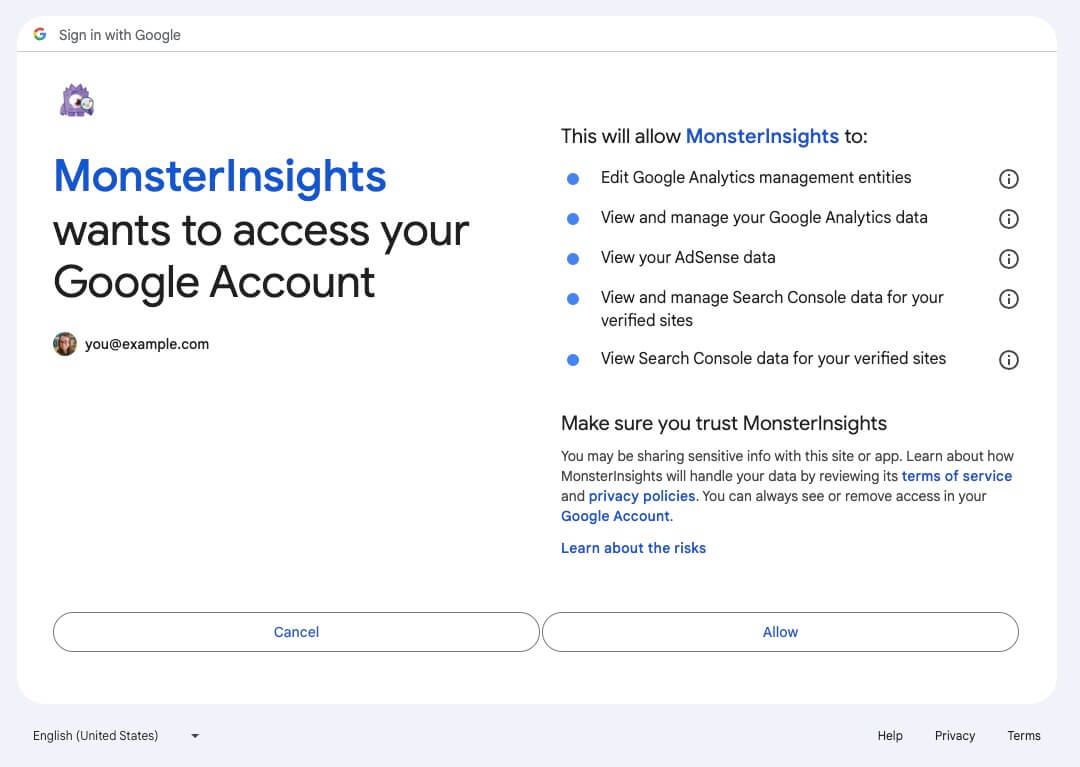
Step 2: Connect Google Analytics using MonsterInsights
Next, connect Google Analytics with your WordPress website. MonsterInsights helps set up analytics without the need to hire a developer or write code.
Simply use its setup wizard and follow the steps to add Google Analytics tracking code.
Step 3: Install MonsterInsights PPC Tracking Addon
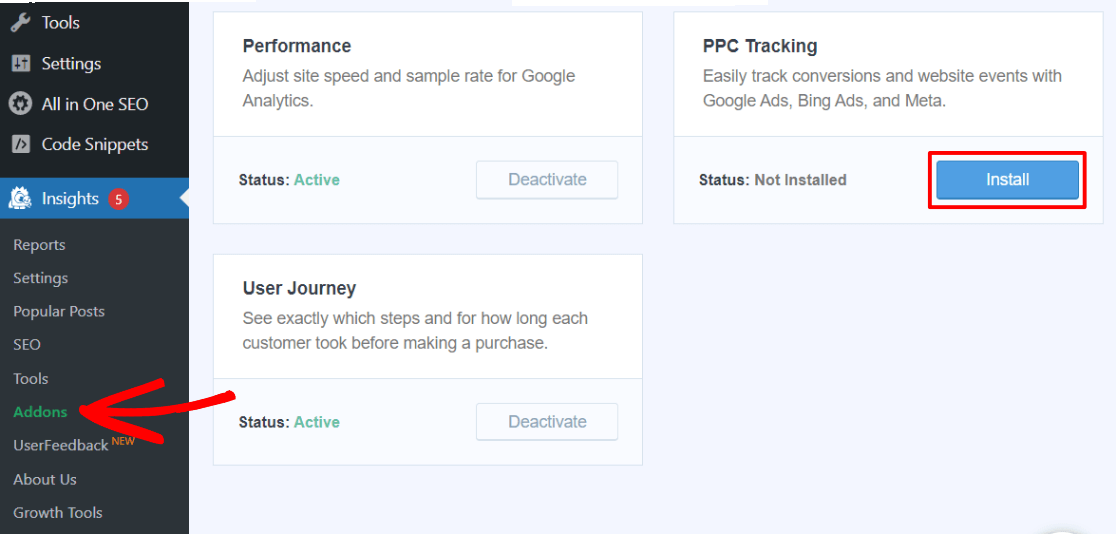
After that, you’ll need to install and activate the PPC Ads addon. Make sure you’re on MonsterInsights Pro or higher plan to use the addon.
To install the addon, go to Insights » Addons and click the Install button for the PPC Tracking addon. Now wait for a few seconds and it will automatically activate.
Step 4: Create a Conversion Action
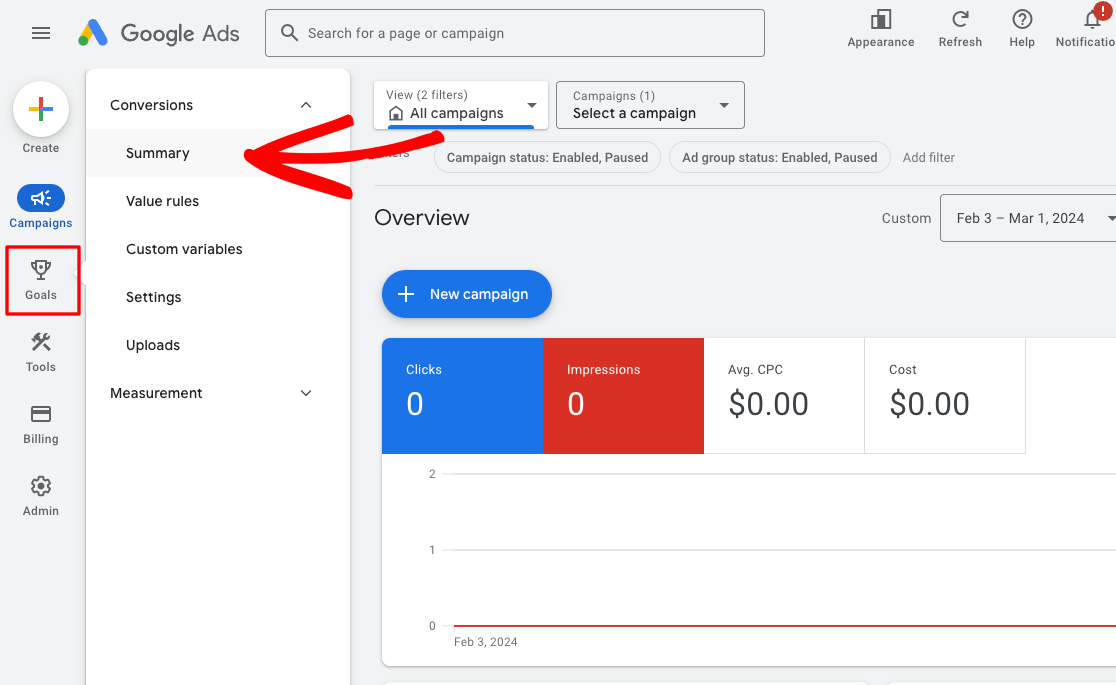
To start, sign in to your Google Ads account. In the navigation on the left side, hover over Goals, expand Conversions, and click Summary. NOTE: If you don’t see this option, go to Settings » Switch to expert mode (see screenshot).
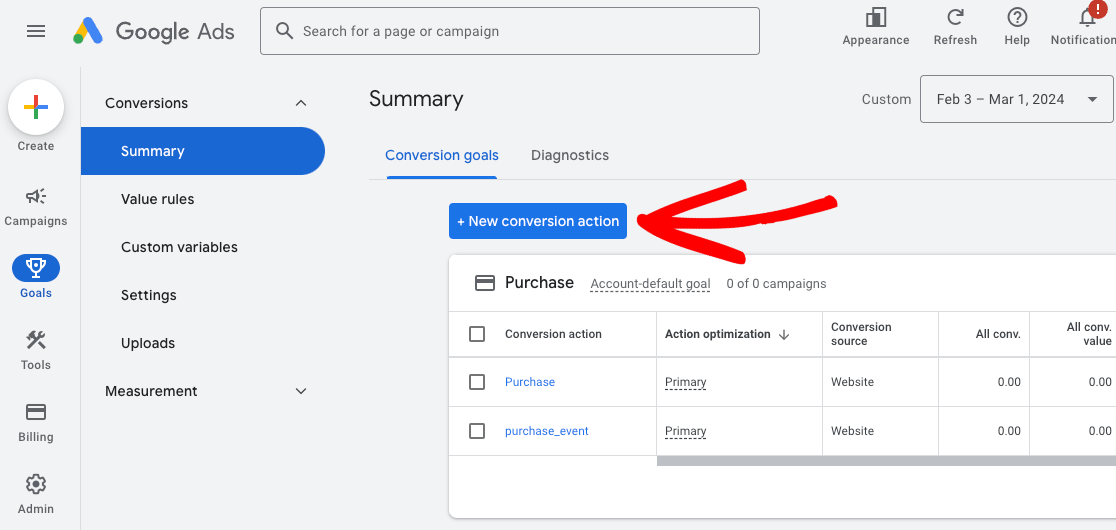
Then, click the + New conversion action button.
Next, click Website.

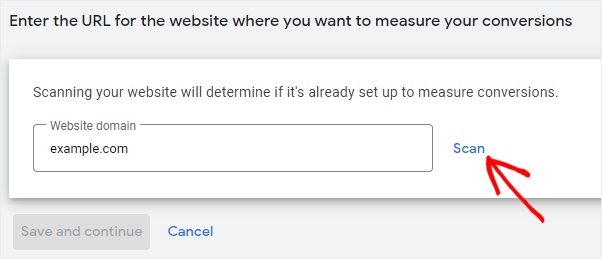
Now, Google will scan your website to see if it’s configured for conversion tracking. Enter your site domain and click Scan.
Then, Google Ads will ask whether you want to create a conversion action Automatically or Manually. NOTE: If you see an option that says “Measure in Google Analytics,” do not click it. Continue with a manual conversion action. You need to select the manual option by clicking + Add a conversion action manually

Now, you’ll select a Goal, enter a Conversion name, and specify a Value for that conversion.
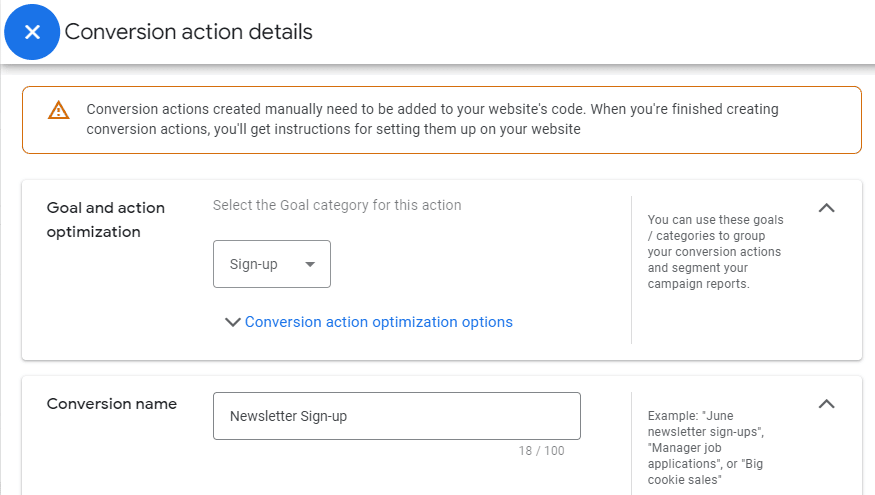
We’re going to use the same conversion value for each conversion, and set our Count to One so that a subscriber is only counted as a conversion once. For purchase conversions, you’ll normally want to set this to Every in order to count each purchase as a conversion.
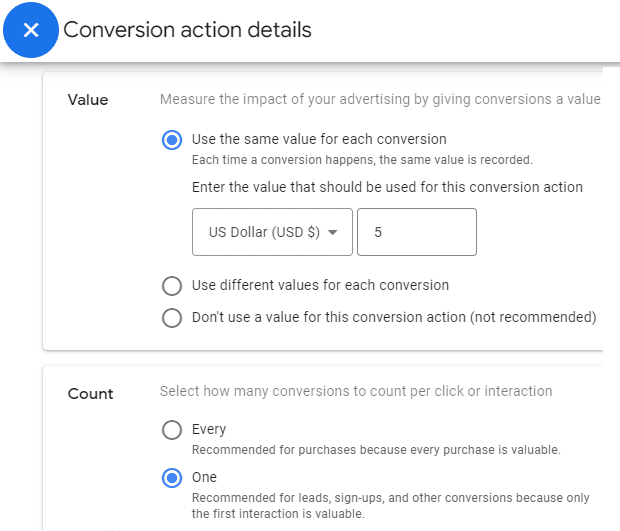
Then, click Done. Now, we’ve created a new conversion in Google Ads named Newsletter Sign-up. This should track everyone who signs up for our newsletter and assign a value of $5 to each of these sign-ups.
At this point, click the Save and continue button to get instructions to add the tracking tag for this conversion to your website. Then you’ll click on the Use Google Tag Manager option.
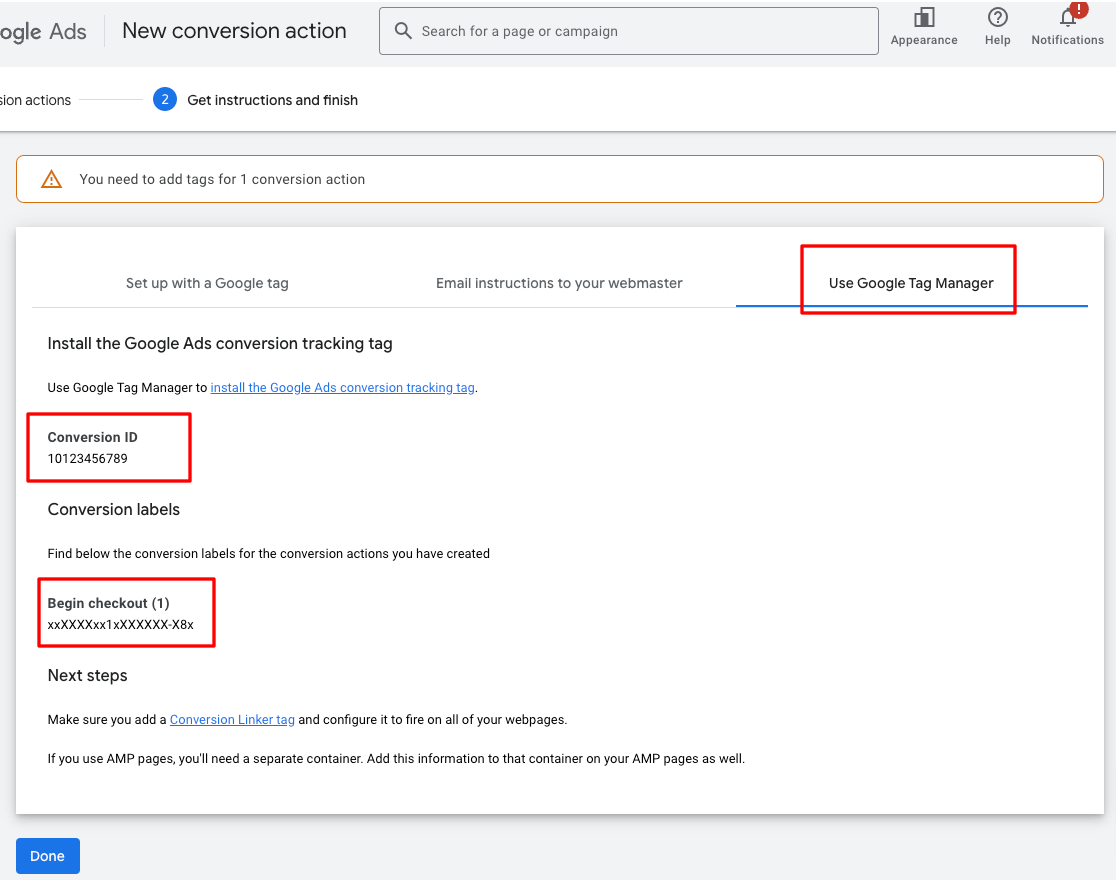
You will now see the Conversion ID and Conversion Label that you’ll need to finish setting up tracking. Copy and save these, or just leave this window open and move onto the next step.
Step 5: Add Your Google Ads Conversion ID and Conversion Label
The next step is to add your Google Ads Conversion ID (and Conversion Label if required) in MonsterInsights.
Go back to your open Google Ads tab and copy your Conversion ID. It will be a 9-digit code with the format AW-123456789 or 123456789.
After copying the ID, go to Insights » Settings » Conversions in MonsterInsights and navigate to Ads Tracking. Paste your Conversion ID into the field.
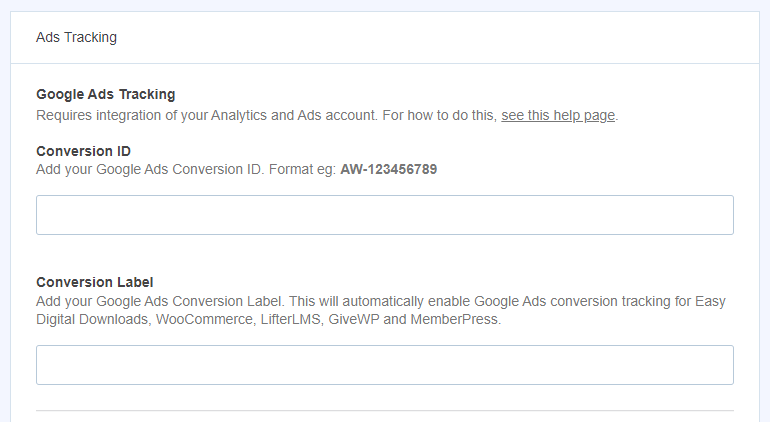
Now, if you’re using WooCommerce, Easy Digital Downloads, MemberPress, LifterLMS, or GiveWP you need to also copy and paste your Conversion Label from Google Ads into the Conversion Label field in MonsterInsights.
MonsterInsights uses Google’s newest tracking technology, called enhanced conversions.
Step 6: Add the Event Snippet to the Conversion Page
NOTE: You can skip this step if you’re using WooCommerce, Easy Digital Downloads, MemberPress, LifterLMS, or GiveWP and you’ve pasted your Conversion Label into MonsterInsights.
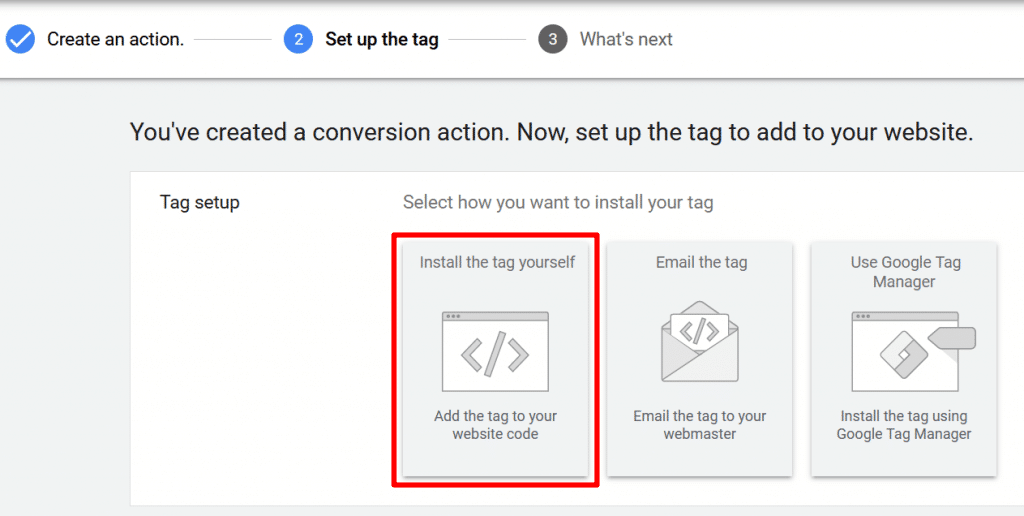
Head back to your Ads tab and click the Back button. Now, click on the Install the tag yourself option:
Scroll down to the Event snippet:
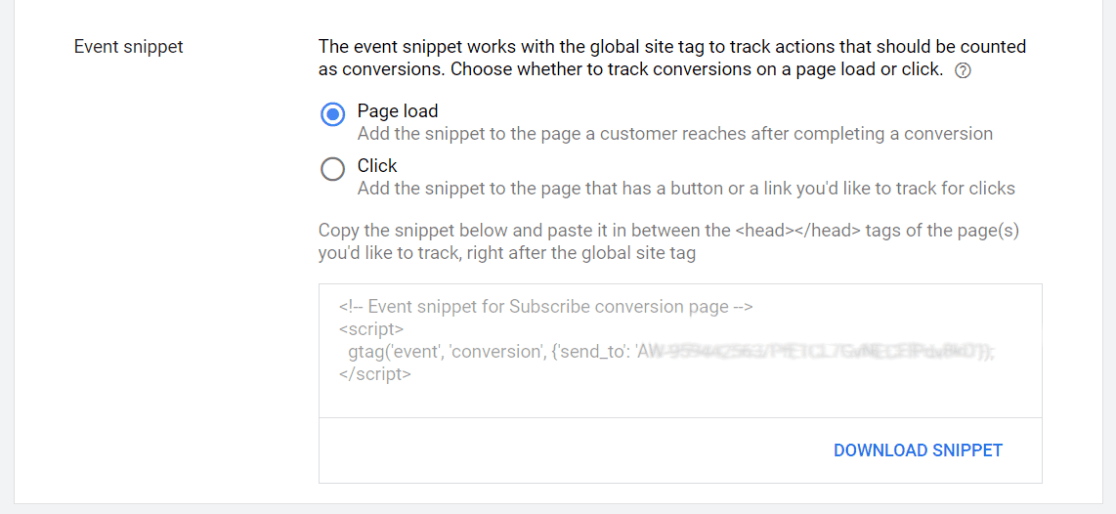
If your conversion is on a destination page, such as yoursite.com/thank-you, you’ll add the snippet to that page. If your conversion is a click, like on a “download now” button, you’ll add your snippet to the page that the button is on.
While Google Ads suggests putting the code in the header, it can also work to put it at the top of the HTML of the page in your WordPress page editor. You could also use a plugin to insert the code in the header on a specific page.
Congrats! You’ve successfully set up Google Ads conversion tracking on your WordPress site.
Why Should You Link Google Analytics With Google Ads?
If you’ve set up Google Analytics on your WordPress site, your Analytics account will already have an abundance of customer interaction data. If you want to make use of your Analytics data to better track the interaction of the customers you acquired through the ads campaign, you need to link your Analytics account with Google Ads.
Some more benefits of linking Google Analytics with Google Ads are:
- See your ad performance report in Google Analytics along with other site data.
- Import Google Analytics metrics, goals, and eCommerce transactions into your Google Ads account.
- Get richer data in the Analytics Multi-Channel Funnels report.
How to Link Google Ads with Google Analytics 4
Now I’ll show you how to link Google Ads with Google Analytics 4 (GA4), the most recent version of Google’s analytics platform.
First, log in to GA4 and select the property that you want to link to your Google Ads account. Then click the Admin icon in the left menu.
Now, click on Google Ads Links item in the right-hand column. Then, on the next screen you’ll click the Choose Google Ads accounts button.
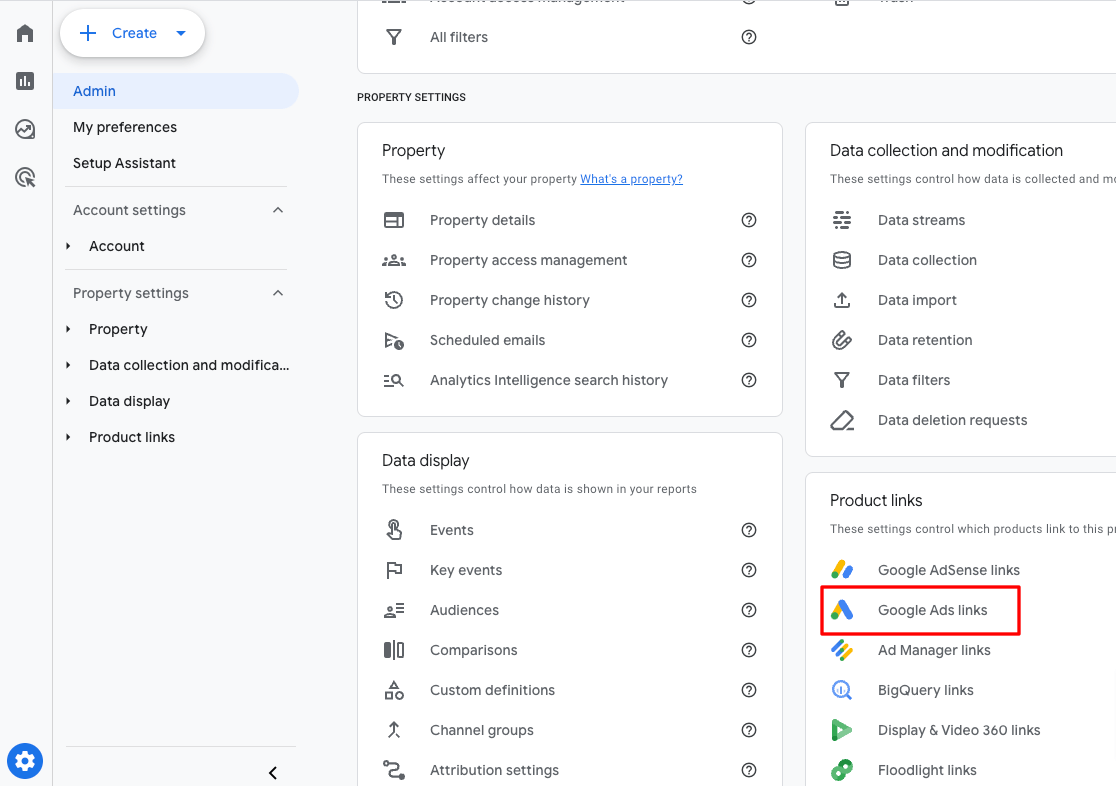
Now, you should see a screen that shows a list of Google Ads accounts that you are authorized to connect with. Place a check in the box next to the account where you manage ads for the selected website, then click Confirm.
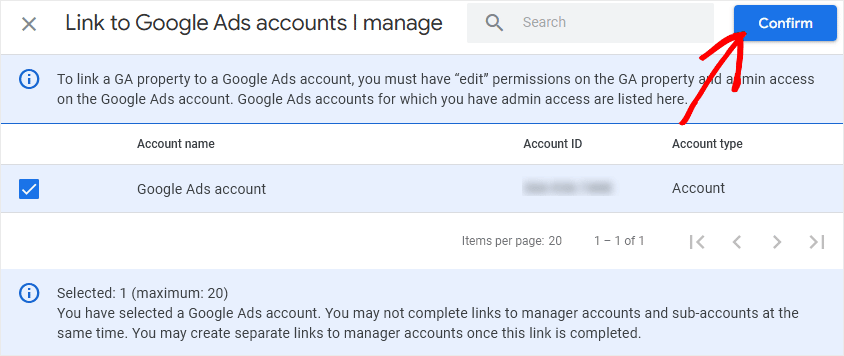
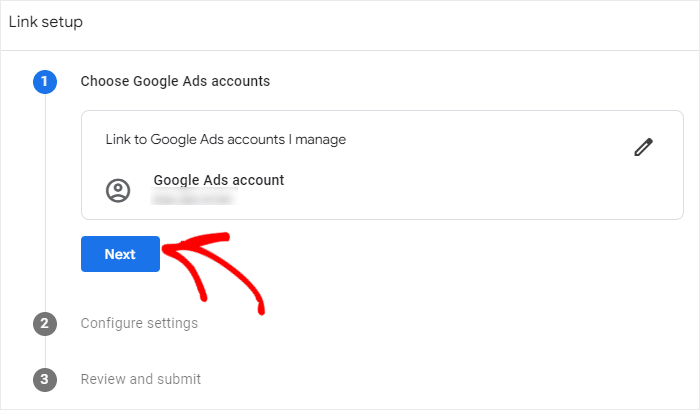
You’ll return to the previous window, where you now see the Google Ads account you selected for tracking conversions. At this point, you can click the Next button.
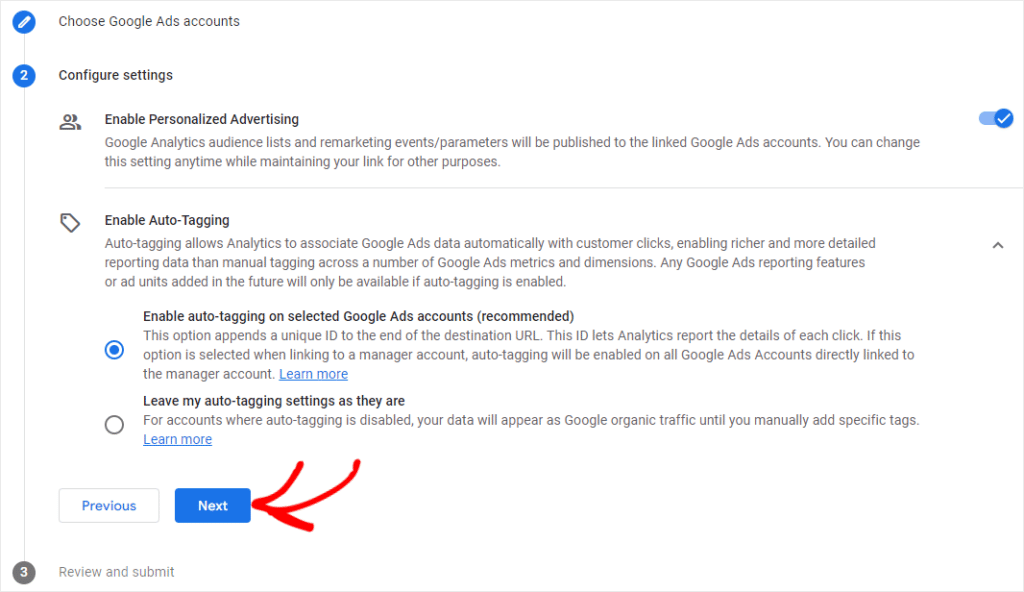
In the next step, you can leave all default settings as is and click Next again.
On the next step, simply check your settings and then click Submit.
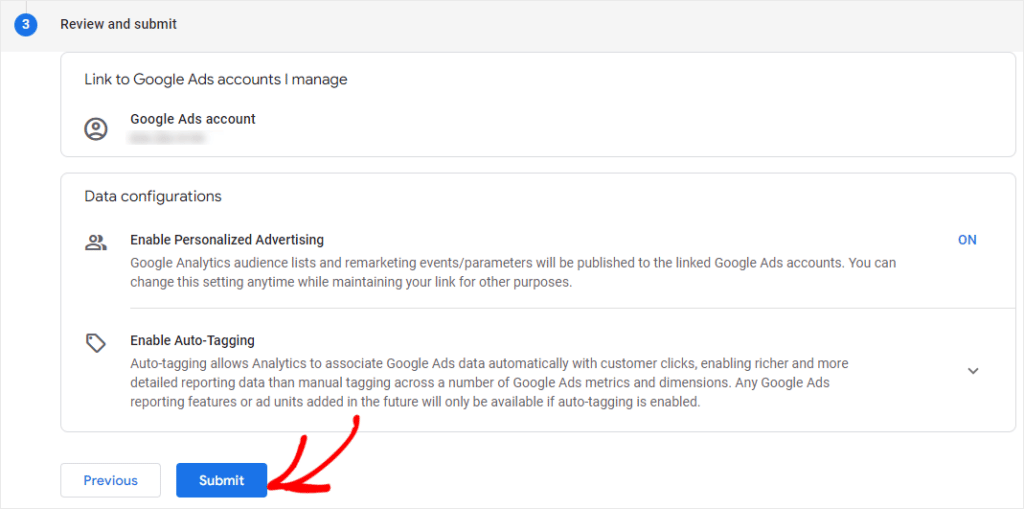
That’s it! Now your GA4 account is connected to Google Ads and can begin collecting more valuable data about your site traffic and ad conversions.
That’s it!
I hope this guide helped you to find out how to use Google Analytics for Google Ads conversion tracking on your WordPress website. To learn how to find Google Ads reports in Google Analytics, check out How to Find Google Ads Reports in Google Analytics.
Not using MonsterInsights yet? What are you waiting for?
And don’t forget to follow us on Twitter, Facebook and YouTube for more helpful reviews, tutorials, and Google Analytics tips.
Frequently Asked Questions
How do I know if my Google Ads conversion tracking is working?
Use Google Tag Assistant to verify your tags are firing correctly. In your Google Ads account, check the “Status” column in your conversions section – it should show “Recording conversions” or “Recent conversions.” Test by completing a conversion action yourself while using Tag Assistant.
Why am I not seeing conversions in my Google Ads account?
Common causes include: conversion tags not installed on the correct pages, ad blockers interfering with testing, incorrect Conversion ID/Label, cookie consent blocking tracking, or conversions happening outside your attribution window. Verify tag implementation with Google Tag Assistant first.
What’s the difference between Google Analytics goals and Google Ads conversions?
Google Analytics goals track all website conversions regardless of traffic source, while Google Ads conversions specifically track actions from ad clicks. For optimal performance, use native Google Ads conversion tracking rather than importing Analytics goals, as it provides more comprehensive data, including cross-device and view-through conversions.
Should I use Enhanced Conversions for my Google Ads tracking?
Yes, Enhanced Conversions is essential. It improves attribution accuracy by using hashed first-party customer data to match conversions with ad interactions, especially valuable as traditional cookie-based tracking becomes less reliable due to privacy changes.

Hey, thank you for sharing your knowledge. I wanted to know if this setup is possible through Google Tag Manager. If yes, then how? Which one is better? Actually, I am facing issues with 100% data accuracy for my clients.
Hi Saurya – it is possible to set up Google Ads conversion tracking in Google Tag Manager. We don’t provide support for Google Tag Manager, but try this article. It depends on how comfortable you are with using GTM.
Hello, is any way to add multible Google Ads Conversion ID and Conversion Label
i have 3 google ads account for one website
is this avaliable ?
Hi there – At this time, we only support one. If you need to add multiple, we recommend using WPCode.