Are you collecting donations through your WordPress website, but aren’t sure how to track them in Google Analytics to gain valuable insights? Google Analytics donation tracking gives you important data that you can use to analyze your audience and your website. We’re glad you’re here to learn this important skill!
In this article, we’ll talk about how to set up Google Analytics to track donations on WordPress. Then, we’ll go over some helpful tips for how to use the data you collect to make improvements to your website and donation campaigns.
How to Set Up Google Analytics to Track Donations
If you accept donations on your website, you’ll need eCommerce tracking set up in order to track how much you’re making in donations, plus more information about the visitors who donated.
With eCommerce tracking, you can easily find metrics like your average donation amount, total number of donations, how the people who donated found your site, and more.
To easily set up Google Analytics and eCommerce tracking on WordPress, we’re going to be using the MonsterInsights plugin.
MonsterInsights is the best Google Analytics plugin for WordPress. It allows you to easily connect your WordPress site with Google Analytics, so you can view all the data that matters most right in your WordPress dashboard.
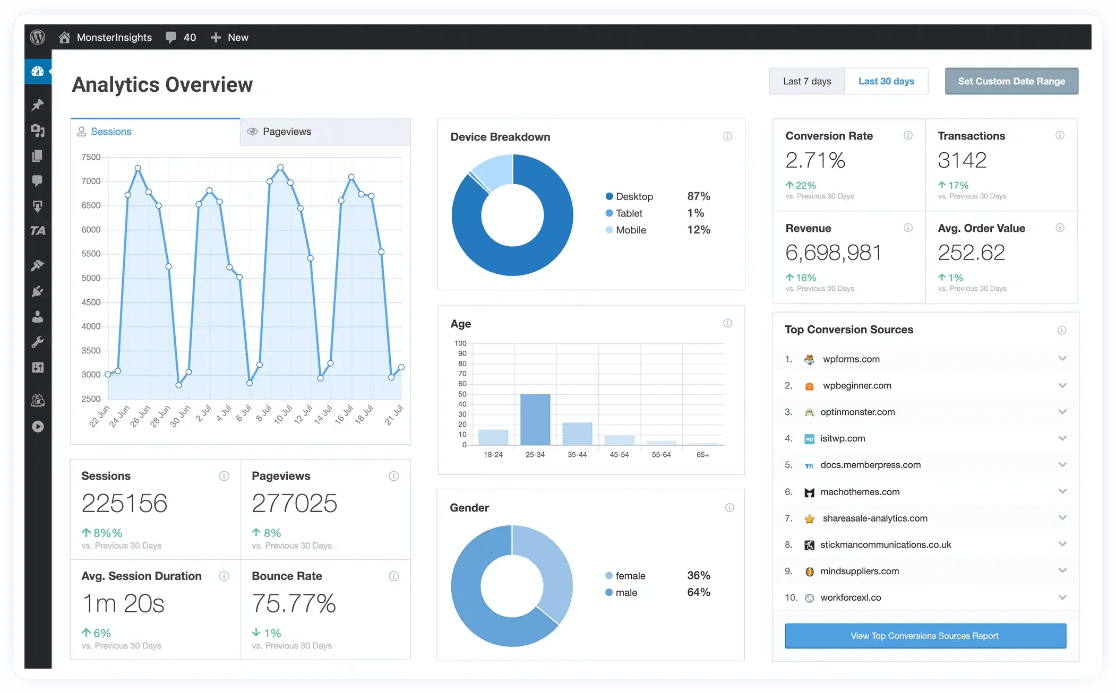
Plus, with a few clicks of a button, you can set up many more tracking features such as event tracking, form tracking, custom dimension tracking, outbound link tracking, media tracking, and more.
Let’s go ahead and set up donation tracking.
Step 1: Install MonsterInsights
If you haven’t installed MonsterInsights Pro yet, you’ll need to install it and authenticate it with your Google Analytics account.
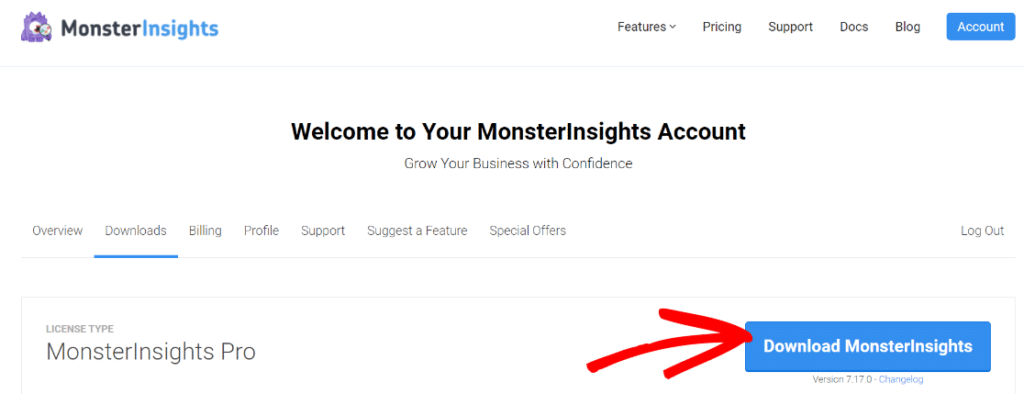
To start, purchase MonsterInsights and the Pro level and download the ZIP files from your account area under the Downloads tab.
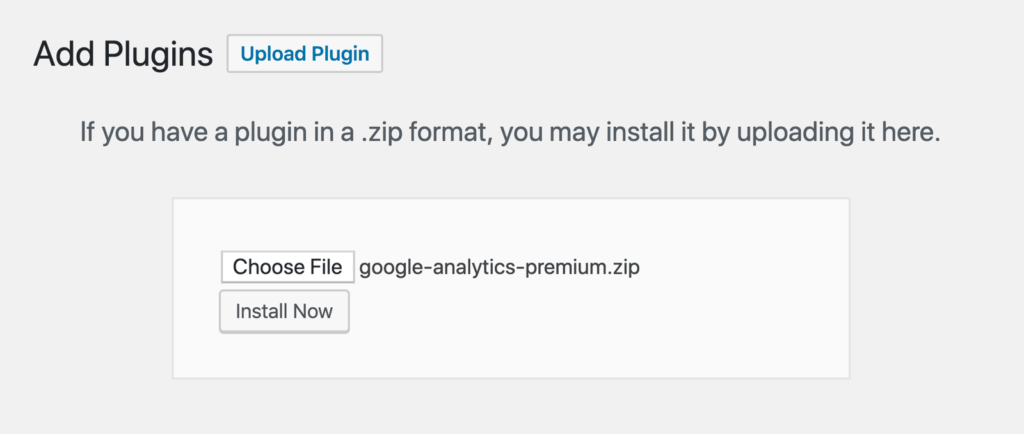
Next, upload the plugin to your WordPress website. You can do that by going to Plugins » Add New » Upload Plugins in your WordPress admin and clicking the Install Now button.
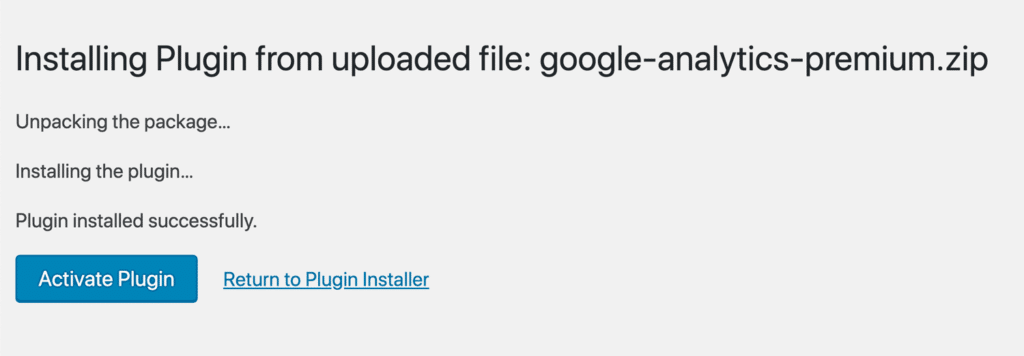
After that, click the Activate Plugin button.
Now, you’ll need to connect Google Analytics to your WordPress website. Using MonsterInsights, it’s a walk in the park. Just follow the steps in its setup wizard and the plugin will add Google Analytics to your site without the need to edit code.
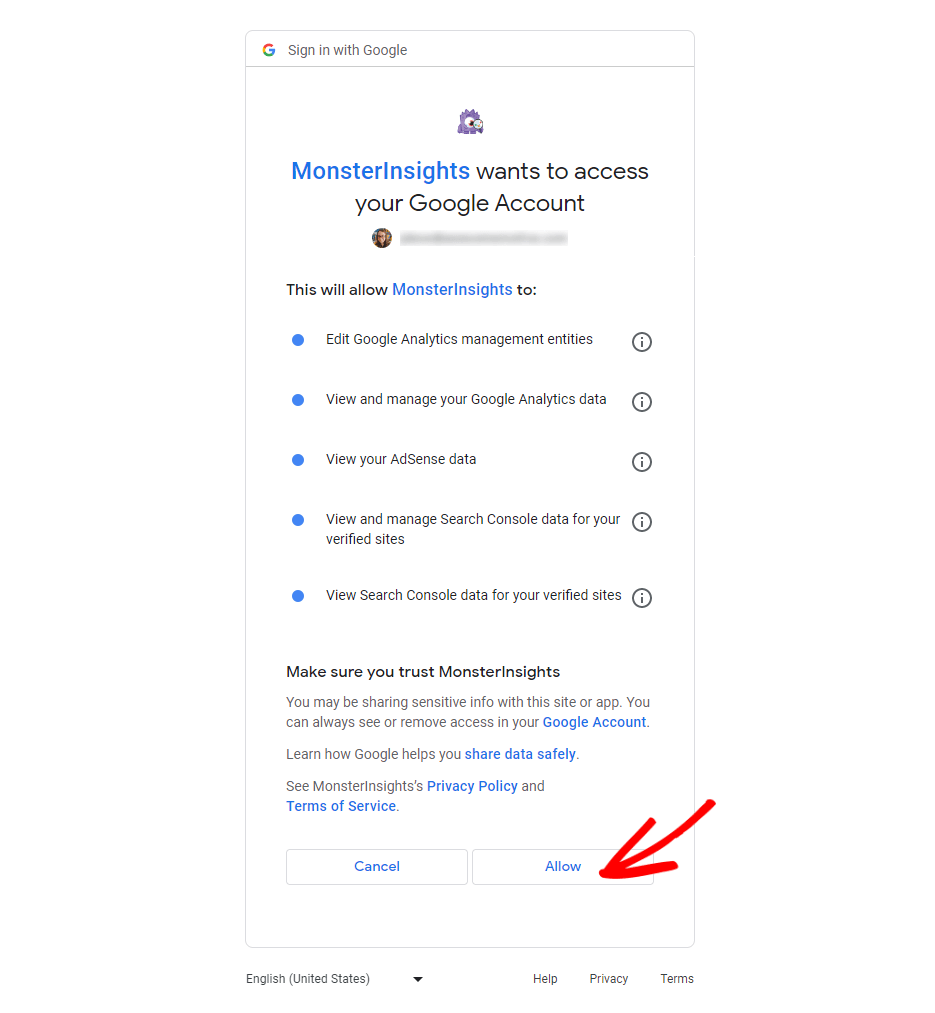
For help getting started, you can read our step-by-step guide on how to properly set up Google Analytics and MonsterInsights.
Step 2: Install the eCommerce Addon
Now, you’ll need to install the eCommerce addon (which you can do in just a couple of clicks).
Head to Insights » Addons and click Install under the MonsterInsights eCommerce addon.
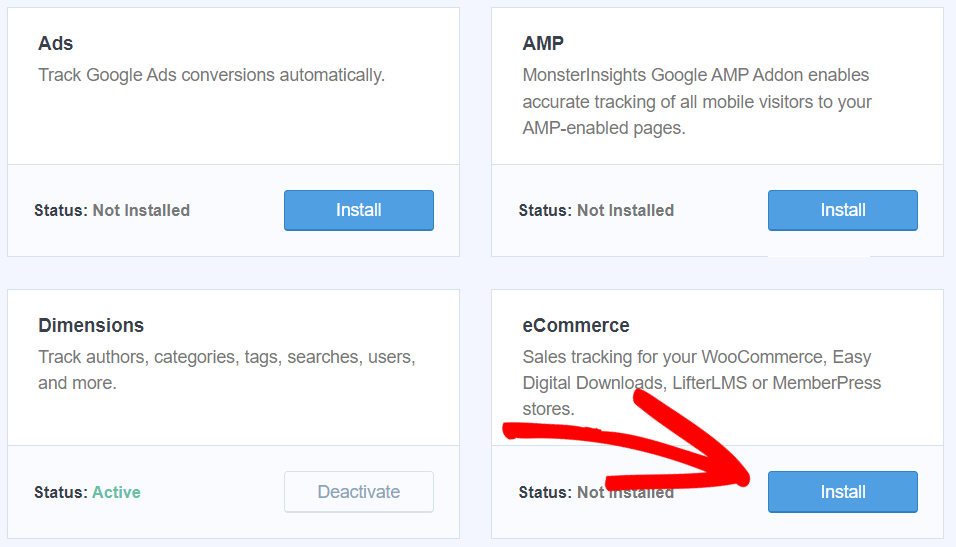
You’re all set! You’ll now be gathering eCommerce data and be able to view reports on your donations.
How to Use Data to Increase Your Donations
So, you have data. Now what?
To view your eCommerce stats in MonsterInsights, go to Insights » Reports, then click the eCommerce tab.
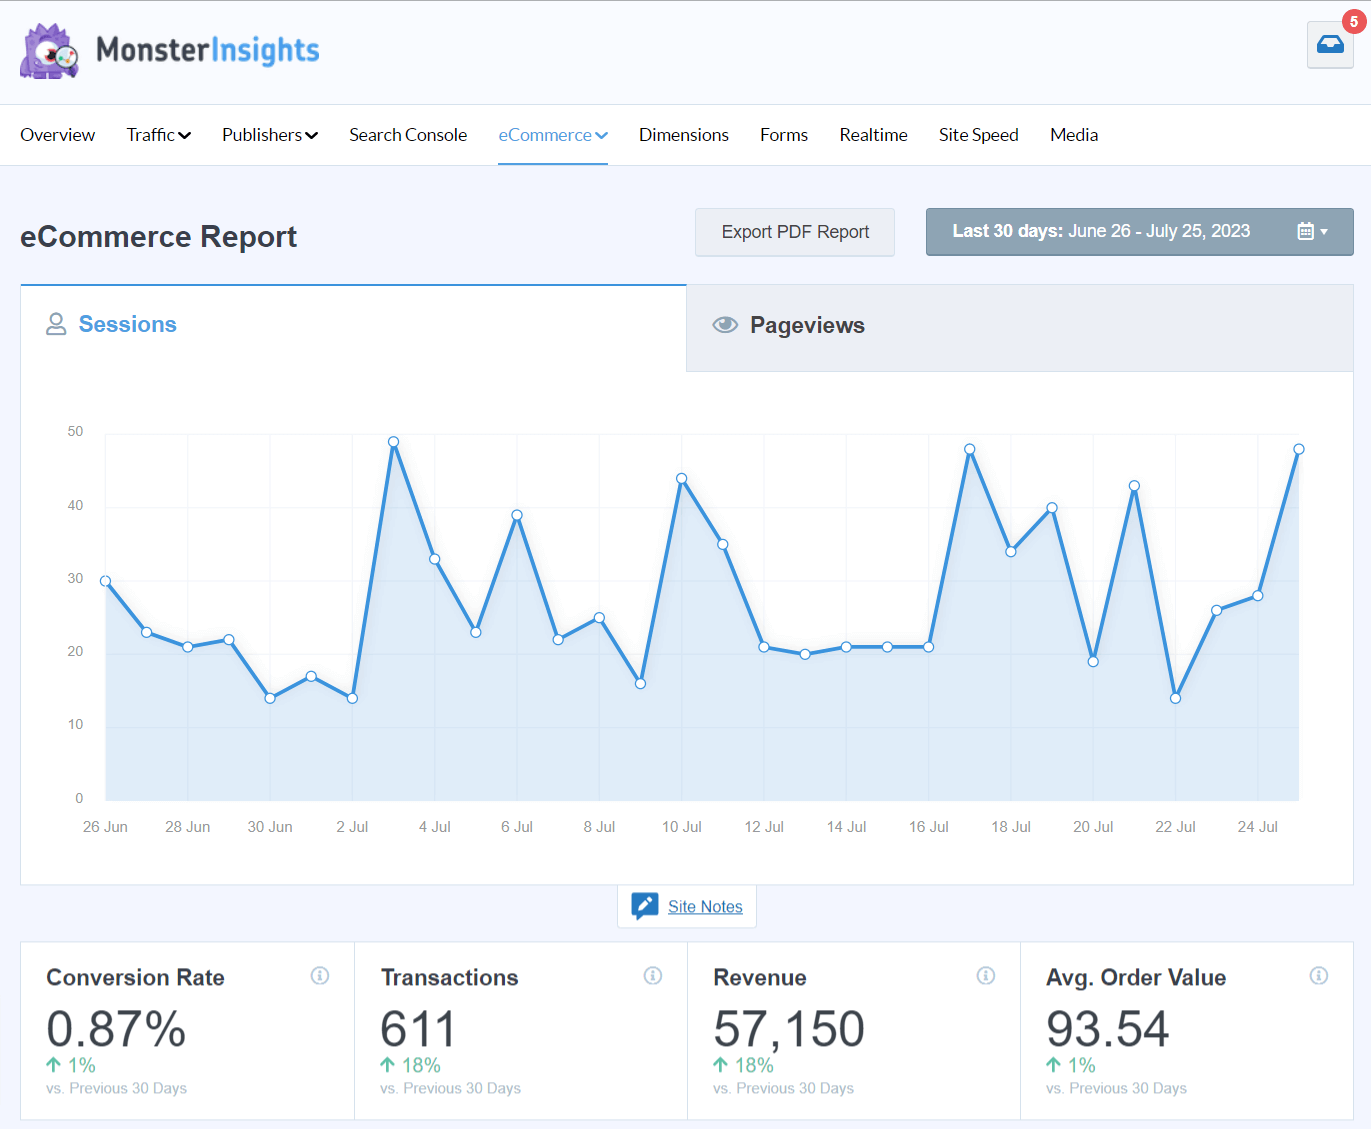
Now that you can access your reports, let’s go back to the actionable insights we talked about at the beginning of this article. We said that, with MonsterInsights and Google Analytics, you’d be able to use your data to make some helpful conclusions about your traffic and donation campaigns.
Here are a few examples.
See which referral source is bringing in the most donations
Who’s making more donations: Users referred to your site from Facebook, or a recent news story? To find out, head to your eCommerce reports tab (screenshot above) and scroll down to the Top Conversion Sources report.
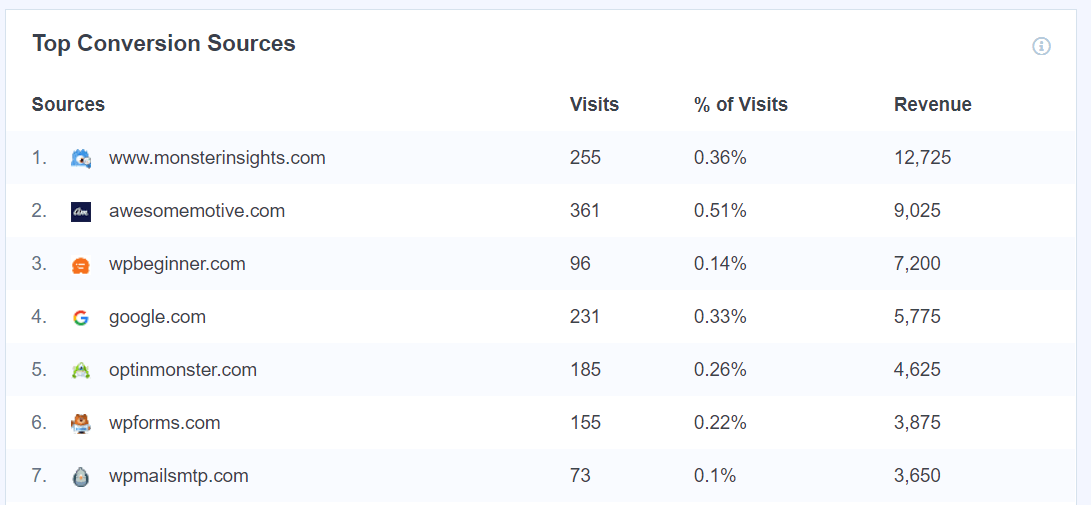
In this report, you’ll be able to see which source is bringing in the most revenue, which, for you, means donations.
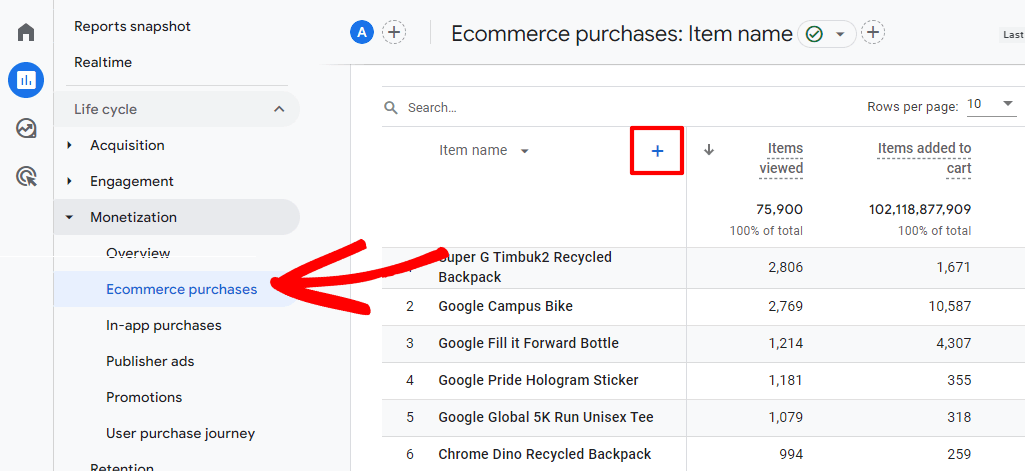
If you want to go even further in depth, open Google Analytics and head to the Monetization » Ecommerce purchases report. There, scroll down to the table and click the blue plus sign:
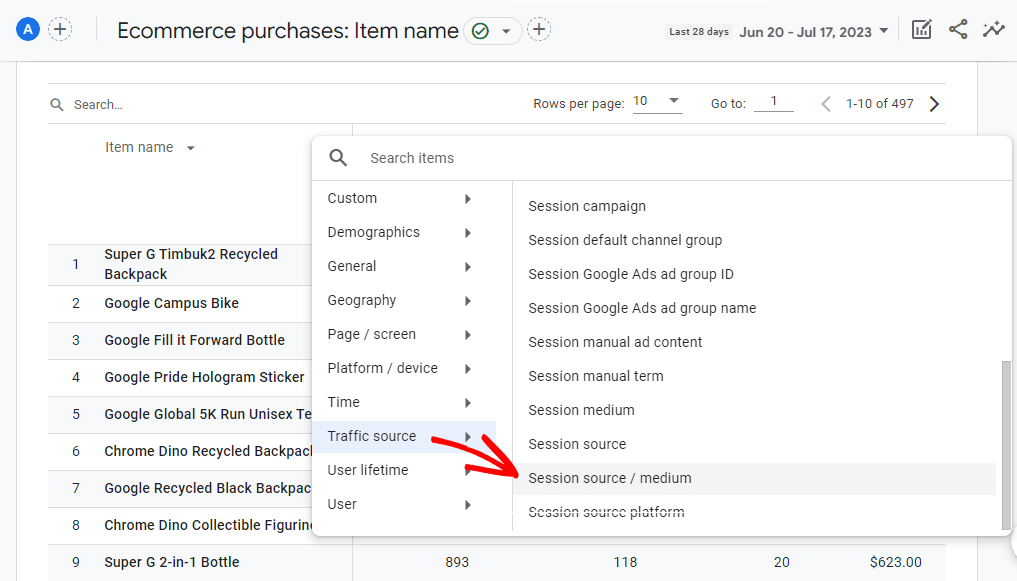
Now, choose Traffic source » Session source / medium:
This will give you a report of exactly which sources are contributing the most revenue. The table will show you data like number of donations (items purchased) and total donations from each channel.
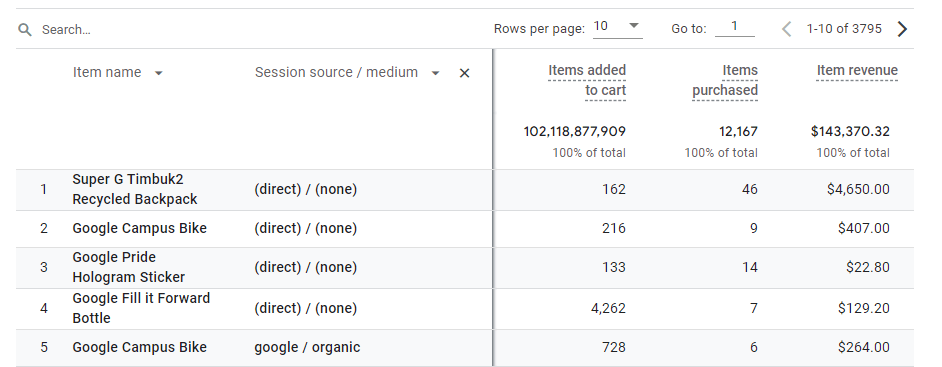
Example conclusions you can make:
- Email is driving a lot of conversions, we should send one more per month.
- A partner is sending traffic that’s donating at a high rate. Let’s work more with them.
- Organic traffic is converting at a really low rate. How can we optimize the website to help funnel our organic visitors? Are there other goals we can set up for them?
See which forms have the highest conversion rates
Did you know that MonsterInsights can easily track your form conversions? Yep, it’s pretty magical!
Just navigate to the Addons screen and activate Forms:

That’s it! You can now see which of your donation forms has the highest conversion rates. Just navigate to Reports » Forms.
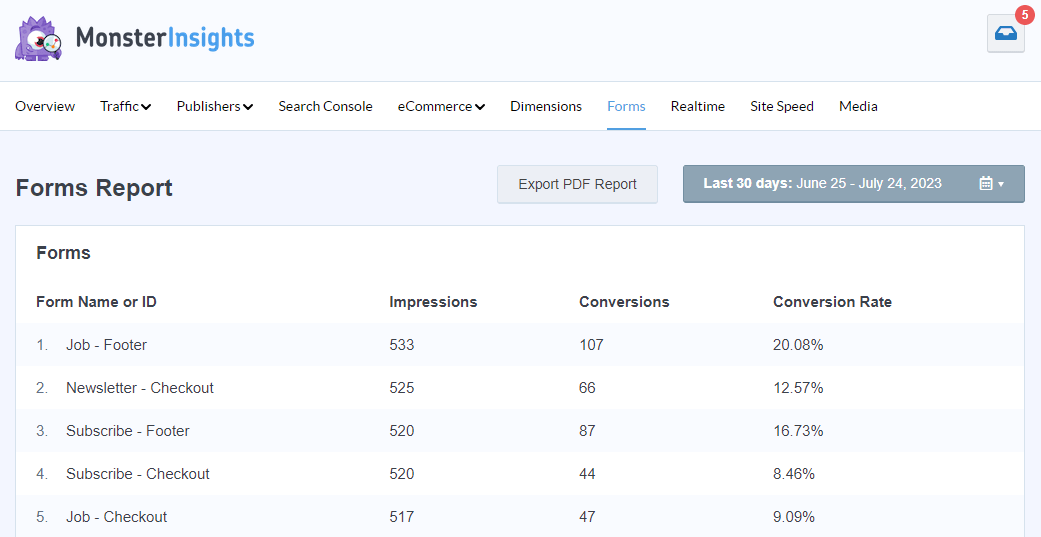
Example conclusions you can make:
- The donation form on our home page has a much lower conversion rate than we’d like. How can we improve that?
- The donation form in the sidebar is performing well! Let’s avoid changing that one for now.
Get started with MonsterInsights donation tracking now!
Wondering what else you should be tracking? Check out the Top 11 Important Google Analytics Metrics to Track.
For more guides and other helpful Analytics tips, follow MonsterInsights on Facebook, Twitter and YouTube.
