Looking for a tutorial for how to add GA4 to Google Tag Manager and install Google Analytics and Tag Manager on your website?
Google Tag Manager is a free tool that allows you to add and update your Google Analytics tracking code and other tags on your site without having to update them in your site’s code. You can also use it to set up more advanced Google Analytics tracking features.
In this article, we’ll show you how to add GA4 to Google Tag Manager and install Tag Manager on your website.
Video Walkthrough
What is Google Tag Manager?

Google Tag Manager is a free tag management system (TMS) offered by Google. It provides a platform for managing and updating different types of tracking codes and tags on your website.
A tag is a tracking code or snippet of JavaScript that sends information about your site to a third party, such as Google.
Using Google Tag Manager, you can deploy different types of tracking codes (tags), such as the Google Analytics tracking code or Meta pixel, on your site without needing to edit your website’s code each time you add or edit a code snippet. You can add codes for event tracking, conversion tracking, remarketing, and more.
For instance, if you decide tomorrow that you want to run ads on Instagram, you’ll need to install a pixel (code snippet) on your site. If you have Google Tag Manager, you can add it there and skip editing your website’s code at all.
Google Tag Manager Alternative for WordPress
The downside to using Tag Manager to add GA4 and deploy tracking codes and site tags is that there’s a steep learning curve if you’ve never used it before.
If you’re using WordPress, there’s a much easier way to set up Google Analytics, advanced tracking features, and install Google, Bing, and Meta pixels: MonsterInsights.
MonsterInsights is the best Google Analytics plugin and Google Tag Manager alternative for WordPress websites. It allows you to set up Google Analytics in WordPress easily, right from your WordPress dashboard and without touching any code.
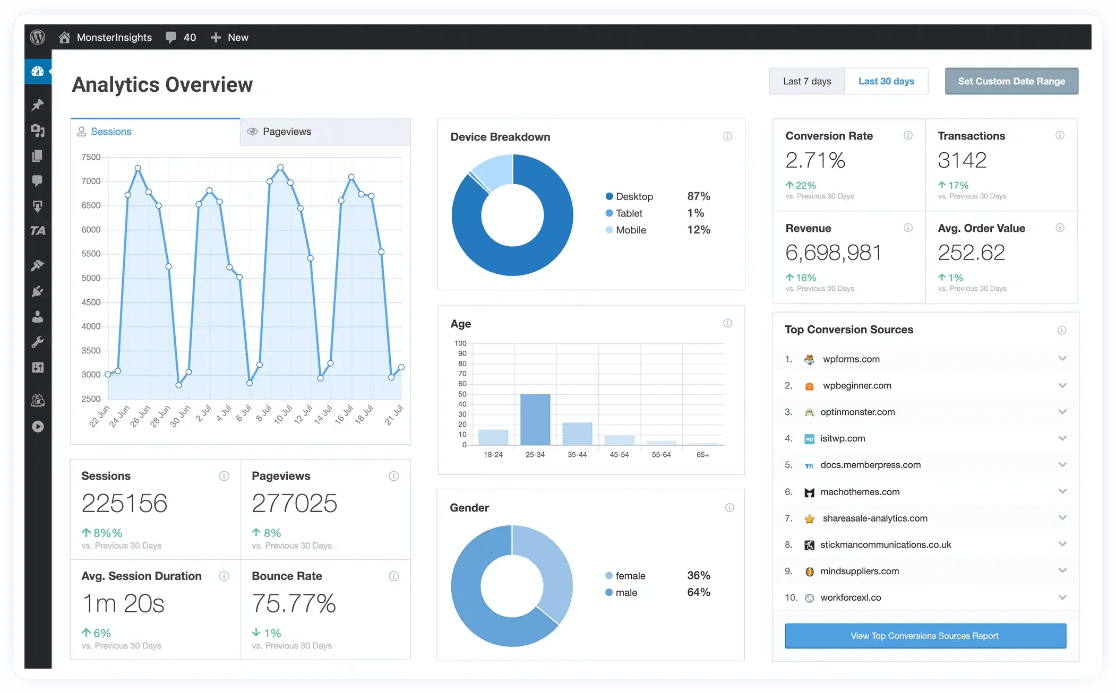
The MonsterInsights plugin makes it simple to set up Google Analytics, whether you’re an absolute beginner or a seasoned professional. Easily set up advanced tracking features in a couple clicks rather than learn how to create them in Google Tag Manager!
Easily and accurately track:
- eCommerce metrics
- Form submissions
- Video interactions
- Google Ads conversions
- Meta (Facebook) Ads conversions
- Outbound clicks and affiliate link clicks
- Downloads
- Authors
- User journeys
- And much more
Plus, you’ll get a whole big dashboard full of reports, so you won’t have to navigate GA4 to figure out where to find your data.
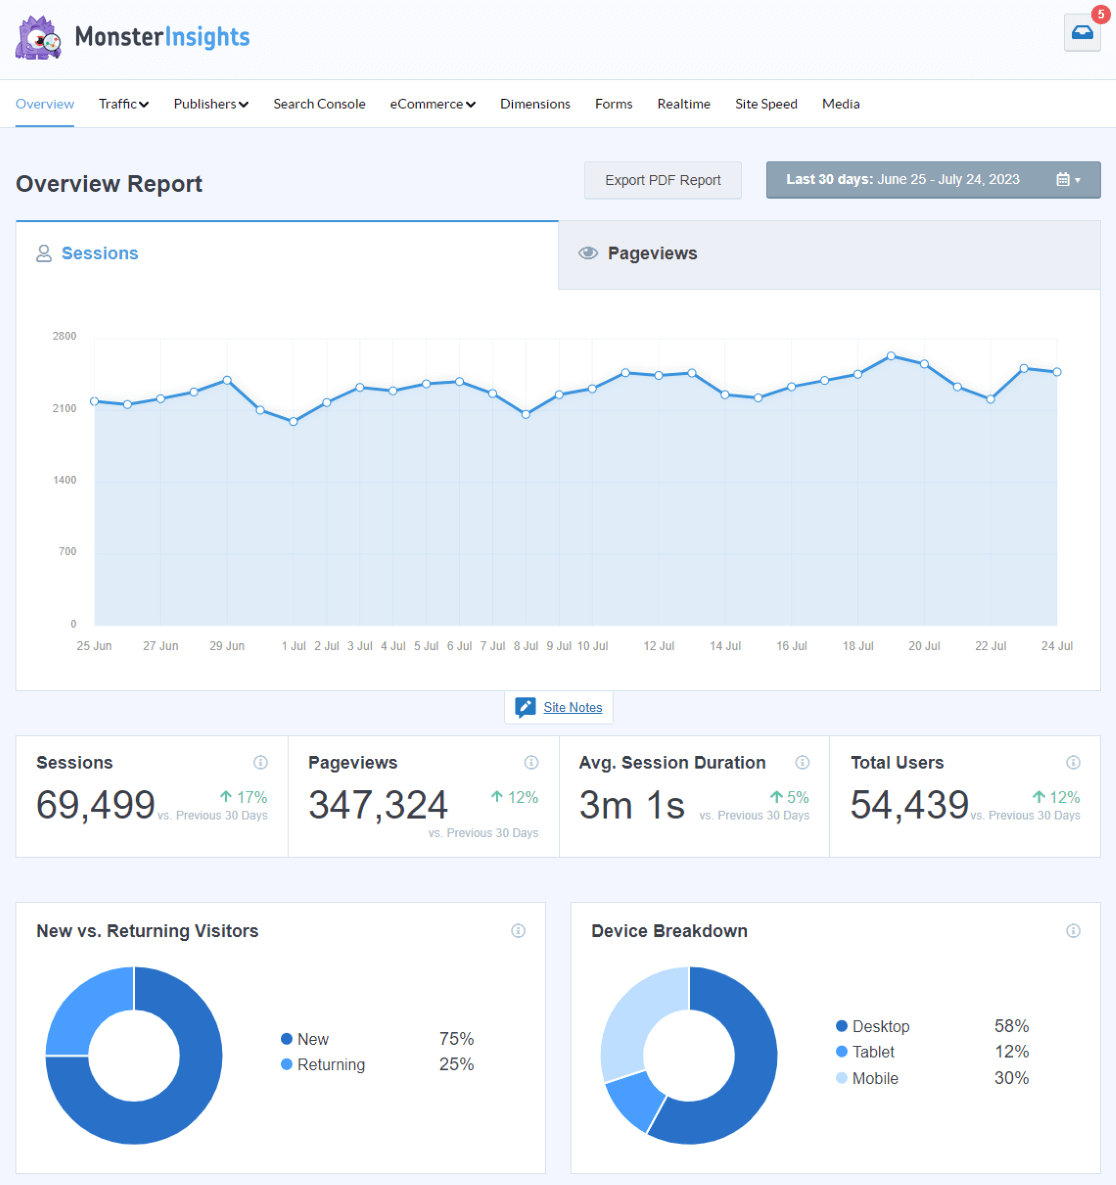
Get started with MonsterInsights now!
Still want to know how to add GA4 to Google Tag Manager? Let’s dive into our tutorial.
Tutorial: Add GA4 to Google Tag Manager
The first thing you need to do is sign up for Google Tag Manager. You can use an existing Google account or create a new one.
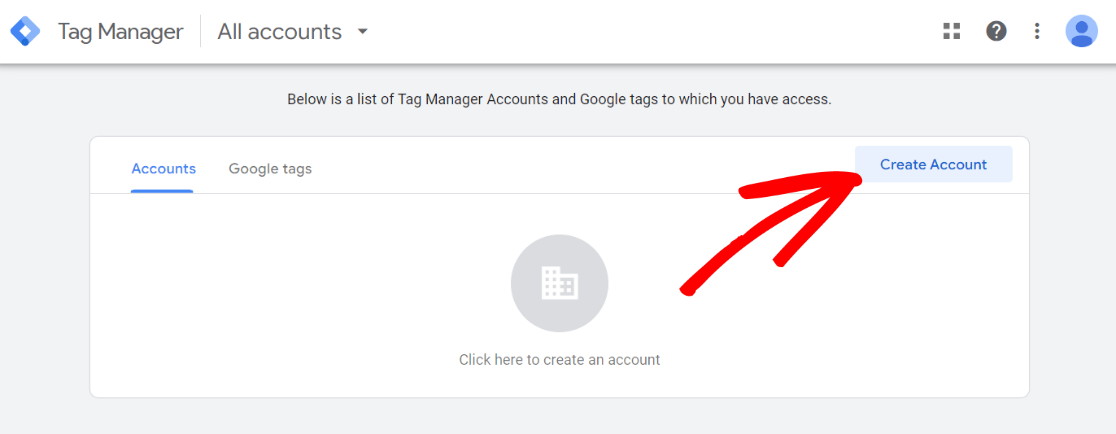
Once you’re logged in, click the Create Account button.
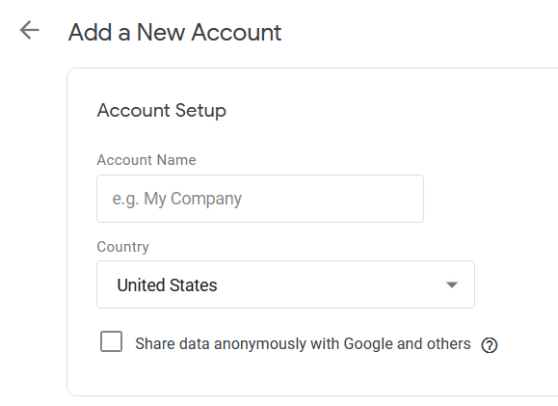
Then, enter a preferred account name to your Account Name field.
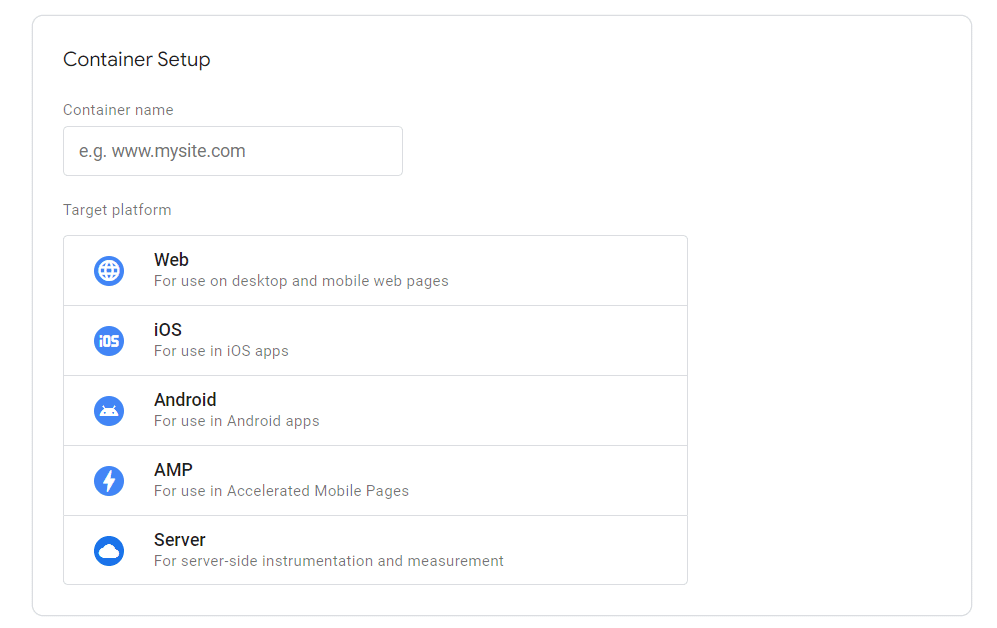
In the Container Setup step, you can enter your website name as the Container name. Under Target platform, choose Web.
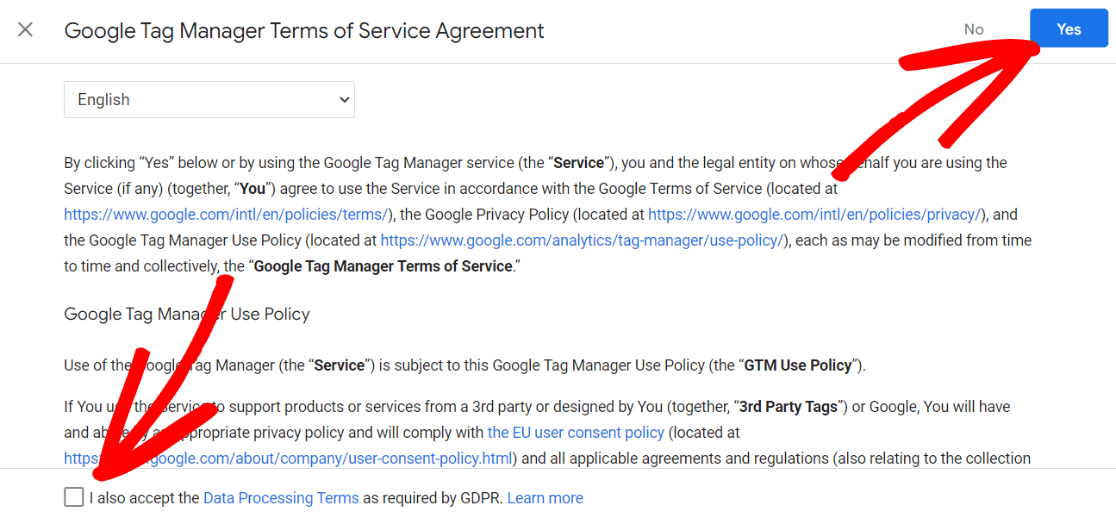
Now you’ll be asked to agree to the Terms of Services for Google Tag Manager. Click Yes and also make sure to check the box at the bottom that says I also accept the Data Processing Terms as required by GDPR.
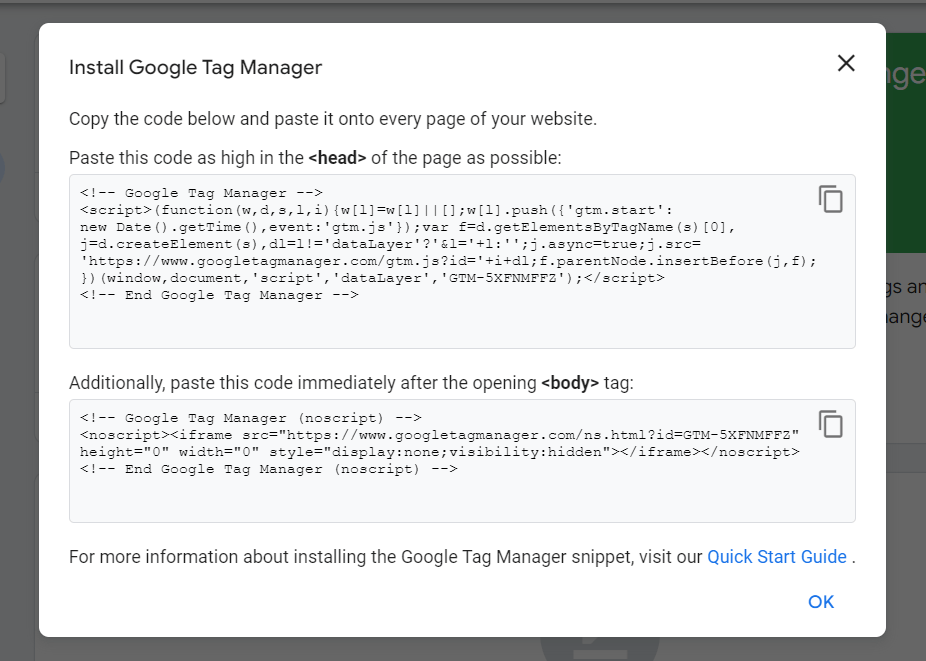
Then you’ll be given two tracking code snippets that you’ll need to enter onto your site’s code. There are a few different ways you can go about doing this, but we recommend using WPCode.
For more details, follow our guide on how to install Google Tag Manager in WordPress.
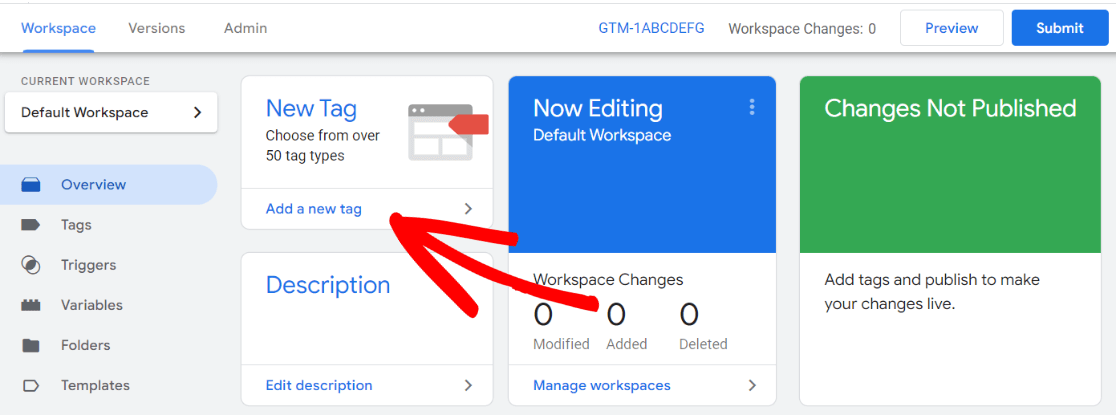
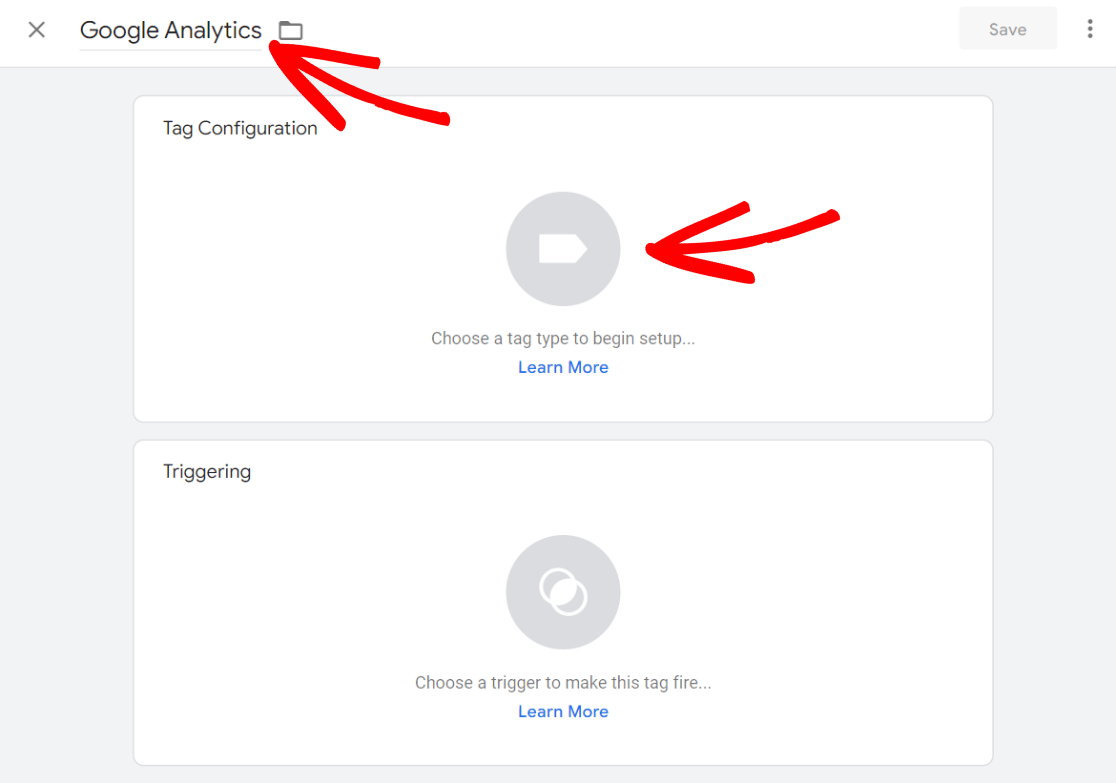
After you’ve successfully entered the code snippets on your website, you will have to set up a tag. Start by clicking New Tag.
First, give your tag a name like Google Analytics. Then click on the big icon where it says choose a tag type to begin setup.
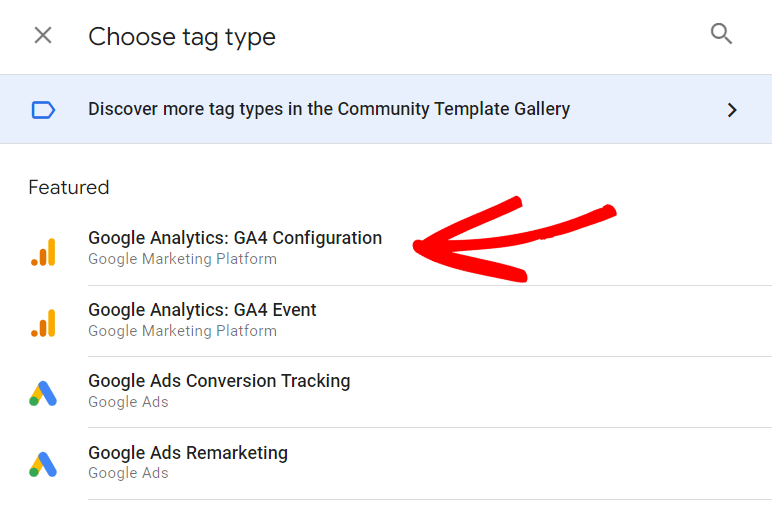
Then select Google Analytics: GA4 Configuration.
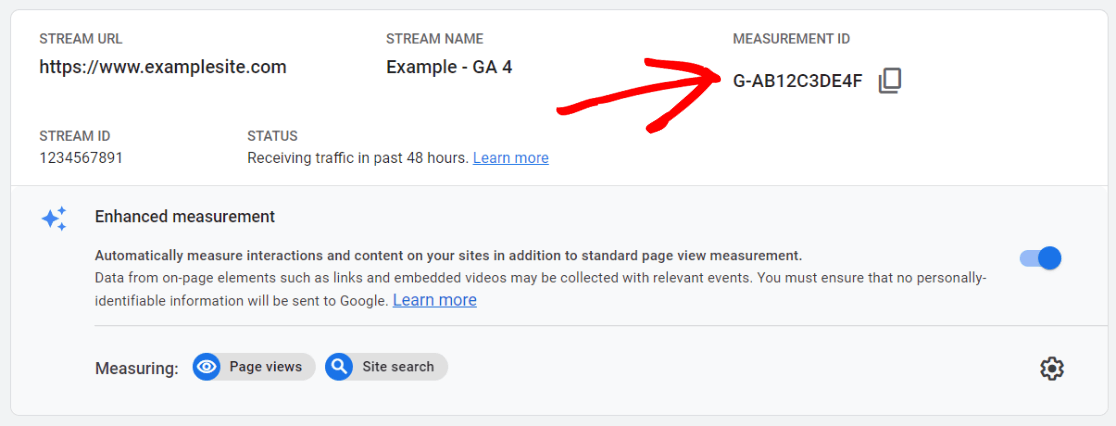
Now, locate your GA4 measurement ID in your Google Analytics account under Admin » Data Streams » Your active stream:
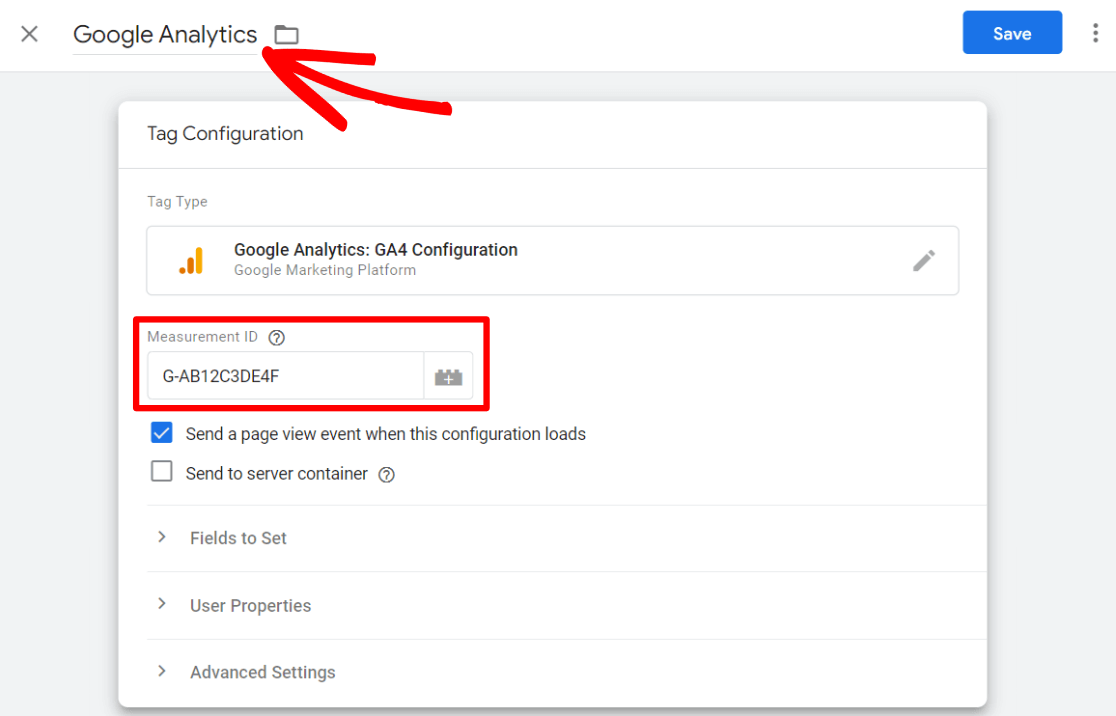
After that, head back to Tag Manager to give a name to your variable and paste your Measurement ID. There are more settings you can choose from, but you can leave them as it is for now.
Now, we’ll set up the trigger that tells our tag when to fire. Since our tag is Google Analytics, we want to make sure it fires all the time, on every page! Scroll down and click the Triggering box.
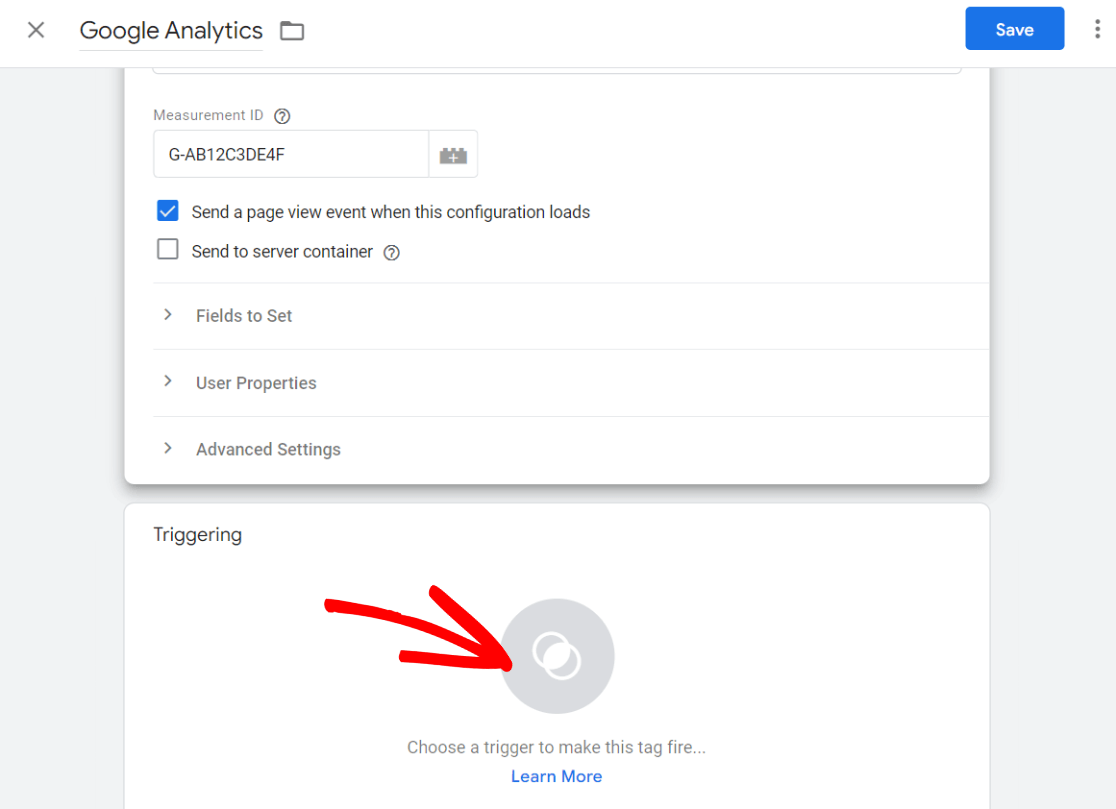
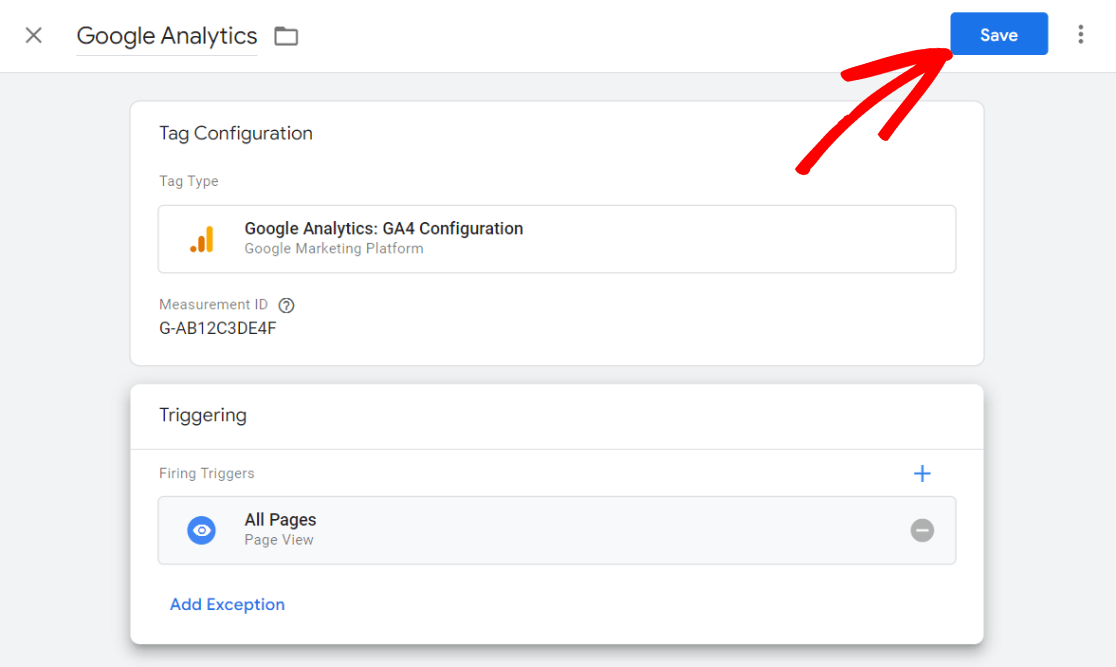
You’ll see that All Pages is a pre-made trigger that you can choose. Go ahead and click it.

Now simply click the Save button at the top and you’re ready to publish your Google Analytics tag.
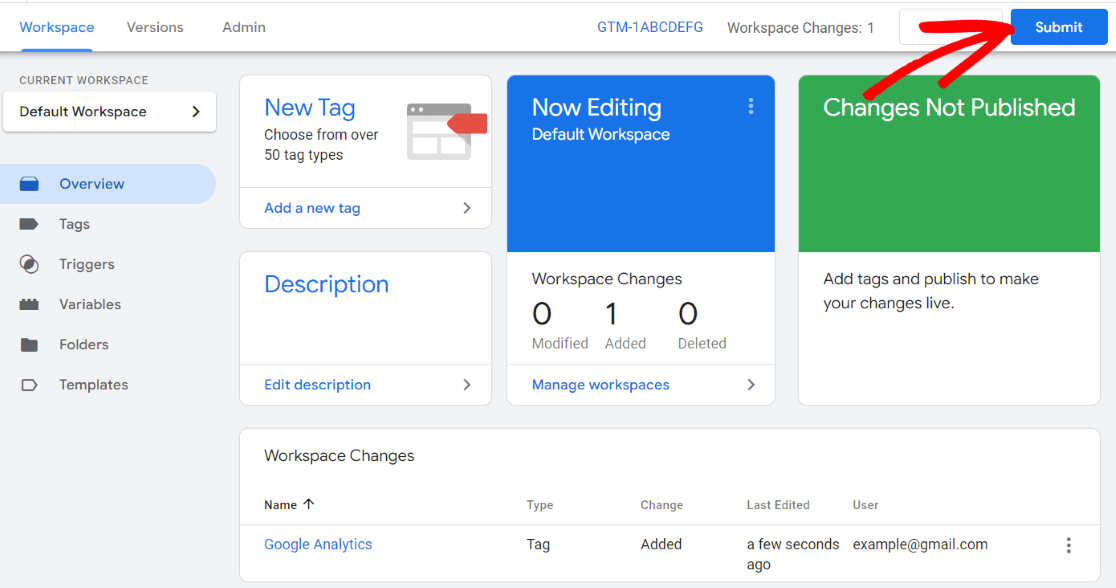
Your tag isn’t live yet! Make sure you hit the Submit button on the Google Tag Manager dashboard.
That’s it!
You’ve successfully implemented Google Analytics with Google Tag Manager. Your Google Analytics tag will execute on every page.
Google Analytics 4 + Google Tag Manager FAQ
What’s the difference between GA4 and Google Tag Manager?
The difference between GA4 and Google Tag Manager is that GA4 is your measurement tool, while Google Tag Manager is just how you install the GA4 tracking code on your website.
Can I use GA4 without Google Tag Manager?
Yes, you can use GA4 without Google Tag Manager! Just install the tracking code right into your website header, or use a plugin like MonsterInsights to make Google Analytics 4 super easy.
How do I set up Google Tag Manager with GA4?
- Set up your Google Tag Manager account, if you haven’t yet.
- Create a new Google Analytics: GA4 Configuration tag and copy paste your Measurement ID into the Measurement ID field.
- Set up a Trigger – choose the All Pages trigger.
- Click Submit to publish your GA4 tag.
We hope this tutorial helped you to add GA4 to Google Tag Manager easily.
Interested in learning more about how easy MonsterInsights makes Google Analytics? Check out Your Ultimate Guide to MonsterInsights Dashboard Reports.
Not using MonsterInsights yet? What are you waiting for?
And don’t forget to follow us on Twitter, Facebook and YouTube for more helpful Google Analytics tips.

Hi,
will there be any consequences if I implement both Monster Insight and Google Tag Manager?
Hi Vincent, thanks for stopping by the blog 🙂 If you’re implementing Google Analytics via MonsterInsights, there’s no need to do it with Google Tag Manager as well. In fact, implementing Google Analytics with both MonsterInsights and Google Tag Manager can skew your stats, since the tracking code will be on your site twice.
However, if you’re using MonsterInsights, you can still use Google Tag Manager to implement other code (besides Google Analytics) without any issues.
Hope that answers your question! Feel free to get in touch with support if you need more details.
Hi, I’m using the Monsterinsights plugin on Wordpress – I presume the same applies – if I’ve installed and activated the plugin I don’t need to add my gtag / gcode to the site – Insights takes care of that right?
Yep that’s correct, MonsterInsights takes care of outputting any code required.
Super Helpful Thank you !
That’s really nice post. I appreciate your skills. Thanks for sharing.
Little Serious Problem : Google Analytics provide now GA-XXXXXXX tag not UA-XXXXXX and Monsterinsight is not perform with that.
Hey Umesh! Thanks for stopping by our blog. Yes, Google Analytics is encouraging all new properties to be GA4. However, you can still create a Universal Analytics (UA) property to use with MonsterInsights. For instructions on how to do this, read How to Add Google Analytics to WordPress. Please note, the team at MonsterInsights is working hard with Google to add GA4 compatibility. Stay tuned for any updates on that!
Great article.