
Are you thinking of adding a WordPress gallery to your site?
A gallery is a great way to organize your images neatly in rows and columns. This way, you can show lots of pictures without using too much space and make it look professional. Plus, it’s easier for people visiting your site to look at them all.
In this guide, we’ll walk you through how to make a great image gallery in WordPress. We’ll make it simple, so it will be easy to set up and make your photos and website look amazing!
The Benefits of an Image Gallery in WordPress
Adding a WordPress photo gallery has lots of perks. Here’s why it’s a great idea:
- Looks more professional and neat: When visitors see your page, they’ll like how clean and organized it looks. Your gallery will make a great first impression!
- Show lots of photos: You can display many pictures without making your page look crowded. It’s a smart way to share more without overwhelming your visitors.
- Boosts your sales: If you have an online store, you can use a special plugin to link photos in your gallery to your products. It’s a great way to encourage people to buy what they see.
- Great for SEO: Search engines like websites with lots of photos. By adding image galleries with alt descriptions, you can improve your site’s SEO.
Creating a gallery in WordPress is a breeze, especially with the Gallery block in the Gutenberg editor. And if you want more cool features, there are plugins for that, too!
Now, let’s look at how to add a gallery to WordPress.
How to Create a WordPress Gallery
WordPress is super handy for adding a single image to your posts and pages. You just pop in an Image block and upload your photo. Easy!
But what if you have many images? Putting them one after another can make your site look cluttered, and visitors have to scroll a lot to see everything.
That’s where a gallery comes in!
In this part of the guide, we’ll show you two easy methods.
First, we’ll go step by step using the WordPress editor, which is built right into your site. It’s simple and quick.
Then, we’ll also walk you through how to use a plugin for your gallery. This gives you some extra cool features to play with and makes your gallery look more professional.
By learning both ways, you can pick the one that fits your needs the best.
Using the WordPress Editor
Creating an image gallery in WordPress using the block editor is straightforward, but remember, this method offers only basic features.
For instance, it lacks advanced customization options for layouts, responsive design for different devices, and additional functionalities like lightbox effects or albums, which can limit how you show your images.
To create a gallery that’s more professional and has more features, jump to our section on using a plugin for WordPress galleries.
Now, let’s take a look at how to do it in the WordPress editor.
- Step 1: Log In to WordPress
- Step 2: Go to a Post or Page
- Step 3: Click Add Media
- Step 4: Create Your Gallery
- Step 5: Edit Gallery
Step 1: Log In to WordPress
To start, you need to log into your WordPress dashboard. This is where all the magic happens. You can manage your posts, pages, and galleries from here.
Step 2: Go to a Post or Page
Next, decide where you want your gallery. You can either add it to a new post or page or edit an existing one.
On the left side of your dashboard, you’ll see options for ‘Posts’ or ‘Pages’.

Click on one of these, then either select Add New to create a new post/page or choose an existing one to edit.
Step 3: Click Add Media
Once you’re in the post or page editor, place your cursor where you want the gallery to appear. In the top area, you’ll find the + button.
Scroll down or search until you see the Media section. There you have a block called Gallery.

Click on it to start the process of creating your gallery.
Step 4: Create Your Gallery
Now it’s time to create your gallery.
You can choose to upload new images from your computer or pick from images you’ve already uploaded to your WordPress media library.
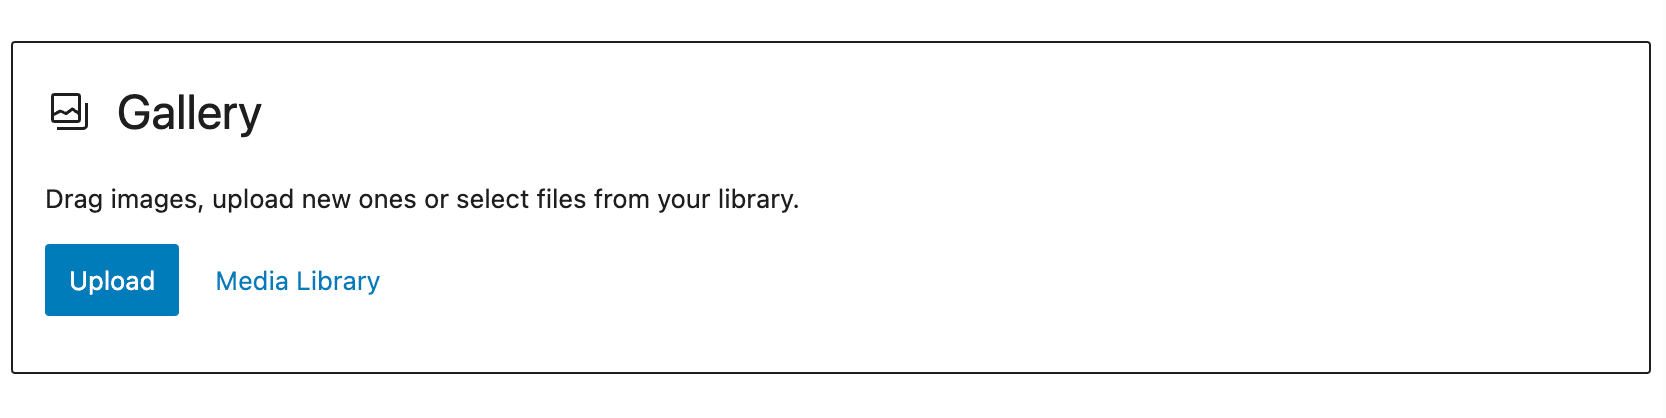

If you’re uploading new images, you can click Upload and select the images from your computer.
Remember, you can upload multiple images at once by holding down the Ctrl key and clicking on each image.
If you’re selecting from the media library, click on the images you want to include in your gallery.

As you select images, you can add alt text, titles, and captions on the right-hand side panel.
Step 5: Edit Gallery
After selecting your images, click on the Create a new gallery button in the bottom right corner.
You’ll be taken to the ‘Edit Gallery’ page. Here, you can rearrange the order of your images and add or edit titles, captions, descriptions, and alt text.

You can also decide how many columns you want in your gallery and choose whether to link each photo to an attachment page, a media file, or not at all.
Adjust the size of your images if necessary.
Once you’ve customized your gallery to your liking, click the Insert gallery button to add it to your post or page.

If you need to make any further edits, click on the gallery in your editor and use the pencil icon to adjust.
When everything looks perfect, hit Publish or Update.
Your new WordPress photo gallery is now live for all your visitors to see.
That was pretty straightforward, right?
However, you might quickly realize that your options are limited, and your gallery might look a bit basic.
Let’s dive into how to create a more professional-looking gallery in WordPress with a plugin.
Using a Plugin: Envira Gallery
If you’re aiming to create an image gallery on your WordPress site that’s not just functional but also visually striking, then exploring the use of a plugin is an excellent choice.
Plugins can really improve your gallery, adding many features that make your site look more professional and modern.
Among the different options available, we’re going to focus on the Envira Gallery plugin. It is the best WordPress gallery plugin on the WordPress market.

Envira stands out because you can easily create galleries that are both fully responsive and aesthetically pleasing.
It’s incredibly fast and comes loaded with features such as a lightbox popup, smooth image navigation, a drag-and-drop builder, and a selection of professional gallery templates.
Let’s explore how Envira can elevate the appearance and functionality of your WordPress image gallery.
- Step 1: Get and Install the Envira Plugin
- Step 2: Verify Your License
- Step 3: Create Your Gallery
- Step 4: Configure Your WordPress Gallery
- Step 5: Embed Your Gallery on Your WordPress Site
Step 1: Get and Install the Envira Plugin
The first step in making your WordPress site stand out with the Envira Gallery plugin is to get your hands on the plugin itself.
Start by visiting their website and navigating to the pricing page.

Take a moment to look over the different plans they offer. Each plan comes with its own set of features and benefits, so choose the one that best fits your needs and budget.
There is also a free version available, but it has fewer features. We will be using the Pro version in this guide.
After your purchase is complete, you’ll be taken through a guide to log in and download your plugin.
The next part is getting the plugin up and running on your WordPress site. To do this, you’ll need to install and activate the plugin on your WordPress site.
If you are not sure how to do so, read this guide on how to install a WordPress plugin.
Step 2: Verify Your License
Once you’ve activated the Envira Gallery plugin, the next step is to verify your license. This is a quick and easy process:
Go to your WordPress dashboard and find Envira Gallery on the menu.
Click on Settings under Envira Gallery.

Now, you need your license key. You can find this on the Envira Gallery website, in your account, or in the confirmation email you received after purchase.
Copy the license key from there and paste it into the license field on the Envira Gallery settings page in WordPress.
After you paste the key, remember to click Verify Key and save your changes.
Step 3: Create Your Gallery
Now that your Envira Gallery plugin is set up and your license is verified, it’s time to create your first gallery. This is where you get to showcase your images beautifully.
First, go to your WordPress dashboard and click on Envira Gallery in the sidebar. Then, select Add New to begin.

At the top of the page, you’ll see a space to name your gallery. Choose a title that reflects what your gallery is about.
Now, let’s add some photos!
Click the Select files from computer button to upload images from your computer. If you want to use images that are already in your WordPress media library, click on Select files from other sources.
After uploading, scroll down to the Gallery section. You’ll see all the photos for your gallery here. If you need to edit any image details, click the pencil icon on the top of each image.

This opens the ‘Edit Metadata’ section.

In the ‘Edit Metadata’ section, you can add captions, titles, and alt text for each image. This is not just for looks; it’s also good for SEO.
When you’re done editing, hit the Save Metadata button.
Now, let’s look at some configurations and features that will make your gallery stand out.
Step 4: Configure Your WordPress Gallery
Now that you’ve created your gallery, it’s time to customize how you want it to look.
On your gallery editing page, you’ll see a sidebar on the left. Click on the Configuration tab. This is where you’ll find a bunch of settings.

In this section, you can change the layout of your gallery. This includes choosing a template, setting the number of columns, image sizes, how images load on the page (lazy loading), and where to position titles and captions.
You can also adjust margins, heights, and thumbnail sizes to get everything looking just right.
Next, head over to the Lightbox tab in the sidebar. Here, make sure to check the Enable Lightbox option.

This cool feature lets visitors click on images to see them in a larger view without leaving the page. It’s great for giving a closer look at your pictures.
The default settings of Envira are usually a good fit for most websites. But take a moment to look through them. You might find something you want to change to better match your site’s style.
Don’t forget about mobile users! Click the Mobile tab to set up how your gallery will look on smaller screens.

Here you can adjust image dimensions for mobile devices, turn the Lightbox feature on or off for mobile, and decide if you want to show image captions on mobile.
There’s a Misc section where you can dive into more options. You can set a gallery slug (a URL-friendly version of the gallery’s name) and even add custom CSS code if you’re feeling adventurous.

Once you’re satisfied with all your settings, hit the Publish button at the top of the page. This will save all the changes you’ve made.
You’ve now configured your WordPress gallery using Envira.
Step 5: Embed Your Gallery on Your WordPress Site
With your gallery now fully set up and configured, the final step is to embed it into a post or page on your WordPress site.
First, decide where you want your gallery to appear. Open up a post or page where you think the gallery would be a perfect fit.
Once you’re in the post or page editor, click the + button located in the top left corner of the screen.
This will open the block menu.
Scroll through or search for the Envira Gallery block and add it to your page or post.
After adding the Envira Gallery block, you’ll see a dropdown menu within the block. Click on this menu and select the gallery you created.

This will embed the gallery into your post or page.

Now that your gallery is in place, don’t forget to save your work.
Click on the Update or Publish button at the top of the page. This will make sure your gallery is live on your site.
Go ahead and view your post or page to see your WordPress image gallery in action.
You’ll notice that when you click on any image in the gallery, it will open in full size with the lightbox effect.

This makes it easy for visitors to view your images in detail. Plus, they can navigate through the images in the lightbox using the slider or by scrolling, depending on which type of gallery you have created.
And that’s it!
You’ve successfully added your beautifully crafted image gallery to your WordPress site.
Your visitors can now enjoy browsing your images in an interactive, responsive, and professional-looking gallery.
Should You Use the WordPress Editor or a Plugin?
When it comes to creating an image gallery on your WordPress site, you might wonder whether to use the built-in WordPress editor or a plugin like Envira Gallery.
Both have their pros and cons, and the best choice depends on your specific needs and circumstances.
Using the WordPress editor is straightforward and doesn’t require any additional installations. It’s a good option if you’re on a tight budget or just starting out.
However, you may soon find that it has limitations. For instance, your images in the WordPress editor gallery might not be clickable, or they might open on a new page, which isn’t user-friendly.
This might frustrate your visitors, and they might choose to exit the page. This creates a bad user experience, and it’s not great for SEO.
Additionally, the appearance of your gallery heavily depends on the theme you’re using. This can make it challenging to maintain a consistent look, especially across different devices.
Customizing the gallery for mobile view can also be tricky, and you may struggle with adjusting the size of your images.

On the other hand, plugins like Envira Gallery offer a more polished and professional solution.
They often provide a more user-friendly experience, with features like clickable images that open in a lightbox rather than redirecting to a new page. This keeps visitors on your site and engaged with your content, which is good for SEO.
Plugins also offer more customization options, allowing you to adjust the gallery’s appearance to match your site’s theme and ensure it looks great on both desktop and mobile devices.

Lastly, plugins often allow you to organize your galleries more efficiently with options like making an album, using tags, and more.
This makes it easier to manage and reuse galleries without having to recreate them each time.
Frequently Asked Questions
What is a gallery in WordPress?
A gallery in WordPress is a feature that lets you display multiple images on your website in an organized and appealing layout, such as in rows and columns.
What is the purpose of a gallery on a website?
A gallery showcases multiple images in a structured layout, enhancing visual appeal and making it easier for visitors to browse and appreciate a collection of photos or a portfolio.
How do I create a gallery in WordPress without a plugin?
To create a gallery without a plugin, use the WordPress editor. Add a new post or page, click Add Media, select Create Gallery, choose your images, and insert the gallery.
How do I make a gallery grid in WordPress?
In the WordPress editor, after adding images to your gallery, you can adjust the number of columns to create a grid layout. This organizes your images in a grid pattern.
How do I make a responsive gallery in WordPress?
To create a responsive gallery, use a plugin like Envira Gallery that supports responsive design. This ensures your gallery adjusts its layout and size based on the viewer’s device screen.
That’s a wrap on creating your WordPress image gallery! If you enjoyed this tutorial, make sure to read the following articles:
16 Best WordPress Plugins for Photographers
8 Proven Ways to Increase User Engagement on Your Website
10 WordPress SEO Optimization Tips to Grow Your Business
Not a user of MonsterInsights yet? Today is the day to start!
If you’re interested in more WordPress tips, make sure to subscribe to our YouTube Channel and follow us on Twitter and Facebook!