Are you hoping to add a website visitor counter to your website? With a website visitor counter (also called a web page view counter), you can show your visitors how much traffic your website gets.
In this article, we’ll show you how to add a website visitor counter to your WordPress website in a few different ways.
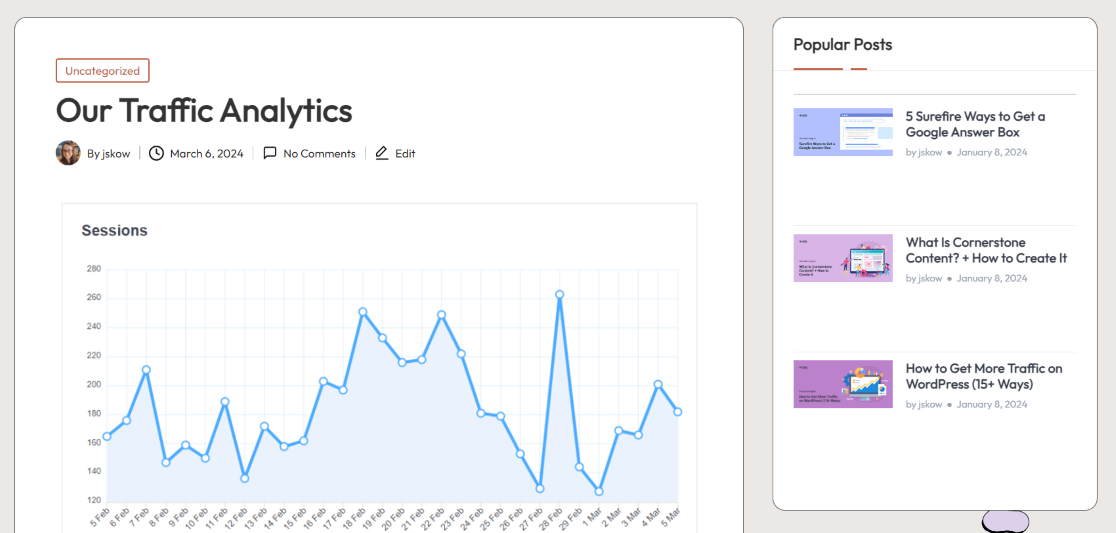
First, we’ll go over how to show your Google Analytics stats on your website. This option is great if you want to show potential affiliates or advertisers what kind of traffic you get or if you want to create a password-protected report for others in your company or organization to check whenever they’d like. It’s also great if you just want your visitors to see your up-to-date traffic.
Then, we’ll take a look at an option if you’re just looking for a traditional web page hit counter that’s not connected with Google Analytics.
Website Visitor Counter Video Walkthrough
How to Show Google Analytics Stats on Your Website
Displaying Google Analytics stats on your site is a great way to show visitors to your site how much traffic you get.
To add Google Analytics stats to your site, you can use MonsterInsights.
MonsterInsights is the best Google Analytics plugin for WordPress. It allows you to easily connect your WordPress site with Google Analytics so you can view all the data that matters most right in your WordPress dashboard.
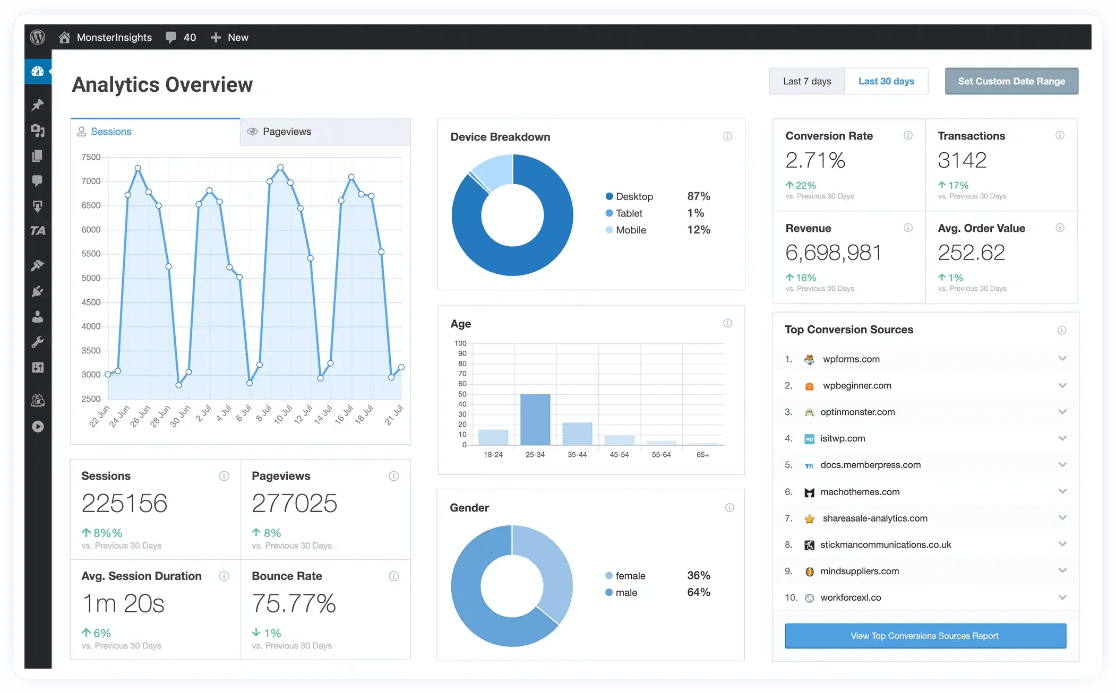
Plus, with the click of a button, you can set up sophisticated tracking features such as eCommerce tracking, form tracking, custom dimension tracking, extra event tracking, outbound link tracking, and much more.
Plus, you can use the MonsterInsights Site Insights block to add your Google Analytics stats to your site on any page or post with the block editor.
Besides your traffic stats, you can display your visitors’ countries, average session duration, bounce rate, new vs. returning visitor rate, device, age/gender breakdowns, and more.
To get started, grab a MonsterInsights license at the Plus level or above.
For help installing and setting up MonsterInsights, check out How to Add Google Analytics to WordPress.
Once you’ve got it all set up and connected to Google Analytics, you can add Google Analytics stats to your website.
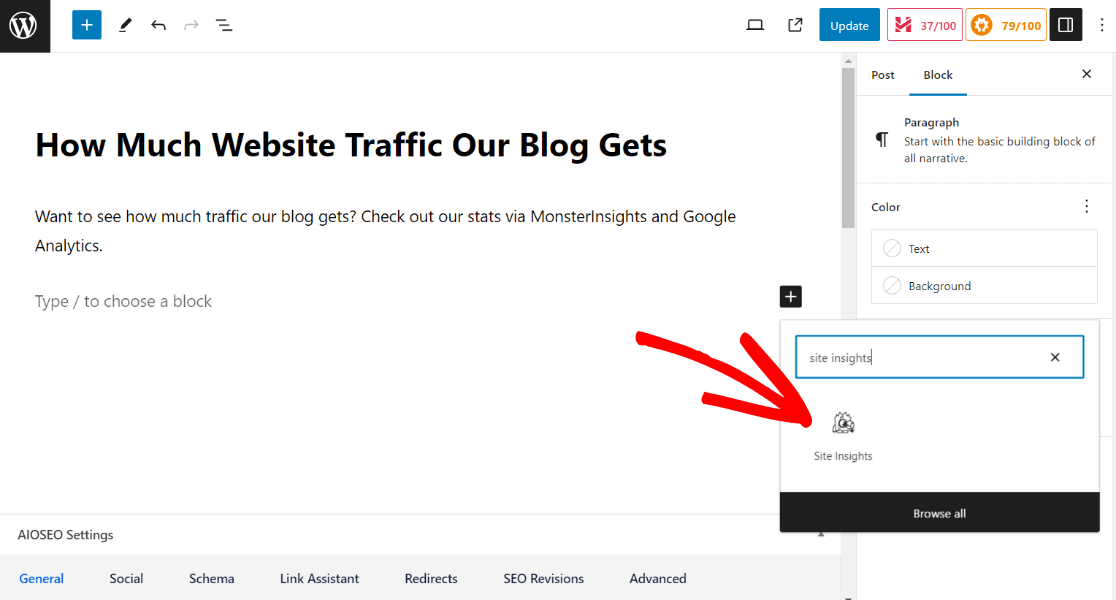
Simply go to any post or page, click to add a block, and search for and add the Site Insights block:
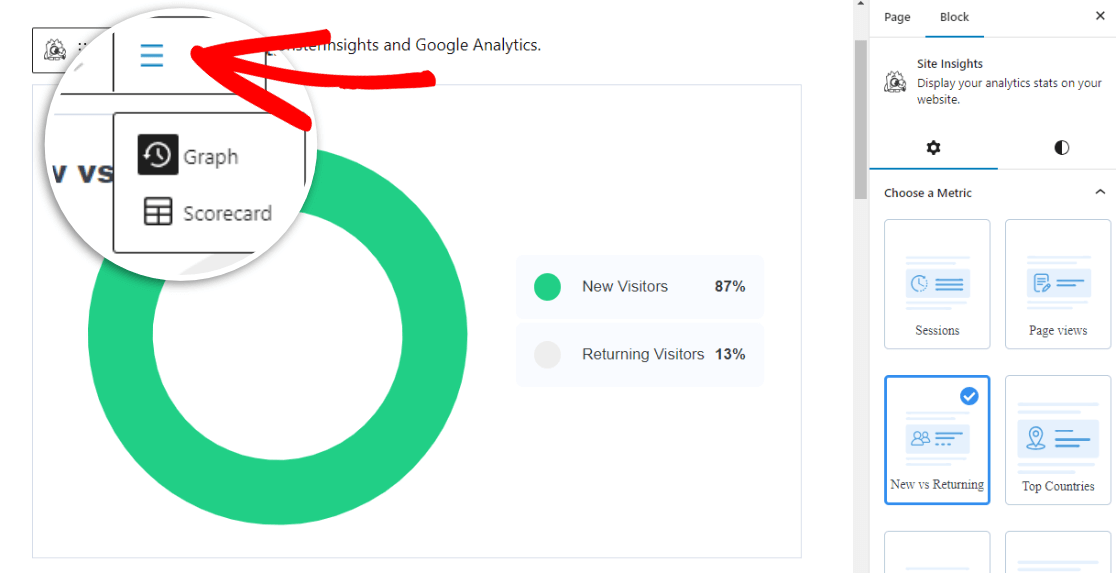
Then, choose the metric you want to add from the right side panel (scroll to the right for more options) and choose whether to add the Scroecard or Graph version to your post. To switch between Scorecard and Graph, click on the three lines in the settings bar:
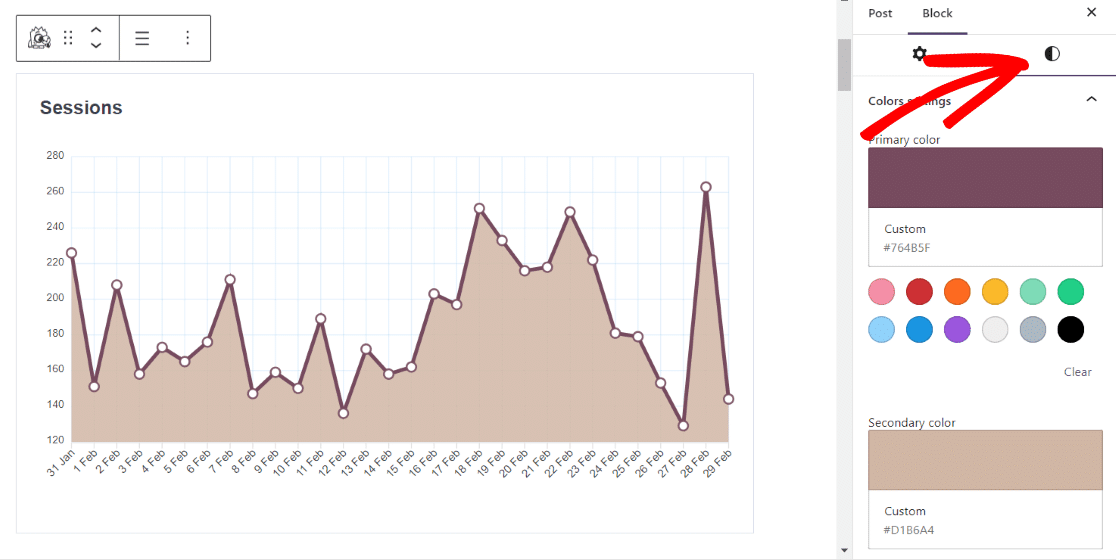
If you’ve chosen a graph, you can change the color if you’d like by clicking on the style icon in the sidebar:
That’s it! Your stats will be shown in your page or post once you click Publish or Update.
How to Add a Free Website Visitor Counter
If you’re looking instead for a free, basic website visitor counter to display your number of website visitors, you can follow this tutorial.
To add a basic visitor counter, we’ll be using the Elfsight Visitor Counter widget.
The Visitor Counter widget is a widget that lives outside of your website that you add to your site using a shortcode. The shortcode can be embedded in any widget area, post, or page.
Please note that the free version that we’re going to use in this tutorial goes up to 200 views per month, and only counts views starting from the time when you embed it. You are able to change the number it starts at, though — otherwise, it starts at 0.
To get more views per month. choose one of the available paid plans.
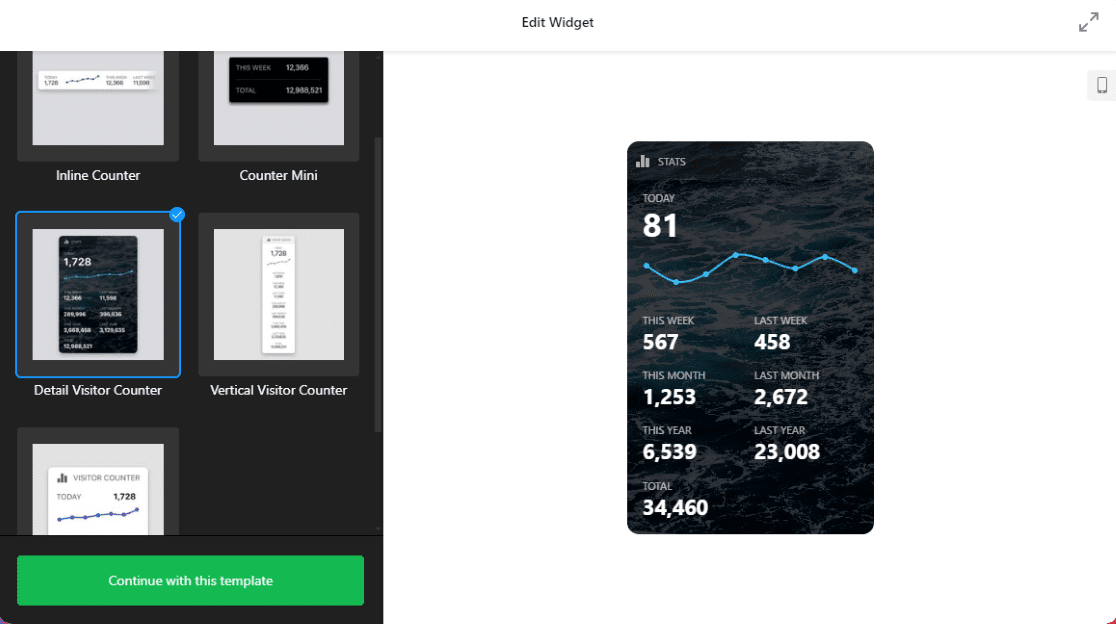
To get started, visit the Visitor Counter site and choose a style from the 5 available templates. When the one you want is selected, click the green Continue with this template button:
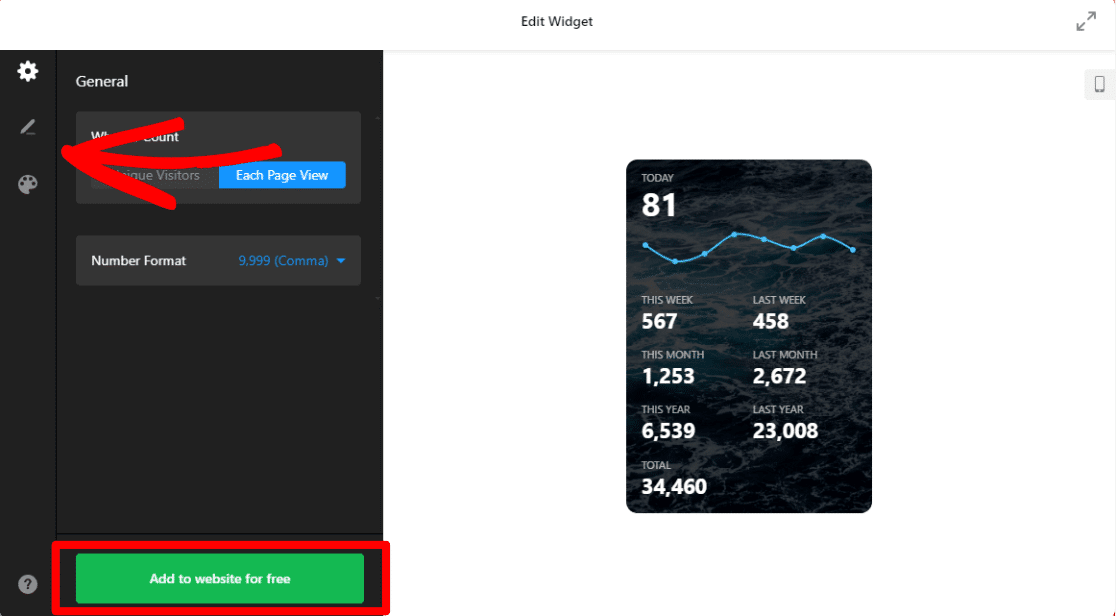
Next, you’ll be able to personalize your widget by choosing a layout, number style, background, colors, and more by clicking through the three tabs on the left. Go through all of the options and make your choices, then click the green Add to website for free button:
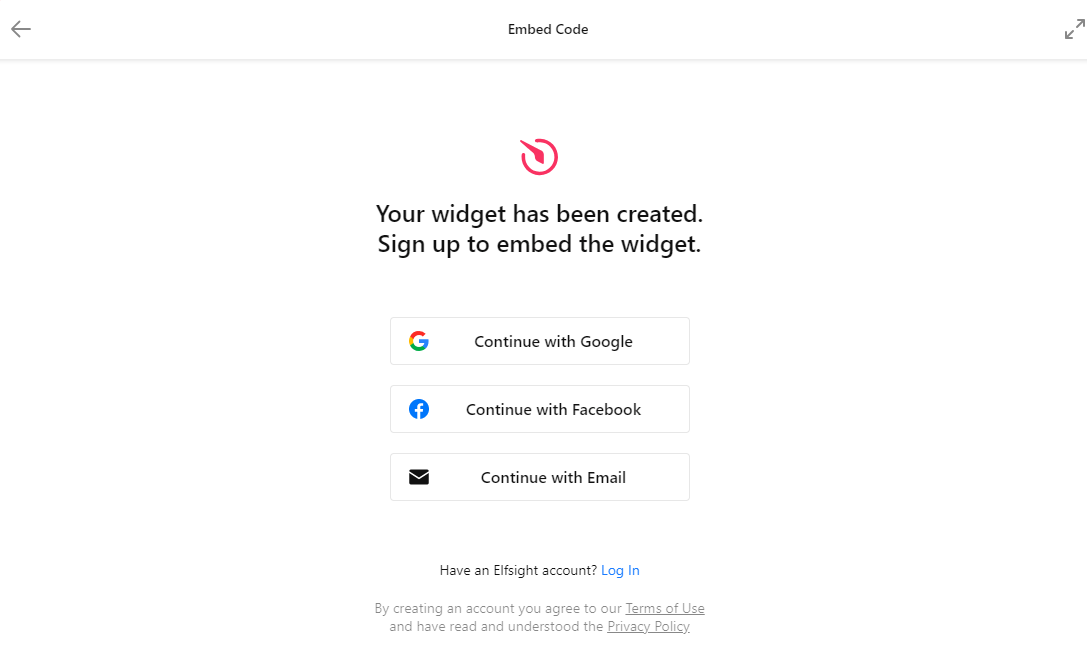
Now, you’ll need to either log in or create an account:
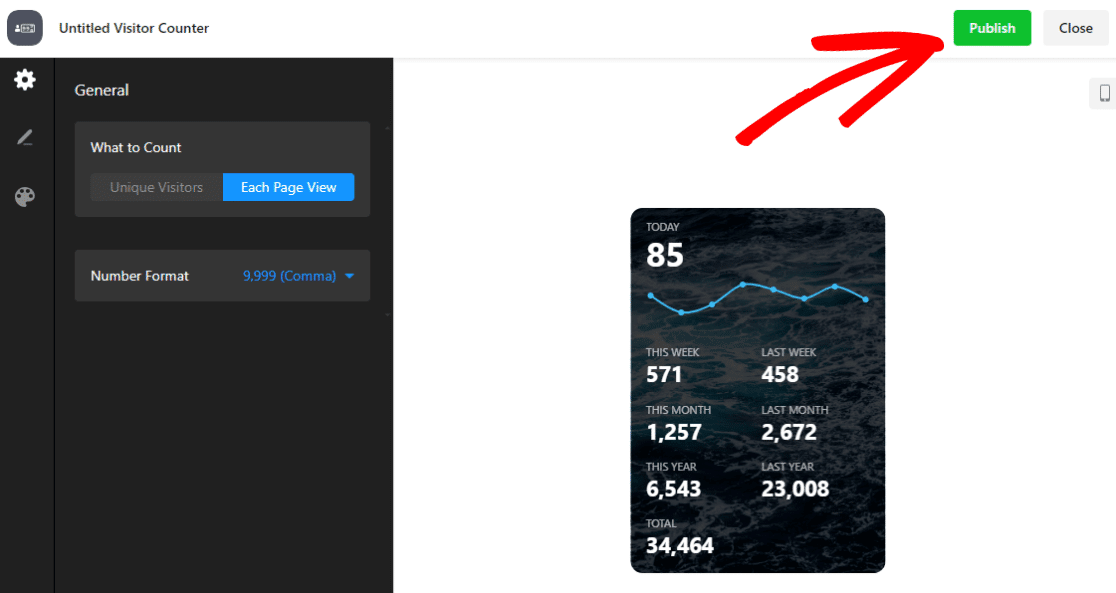
Then, you can go ahead and click the green Publish button:
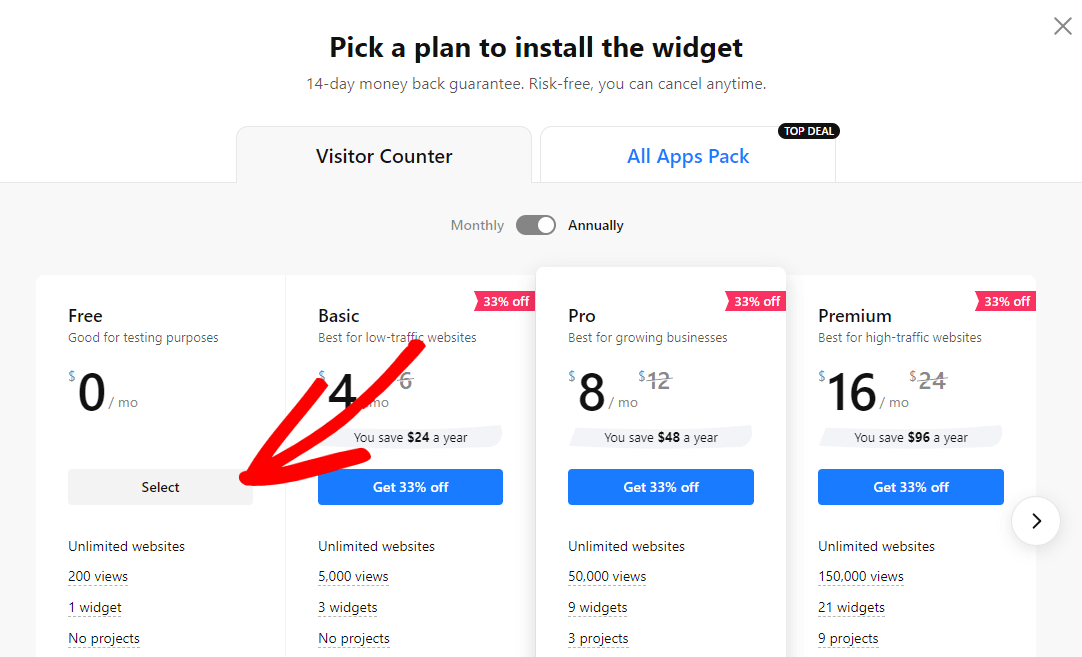
On the next screen, you’ll be prompted to pick a plan. Go ahead and choose the free one by clicking Select:
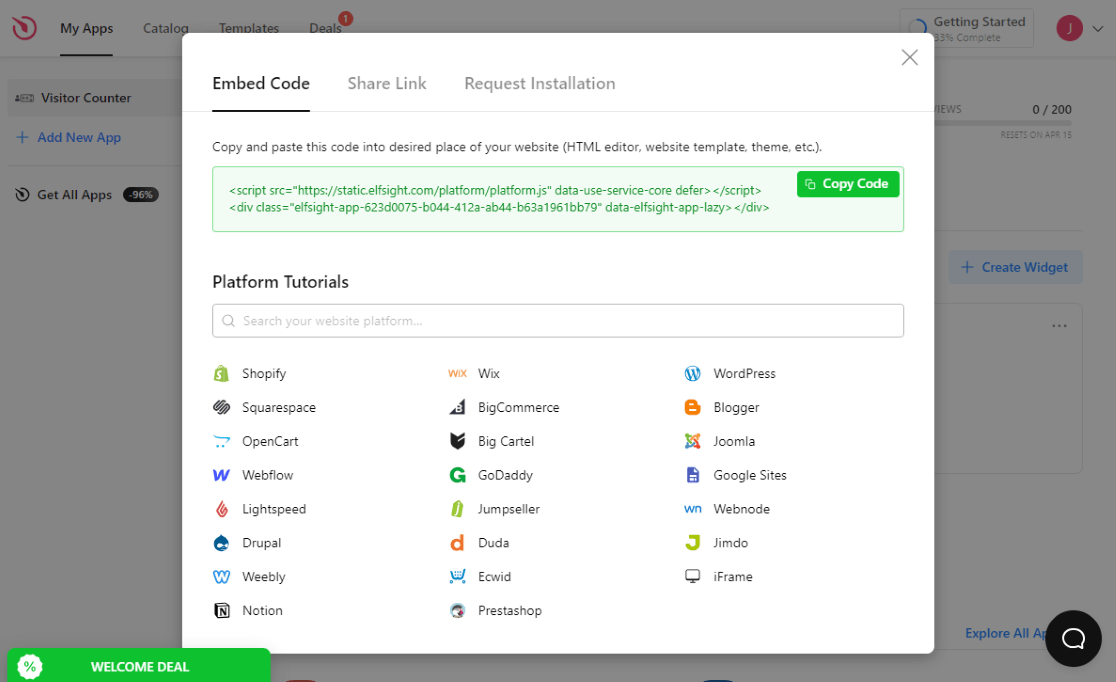
That will send you to a screen where you can copy the embed code in the green box at the top. Go ahead and copy it.
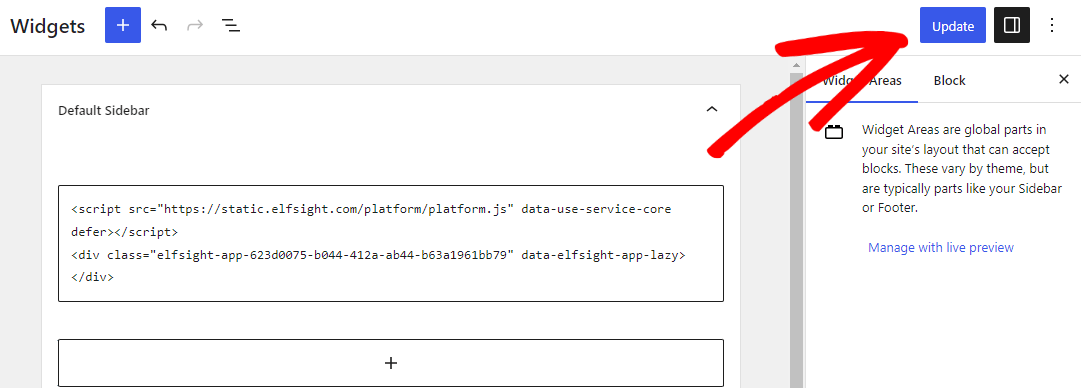
Finally, head to your website, open the Appearance » Widgets screen, and add a Custom HTML widget where you want your visitor counter to go. Or, open the page or post you want to embed it in and add an HTML block. Paste your HTML code into the widget or block and click Update:
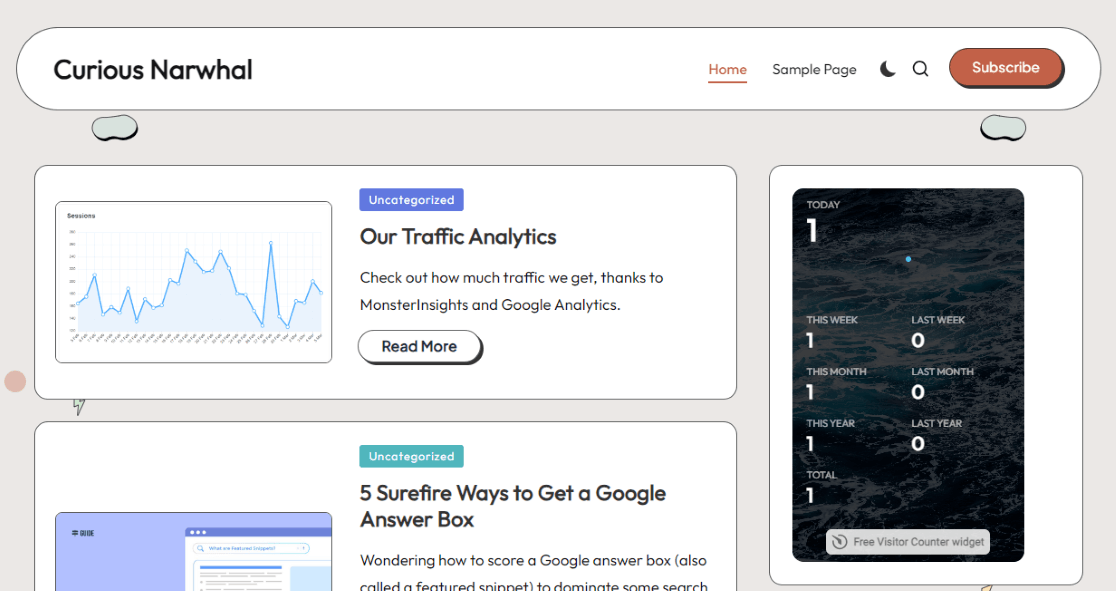
That’s it! Your widget will now be displayed on your website:
We hope you liked our tutorial on adding a web page view counter to WordPress. You might also want to check out:
7 Website Traffic Checkers: How Much Traffic Does a Website Get?
How to Track Website Traffic Using Google Analytics (2024)
WordPress Widgets Beginner’s Guide: 16+ Best Widgets for 2024
Not using MonsterInsights yet? What are you waiting for?
And don’t forget to follow us on Twitter, Facebook and YouTube for more helpful Google Analytics tips.

