I know firsthand how confusing it can be to set up AMP tracking and get accurate analytics data from your Accelerated Mobile Pages. After Google officially announced GA4 support for AMP in June 2024, the tracking landscape changed significantly, but many site owners are still struggling to set it up.
In this comprehensive guide, I’ll walk you through exactly how I set up AMP tracking in Google Analytics 4 and WordPress, sharing the methods that have consistently worked for me.
Table of Contents:
What Is Google AMP?
Google’s Accelerated Mobile Project (AMP) is an open-source framework I’ve seen transform mobile user experiences since its launch in 2015.
When I first started implementing AMP, I was amazed by the performance improvements—AMP pages can load up to 10 times faster than regular web pages, according to Google.
AMP works by creating stripped-down versions of your web pages that use streamlined HTML, restricted CSS, and lazy-loaded images.
I’ve watched this approach dramatically reduce loading times, which is crucial considering 53% of mobile site visitors leave a page if it takes longer than 3 seconds to load.
Why I Recommend Using Google AMP
Through years of implementing AMP pages, I’ve observed consistent benefits that make the effort worthwhile:
Lightning-Fast Loading Speeds: I’ve seen AMP pages achieve loading times under 1 second consistently. This matters because pages that load in just 1 or 2 seconds have an average bounce rate of 9%, while pages that take 5 seconds have a bounce rate of 38%.
Improved Mobile User Experience: The instant loading eliminates the frustration that comes with slow mobile sites, where 40% of online users will leave a site if it takes more than 3 seconds to load.
Enhanced SEO Performance: While AMP itself isn’t a direct ranking factor, page speed is. Google has consistently rewarded fast-loading pages, and I’ve seen AMP implementations contribute to better search visibility.
Increased Engagement: In my experience, faster-loading pages lead to more page views per session. Shoppers visit 8.9 pages when the load time is 2 seconds, versus just 3.3 pages when the load time is 8 seconds.
The Challenge: AMP Tracking Complexity
Here’s where I’ve seen most website owners struggle: AMP uses a completely different analytics framework than standard web pages. You can’t simply use your regular Google Analytics tracking code on AMP pages—they require a specialized <amp-analytics> tag.
I’ve spent countless hours troubleshooting AMP tracking issues for clients, and I can tell you that manual implementation often leads to:
- Double-tracking sessions when users navigate between AMP and non-AMP pages
- Missing conversion data
- Inaccurate user journey tracking
- Complex debugging processes
That’s why I always recommend using MonsterInsights for WordPress sites—it eliminates these headaches entirely.
How to Set up AMP Tracking in Google Analytics
- Install the Official AMP Plugin for WordPress
- Install MonsterInsights and Connect Google Analytics
- Install the MonsterInsights AMP Addon
You can track your AMP-enabled pages with Google Analytics, but the setup can be a confusing task for beginners. That’s because AMP uses a separate analytics snippet than your standard Google Analytics tracking code.
To set up AMP tracking without a plugin, your developer would have to modify the Google Analytics tracking code manually. Even then, sometimes it still requires additional troubleshooting to get it to work right.
Thankfully, MonsterInsights can help you easily set up AMP tracking in Google Analytics and WordPress with just a couple of clicks. With our Google AMP addon, you can accurately track your web traffic.
Here are a few key features of the MonsterInsights Google AMP addon:
- It stops double-tracking visitors: By default, when a user visits an AMP page and then a normal page (or vice versa), Google Analytics counts it as 2 different sessions. But the MonsterInsights Google AMP addon fixes this issue and tracks it as a single session.
- It supports other MonsterInsights features: In your AMP pages, you can adjust sample rates with the Performance addon or track your visitors with different dimensions with the Custom Dimensions addon.
Now, follow these steps to set up AMP tracking in Google Analytics.
Step 1: Install the Official AMP Plugin for WordPress
The first thing you’ll need to do is install the official AMP plugin on your WordPress site. Simply go to Plugins » Add New from your admin area and search AMP in the search bar.
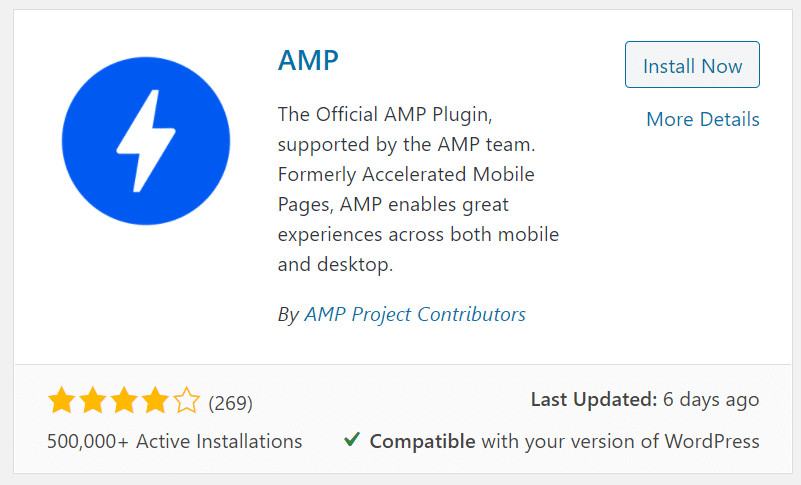
Click Install Now to install the plugin. After that, wait for a few seconds and then Activate the plugin.
The plugin will automatically create AMP versions for your posts and pages. If you want, you can type /amp/ at the end of the URL of a post to check its AMP version.
Step 2: Install MonsterInsights and Connect Google Analytics
Once you’ve installed the AMP WordPress plugin, you’ll now have to install MonsterInsights on your site.
MonsterInsights is the best Google Analytics plugin for WordPress. It allows you to easily connect your WordPress site with Google Analytics so you can view all the data that matters most right in your WordPress dashboard.
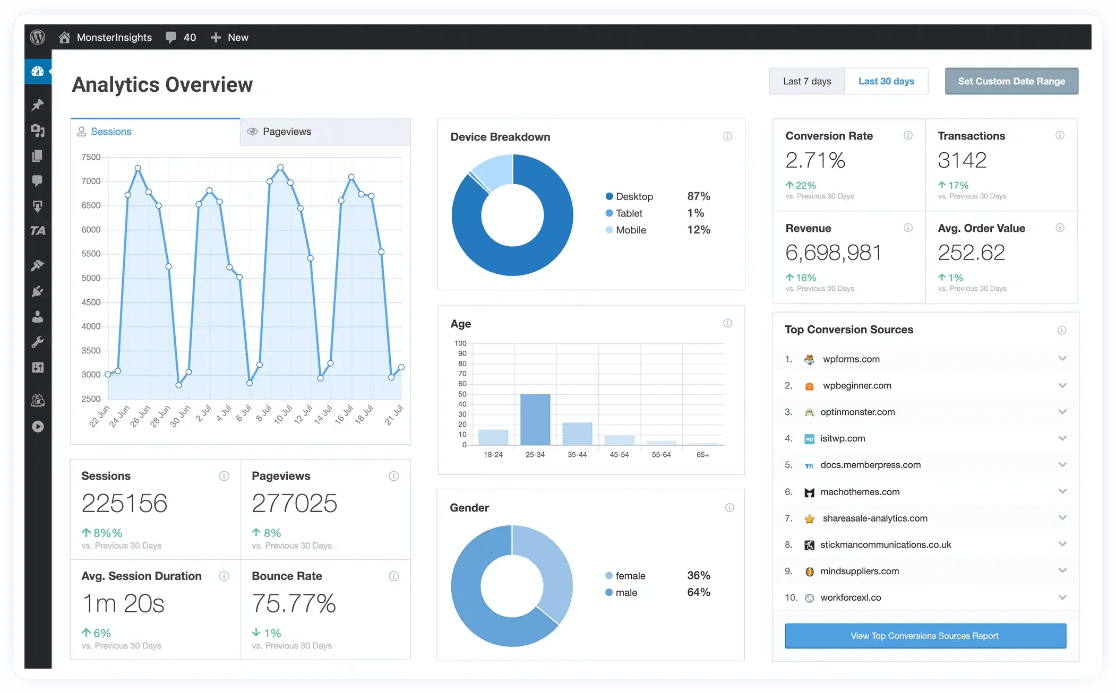
Plus, with the click of a button, you can set up sophisticated tracking features such as event tracking, eCommerce tracking, form tracking, custom dimension tracking, outbound link tracking, and more.
To set up Google AMP tracking, you’ll need the MonsterInsights Plus license or above.
To start, purchase MonsterInsights at the Plus license level or above. Then, download the ZIP files from your account area under the Downloads tab.
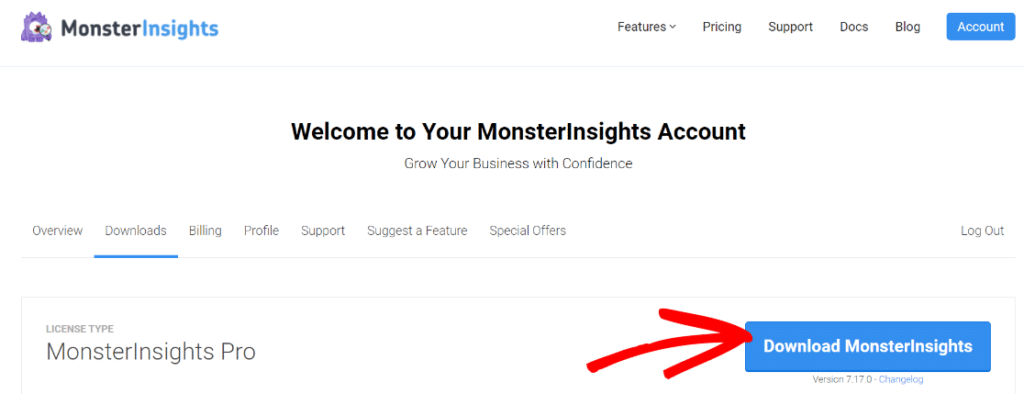
Next, upload the plugin to your WordPress website. You can do that by going to Plugins » Add New » Upload Plugins in your WordPress admin and clicking the Install Now button.
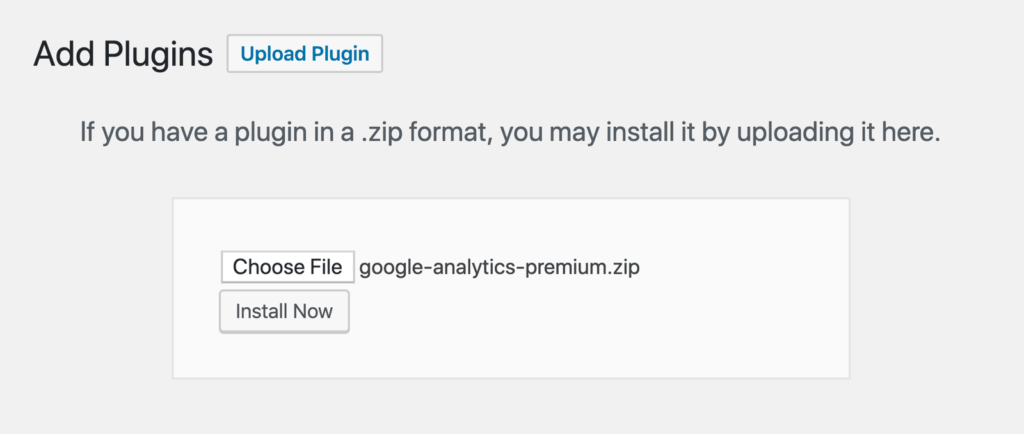
After that, click the Activate Plugin button.
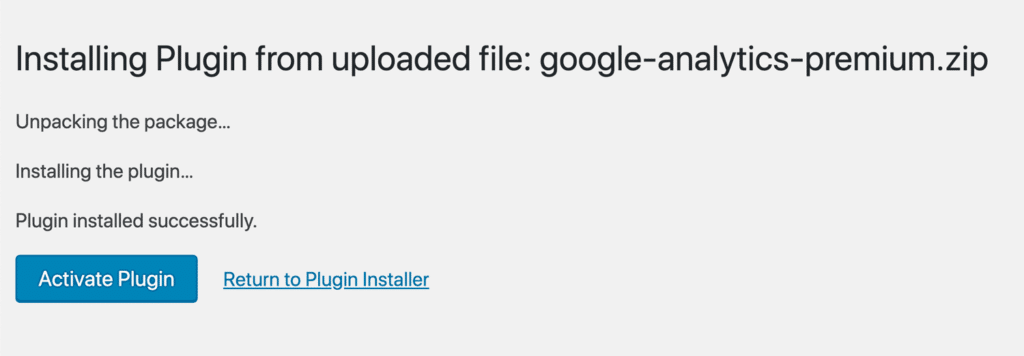
Now, you’ll need to connect Google Analytics to your WordPress website. Using MonsterInsights, it’s really easy! Just follow the steps in the setup wizard and the plugin will add Google Analytics to your site without the need to edit code.
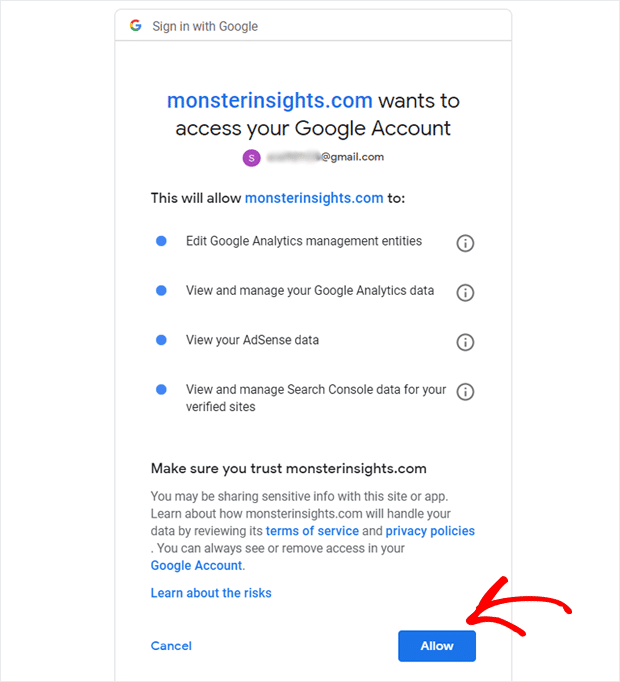
For help getting started and a walkthrough of the onboarding wizard, check out our step-by-step guide on how to properly set up Google Analytics and MonsterInsights.
Step 3: Install the MonsterInsights AMP Addon
Now that Google Analytics is added to your WordPress website, you’ll need to install the MonsterInsights AMP addon.
To do that, head to Insights » Addons and click Install under the MonsterInsights AMP addon.
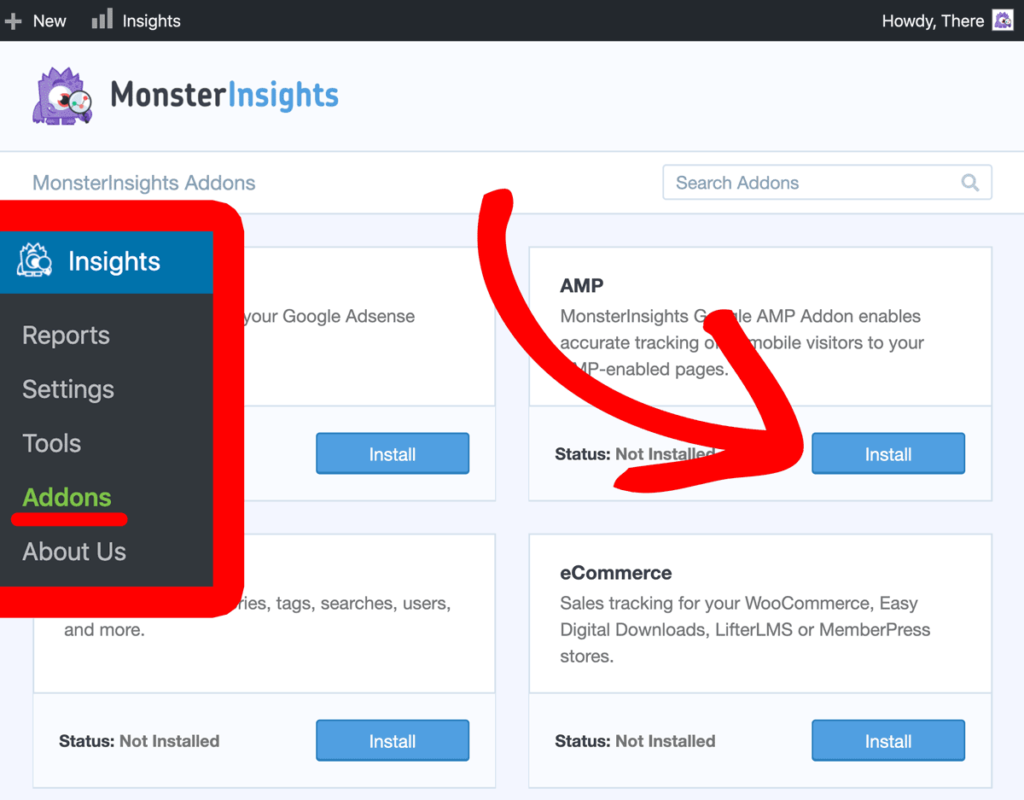
After the addon is installed, it will automatically activate, and you should see the status change to Active.
Congrats!
You’ve successfully installed the Google AMP addon. No further configuration is required.
If you want to confirm your AMP settings just to be sure, go to Insights » Settings and click the Publishers tab. Then, scroll down to the ‘Google AMP’ section. You’ll see the cursor for Google AMP activation is enabled.
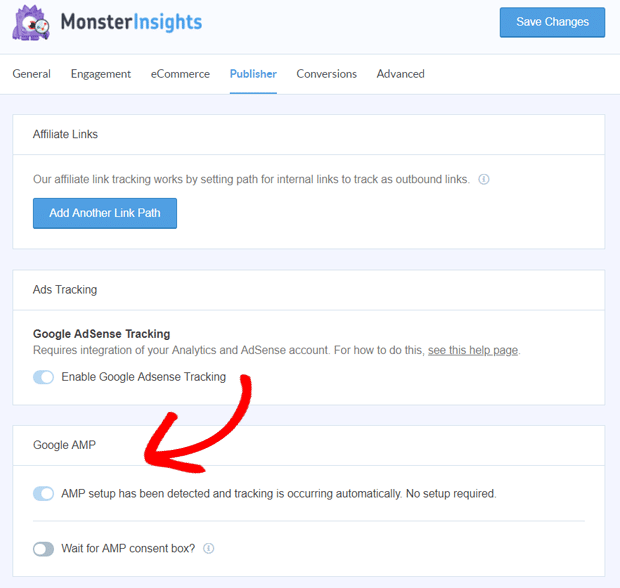
The second option there allows you to enable AMP tracking after consent. If you haven’t implemented a consent box on your site, make sure not to enable this option. Otherwise, it will prevent the plugin from tracking all AMP users.
How to Find AMP Data in Google Analytics
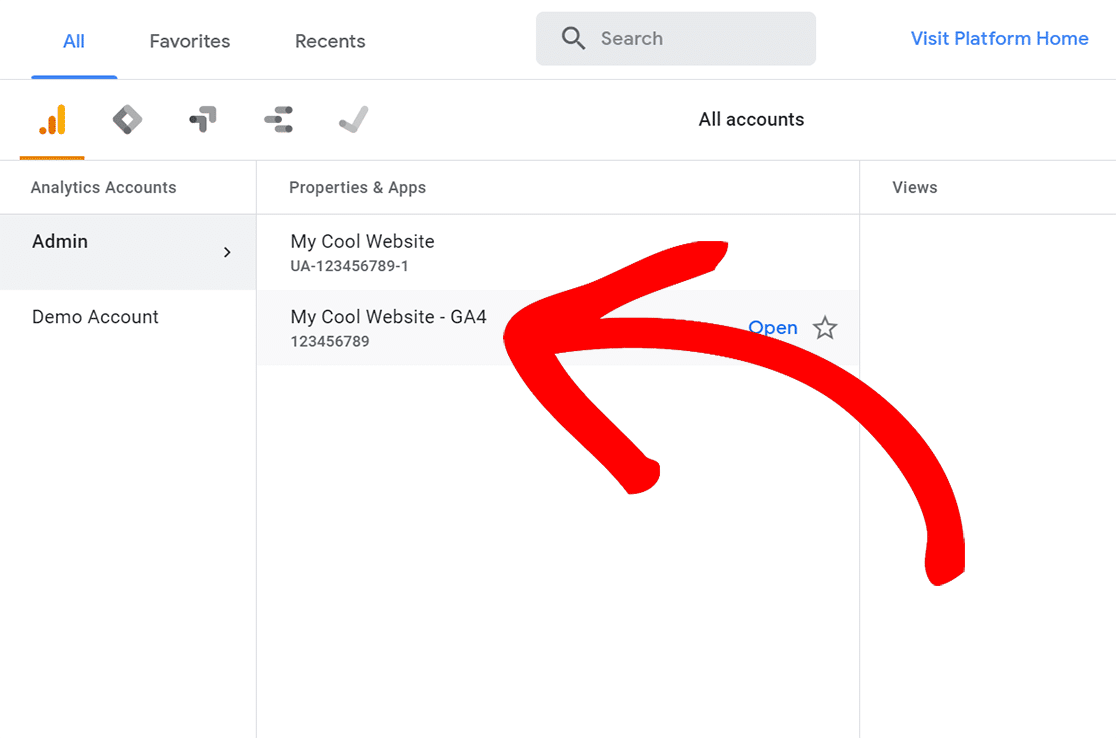
To find your AMP data in Google Analytics, log into your Google Analytics account and select the website for which you’d like to find the AMP data.
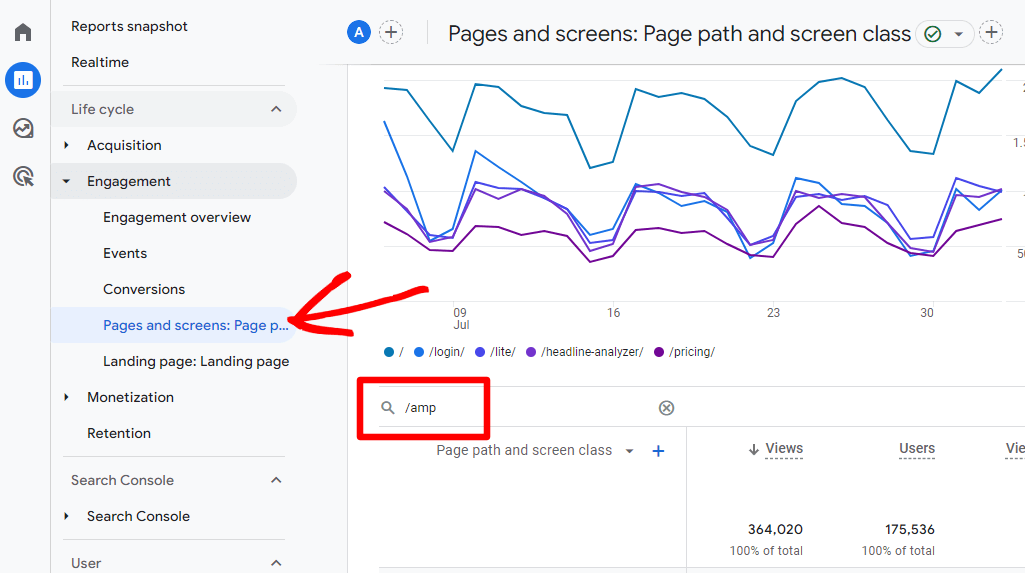
Go to Reports » Engagement » Pages and screens. To view the data for your AMP pages only, use the search bar above the table with the keyword /amp. This will show you the traffic reports for your AMP pages only.
And that’s it!
I hope you liked this article on how to track AMP pages in Google Analytics. You can also check out our Beginner’s guide to Google Analytics for WordPress.
Not using MonsterInsights yet? What are you waiting for?
And don’t forget to follow us on Facebook and YouTube for more helpful Google Analytics tips.
FAQs
Does AMP affect Google Analytics tracking?
Yes, AMP requires a different tracking implementation than regular web pages. AMP pages cannot use standard Google Analytics tracking code (gtag.js) and instead require the <amp-analytics> tag. This can affect data accuracy if not properly configured, which is why I recommend using MonsterInsights to ensure seamless tracking between AMP and non-AMP pages.
How do I check if my AMP tracking is working?
I verify AMP tracking by checking GA4’s Real-time reports while browsing AMP pages, using Google’s AMP validator to ensure page validity, and monitoring the browser console in debug mode. You should see pageviews appear in real-time analytics within seconds of visiting an AMP page.
Can you use Google Tag Manager with AMP pages?
Yes, but with limitations. While Google announced GA4 support for AMP in 2024, GTM for AMP has more complex setup requirements and fewer features than standard GTM. I typically recommend using MonsterInsights for WordPress sites as it handles the complexity automatically.
Why do I see different session counts between AMP and regular pages?
This typically happens when AMP tracking isn’t properly configured to maintain session continuity. By default, moving between AMP and non-AMP pages creates separate sessions. MonsterInsights solves this by ensuring proper client ID management across page types.
Can I track eCommerce conversions on AMP pages?
Direct eCommerce tracking is limited on AMP pages. While you can track product views and basic interactions, full eCommerce transaction tracking requires custom implementation or integration with third-party solutions. I recommend using regular pages for checkout processes while using AMP for content and product browsing.
