Do you want to create a form to accept files from your users but don’t know how to get started? There is no direct way of uploading files on WordPress by default.
But with a file upload form on your website, you can allow visitors to easily submit files and attachments.
And the best part is that you don’t have to give them backend access, as they can simply upload their media through the form.
In this article, we’ll show you how to create a file upload form in WordPress. Let’s get straight to it…
Select the Best Plugin for WordPress File Upload Form
Before we start with our tutorial, it’s important to select the right plugin for creating a file upload form on WordPress. That’s because many form builders are too technical to understand and use.
This is where WPForms comes in handy. It’s the most user-friendly form plugin you can use today. You can use its simple drag and drop builder to create amazing forms for your website.
Besides that, it’s the best WordPress file upload plugin as you get tons features like pre-built form templates in its Form Template addon. You can also use different fields and options for customization, anti-spam features, and much more.
And since WPForms is compatible with many marketing services, payment providers, and other WordPress plugins, it offers great flexibility.
With that sorted, are you ready to build your file upload form?
How to Create a WordPress File Upload Form
Now that you know which plugin to use, you can create a form to accept different files on your website. Let’s start…
Step 1: Install WPForms WordPress Plugin
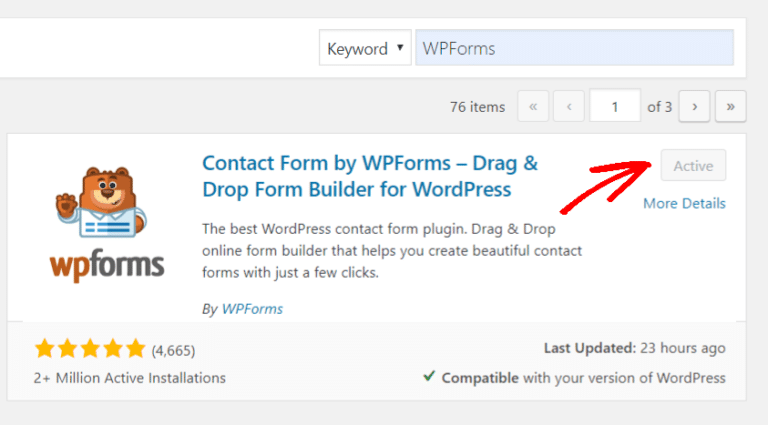
The first thing you need to make sure is that WPForms is running on your website. To do that, you can go to Plugins from your WordPress dashboard and click Add New.
Now search for WPForms in the search bar and click Install. You’ll also have to activate it after its done installing.
Step 2: Add a New Form in WPForms
Once the plugin is active, go to WPForms from your WordPress dashboard and then click Add New.

Step 3: Enter a Name and Select a Template
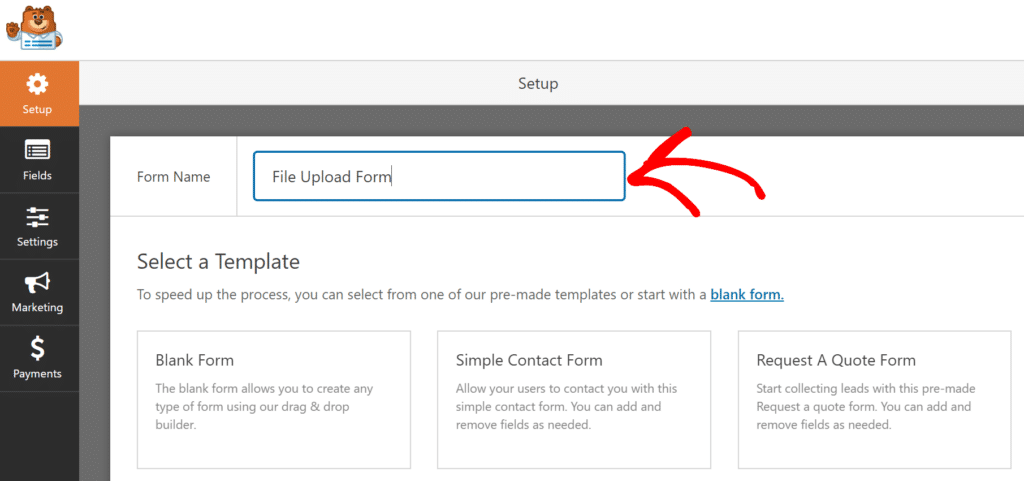
The next step is to give a name to your file upload form. This is helpful if you have multiple forms on your website, so you can easily find them in the future. And having different names also helps you in tracking their performance.
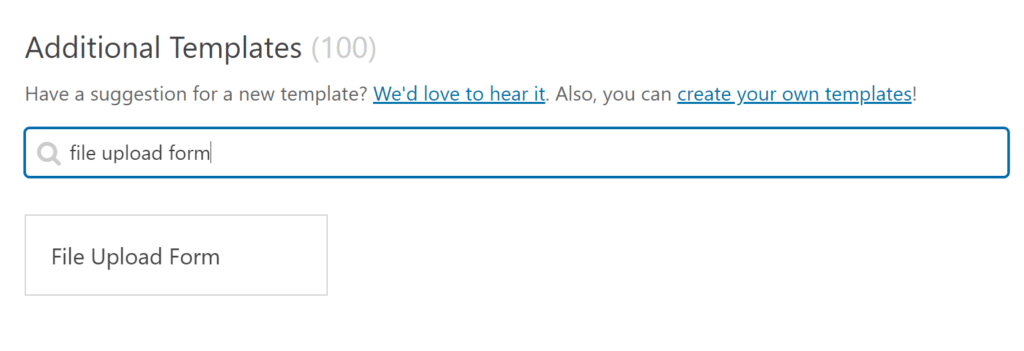
Now scroll down and search for file upload form in Additional Templates section. Then click on it to start customizing your form.
Do make sure that you have WPForms Forms Template addon active to view and use the file upload form template.
Step 4: Customize Your File Upload Form
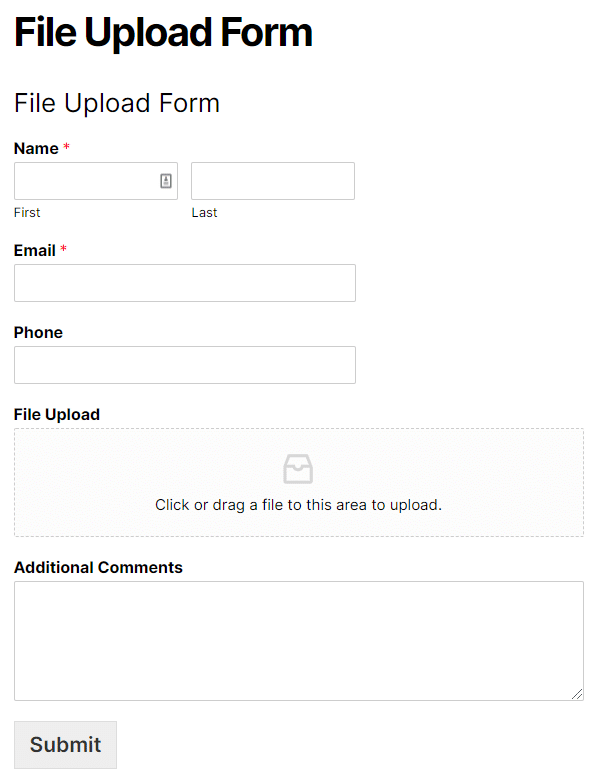
You can now use WPForms drag and drop builder to customize your form. The template already offers basic fields like name, email address, phone, file upload option, and additional comments.
But you can add more fields to your form and give it a personalized look. For instance, you can add a checkbox field, a dropdown menu, and paragraph text. Simply drag and drop them where you want to place the field on your form.
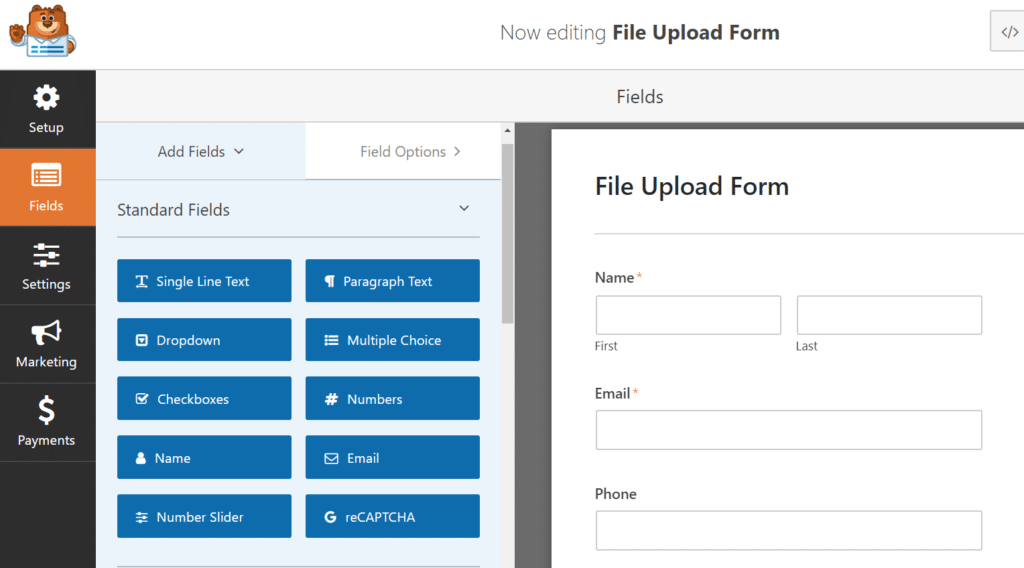
And if you scroll down, you can get more advanced fields to add to your form. Some of them include ratings, HTML, password, website URL, address, and more.
You can further customize your form by editing each field options. For instance, if you select the File Upload field on your form, you’ll be taken to the Field Options tab.
Here you can edit the field and enter a new label and add a description. You can also limit the file extensions that users can upload along with the maximum file size.
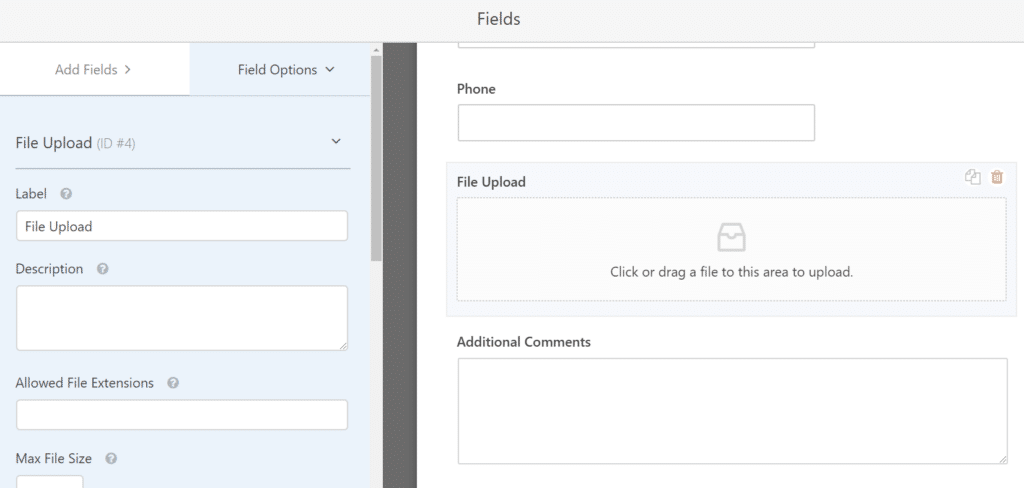
You can access more editing options under Advanced Options like enabling Store file to WordPress Media Library, adding a CSS class, and more.
Not only that, but you can also enable conditional login and show or hide fields based on user’s selection. Click Save once you’ve made all the changes.
Step 5: Change Your Form Settings
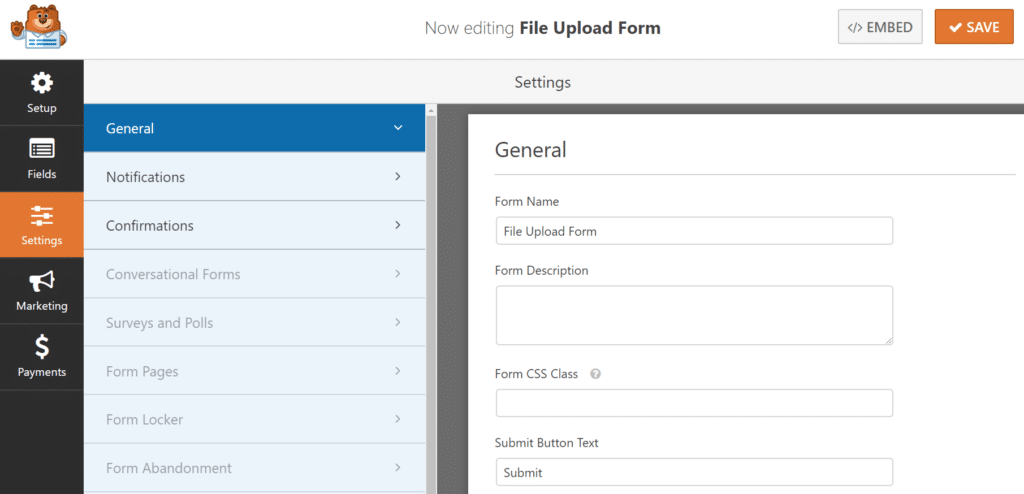
After you’re done customizing your form and editing each field, the next step is to change its settings. The first set of settings will be under General and here you can change the name of your form.
You can also add a form description to help your visitors, change submit button text, and enable different options like an anti-spam honeypot, AJAX form submission, and more.
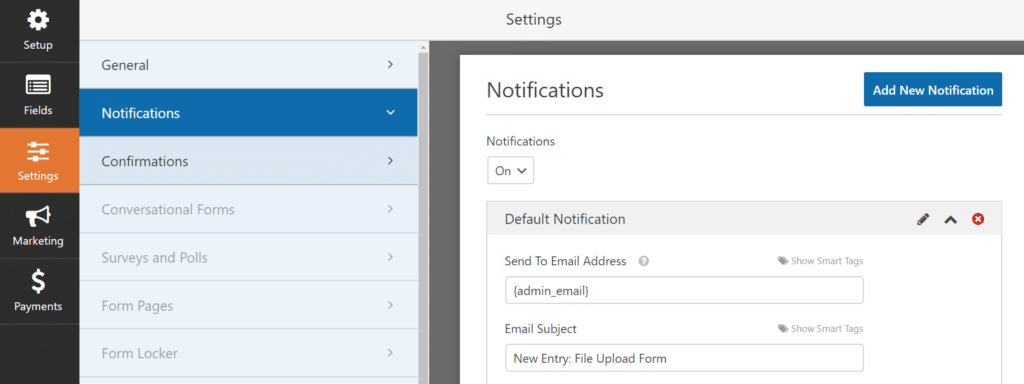
The next settings you can change are under the Notifications tab. Here you can configure how do you want to be notified when someone uploads a file via your form.
For instance, you can customize the settings by adding a specific email subject line to immediately know that someone has uploaded a file.
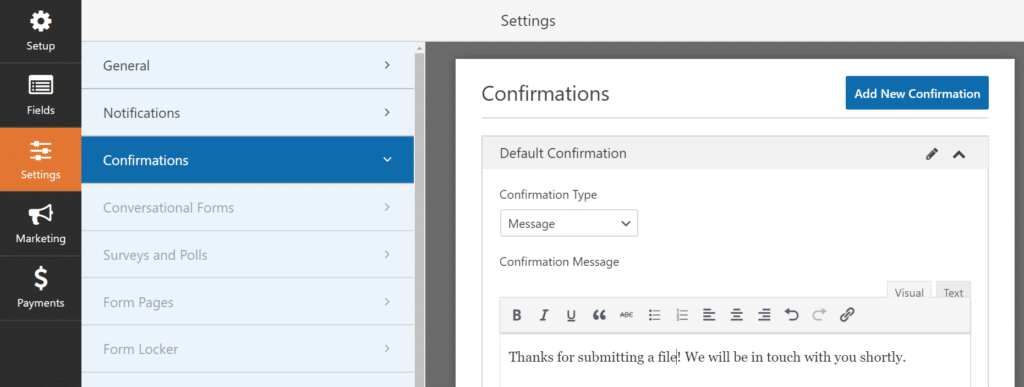
The first option is to display a message when a user uploads a file, which confirms that they’ve successfully submitted a file on your website.
The next options are to show them a page after they upload a file or redirect them to another URL on your website.
Once you’ve made all the changes to form settings, go ahead and click Save.
Step 6: Add Your File Upload Form to Your Website
Now that your form is ready, its time to add it to your WordPress website. You can add it to a blog post, sidebar, and other pages. But there are several ways you can add your form, as WPForms offers multiple options.
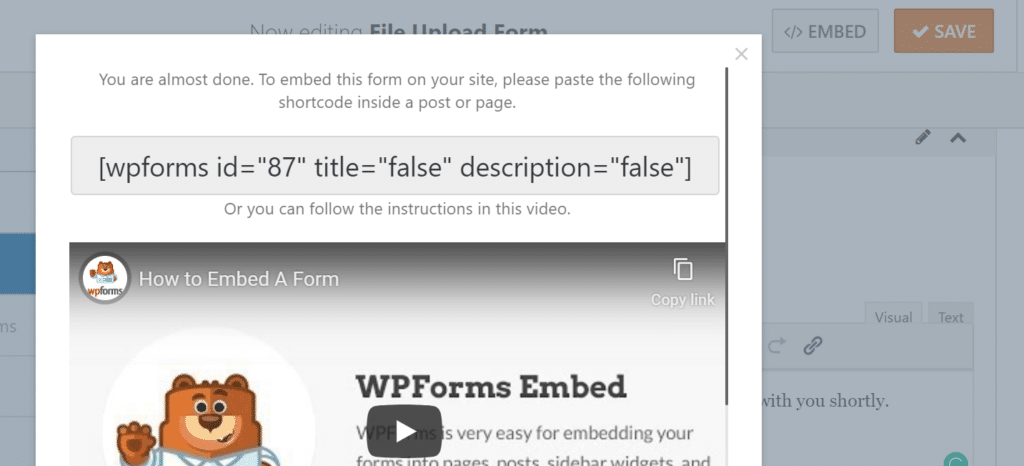
First, you can click on the Embed option on the top and copy the shortcode. Next, insert the code anywhere on the website where you want to show your file upload form.
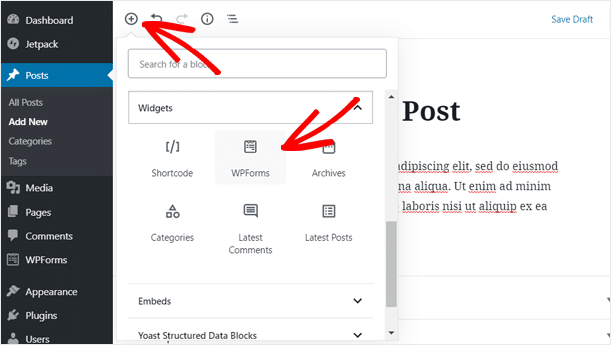
Or you can use the WPForms widget in your content edit screen and add your newly created file upload form.
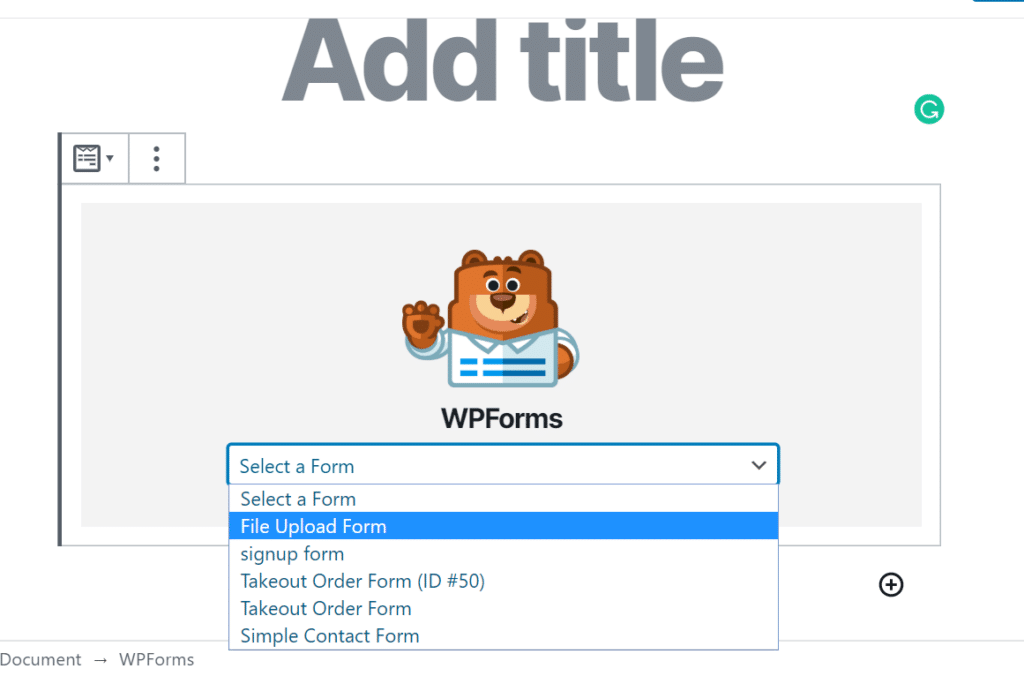
From the dropdown menu, select the File Upload form you just created. The form will now appear on your post and it’s ready for publishing.
And if you want to upload the form on your sidebar, then go to Appearance » Widgets from your WordPress dashboard.
If WPForms isn’t added to your sidebar, add it and you’ll see it appear in your sidebar options. Now select the file upload form you want to display on your website and click Save.

With that, your file upload form is ready to use and will appear on your website.
How to Allow All File Types in WordPress
Now that you’ve created a file upload form, what if you need to accept file types that aren’t allowed by WordPress by default?
For example, you cannot upload a file with .exe extensions on WordPress. And if you try to upload them, you’ll get an error saying Sorry, this file type is not permitted for security reasons.
This is where you need a plugin that lets you plugin like File Upload Types by WPForms. Using the plugins, you can allow users to upload any type of file to your website.
And since it’s made by WPForms team, it works perfectly with your file upload form. To learn more here’s a step by step tutorial in how to allow WordPress to upload all file types.
That’s it!
We hope you liked our article on how to create a file upload form in WordPress. You can also check out our guide on how to properly setup Google Analytics in WordPress.
And don’t forget to follow us on Twitter and Facebook for more helpful WordPress tutorials.

