Ever wonder what the average age of your website visitors is? Or which gender prefers to read your content or buy your products? By looking at the Google Analytics demographics of your website visitors, you can get insights that can help you create the right content for the right audience and develop marketing campaigns that are an instant hit.
In this article, we’ll show you how to quickly and easily find out the demographics of your website users.
Why Track the Demographics of Your Website Visitors?
Demographic data can help you better understand your website visitors and find out more about your high-value customers. You can then use the information to create content marketing strategies that get results.
For instance, if you know which age group interacts with your website the most, then you can tailor your content topics, write content that visitors can relate to, and run advertising campaigns to target that age group.
If you have an eCommerce store, then you can use demographic data to segment your visitors into different buyer personas. This will help you promote the right product to the right audience.
How to Set up Google Analytics Demographics
Google Analytics is the best tool for determining your users’ demographics. It allows you to track your website performance and see how people interact with your content, which pages they visit, where they’re coming from, and more.
However, setting up Google Analytics can be tricky, especially for beginners. That’s because it requires editing code on your website, and you may have to hire a professional to do the job. Now, this requires additional investment, which can be difficult if you’re just starting a website.
An easier way of adding Google Analytics to your WordPress site is with MonsterInsights. It makes using Analytics a piece of cake. You can set it up in just a few clicks and without any coding. Plus, MonsterInsights sets up essential data tracking with a couple of clicks that you don’t get out of the box with Google Analytics.
So, to see the demographics of your website users, just follow these steps…
Step 1: Install MonsterInsights and Connect Google Analytics
The first step is to download and install MonsterInsights on your WordPress website. To start, grab the license that aligns with your business goals, log in to your MonsterInsights account area, and download the plugin.
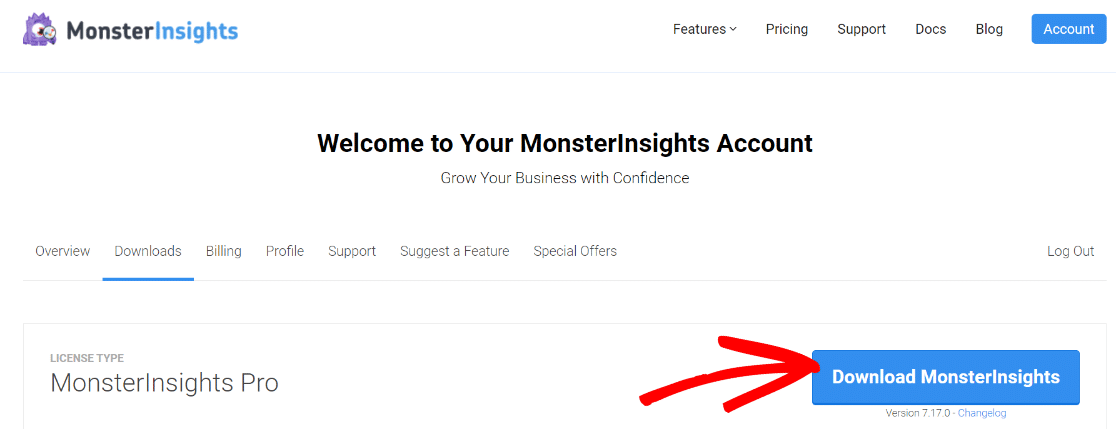
Then, upload it to your WordPress site. Once the plugin is installed and activated, paste the license key found in your account into Insights » Settings » General:
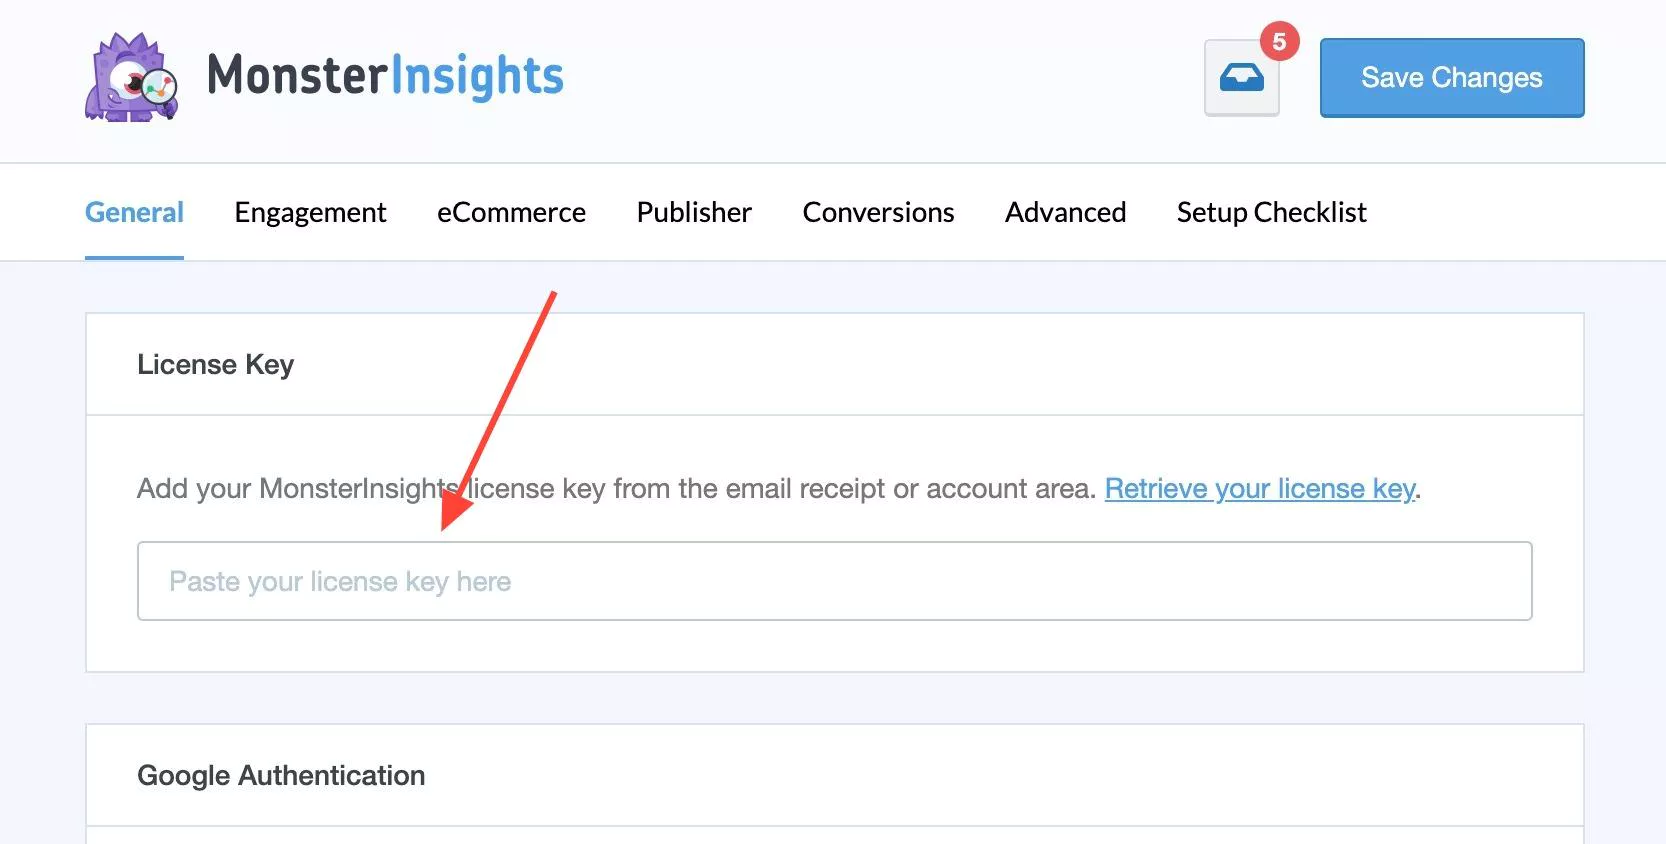
Finally, follow the MonsterInsights setup wizard to add Google Analytics to your site.
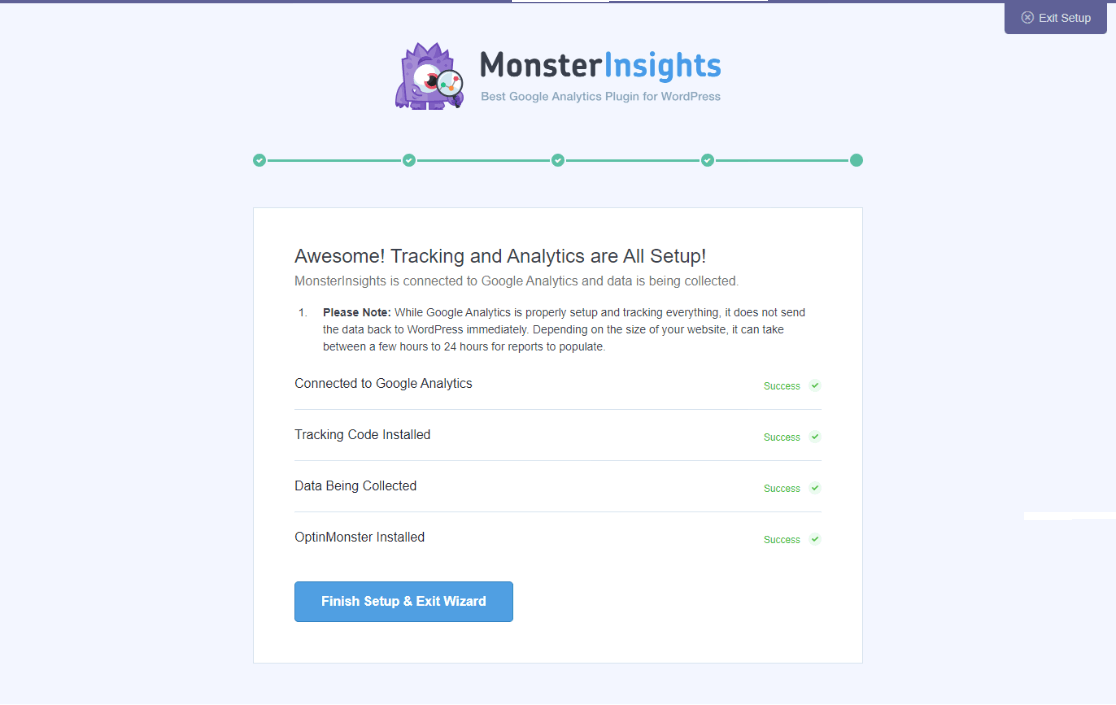
For full instructions on setting up MonsterInsights, you can follow our detailed tutorial on how to properly set up Google Analytics in WordPress.
Step 2: Enable Demographics Reports in MonsterInsights
After setting up MonsterInsights and connecting your website with Google Analytics, the next thing to do is enable demographics reports.
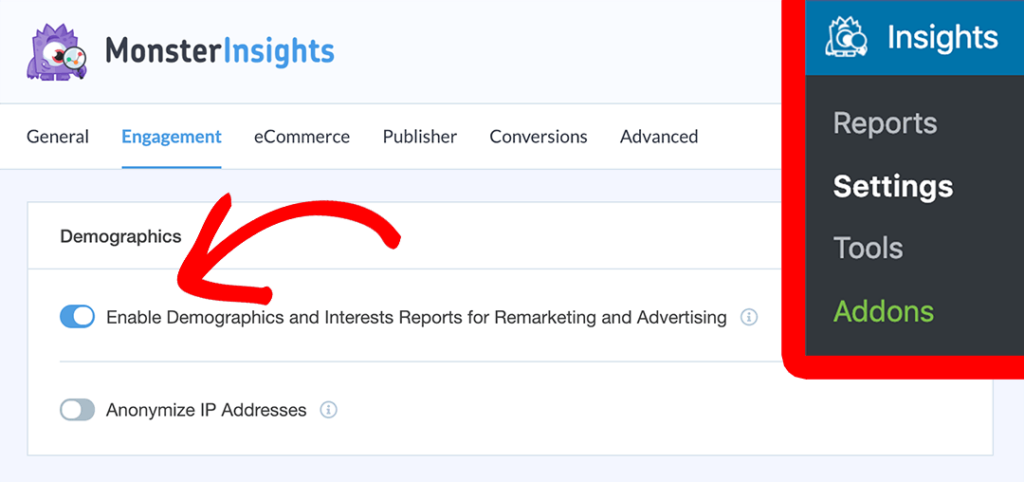
To do that, go to your WordPress dashboard and navigate to Insights » Settings » Engagement. Then under Demographics, check the option that says Enable Demographics and Interests Reports for Remarketing and Advertising.
Step 3: Enable Demographics Reporting in Google Analytics
By default, Google Analytics will collect country, city, and language demographics. If you want to see some data about the gender, age, and interest categories of your visitors, you’ll need to enable something called Google signals.
Google signals is a way to collect extra information about your visitors that Google Analytics doesn’t collect by default. When you turn on Google Signals, you’re enabling:
- Cross-platform reporting
- Remarketing
- Advertising reporting features
- Demographics and interests
However, for demographics and interest reports, it’s important to note that Google can only report them for Google users who have ad personalization turned on. So, you’ll get a snapshot of demographic data for your audience. You won’t be seeing data for each and every user.
Another important thing to note about Google signals is that turning it on will cause Google to use data thresholds, which means that some data might be withheld from your reports (you can’t access it). This is so that Google can comply with privacy laws. For more on what this means, read more about data thresholds.
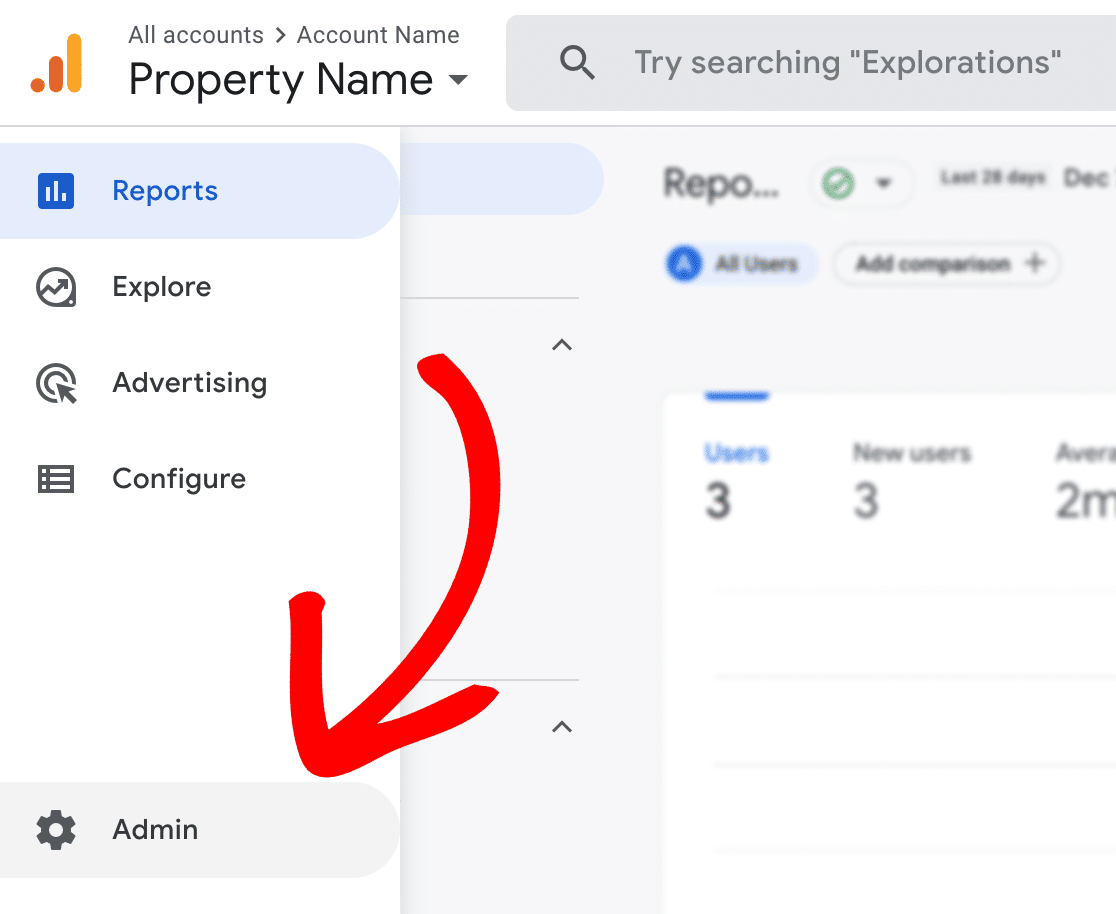
Now, we’ll enable Google signals. To start, go head to the Admin cog in Google Analytics:
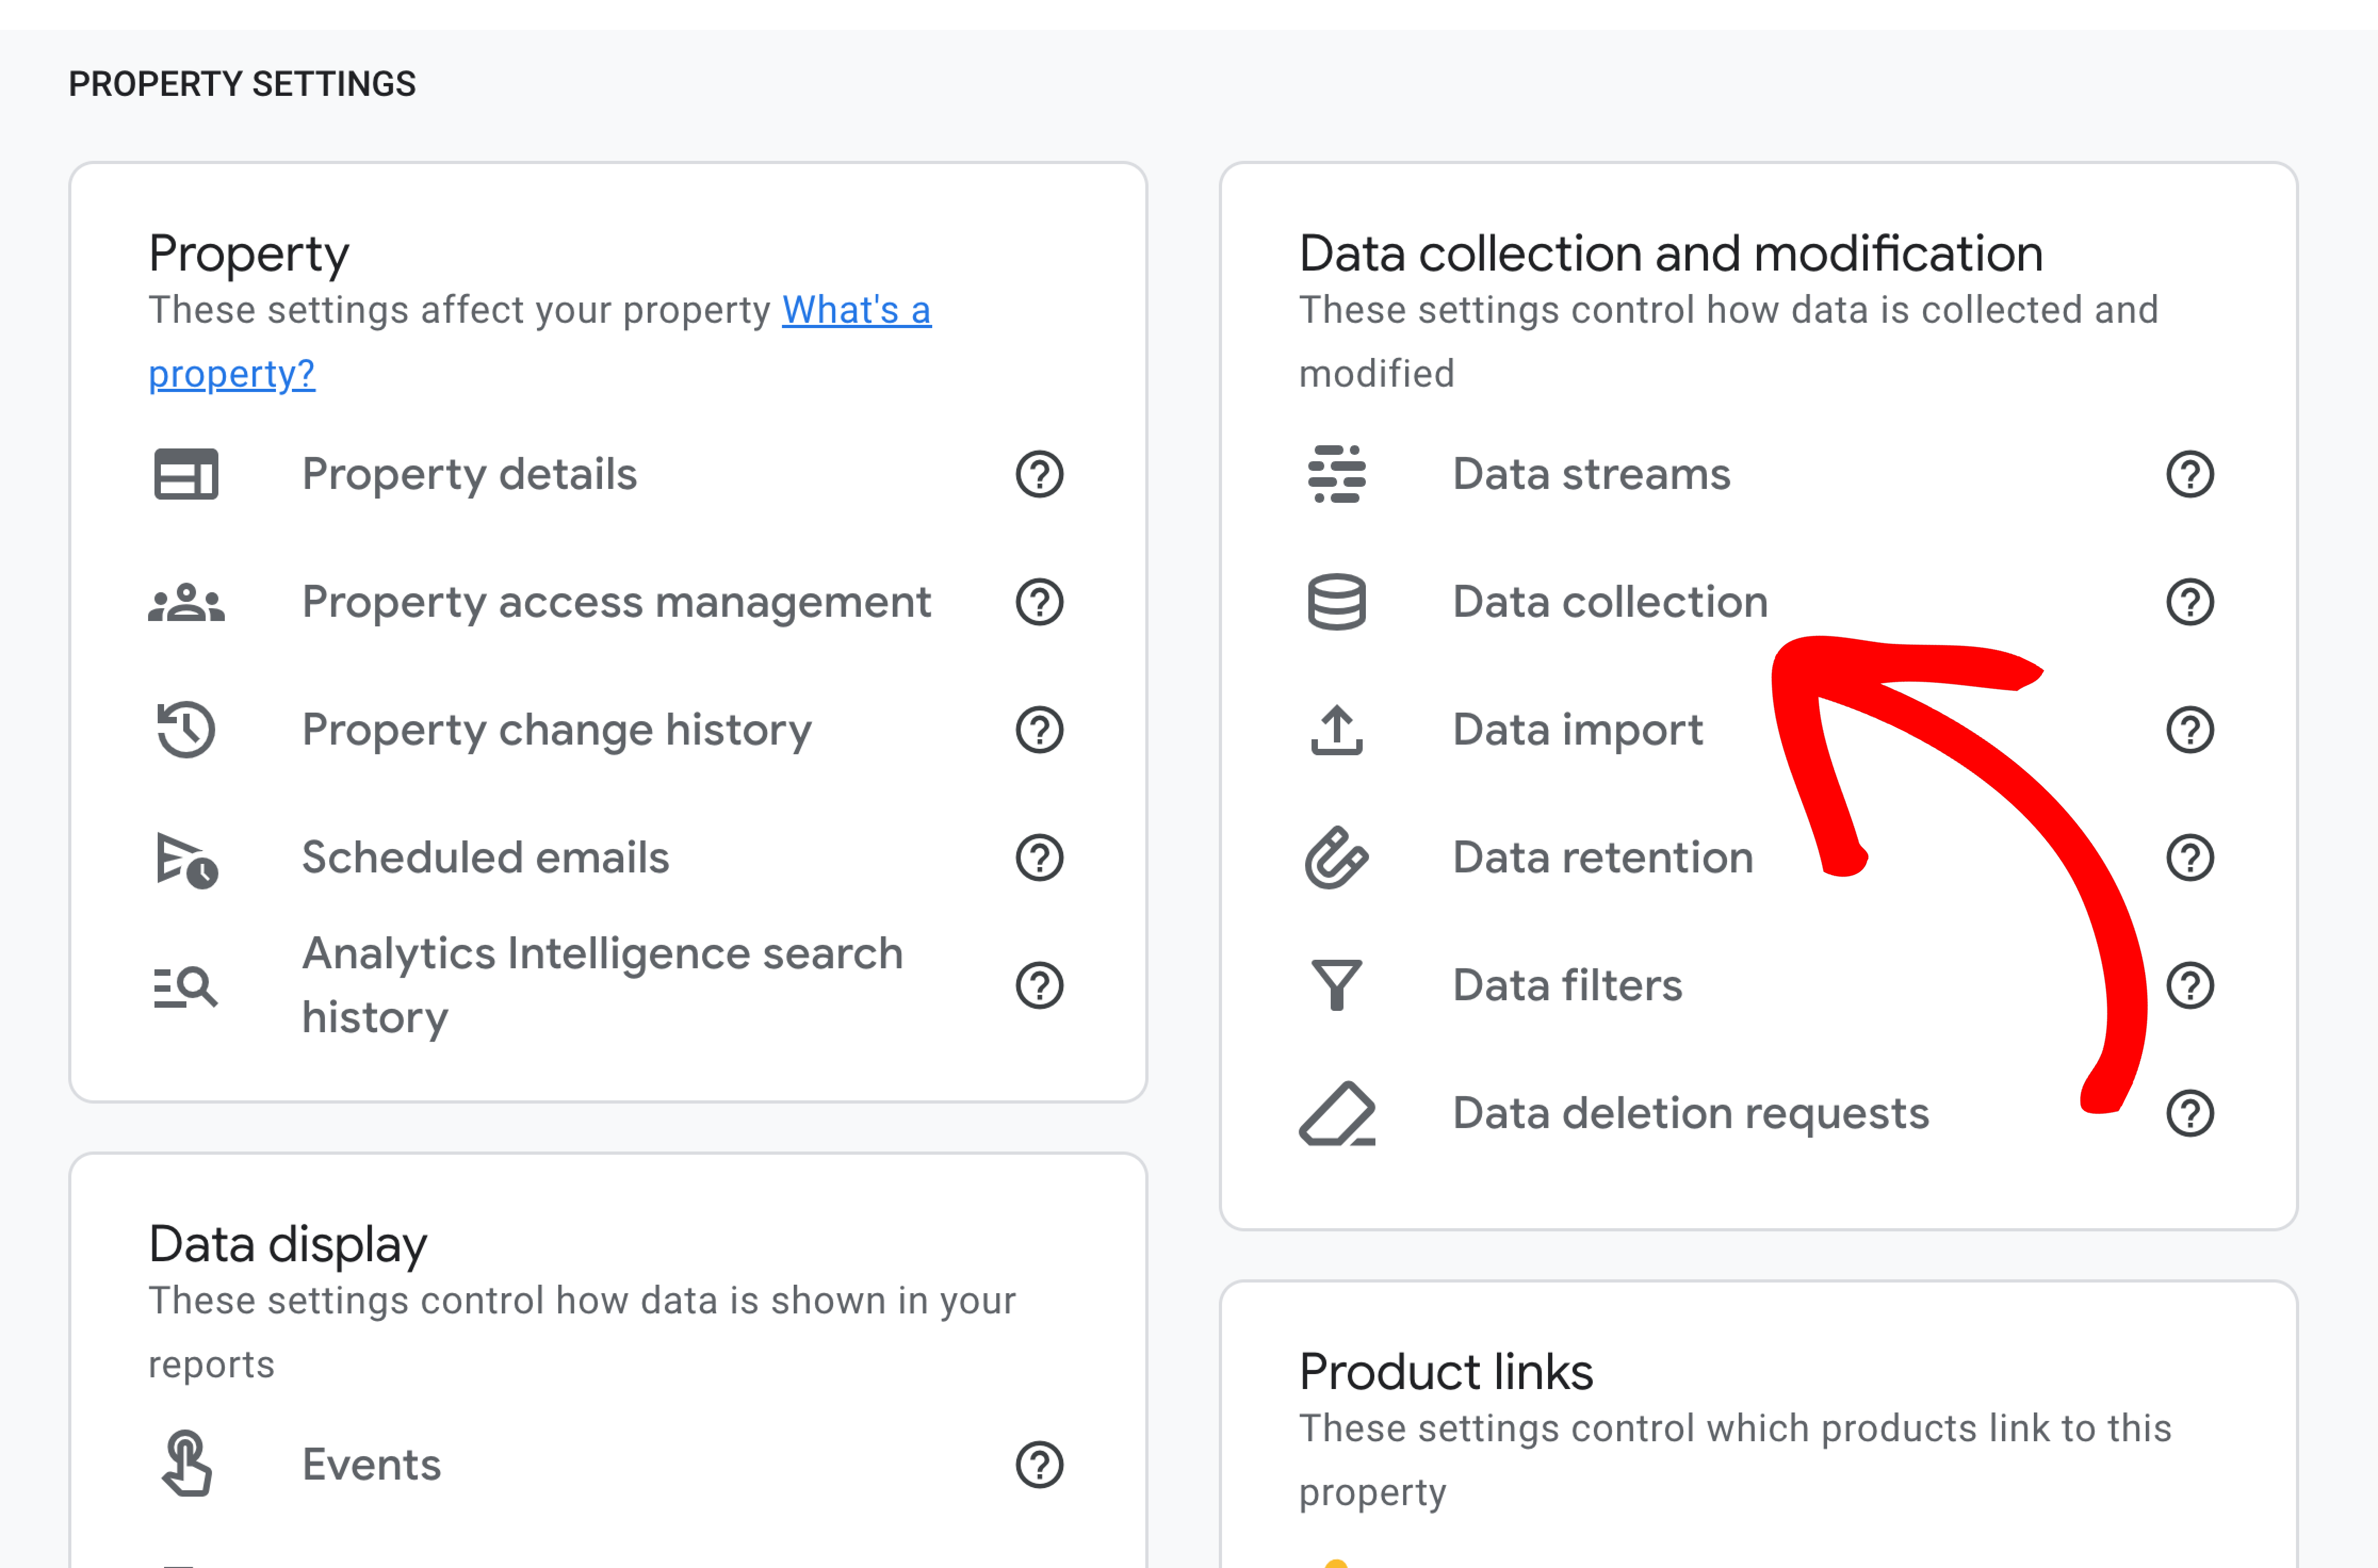
Then, in the Property column, click on Data Settings » Data Collection:
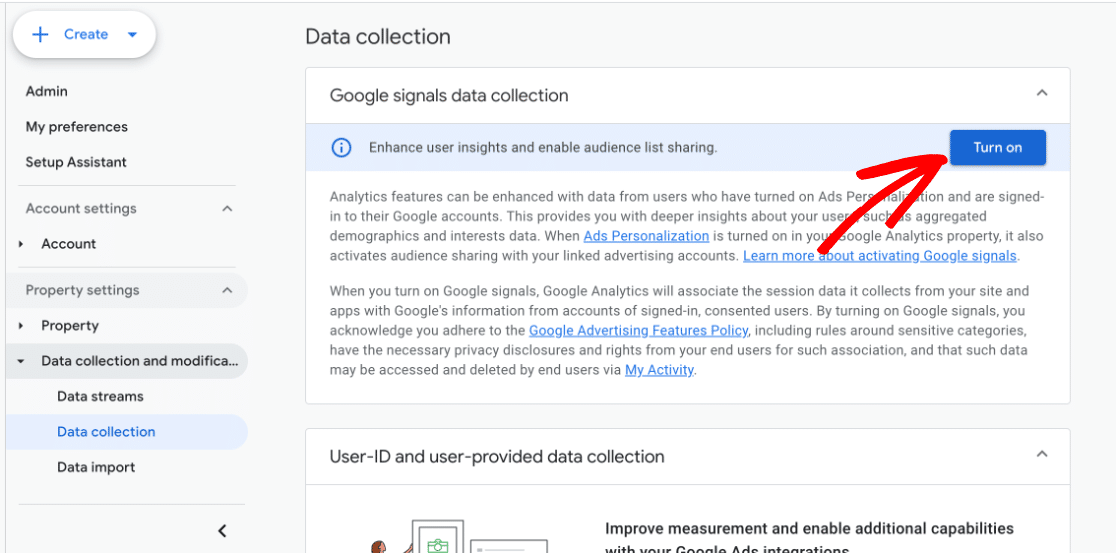
Finally, click on the button to turn on Google signals data collection:
You’ve now successfully enabled demographics and interest reporting in Google Analytics!
Step 4: View Google Analytics Demographics Reports
Now that you have reporting set up, you’ll be able to view the data after it’s been collected.
Since you have MonsterInsights installed, you won’t even have to open Google Analytics to find your data. It’ll be right inside your WordPress admin!
To see the demographics of your website users, go to Insights » Reports and then navigate to the Publishers tab. Now, scroll down to see the ages and genders of the people who visited your website:

Keep in mind that unknown data is normal since Google signals can only collect the data from users who are logged into Google and have ad personalization enabled. You can still get a feel for your users’ demographics based on the data there.
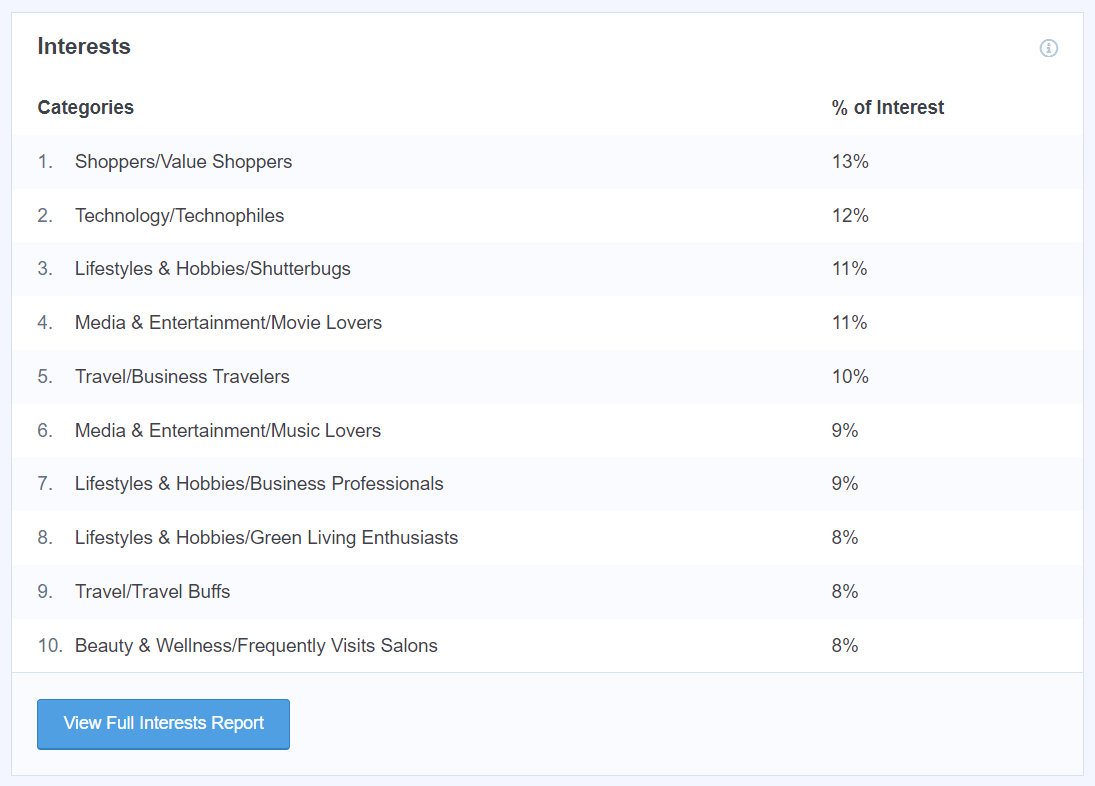
Scroll down further to find your Interests report:
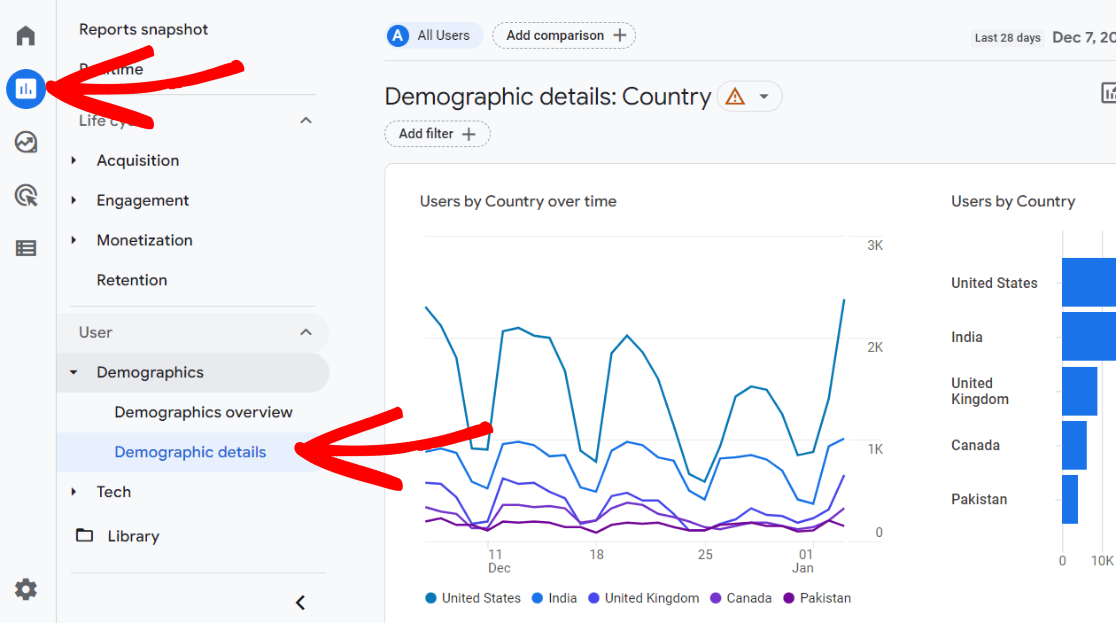
Want to find demographics reports inside Google Analytics? In the Reports tab, navigate to Demographics » Demographic details.
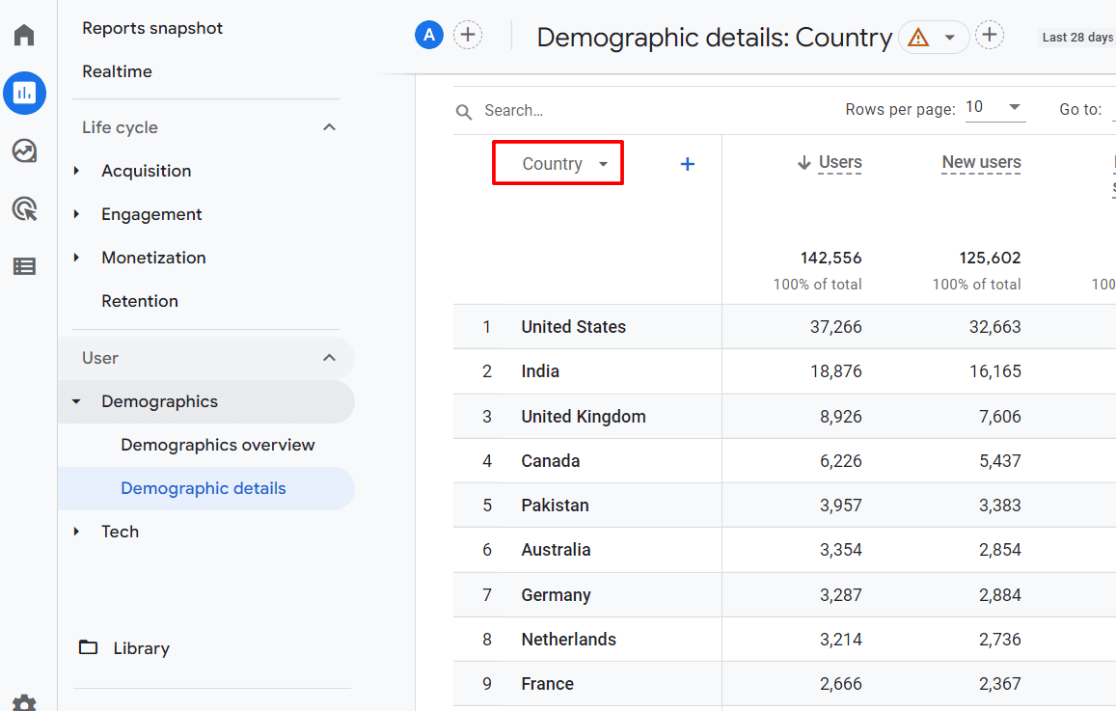
Now, scroll down to the table. It’ll be automatically set to Country, but find the Country dropdown:
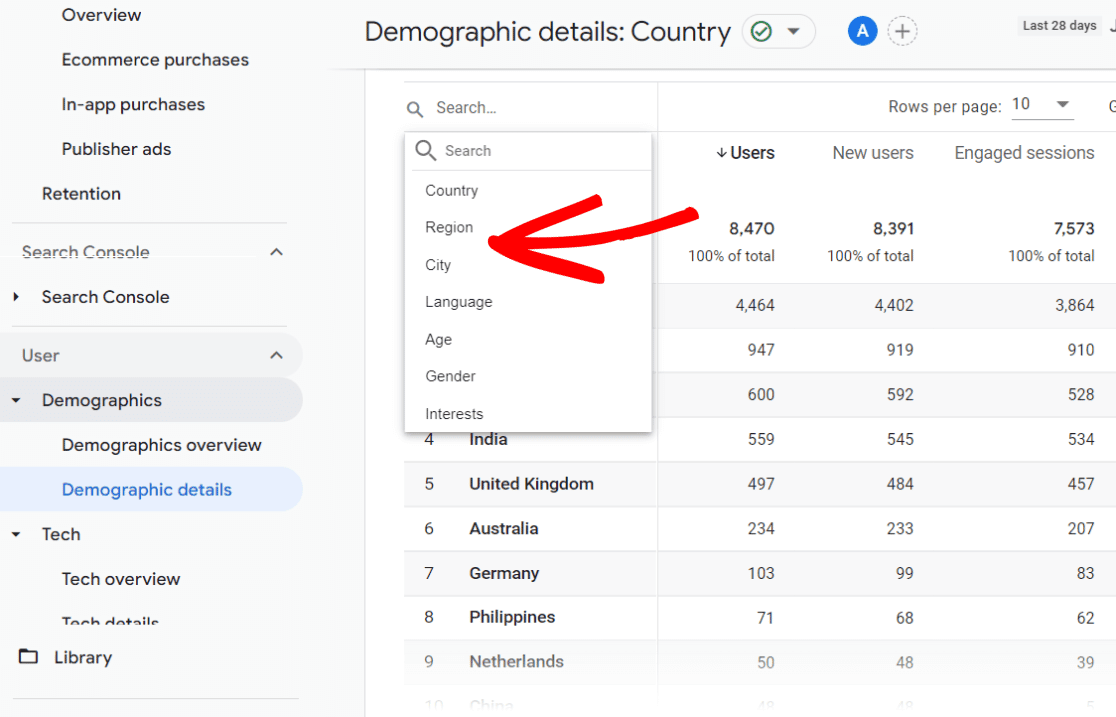
In this dropdown, you’ll be able to select different demographic data to see in the table.
That’s it!
We hope you liked our article on how to turn on demographics and interest reports in Google Analytics.
If you liked this post, you might also want to check out:
How to Track Link Clicks in Google Analytics 4 and WordPress
How to Use the New Plot Rows Feature in Google Analytics 4
How To Set Up QR Code Tracking With Google Analytics
Not using MonsterInsights yet? What are you waiting for?
And don’t forget to follow us on YouTube for more helpful Google Analytics tips.
