If you have two or more domains (websites) that you want to be tracked in the same Google Analytics profile like they’re one website, then you need to set up GA4 cross-domain tracking.
Cross-domain tracking is really handy to use if you have two domains that you want to be tracked like one website, such as a blog or other website add-on that lives on a subdomain.
Instructions for cross-domain tracking can be a little confusing, especially if you’re more of a Google Analytics beginner. Thankfully, we have some very straightforward instructions for you to follow. And, if your website is on WordPress, we have the best way to see your Google Analytics reports right inside your WordPress dashboard and set up cross-domain tracking.
What is Google Analytics Cross-Domain Tracking?
GA4 cross-domain tracking is a way of telling Google Analytics to track two different domains together in the same property. It also eliminates the issue of having referral traffic from one site to the other.
For instance, consider a situation where you have an eCommerce store (mystore.com) and a blog (myblog.com) on two separate domains.
Now, say a user visits your blog, then clicks over to your eCommerce store, and then returns to your blog post.
By default, Google Analytics will count the user 3 times. You’ll see two visits for your blog and one for your store, totally skewing your data.
To count those three visits as just one session instead, you need to use GA4 cross-domain tracking.
Cross-domain tracking helps you get accurate data about your visitors and how they interact with your multiple domains. It’ll track your domains together as a single site.
Now, let’s jump into our tutorial.
GA4 Cross-Domain Tracking Instructions
Let’s face it: GA4 isn’t always the easiest to use, especially if you’re a beginner or just haven’t used it much.
Thankfully, cross-domain tracking is actually pretty simple to set up. Let’s take a look.
GA4 Cross-Domain Tracking in WordPress
To set up Google Analytics in WordPress, your best bet is to use a Google Analytics plugin.
MonsterInsights is the best Google Analytics plugin for WordPress. It allows you to easily connect your WordPress site with Google Analytics so you can view all the data that matters most right in your WordPress dashboard.
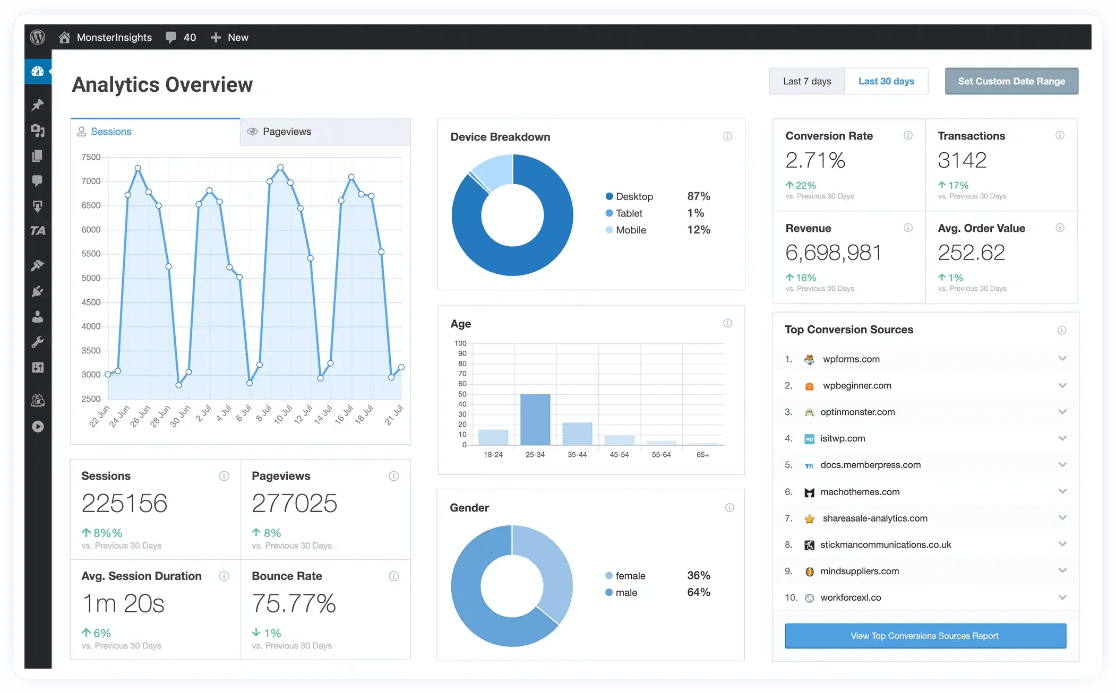
Plus, with the click of a button, you can set up advanced tracking features that don’t come out-of-the-box with Google Analytics, such as eCommerce tracking, form tracking, outbound link tracking, media tracking, and more.
Using MonsterInsights is also a good way to set up and manage cross-domain tracking between two or more WordPress sites. When you can see your stats right inside your dashboard, you can be sure cross-domain tracking is set up and working properly.
Plus, you don’t have to worry about re-adding your Google Analytics tracking script and losing out on any data every time you update your theme.
To get started, grab the license level that’s right for your sites at monsterinsights.com/pricing, install MonsterInsights on the sites you want to set up cross-domain tracking for but do not connect them with Google Analytics, and then follow our instructions below.
Step 1: Connect One Site with Google Analytics in MontsterInsights
Your first step is to authenticate one of your cross-domain sites with Google Analytics via MonsterInsights. To do that, go through the onboarding wizard and connect with the Google Analytics account you want to use for tracking.
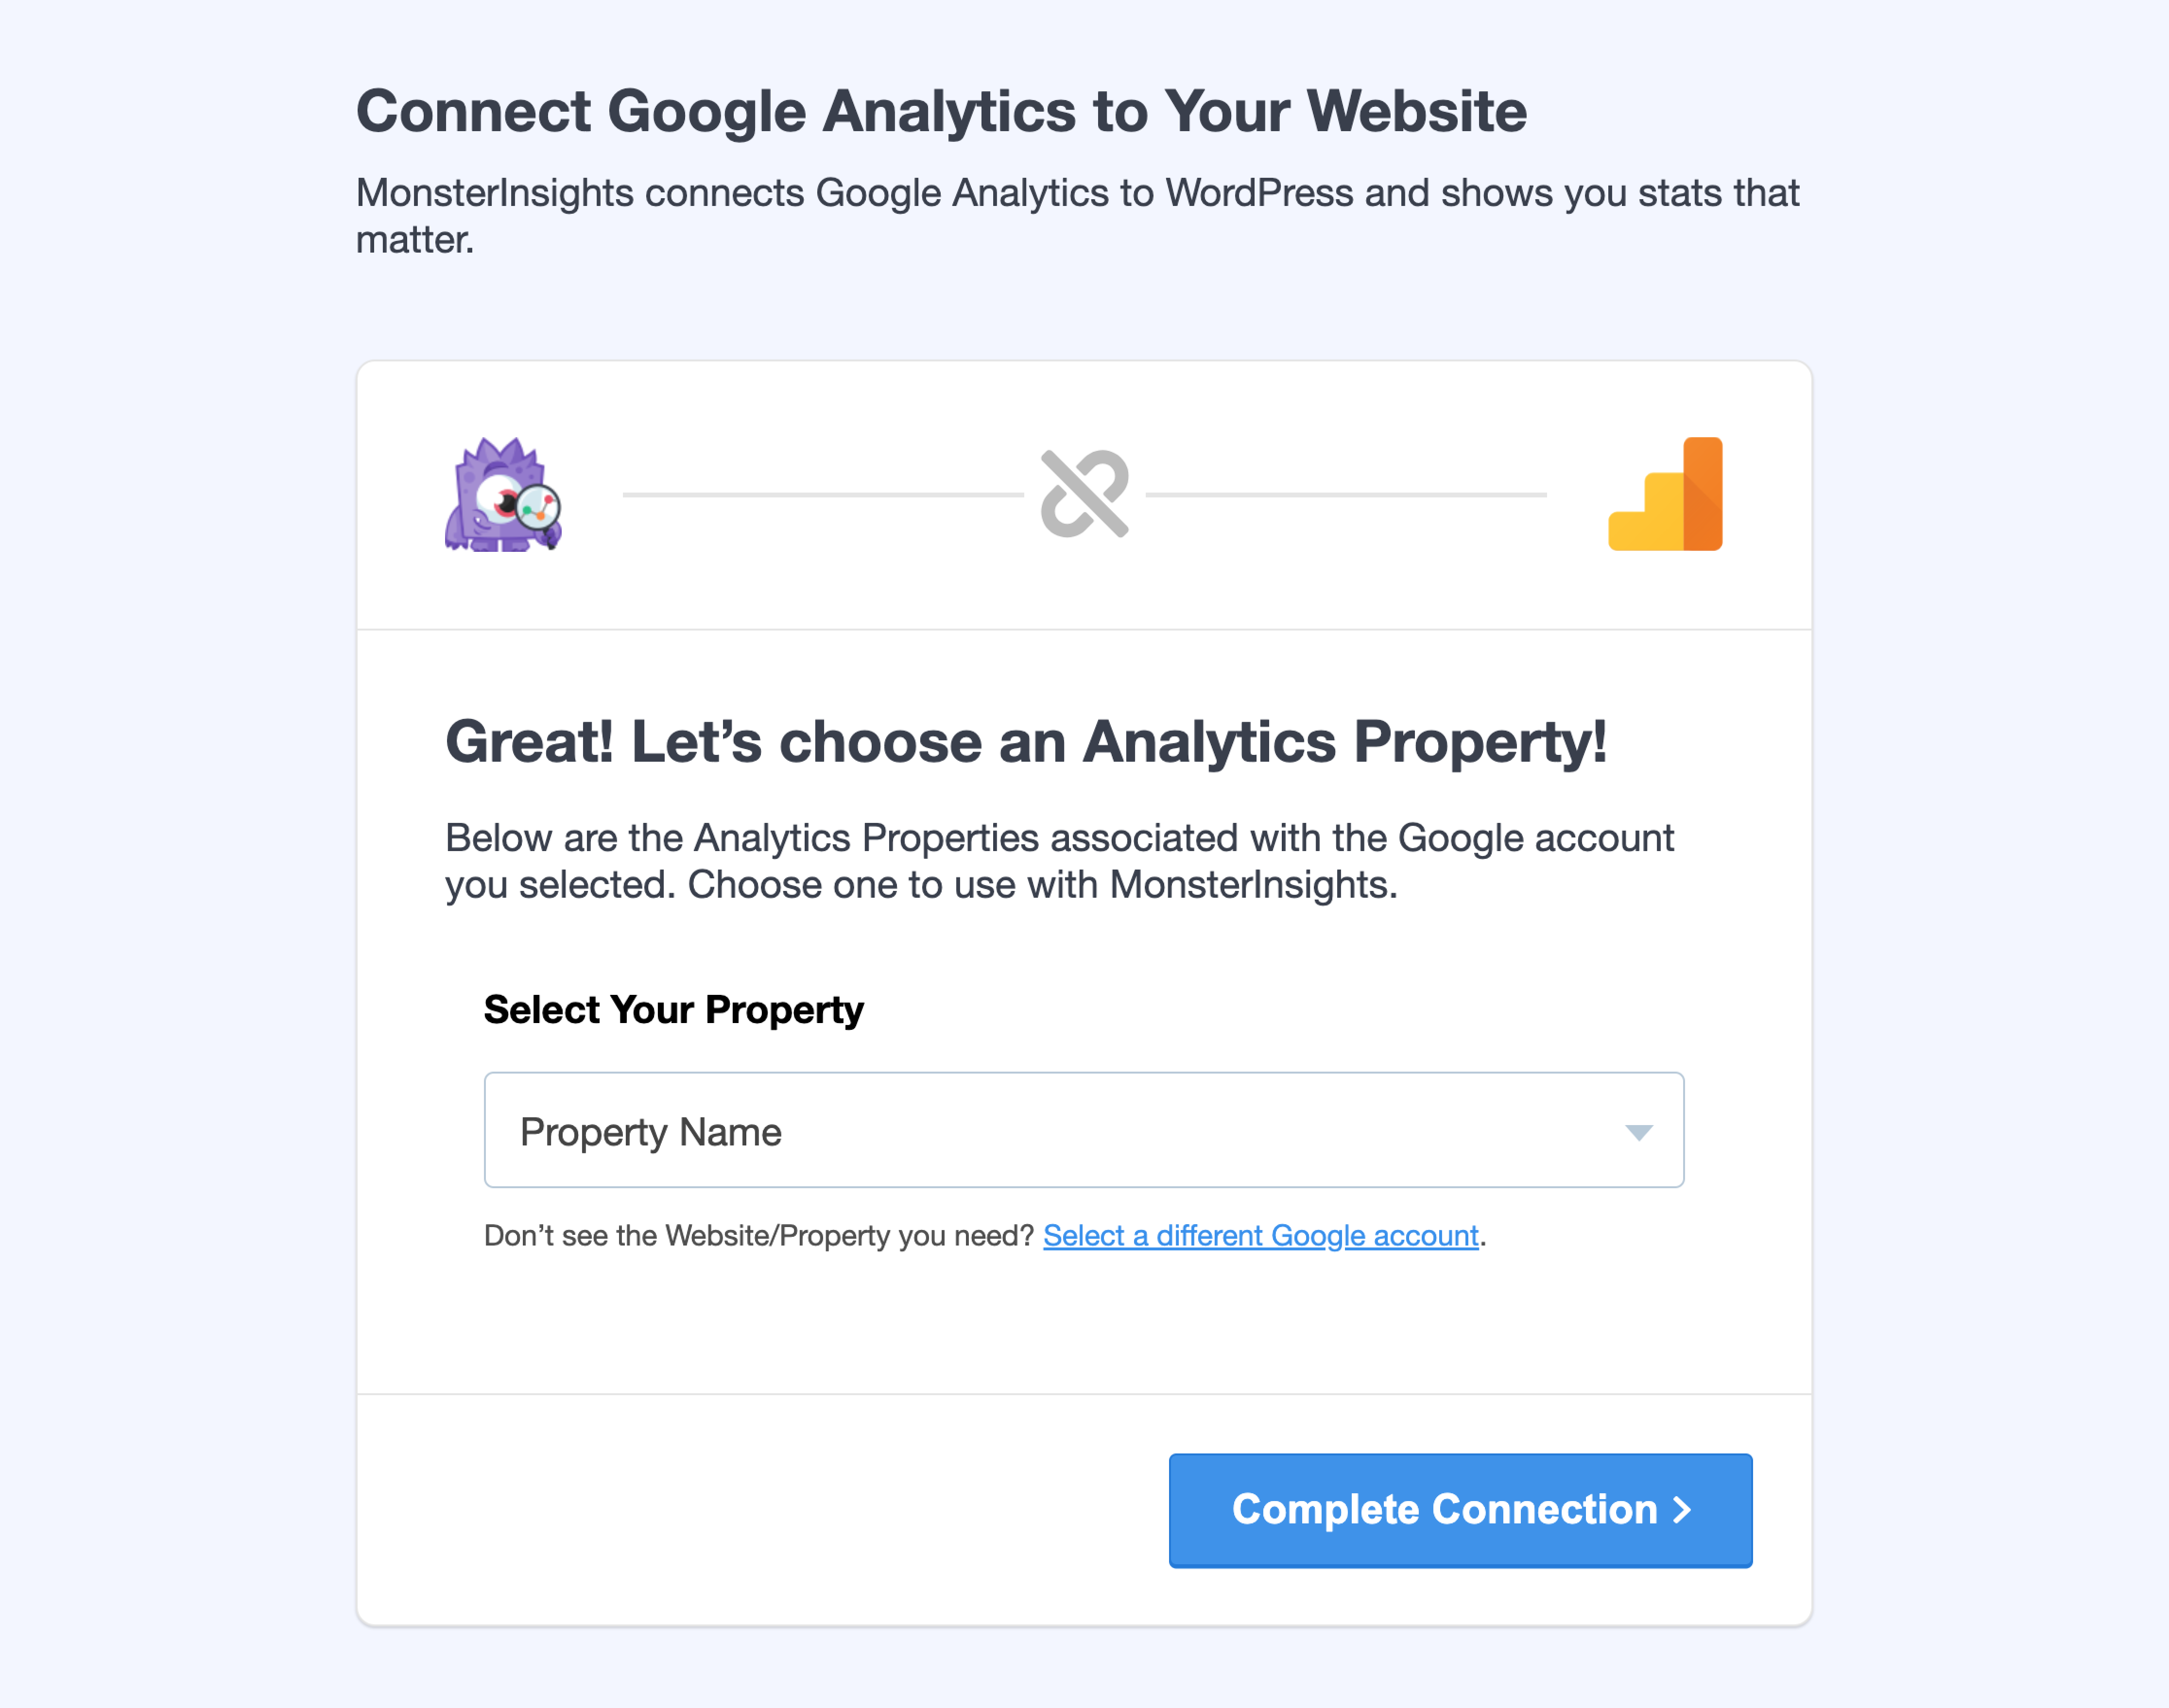
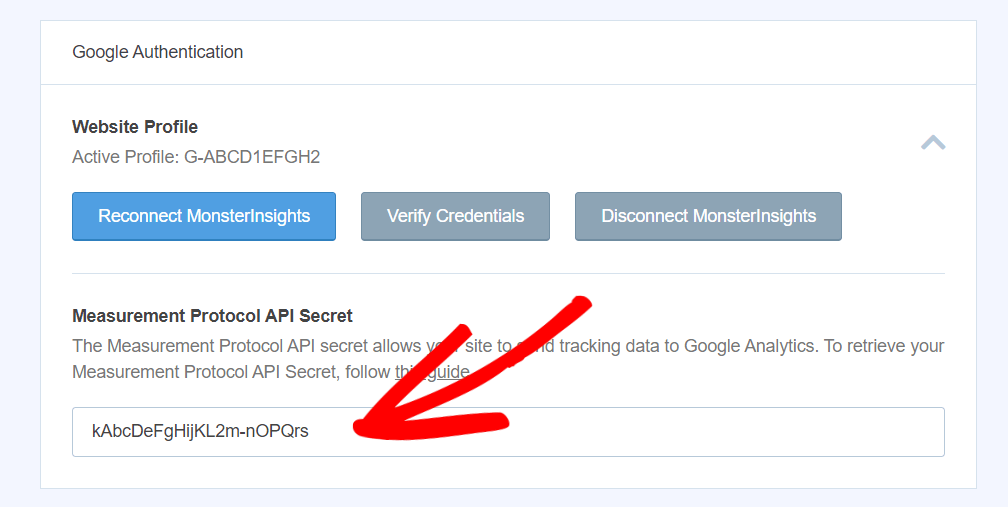
If you’ve already skipped the onboarding wizard, you can find the option to connect to Google Analytics under Insights » Settings » General:
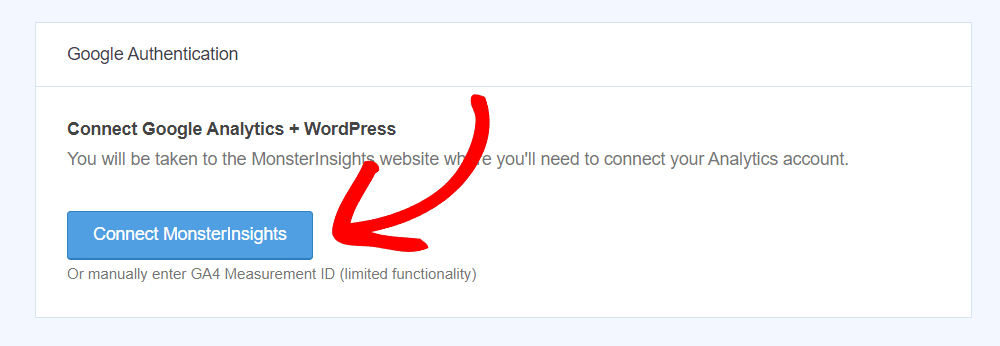
Take note of the Measurement Protocol API Secret that automatically generates for you — you’ll need to make sure to use it on your cross-tracked domain.
For a walkthrough of the onboarding wizard, check out How to Add Google Analytics to WordPress the Right Way (2024).
Step 2: Add Tracking Manually to Linked Domain(s)
The next step is to connect your additional domain(s) to Google Analytics using the manual method. To do that, sign into WordPress for each additional domain you want to cross-track, make sure MonsterInsights is installed, then head to Insights » Settings » General and find the Manually Enter Your GA4 Measurement ID box:
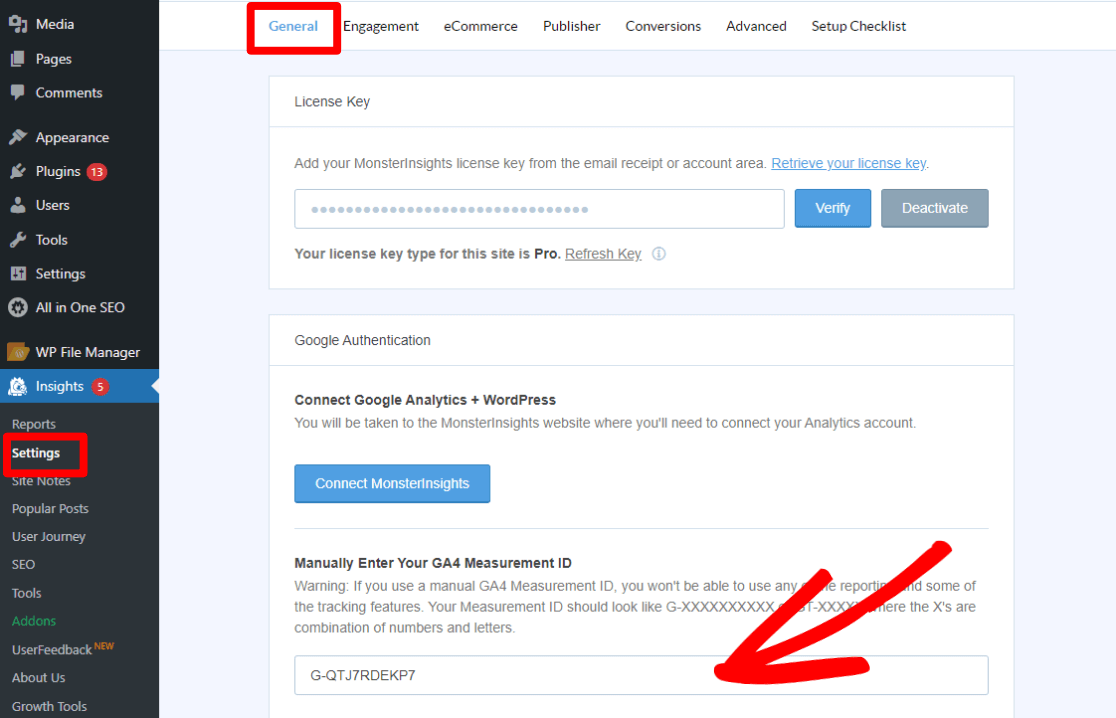
If the onboarding wizard opens up, you can go through it without connecting with Google Analytics and/or click the Exit Setup button at the top of the screen.
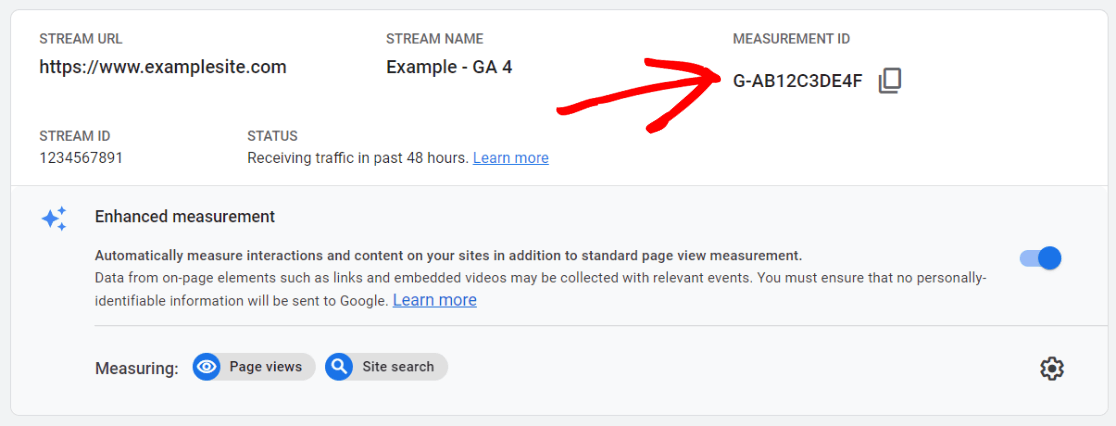
In order for your domains to be tracked together, you’ll need to enter the same Measurement ID for all of them.
Your Measurement ID can be found in your Google Analytics account under Admin » Data Streams » (your data stream here):
Go through this step for each site you have that needs to be tracked in the same Google Analytics account.
Also, make sure to enter the same Measurement Protocol API Secret that automatically generates in the site that you’ve authenticated with Google Analytics (that you took note of in step 1).
Step 3: Add Cross-Tracked Domains in MonsterInsights
In both or all of the sites you have that need to be cross-tracked, you need to add the other site(s) into your MonsterInsights settings.
To do that, go to your WordPress dashboard and click on Insights » Settings » Engagement.
Now navigate to Cross-Domain Tracking and click Add domain.
![]()
Enter the domain(s) you want to include in cross-domain tracking. If you have more than one domain, click Add Domain to enter another website.
![]()
Once you’ve added your other websites, go ahead, and click Save Changes.
Make sure to complete this step on each website you have that you’re setting up cross-tracking on.
Step 4: Add Cross-Tracked Domains in Google Analytics
Finally, head to the Google Analytics account that you just connected to your sites. Head to Admin » Property » Data Streams and click on your data stream.
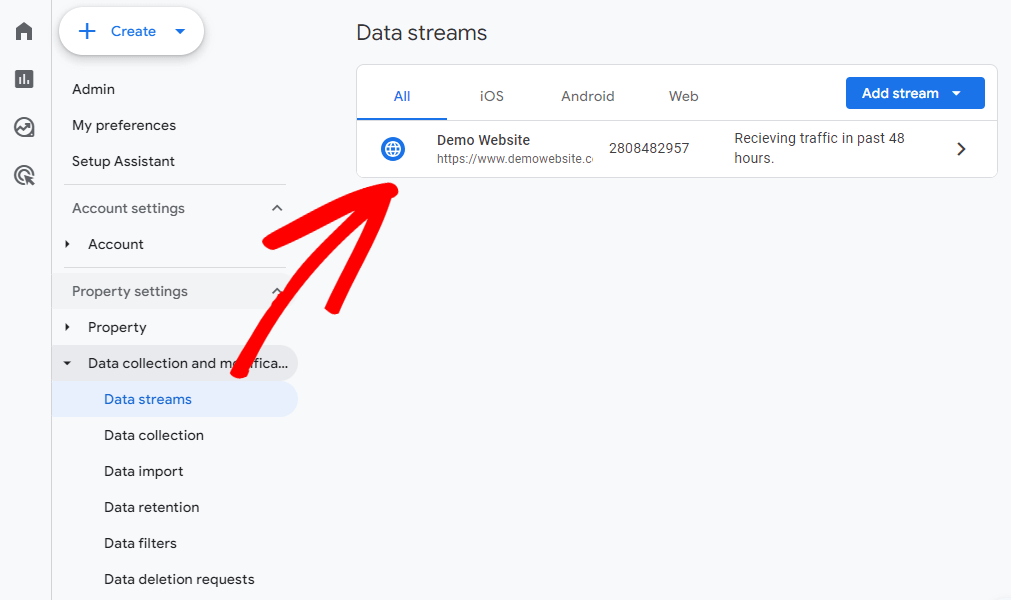
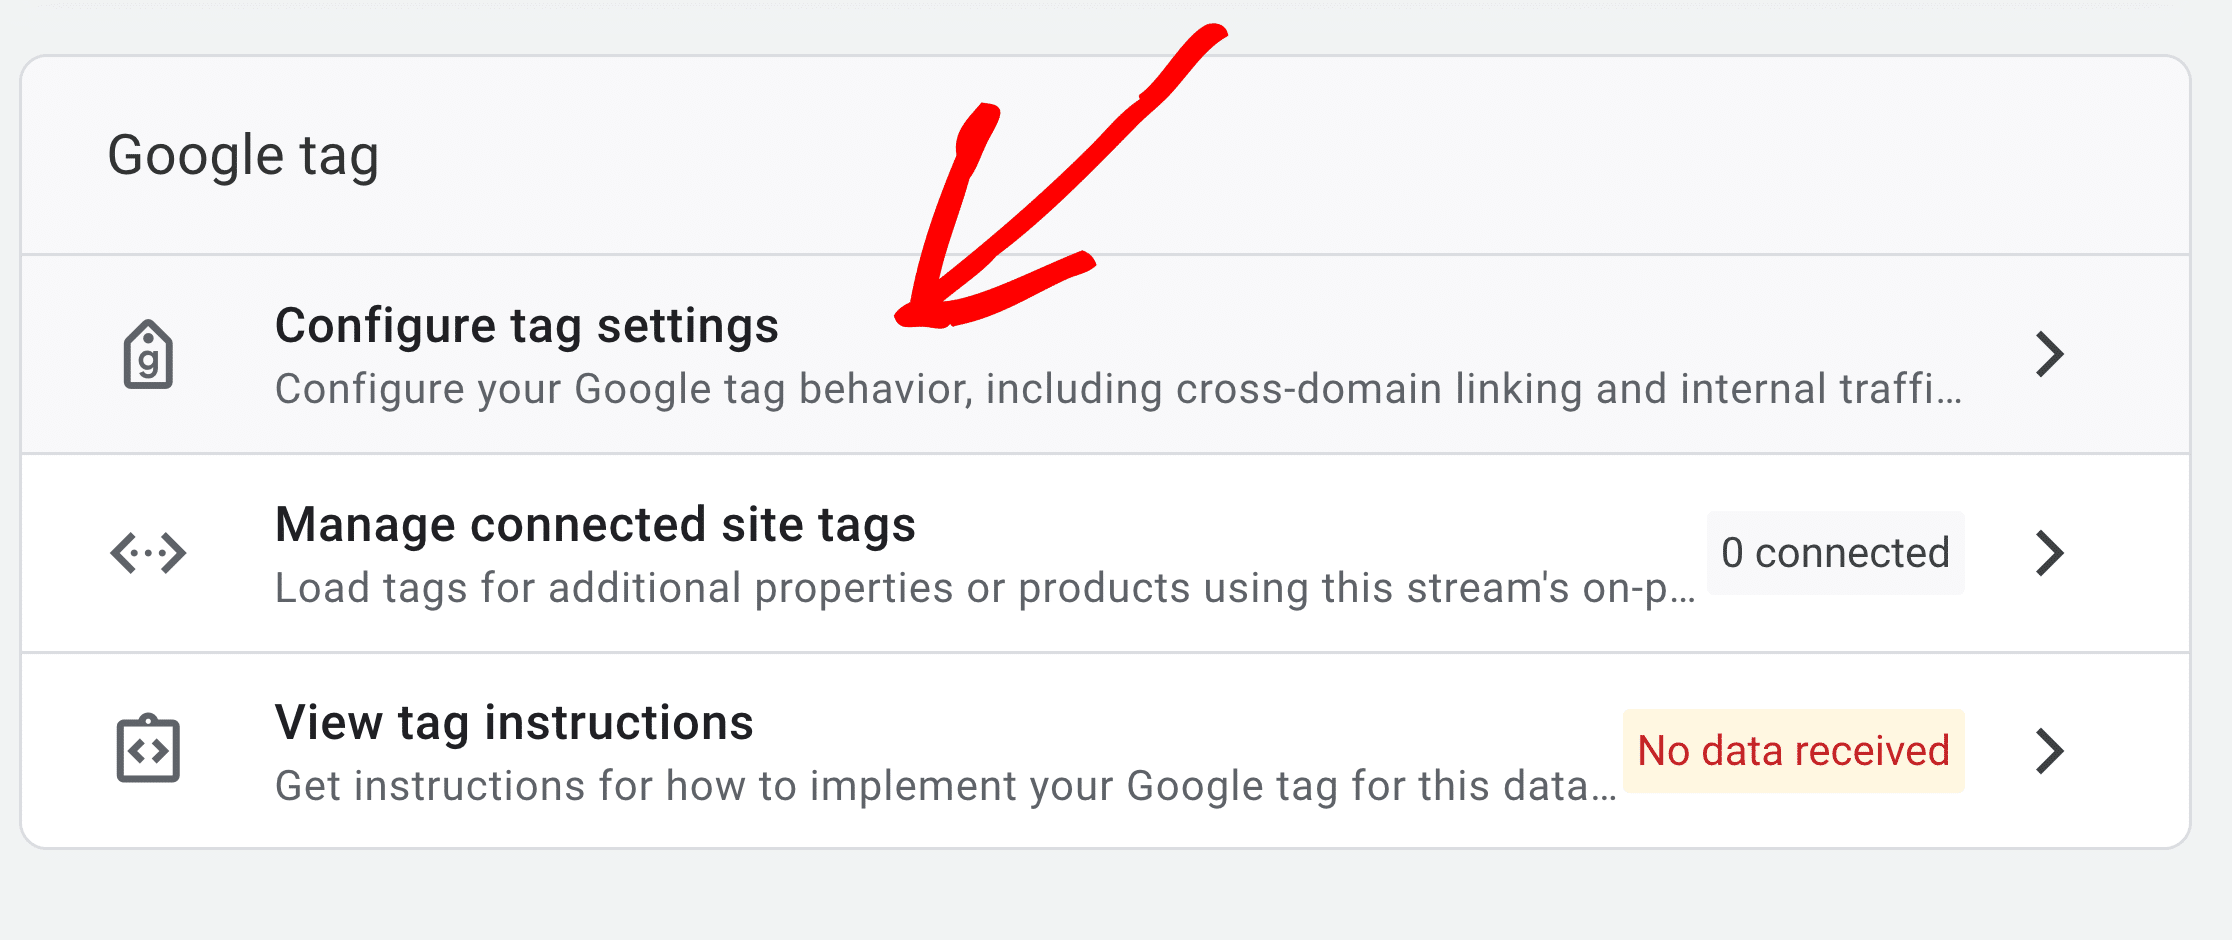
Then, scroll down to the Google tag section and click on Configure tag settings.
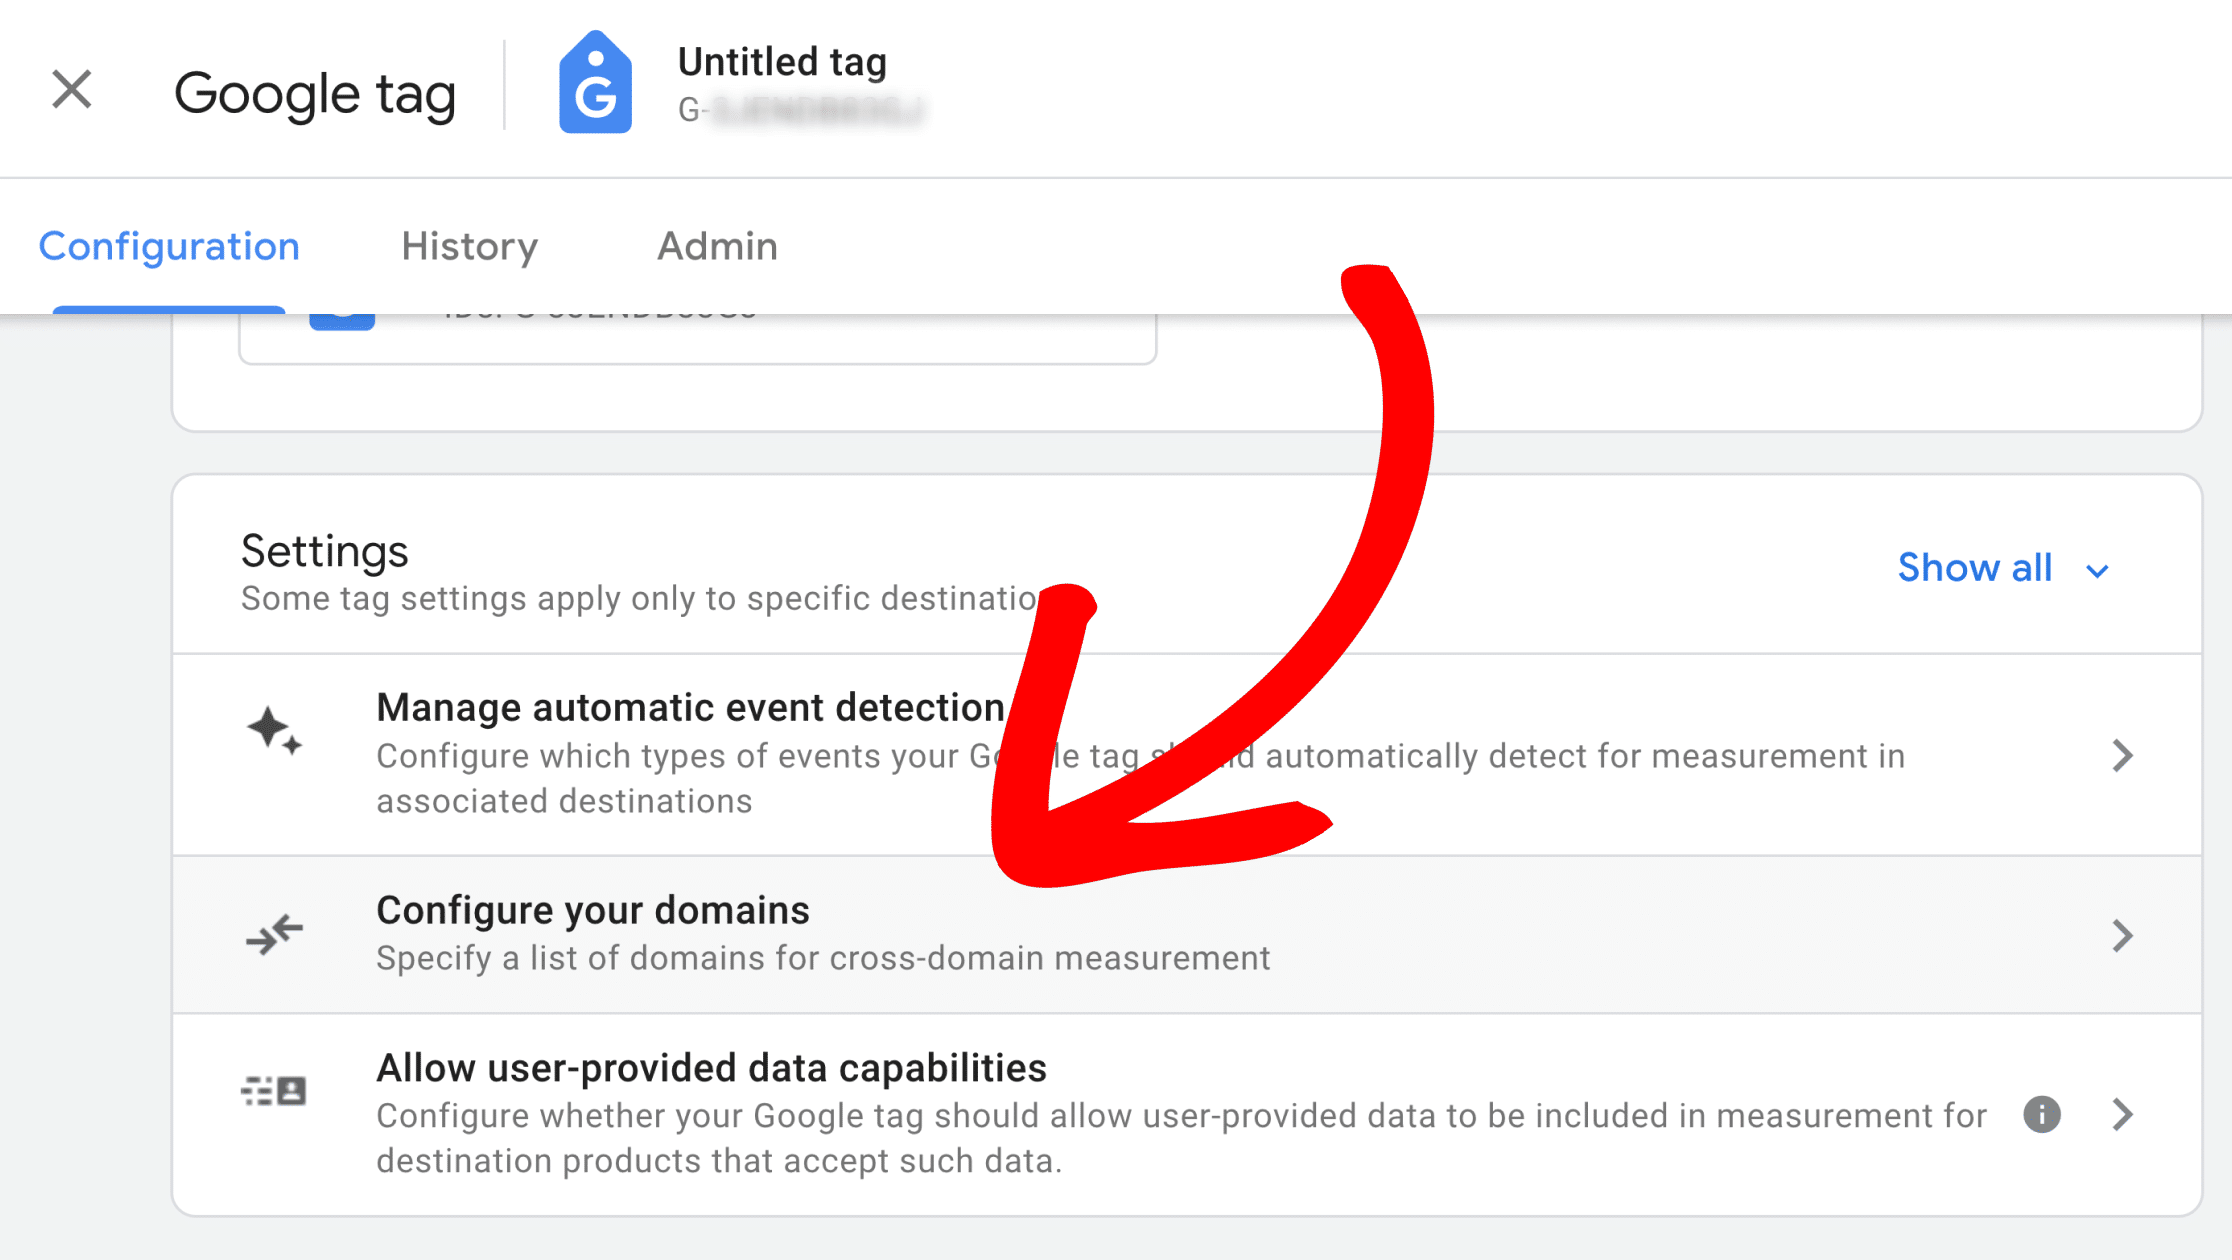
Next, click on Configure your domains in the Settings section.
Now, click on the Add condition button. Then, select the condition that works best for your case.
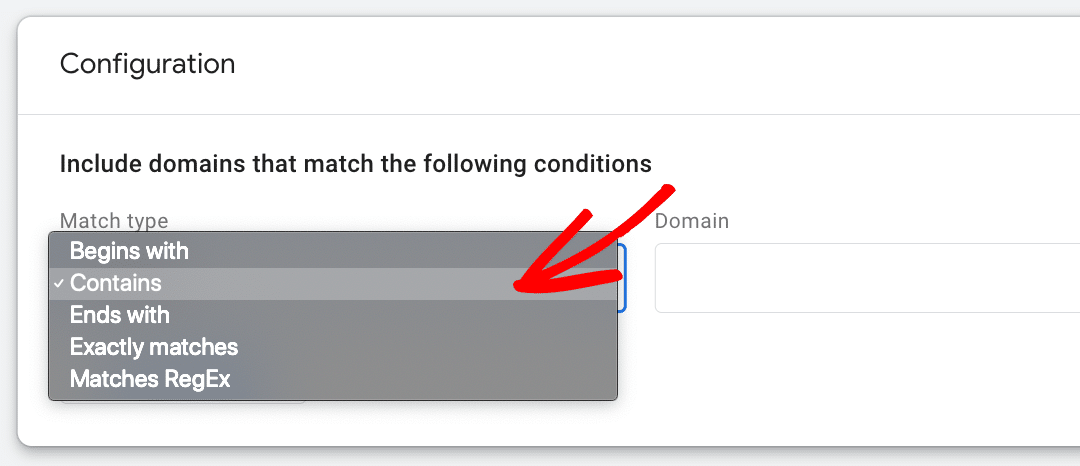
Here’s an example. Suppose you select Contains in the dropdown and type in “mysitehere” in the Domain input field.
Then, the following domains would be included in your cross-domain tracking:
- www.mysitehere.com
- mysitehere.com
- mysitehere.org
- shop.mysitehere.com
When you’re done, click the Save button at the top of the page.
That’s it!
You can now accurately track your visitors across multiple domains and count them as a single session in your Analytics reports.
Using the cross-tracked data, you can see how they interact with your websites, which links they click, and how you can boost your site’s performance.
We hope you liked our guide on how to set up cross-domain tracking in Google Analytics. You might also want to check out:
Top 5 User Engagement Metrics for Your Website Explained
How to Easily Keep PII Out of Google Analytics
WordPress SEO Checklist: 17 Simple Steps
Not using MonsterInsights yet? What are you waiting for?
And don’t forget to follow us on X, Facebook and YouTube for more helpful Google Analytics tips and tutorials.
