Do you want to create an order form on your WordPress site? Adding an order form to your website lets you collect orders and payments online, and helps to increase your sales.
In this article, we’ll show you how to create a simple order form in WordPress (the easy way).
Choosing the Right Plugin for Your WordPress Order Form
WordPress comes with many form builder plugins that allow you to create an order form; however, many of them aren’t user-friendly.
But thankfully WPForms solves this problem by offering a simple solution for beginners.
WPForms is the most beginner-friendly WordPress form plugin available in the market.
It comes with a built-in order form template which lets you create a WordPress order form within a few minutes.
When your forms are ready, it allows you to embed them on your website sidebars, posts, and pages easily with widgets.
Not only that, you can use WPForms for every type of form you’ll ever need on your site, including a simple contact form, survey form, and more.
Now let’s take a look at how to create a simple order form in WordPress using WPForms (step by step).
Step 1: Create a Simple Order Form in WordPress
First thing you need to do is install and activate the WPForms plugin on your WordPress site. For more details, see this guide on how to install a WordPress plugin.
Once the plugin is activated, go to WPForms » Add New to create a new form.
After that, it’ll open the setup page with different form templates. Choose the Billing / Order Form.
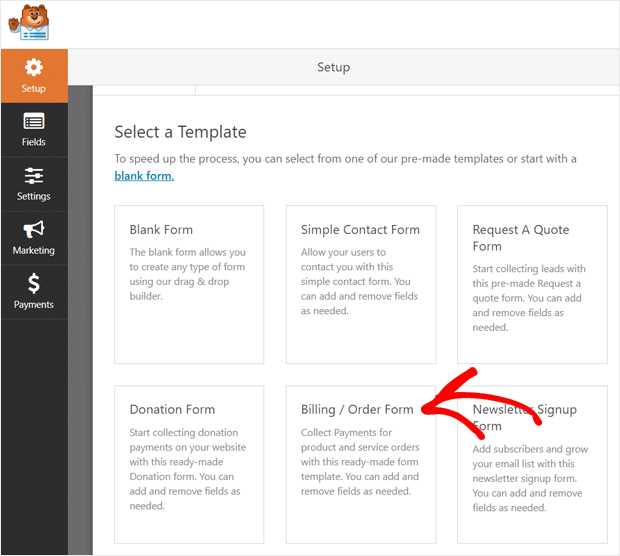
Now WPForms will create a simple order form for you.
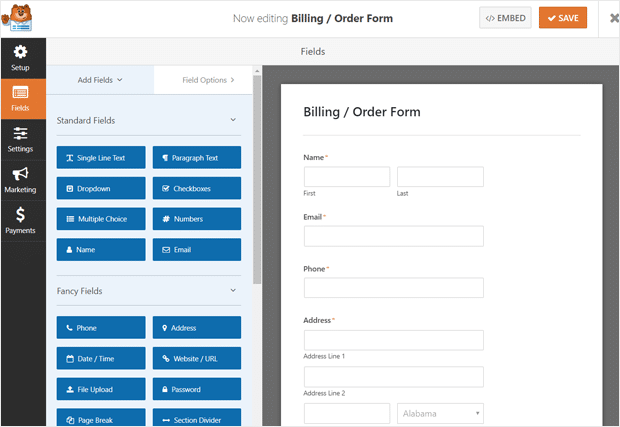
You can customize the form easily by using the simple drag and drop form editor. Here’re the main customization options and how to do them.
- Customize any field by simply clicking on it, and editing the options
- Rearrange the order of the fields by dragging them up and down
- Add additional fields by dragging them from the left side panel to the right side panel.
You can customize all the available fields, add new fields, and make an order form as you want.
While you can use most fields as they’re by default, you may want to change the ‘Available Items’ section.
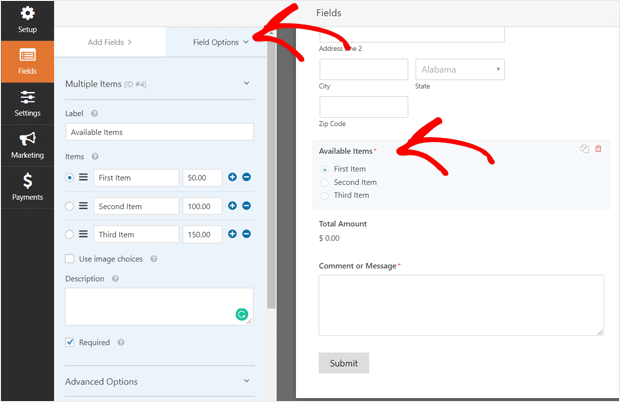
Upon clicking on the ‘Available Items’ field, the editing options will appear on the left-hand panel. You can rename the items, change the pricing, add more products, or delete the items.
Check the ‘Use image choices’ if you want to show the images alongside your items in your order form.
When you’re happy with your order form, click the Save button on the top right corner.
Step 2: Configure Your Order Form Settings
Now that you’ve built an order form, the next step is to configure its settings.
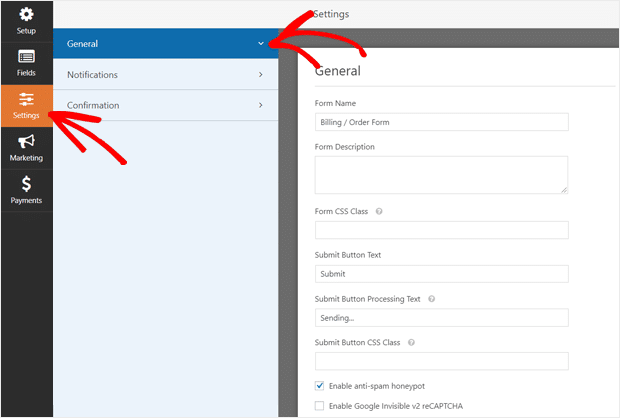
Click on the Settings tab and then you’ll see different settings. At first, the General settings will open where you can customize your form name, description, submit button label, and anti-spam options.
Second, you can customize Notifications for your order form. At first, you can see a default notification setting. This notification will send notification emails to the admin of your website.
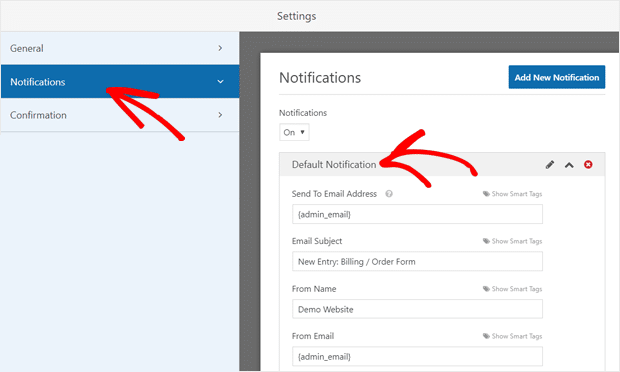
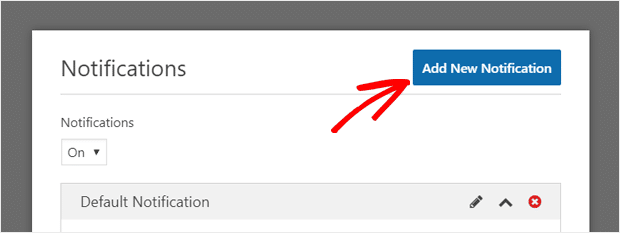
You can also add new notification to send emails to your users who submit your order form. Click on the Add New Notification button, and then name your notification.
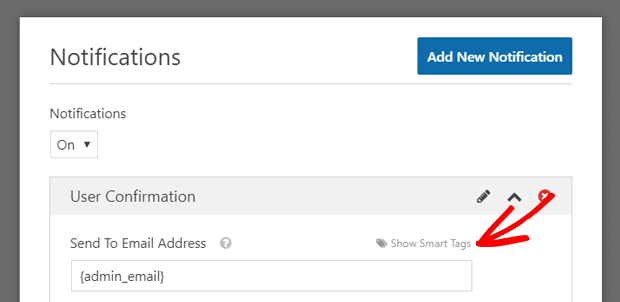
After that, click ‘Show Smart Tags’ option next to the Send to Email Address field.
Select the ‘Email’ option. After that, WPForms will automatically select the field where users enter email address and add that to Send to Email Address field. For example, {field_id=”1″} in the screenshot below.
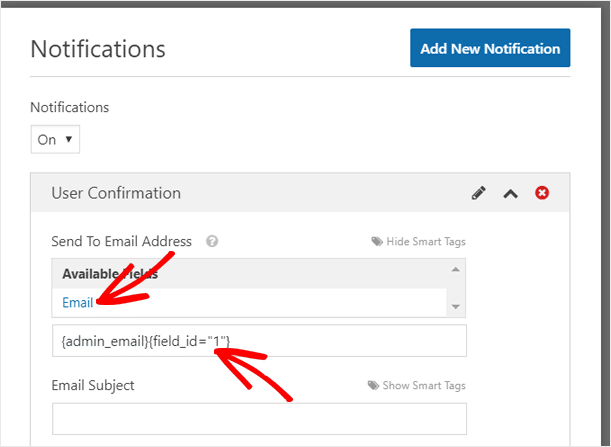
Now, you can delete the {admin_email} tag from there because it’s used for sending email to the website admin.
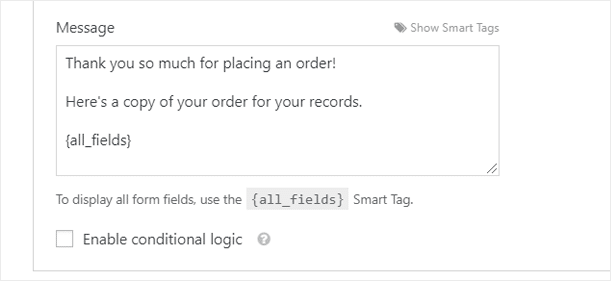
Next, you can change your notification’s email subject, from name, email, reply to, and message. For example, you can compose a message like below in the screenshot.
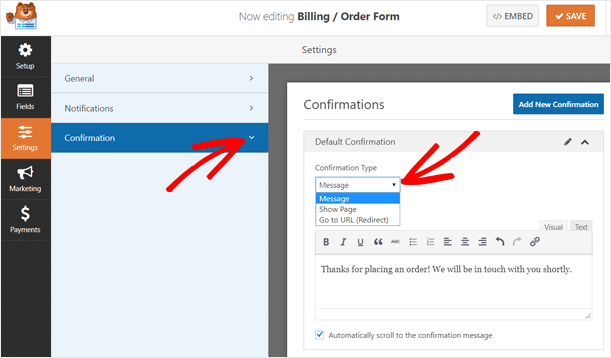
Third, you can click on the Confirmation option to configure what to show your users after they submit your order form.
There’re 3 confirmation types you can use in WPForms:
- Message – A simple confirmation message that will appear when users successfully submit your order form.
- Show page – Redirects the users to a page like Thank You page after they complete your order form.
- Go to URL (Redirect) – Redirects the users to any page on your website or another website.
You can choose any one confirmation type and configure its options.
Once done, don’t forget to click the Save button at the top right corner to save all your form settings.
Step 3: Configure Your Payment Settings
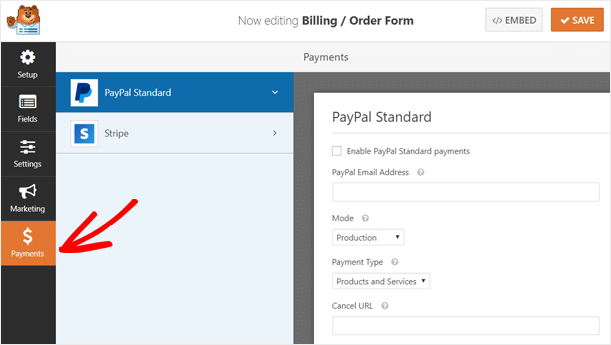
The next step is to configure payment settings for your order form. Simply click on the Payments tab to get started.
WPForms comes with simple integration for PayPal and Stripe to collect online payments. To use these payments, you need to first install and activate the respective addons by going to WPForms » Addons page from your dashboard.
After that, you can easily configure payment options for your order form. Once done, don’t forget to click the Save button at the top.
Step 4: Add Your Order Form to Your WordPress Site
WPForms allows you to add your order form to many places on your website, like blog posts, pages, and sidebars.
To add your order form to your WordPress post or page, you can use the WPForms widget in your content edit screen.
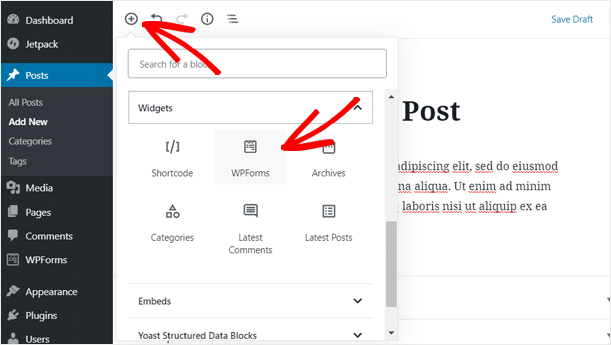
After the WPForms widget is added to the content area, you need to select the Billing / Order Form that you created earlier.
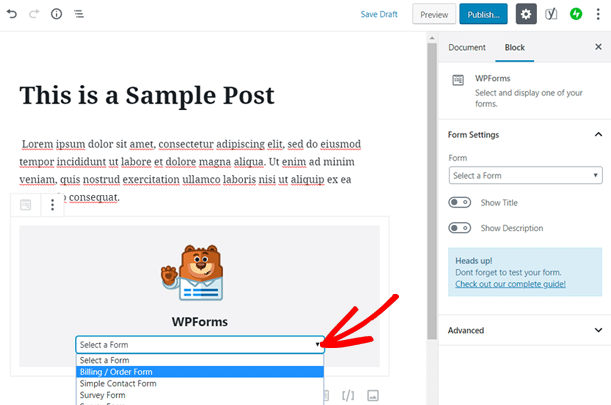
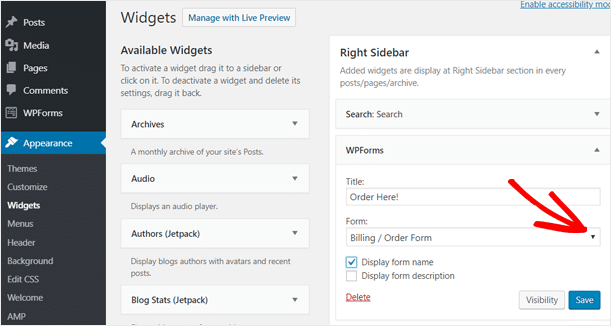
Similarly, you can also add your order form to the widget-ready areas on your site like the sidebar.
Go to Appearance » Widgets and drag the WPForms widget to your sidebar. Next, you need to select the Billing / Order form from the drop-down menu and save the widget.
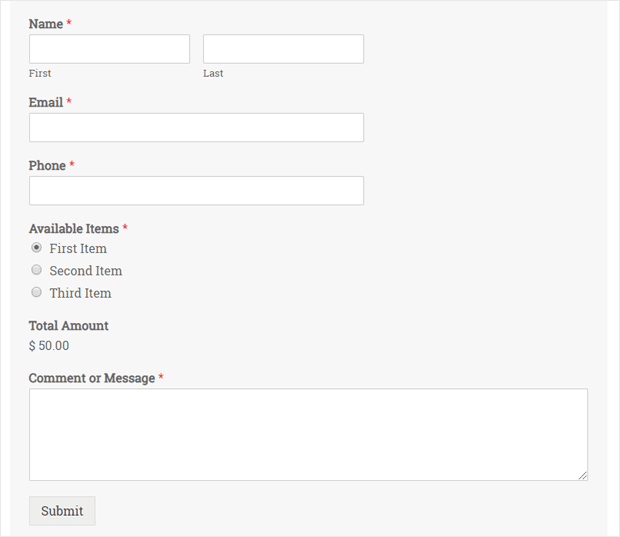
Once done, you can preview your order form live on your site. Here’s how the order form looked on your demo website.
Track Your WordPress Form Conversions
Once you publish your order form, you may get curious about its performance. You want to know how many users are viewing, and actually submitting it.
If you want to see how your order forms are actually performing, then MonsterInsights plugin is the best solution. It’s the most user-friendly Google Analytics plugin for WordPress.
It comes with a simple Forms Tracking Addon to let you track your WordPress forms easily.
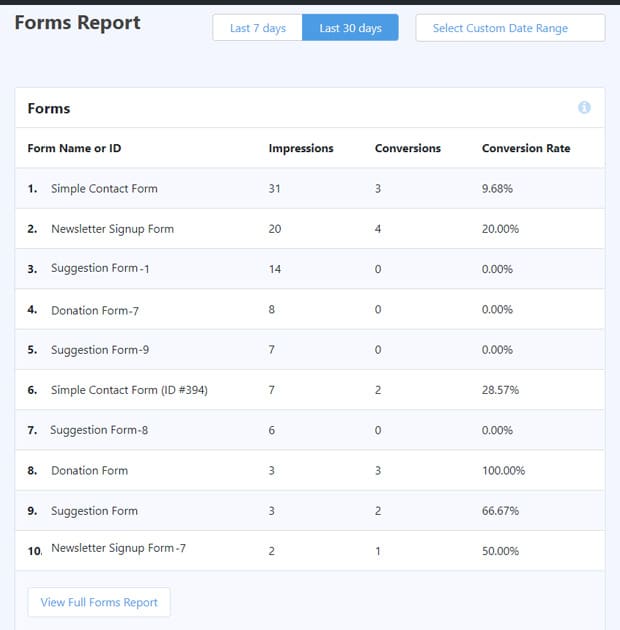
For more details, see our guide on how to track WPForms conversions with Google Analytics.
We hope this article helped you to learn how to create an order form in WordPress easily. You may also want to see our guide on how to create a survey in WordPress.
And don’t forget to follow us on Twitter and Facebook for more helpful WordPress tutorials.
