Looking for the best way to collect user feedback in WordPress?
When you’re able to collect real verbatim user feedback, there are so many ways you can use it to improve your website, your products, your content, and more. All of those improvements lead to more sales and more conversions, and a bigger bottom line for your business!
There’s a really easy, convenient way to gather user feedback in WordPress. First, though, let’s take a look at why you should collect user feedback, and what you can do with it.
Why Collect User Feedback in WordPress?
When you think about making improvements to your website or your products, what’s making you come up with your ideas for those improvements? You probably base a lot of your ideas on what you think your website needs, right?
But, doesn’t it make more sense to ask the people who are actually visiting your website about what they need and want it to have?
Sure, a lot of your own intuition and research probably lead you to have a pretty good idea about what your website or products need. However, asking your users really opens up a whole new set of possibilities. Chances are, they’ll suggest things you hadn’t thought of at all!
When you can make changes suggested by the very people you’re hoping will buy from you or convert on your website, you can grow those connections with your audience and reach them in the ways they want to be reached. Make the changes suggested by your users and watch your sales and conversions grow!
Video Walkthrough
Tutorial: How to Collect User Feedback in WordPress
Ready to learn the best way to collect user feedback on your WordPress website?
For this tutorial, we’re going to use UserFeedback.
UserFeedback is a user feedback plugin for WordPress with an extensive list of powerful features. When installed, it’s easy to gather candid feedback from your visitors so that you can grow your business.
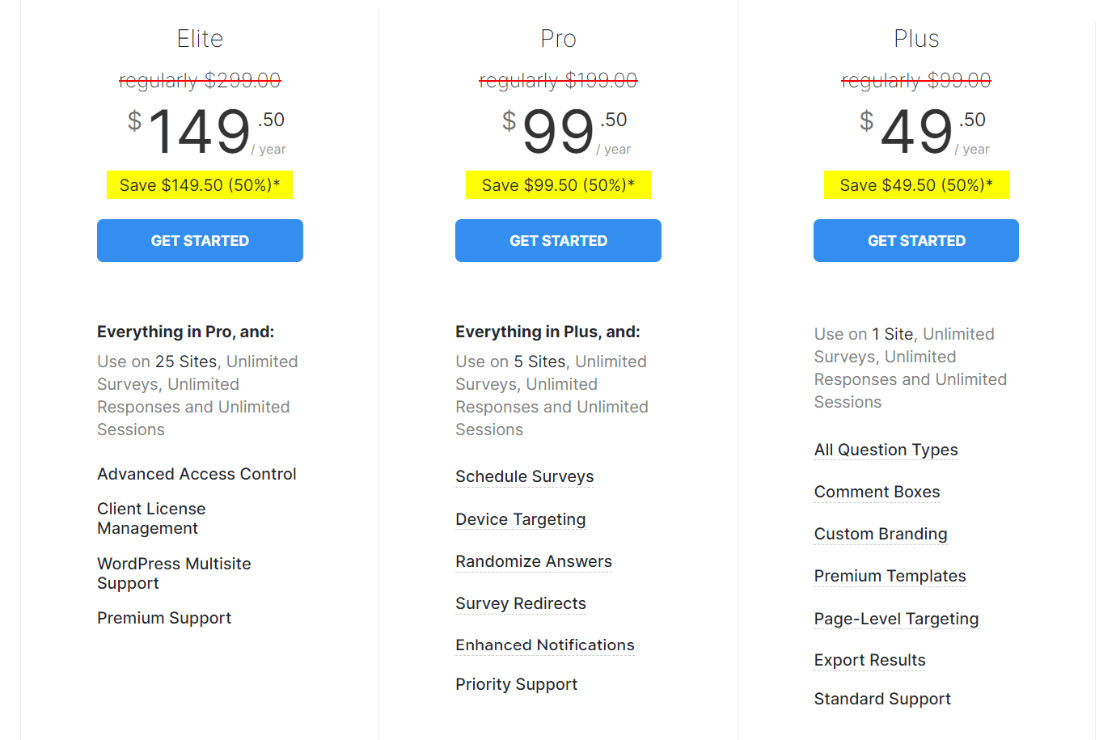
To start, download UserFeedback at the license level that’s right for your site. Or, get started for free.
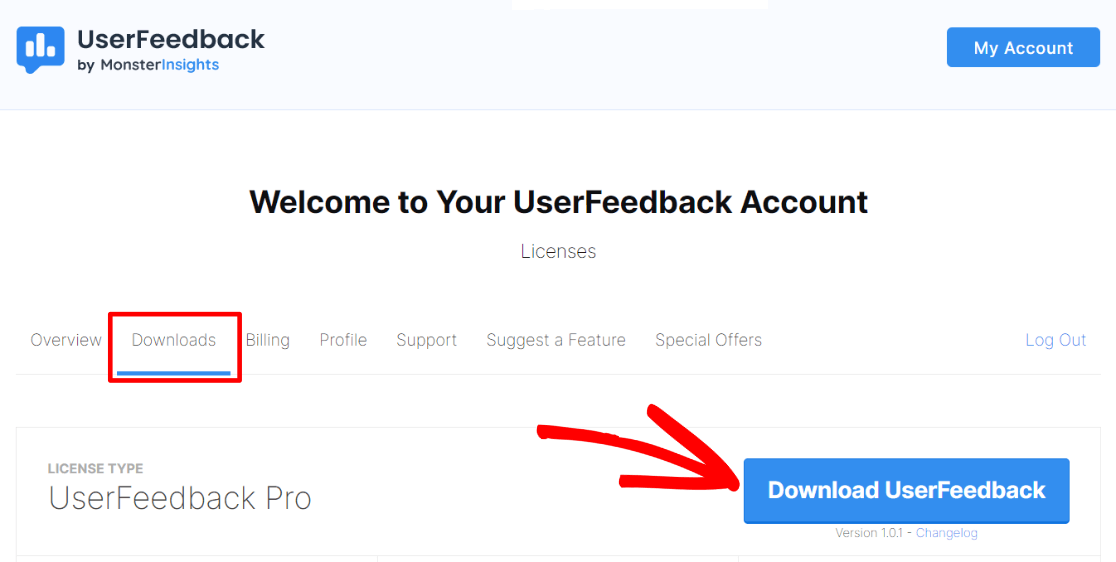
Once you’ve signed up, you can download the plugin from the Downloads tab inside your account:
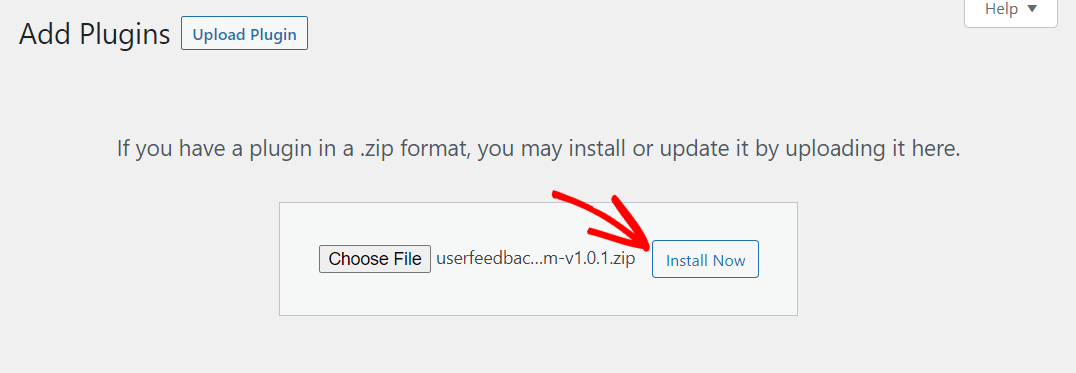
Next, open WordPress and go to Plugins » Add new, then click on the Upload Plugin button:

Go ahead and upload the UserFeedback file, then click Install Now:
When the plugin is done installing, click Activate Plugin:

Once you activate the plugin, the setup wizard will automatically launch. Go ahead and click Start, and let’s walk through setup.
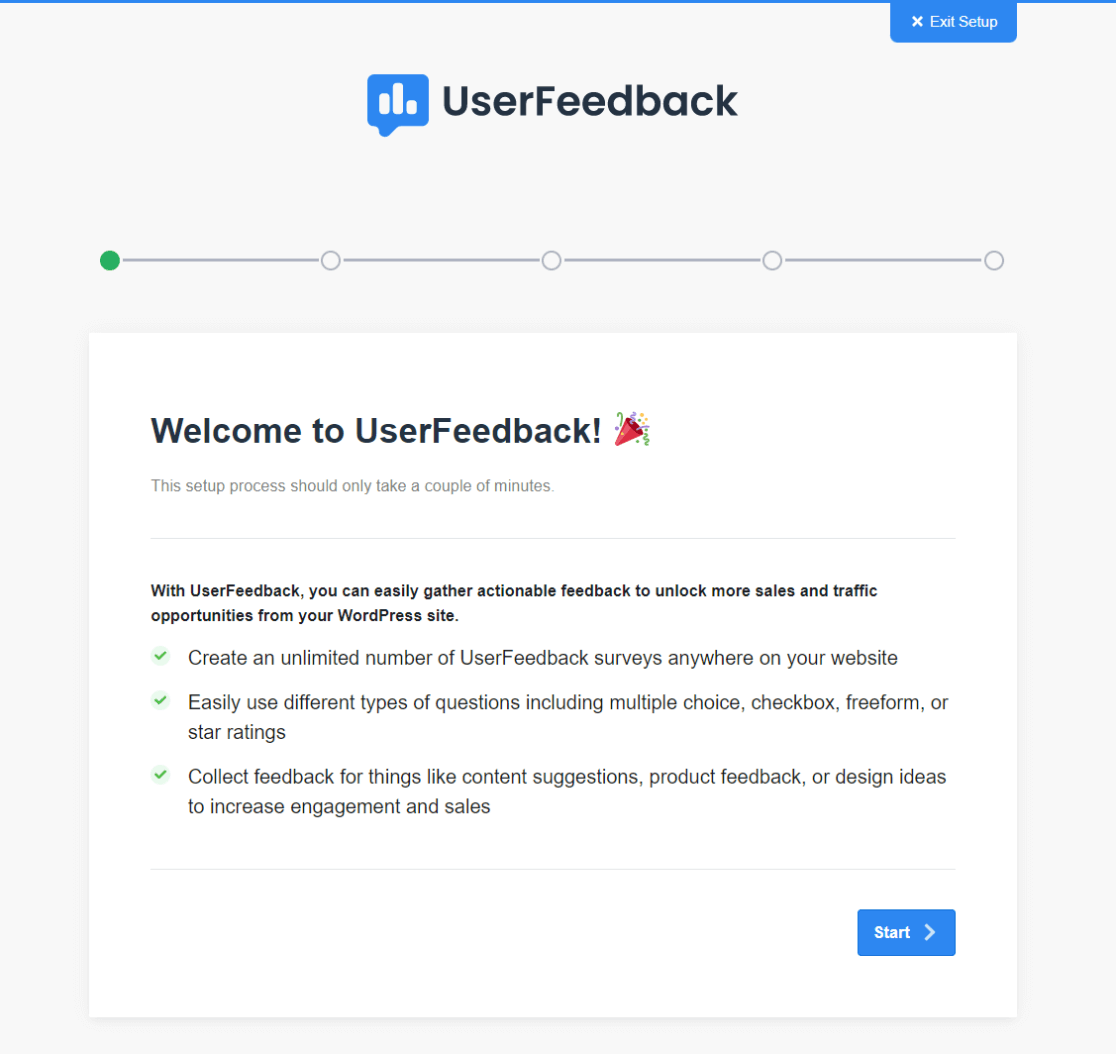
Step 1: Build Your First Survey
The first thing you’ll do is create your first UserFeedback survey. Don’t worry, you’ll be able to change it at any time after you set it up.
So, pick a question from the available ones or create one of your own. Once you’ve done that, click the Next Step button.
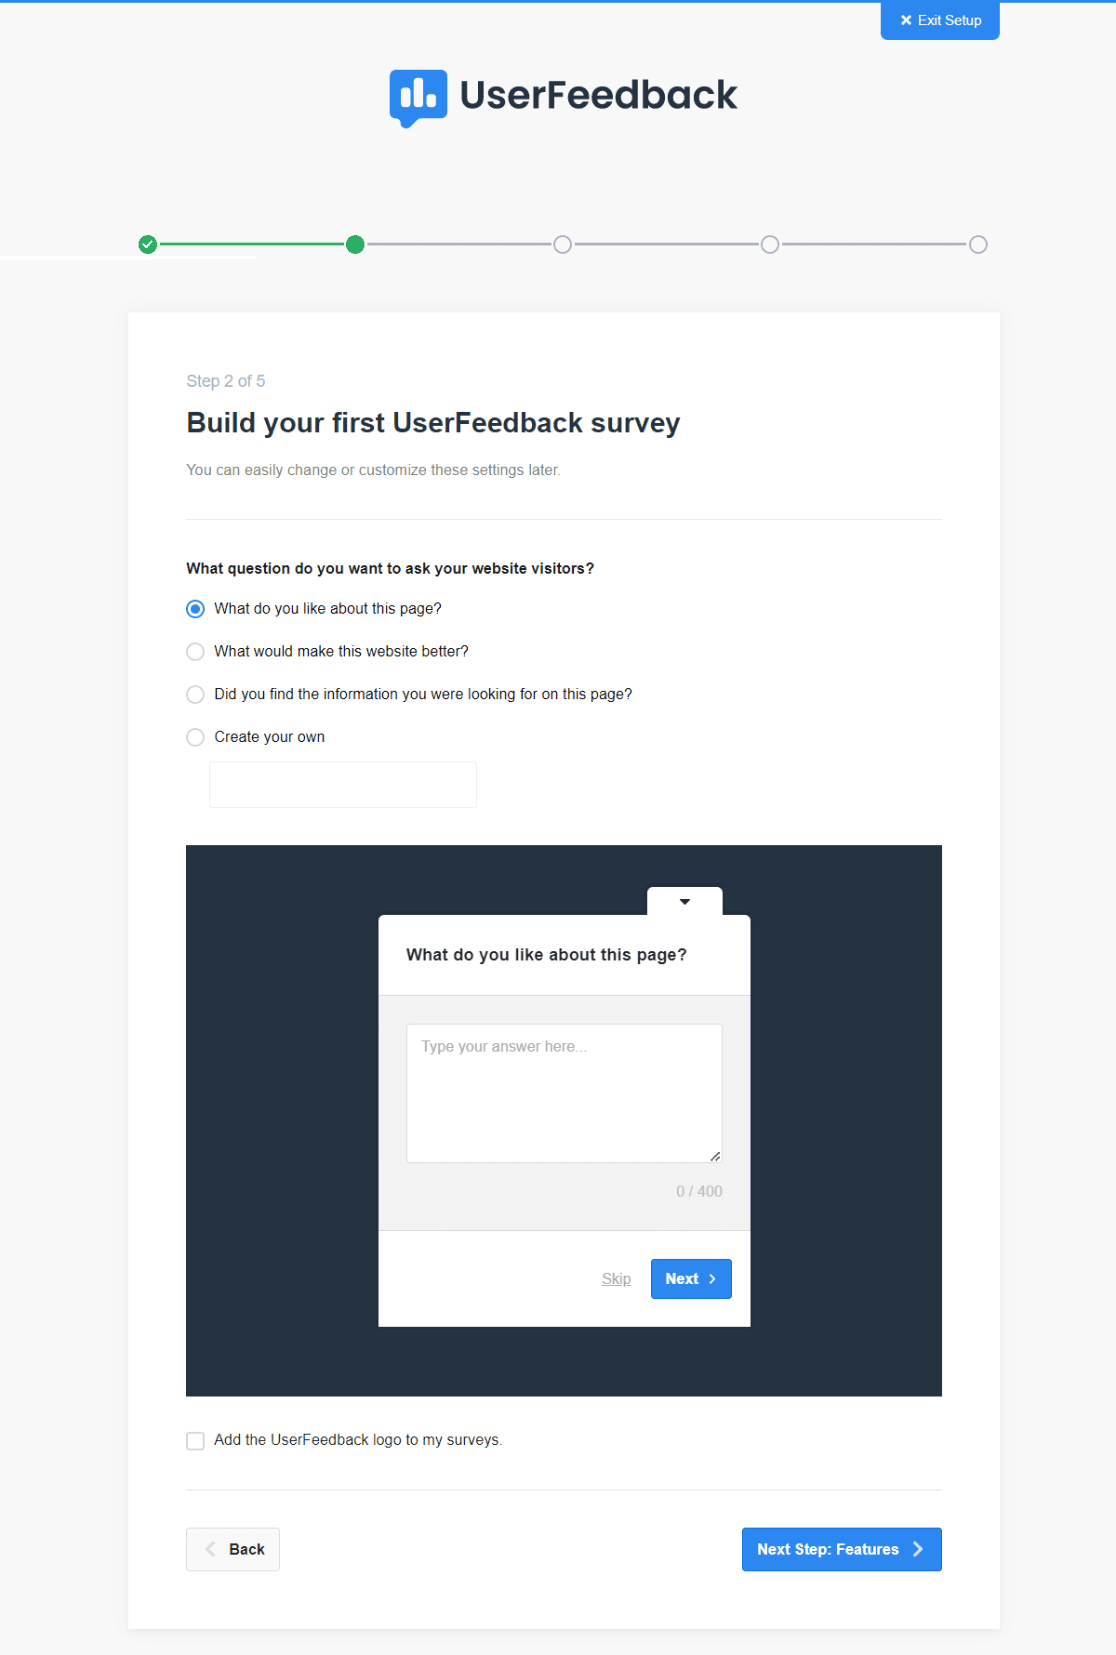
Step 2: Choose Features to Enable
Depending on your license level, you’ll have some features you can choose to enable.
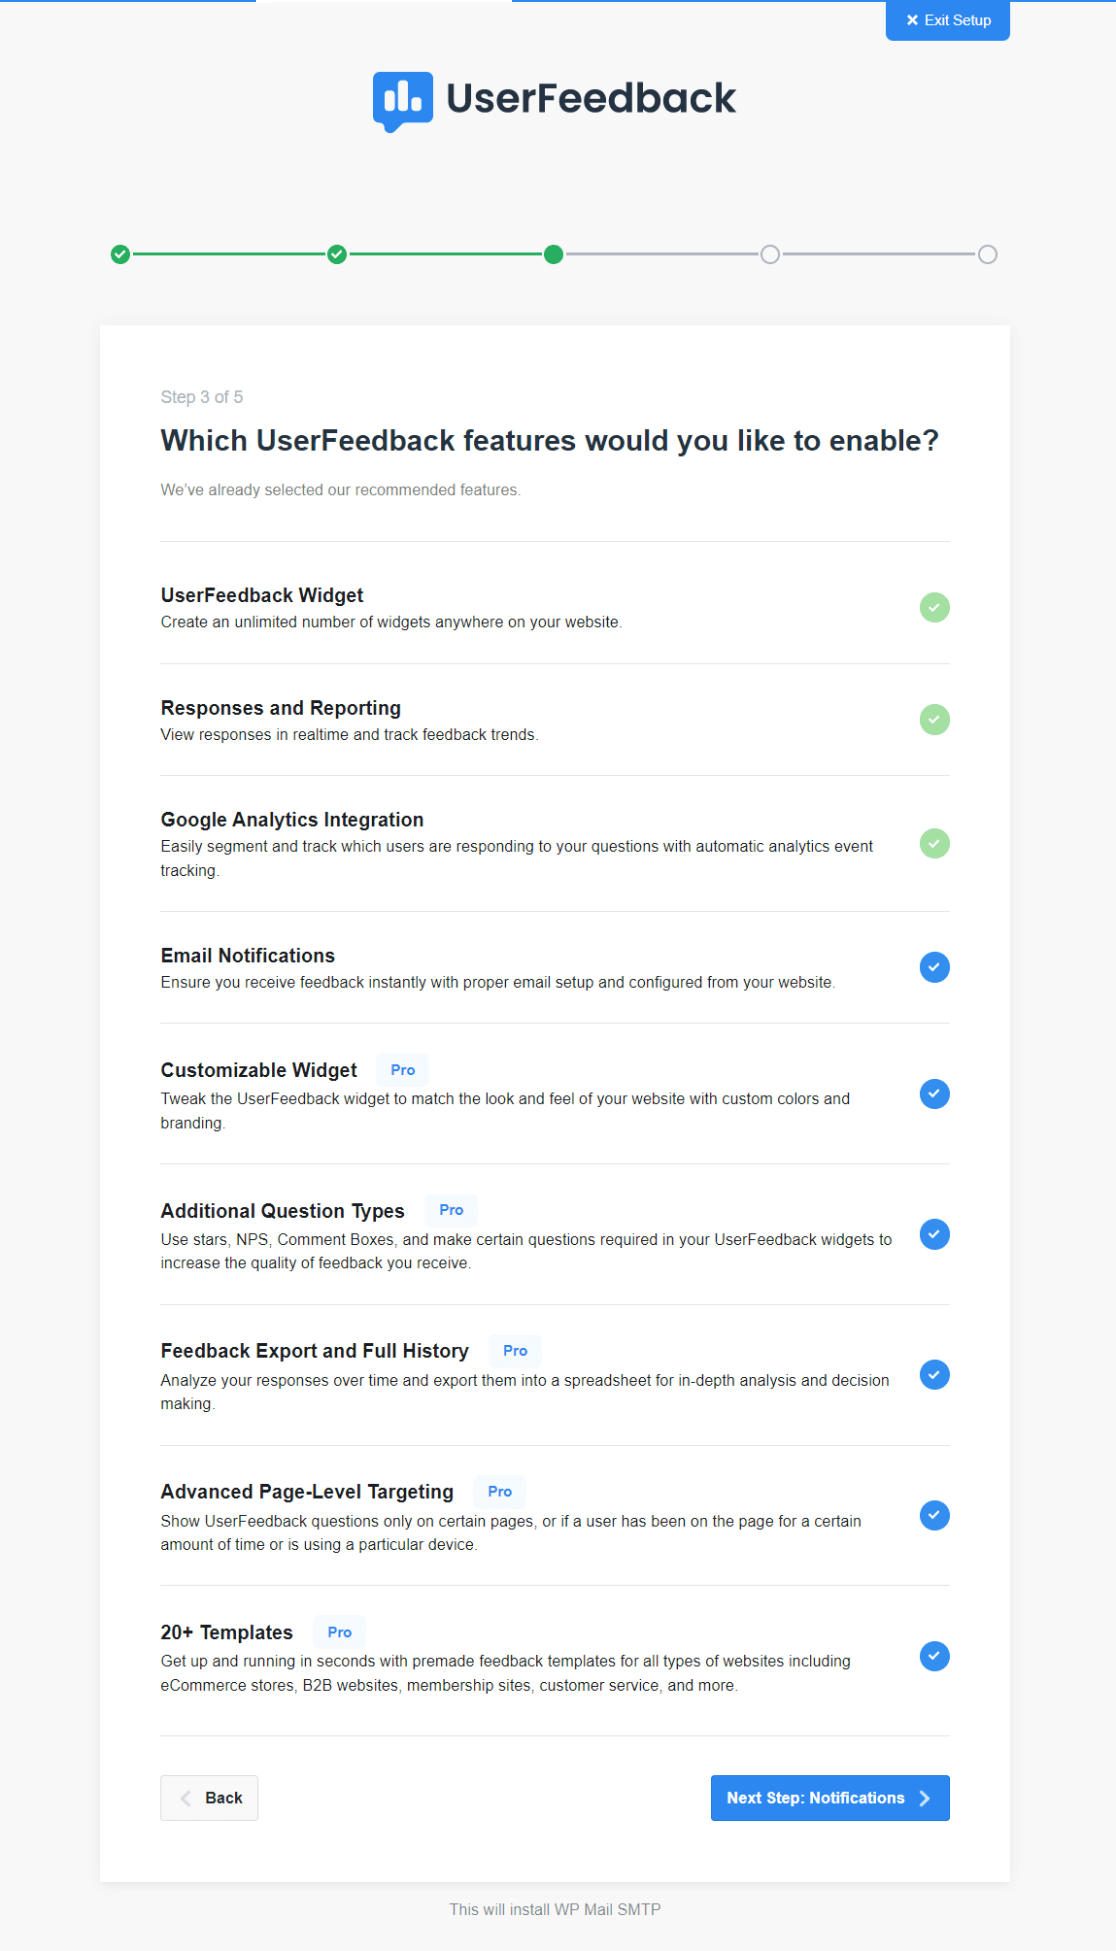
Go ahead an enable the ones that you want and need, or all that your license level allows.
Step 3: Customize Your Notifications
This is where you can choose the email address for your survey answers to be sent to, and agree to receive important communications from the UserFeedback team. You can also choose to help the team better understand their users and their website needs.
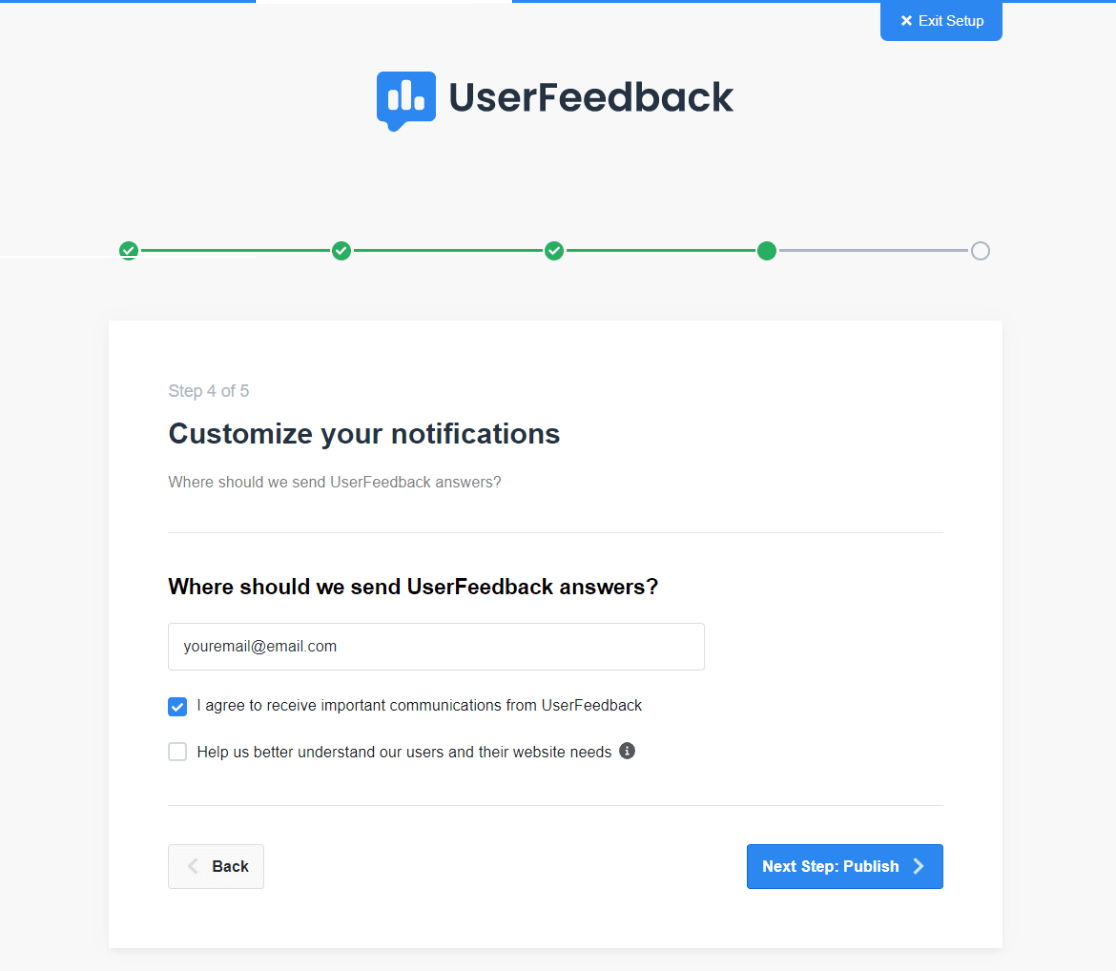
Step 4: Publish
In the final step, the addons and features you chose will be installed, then you’ll be able to click the button at the bottom to exit to your dashboard.
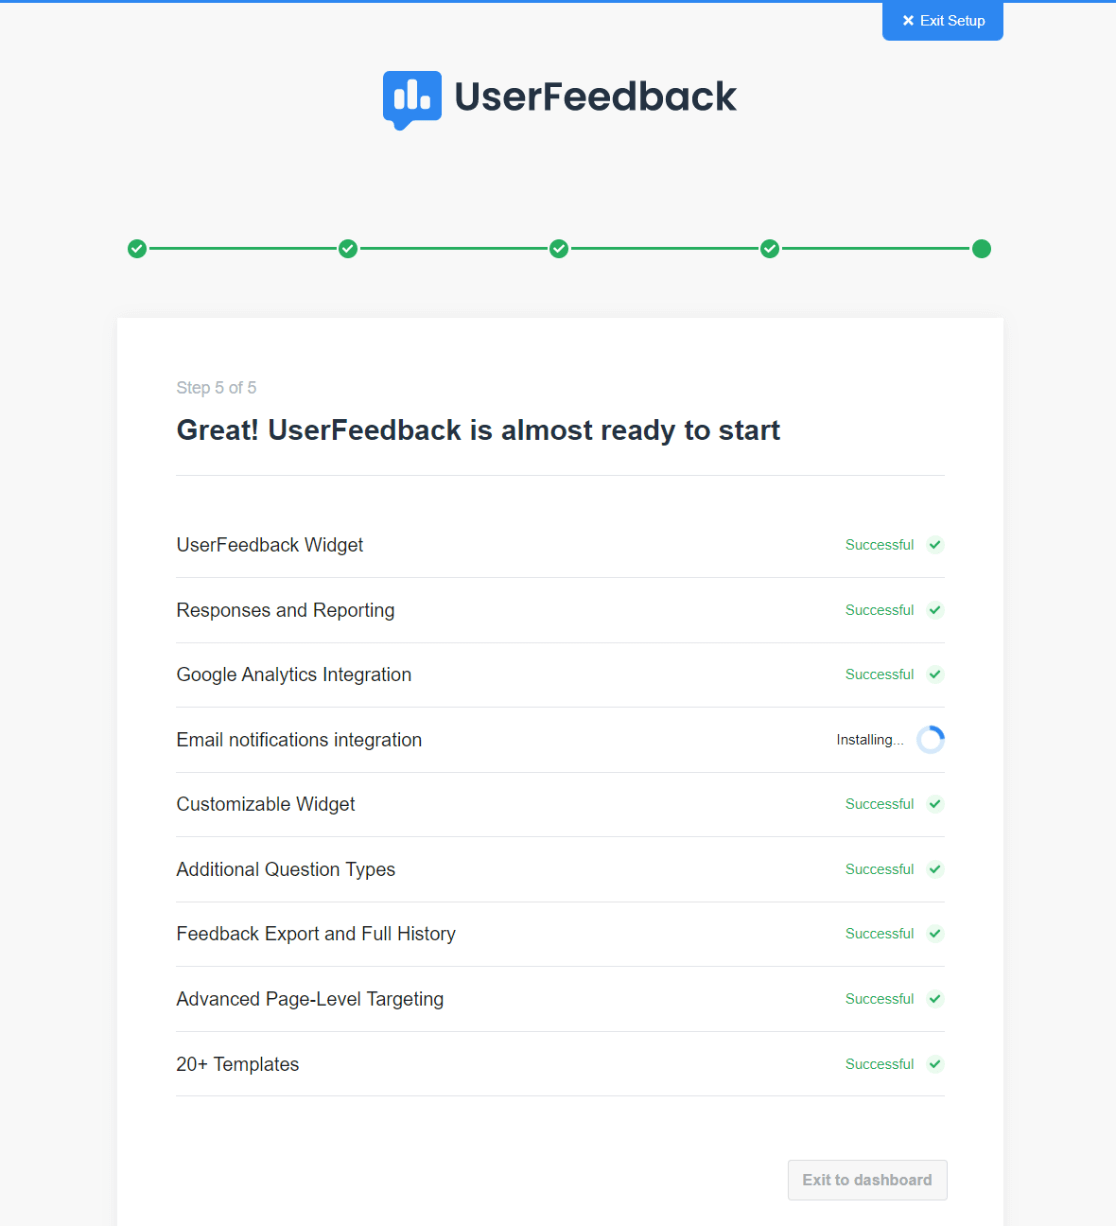
Step 5: Edit Your Survey
Now, do you want to edit the survey you created during setup, or create another new one? To edit your survey, head to UserFeedback » Surveys in your WordPress admin, then hover over your survey and click the Edit link.
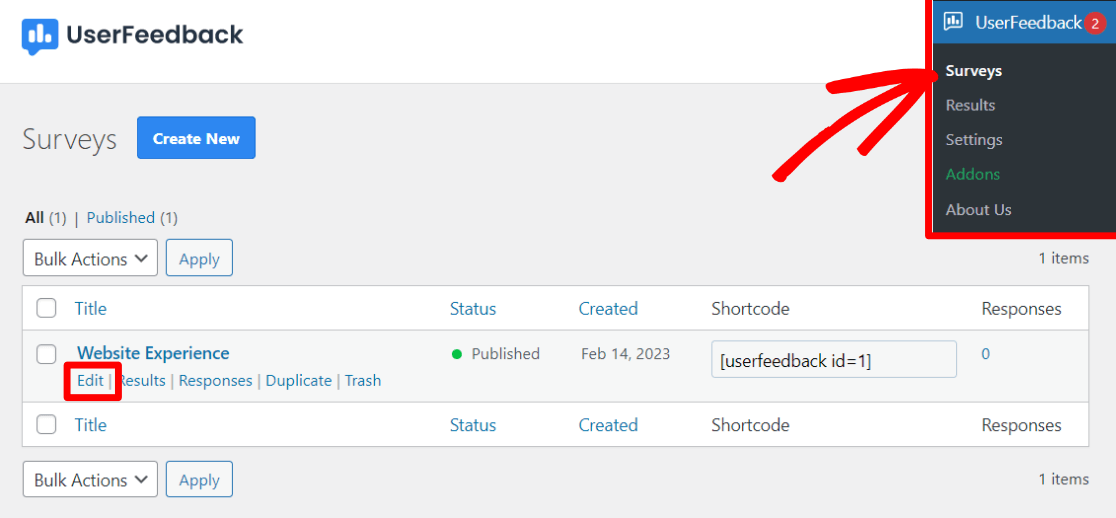
You’ll land on the screen where you can edit the questions you ask in your survey, as well as the thank you message that’s displayed. Go ahead and add or edit questions and your thank you message, then click the Next Step button.
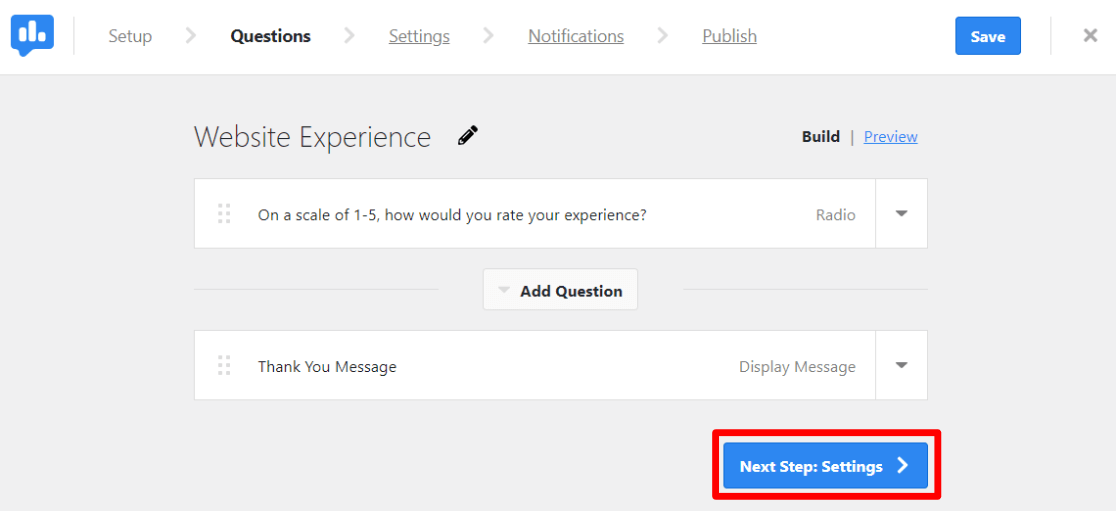
The Settings page is next, where you’ll really be able to customize your survey.
First, you can choose to turn off or on your Google Analytics tracking through MonsterInsights (we recommend you always keep this on). Then, in the Targeting box, you can customize where and when your survey appears. Choose which device types it’ll appear on, and choose which pages.
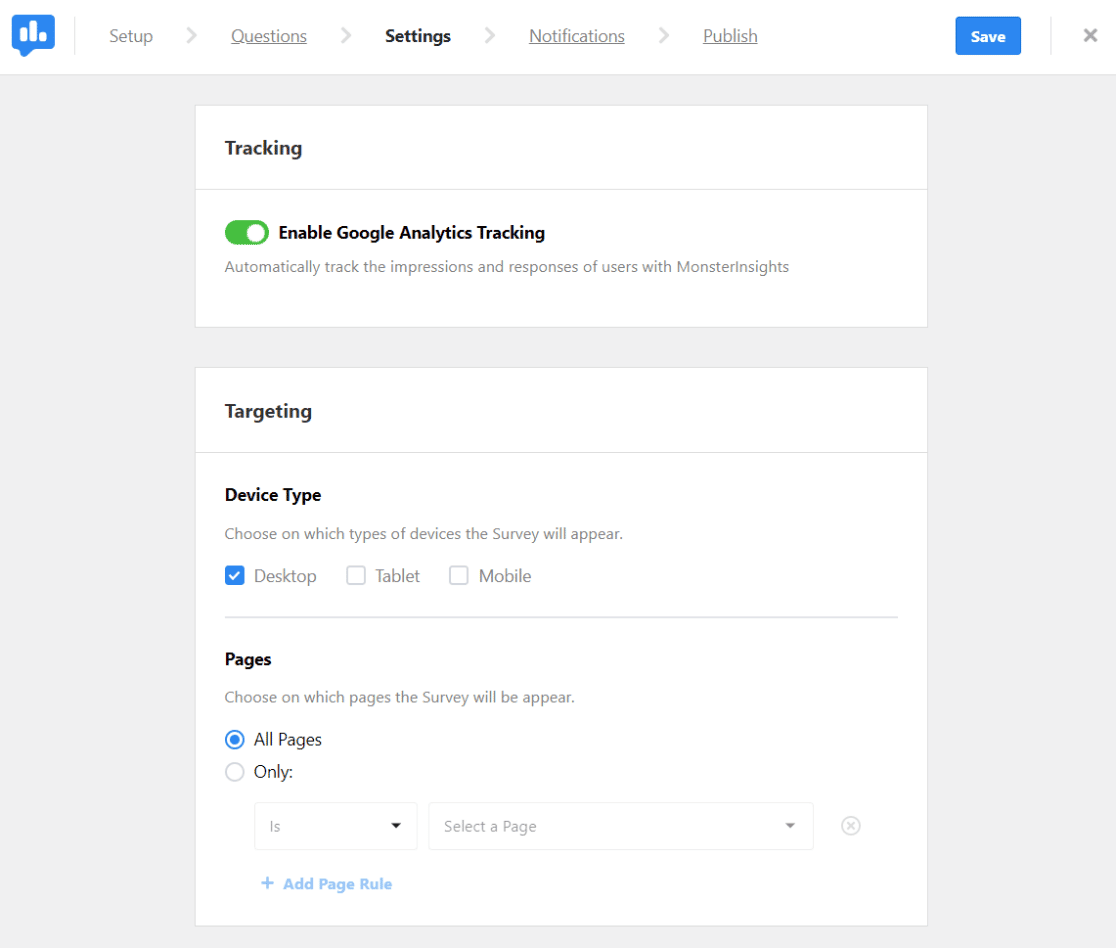
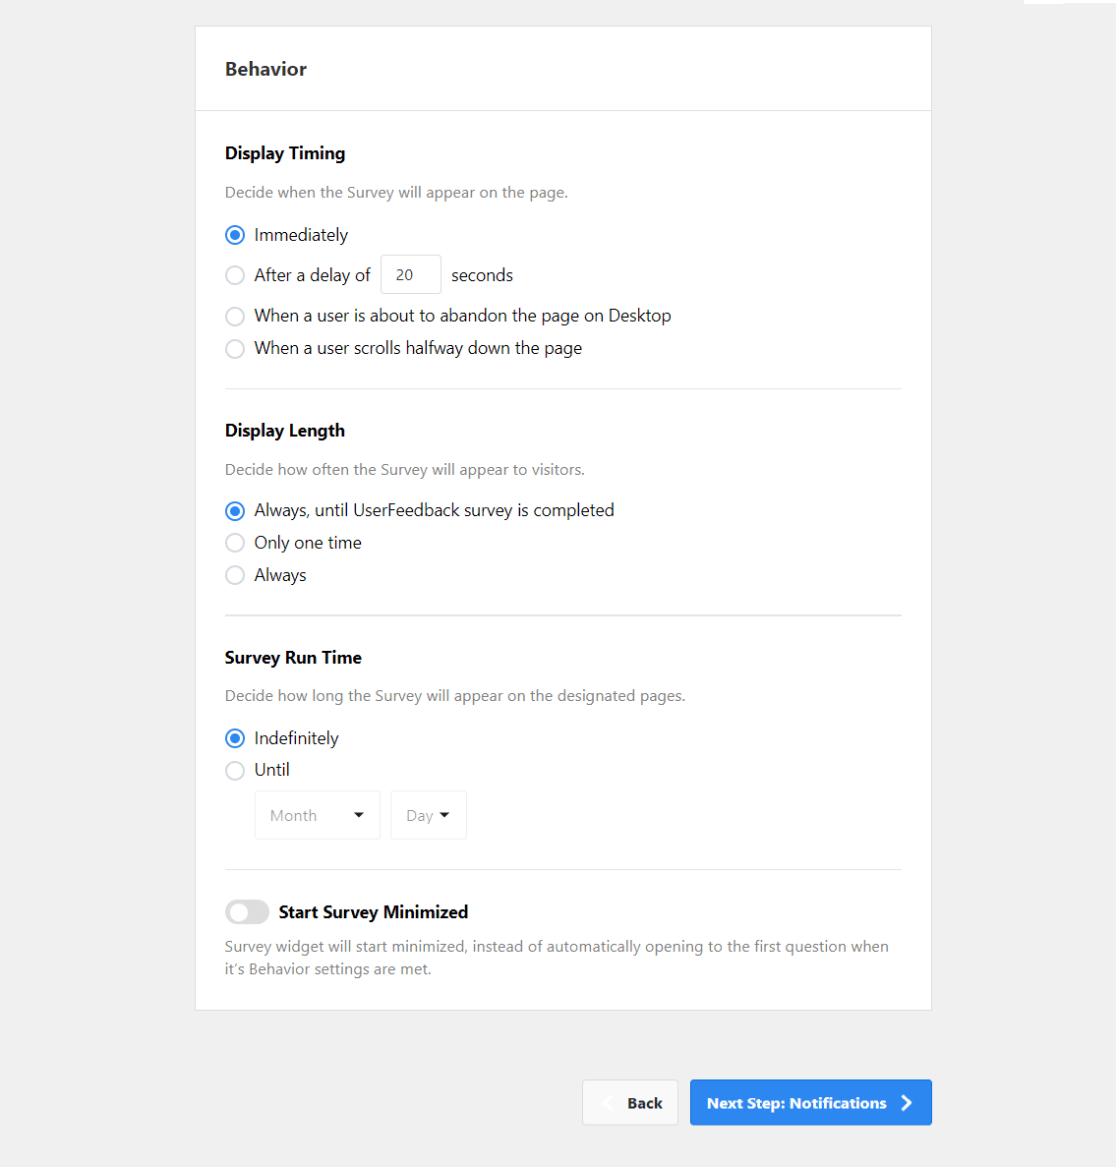
Next, in the Behavior box, you can choose when your survey will pop up, how long it will stay there, how long it should run, and whether or not you want the survey to start minimized (less visible).
When you’re done with all these settings, click the Next Step button at the bottom.
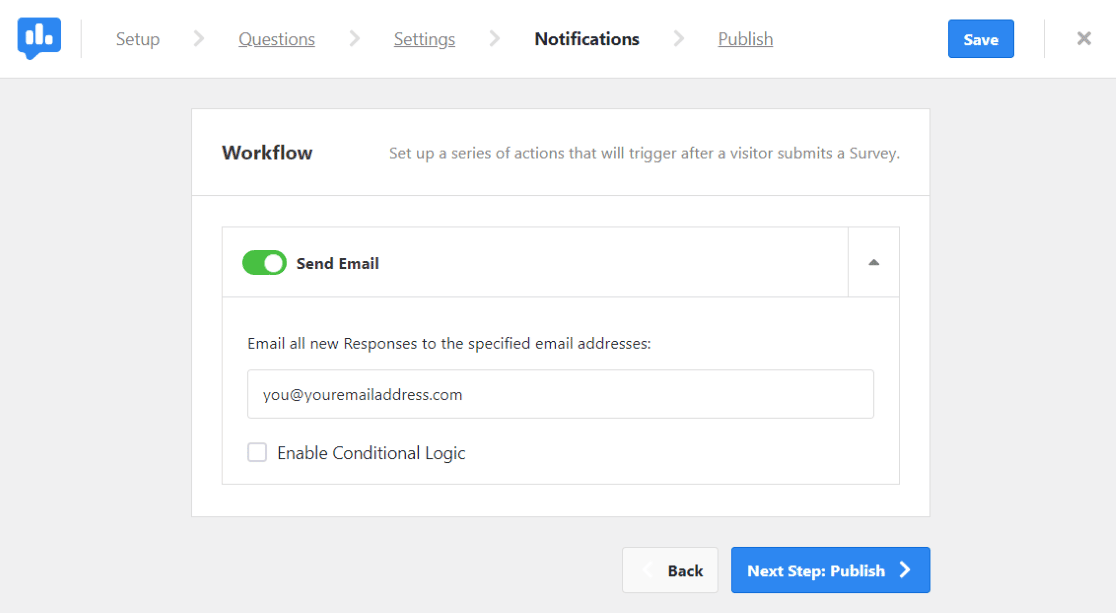
Finally, on the Notifications screen, choose whether you’d like to send a notification to an email address each time the survey is completed.
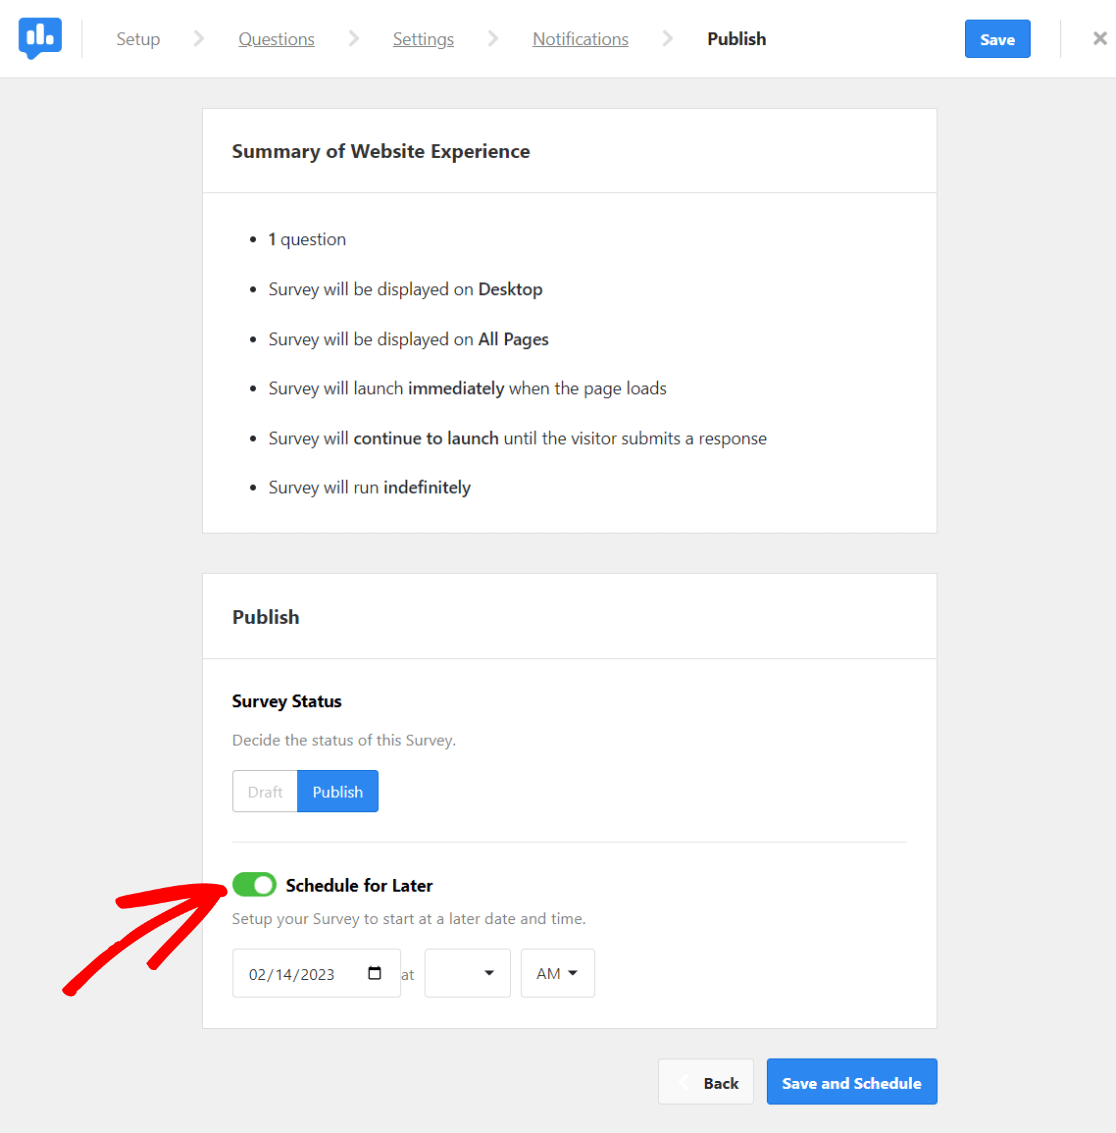
That’s it! Go ahead and proceed to the Publish page. Note that the default setting is to schedule your survey. If you want it to go live immediately, just toggle the Schedule for Later switch to off.
That’s it!
We hope you liked our tutorial on how to set up a user feedback survey in WordPress. To learn more about how MonsterInsights tracks survey form submissions, check out How to Track Form Submissions in Google Analytics & WordPress.
Not using MonsterInsights yet? What are you waiting for?
And don’t forget to follow us on Twitter, Facebook and YouTube for more helpful Google Analytics tips.
