Do you need to add custom link attribution events to WordPress navigation menu items for tracking in Google Analytics?
By adding custom events to WordPress menu items like a contact page or other Call-To-Actions, you can easily track how often those menu item links get clicked.
This guide will show you how to use MonsterInsights’ custom link attribution to add events to navigation menu items in WordPress. For our guide on how to do this with regular links, please see: How to Add Custom Link Attribution: Setup Custom Link Categories, Labels, and Actions.
Before getting started…
- MonsterInsights is installed and activated.
- MonsterInsights is connected with Google Analytics.
- Your version of MonsterInsights is up-to-date. (Version 7.30 or later of MonsterInsights required.)
The Benefits of Custom Event Tracking
The benefits of custom event tracking are that you can measure the results of the most important links that are on your site. These include:
- Calls-to-Action (CTA’s).
- Internal links to high-value pages on your site.
- Editing the default tracking behavior already included in MonsterInsights such as telephone links, email link clicks, or downloads. MonsterInsights already automatically tracks these. Now, you can customize these links too.
Note: Custom categories, actions, and labels take precedence over built-in detection. You don’t have to use all three.
Here are some of the events MonsterInsights already automatically adds to Google Analytics.
About Custom Link Attribution with MonsterInsights
Custom event tracking links follow this formula:
<a href="https://www.monsterinsights.com" data-vars-ga-category="Custom Category" data-vars-ga-action="Custom Action" data-vars-ga-label="Custom Label">Example</a>
How to Add Custom Event Tracking to Navigation Menu Links in WordPress
To add custom link attribution to 1 of your navigation links, you can use the following code (as an example) to add to your theme’s functions.php file or a custom functionality plugin.
add_filter( 'nav_menu_link_attributes', 'monsterinsights_custom_menu_link_atts', 10, 3 );
function monsterinsights_custom_menu_link_atts( $atts, $item, $args ) {
$menu_target = 1075; // Change 1075 to the ID of your menu item.
if ($item-&amp;gt;ID == $menu_target) {
$atts['data-vars-ga-category'] = 'CTA'; // Change CTA to whatever makes sense for your site.
$atts['data-vars-ga-label'] = 'contact primary header menu';// Adjust label content to suit your needs.
}
return $atts;
}
The above code will add custom link attributes the menu item with the id of 1075.
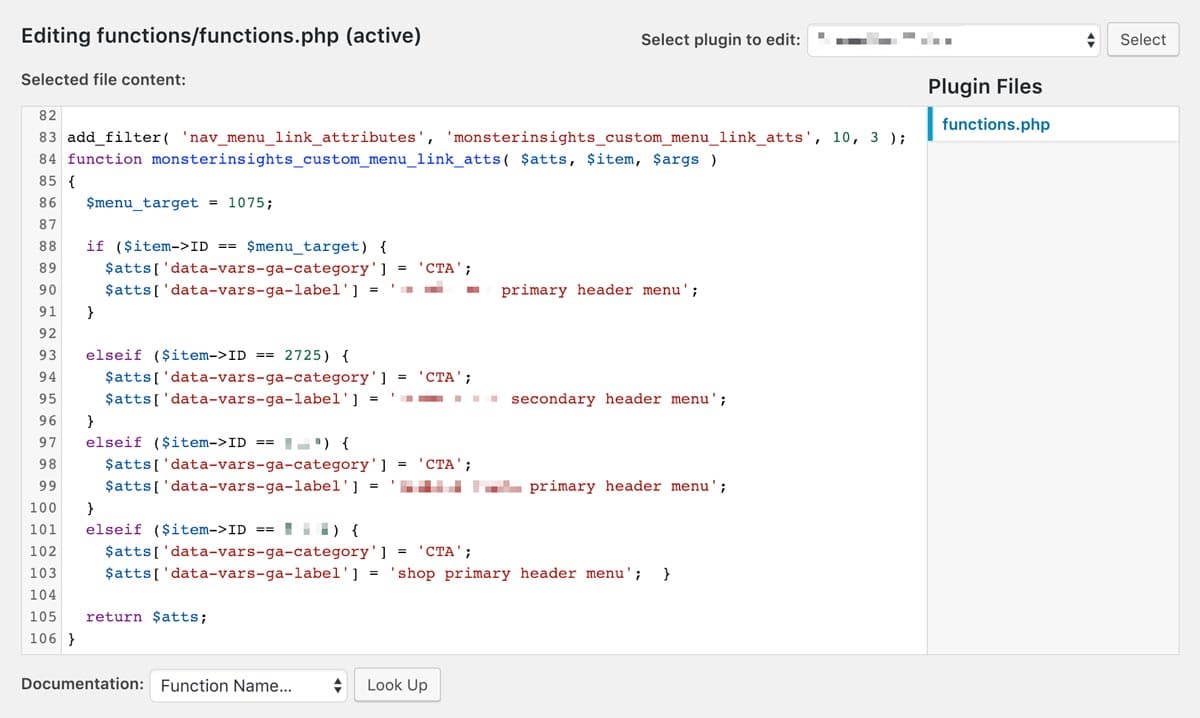
To add custom link attribution to 3 links, you can use the following code:
add_filter( 'nav_menu_link_attributes', 'monsterinsights_custom_menu_link_atts', 10, 3 );
function monsterinsights_custom_menu_link_atts( $atts, $item, $args ) {
$menu_target = 1075; // Change 1075 to the ID of your menu item.
if ($item-&amp;gt;ID == $menu_target) {
$atts['data-vars-ga-category'] = 'CTA'; // Change CTA to whatever makes sense for your site.
$atts['data-vars-ga-label'] = 'contact primary header menu'; // Adjust label content to suit your needs.
} elseif ($item-&amp;gt;ID == 2725) { // Change 2725 to the ID of your menu item.
$atts['data-vars-ga-category'] = 'CTA';
$atts['data-vars-ga-label'] = 'contact secondary header menu';
}
elseif ($item-&amp;gt;ID == 1109) { // Change 1109 to the ID of your menu item.
$atts['data-vars-ga-category'] = 'CTA';
$atts['data-vars-ga-label'] = 'article submissions primary header menu';
}
return $atts;
}
Note
Please note: the text above: $menu_target and the $item->ID number to the right of the == will need to be replaced with the id numbers of the menu items.
In the above instance, we’re adding custom link attributes to 3 different menu items. The menu items with id’s: 1075, 2725, and 1109.
We’re adding a category of CTA to all links and a unique custom label to each link.
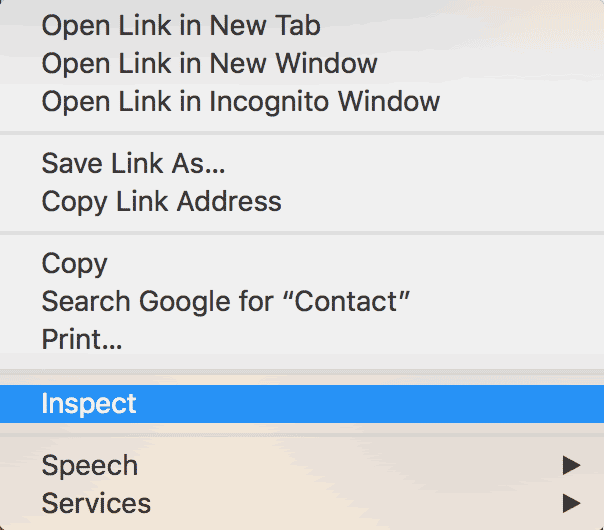
Step 1: To find the ID of the navigation menu items in WordPress on your own site, right-click on the navigation menu item in your web browser:

Step 2: Next, click “inspect” or “inspect element.”
You’ll then see the source code of the website:

Step 3: What we’ll be looking for next is the unique id number associated with the <a> link element that WordPress assigns to menu link elements:

And as you can see, it’s 1102.
Step 4: Be sure to use your own unique ID numbers for your specific navigation links.
Step 5: You’ll also want to replace the label with whatever makes sense for your site. Or remove it to leave the default.
Step 6: You can also add a custom event action or leave the default. (This typically defaults to the full URL of the link)
Step 7: Next, you’ll want to navigate to the functions.php file of your theme or functionality plugin, and insert your own code that you’ve customized for your site.

If you only need to track one or two menu items, the other elseif statements can be removed. Similarly, feel free to add more elseif statements.
Remember: It’s best to only track important events. Otherwise, you’ll have a lot of irrelevant data clouding those decisions.
Examples of Other Events to Track:
Phone Calls: MonsterInsights track phone calls automatically!
Email Links: MonsterInsights tracks email links automatically!
Downloads: MonsterInsights tracks file downloads with no code! Please see our guide: How to Track and View File Downloads in Google Analytics.
Outbound links: MonsterInsights tracks Outbound links with no code! Please see our guide: How to Find the Source of Outbound Traffic in Google Analytics.
That’s it! Now you know how to add custom attribution events to navigation menu items in WordPress.
Interested in learning more about custom link attribution with MonsterInsights? Then please see our guide: How to Add Custom Link Attribution: Setup Custom Link Categories, Labels, and Actions.

