Cross-domain tracking makes it possible for Analytics to see sessions on two related sites as a single session. It also helps you to better track your goal conversions. In this guide, we’ll show you how to implement cross-domain tracking using MonsterInsights.
Why You Need Cross-Domain Tracking
You need cross-domain tracking when your Google Analytics session spans across two or more domains and you want to track the sessions across different domains as a single session.
Let’s take a detailed look.
Imagine that a user lands on your site from a PPC campaign, and then goes to your third-party shopping cart’s site like Shopify to complete the checkout process.
If you’re not implementing cross-domain tracking on your site, here is how Google Analytics tracks ecommerce transactions.
- It counts the same user as two different users and tracks this single session as two sessions.
- Instead of crediting the PPC campaign for conversion, it simply tells you that someone from your site made a purchase. That means you can’t determine the original source of your goal conversion.
Another benefit of implementing cross-domain tracking is that you can collect data from different domains in a single report.
In this article, you’ll first learn how to add your other site domains to the MonsterInsights’ cross-domain tracking setting. Adding your other domains to MonsterInsights works for Google Analytics properties.
After you add your domains to MonsterInsights, you’ll learn how to add them to your Google Analytics property.
Prerequisites
- On your main WordPress site, you’ll need to have the MonsterInsights plugin installed and be authenticated with Google Analytics.
- For the other sites you want cross domain tracking set up, you’ll need Google Analytics installed and configured to use the same GA4 measurement ID as your main site. So, if your main site’s measurement ID is G-1A2B3C456, then your other site’s installed measurement ID must also be G-1A2B3C456.
Adding Your Other Sites for Cross-Domain Tracking in MonsterInsights
Step 1: To add your other sites for cross-domain tracking, navigate to Insights » Settings » Engagement, and navigate down to Cross-Domain Tracking. Then, click the button to add a domain. 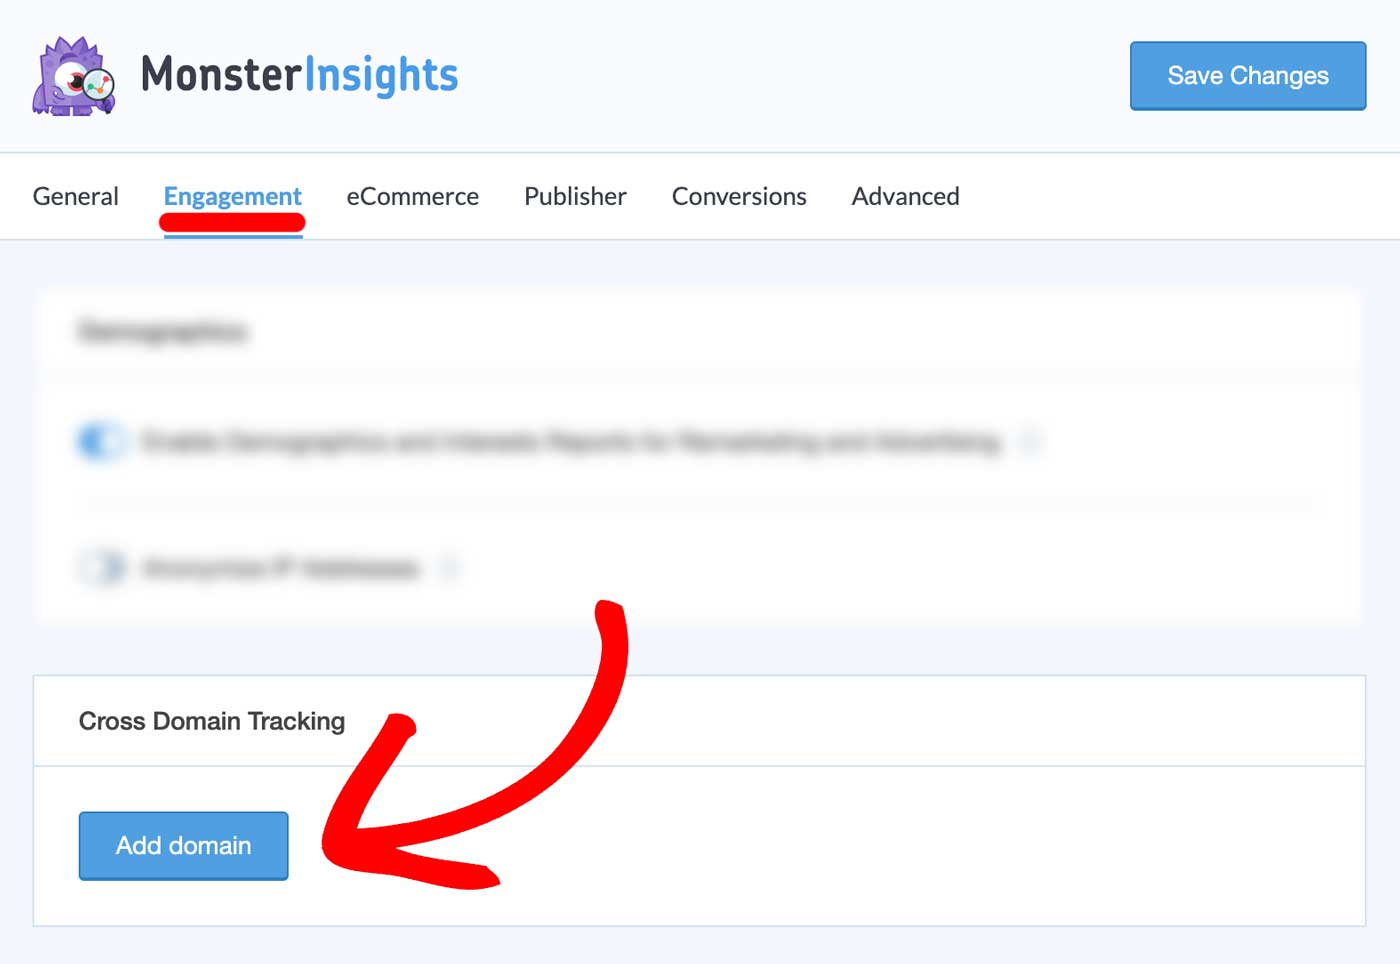
Step 2: Add the domain for your other site.
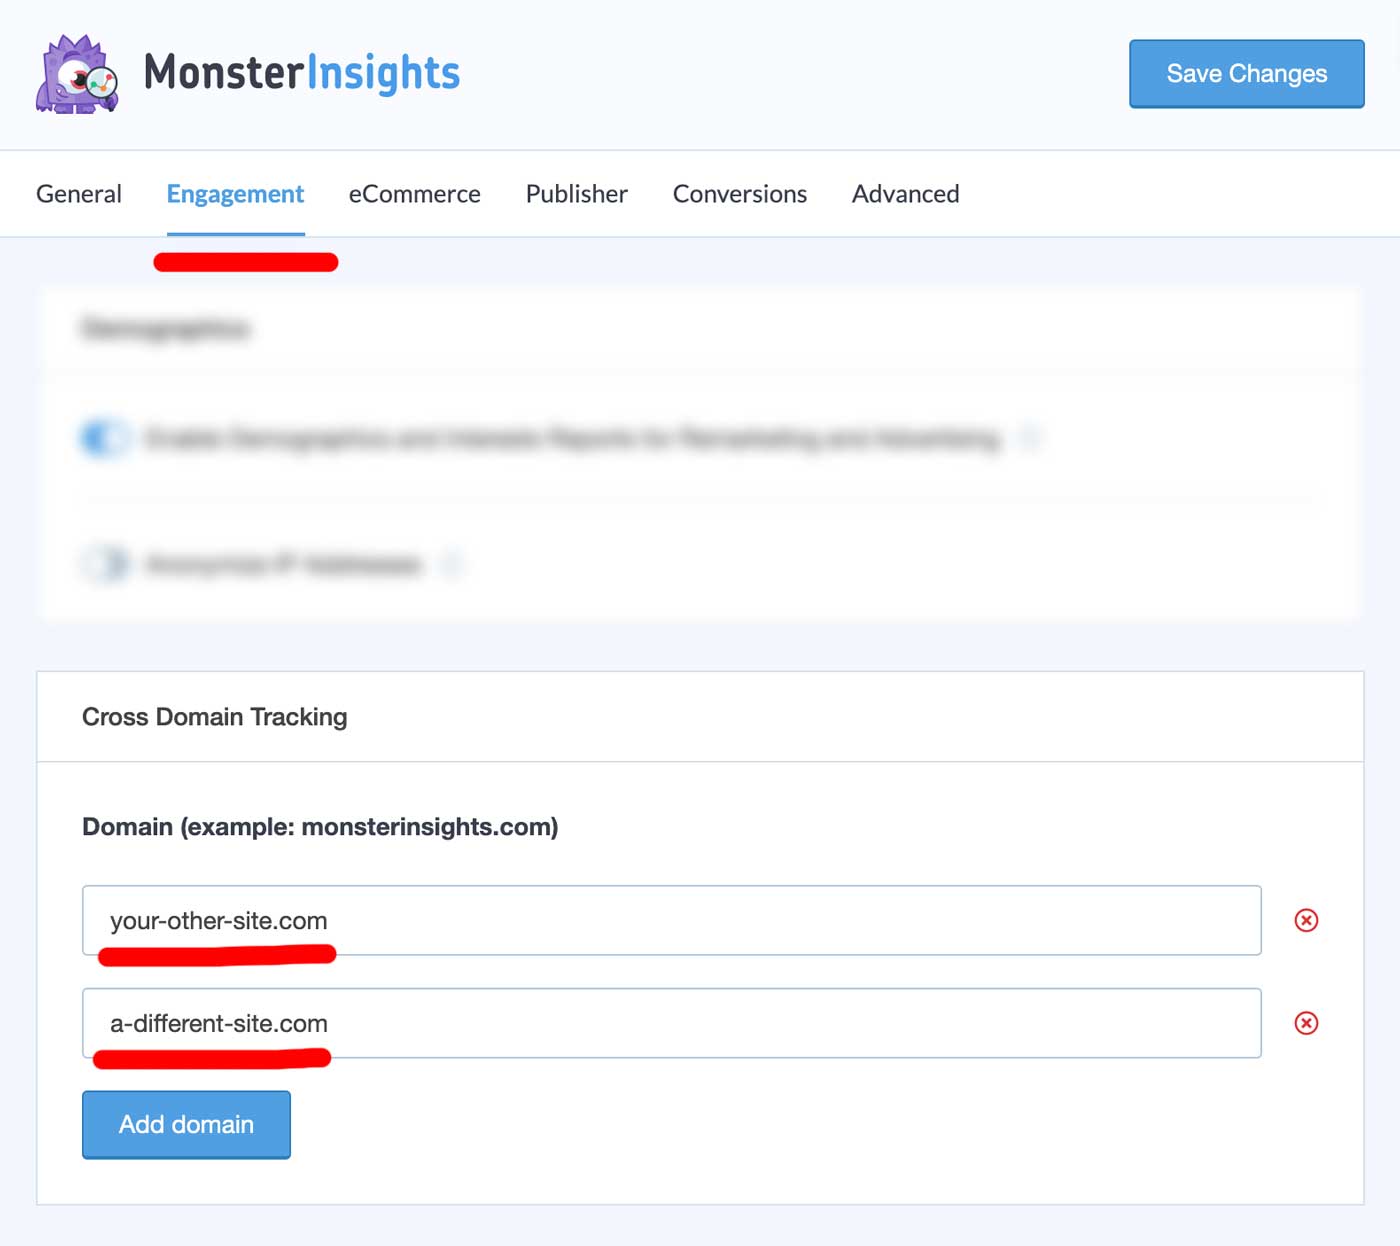
Step 3: Then, click Save Changes.
Please note, that you’ll want to avoid including the domain MonsterInsights itself is installed on in this.
In other words, if the site MonsterInsights is installed on is yourdomain.com, you can include example-1.com in the cross-domain tracking but don’t include yourdomain.com.
Verify Your Source Code for Cross-Domain Tracking
If you want to test whether cross tracking is implemented correctly, you just need to look at the source code of your site.
__gtagTracker(
    'config',
    'G-XXXXXXXXXX',
    {
        "forceSSL":"true",
        "link_attribution":"true",
        "linker":"{\"domains\":[\"myothercooldomain.com\"]}",
        "page_path":"location.pathname + location.search + location.hash"
 ;} );
If you can find the custom tracking code in your Google Analytics source code, you’ve successfully implemented cross tracking on your site.
Adding Your Other Sites for Cross-Domain Tracking in Google Analytics
You will need to update the Configure your domains property setting. Google recommends using only this setting for all of your cross-domain tracking.
Step 1: Navigate to analytics.google.com » Admin » Property » Data Streams and click on your data stream.

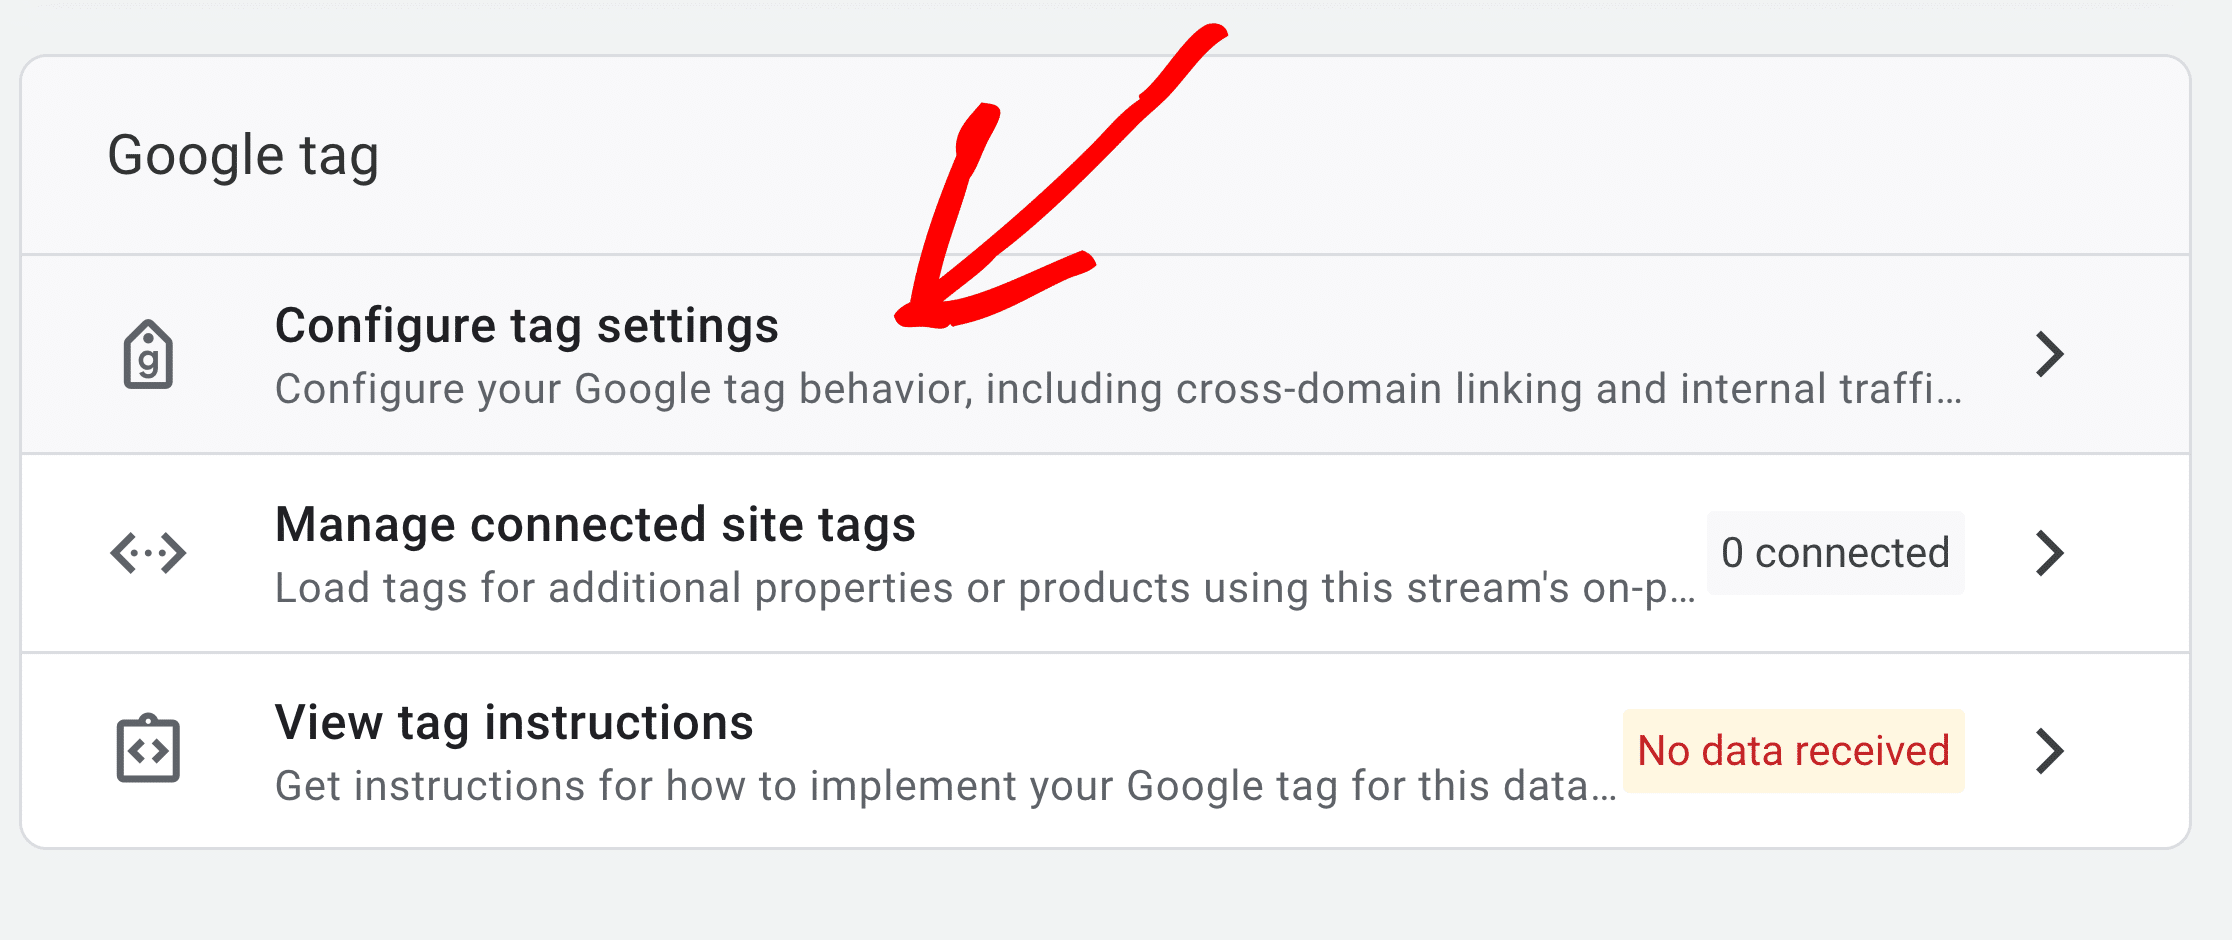
Step 2: Scroll down to the Google tag section and click on Configure tag settings.
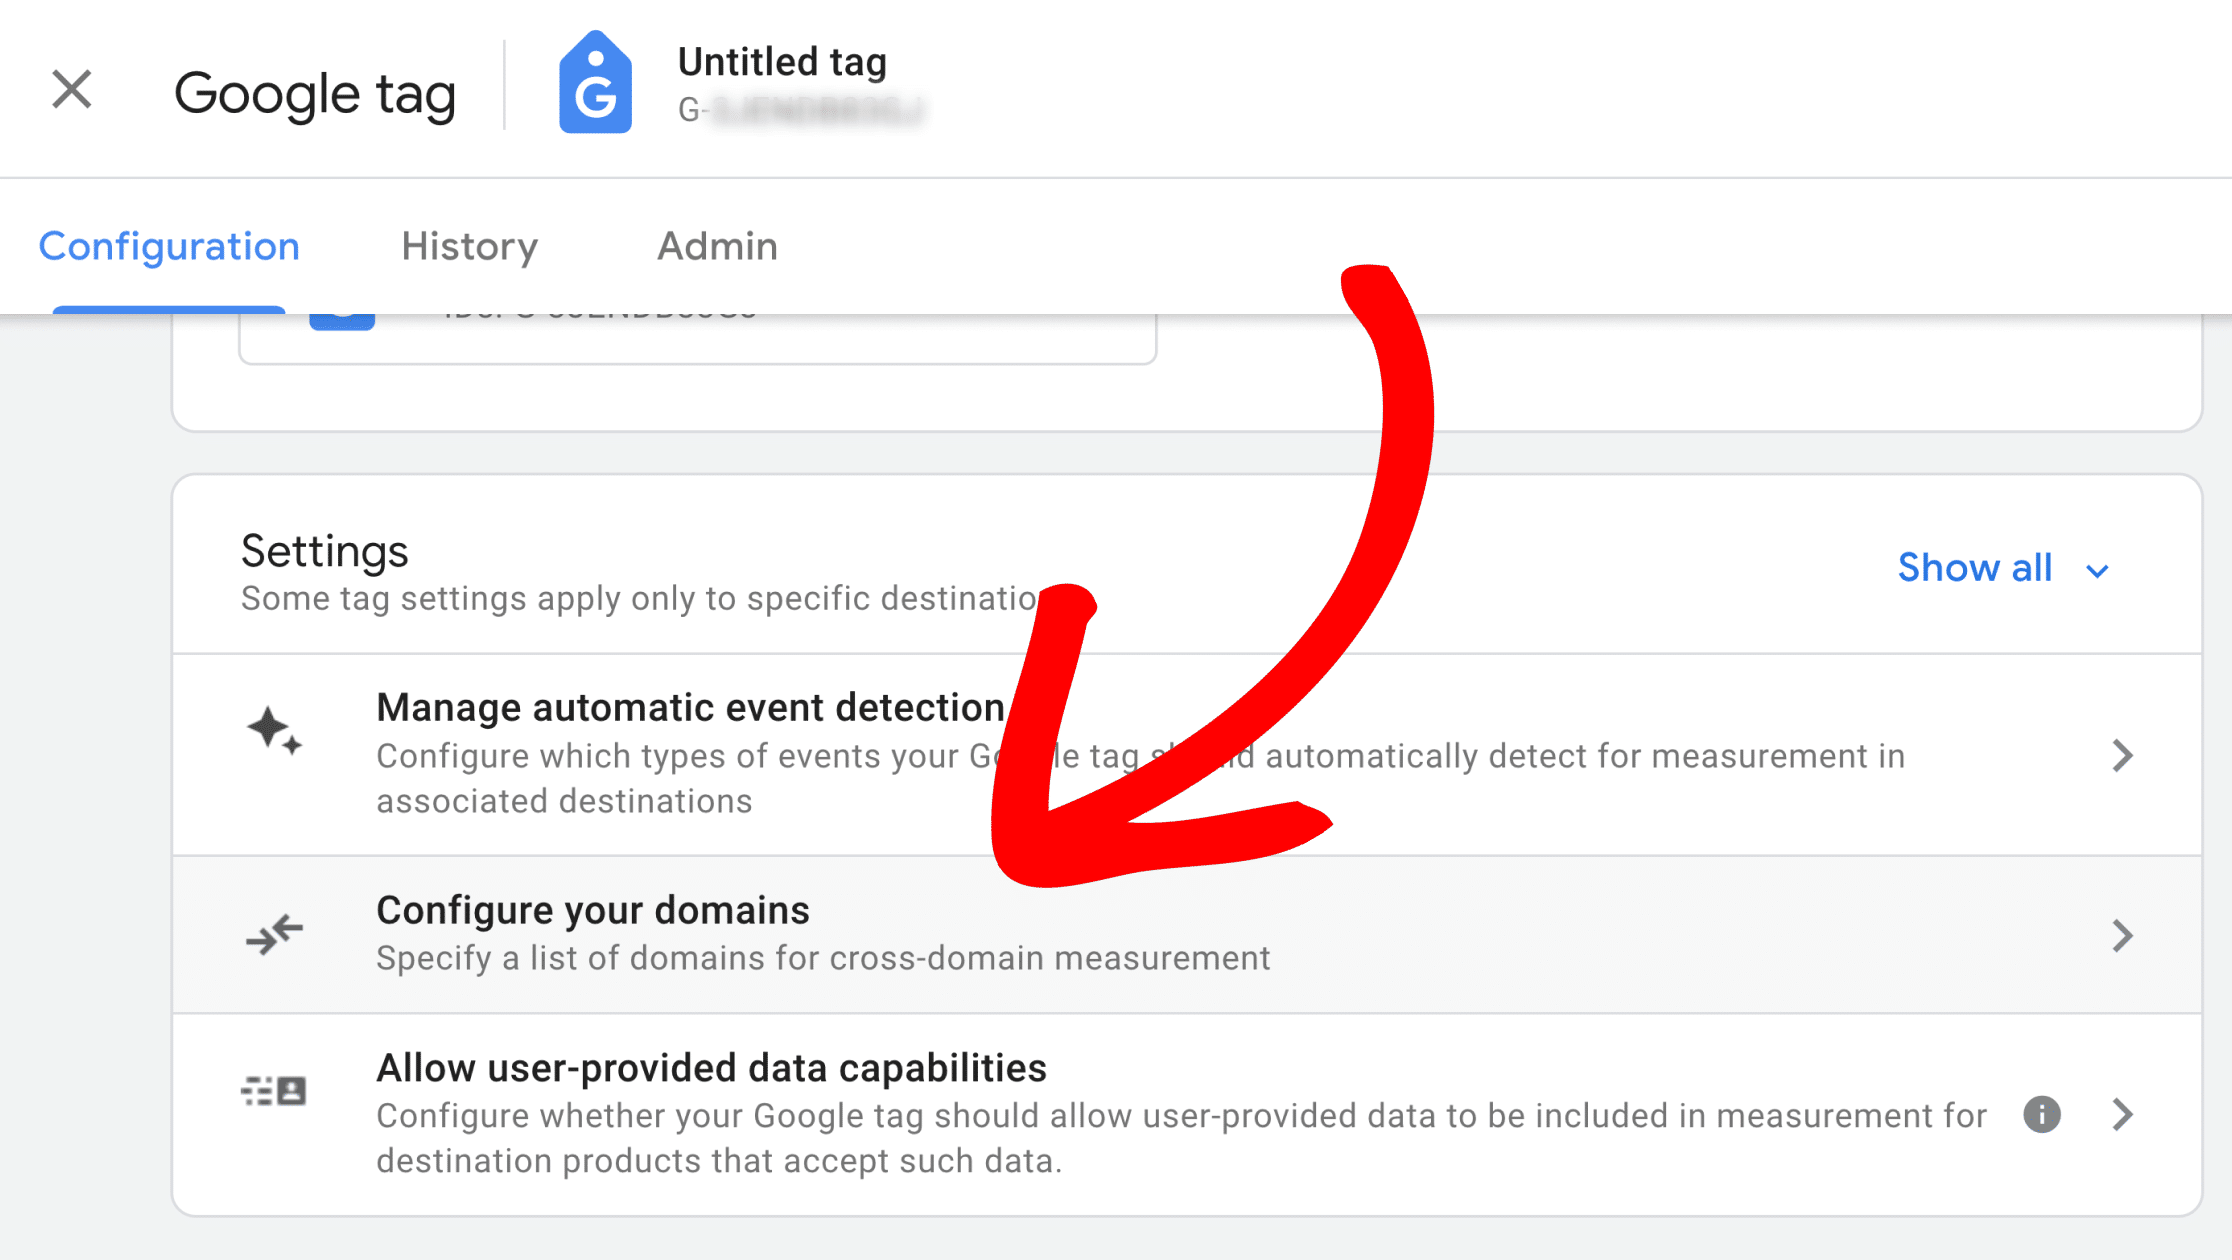
Step 3: Click on Configure your domains in the Settings section.
Step 4: Click on the Add condition button. Then, select the condition that works best for your case.
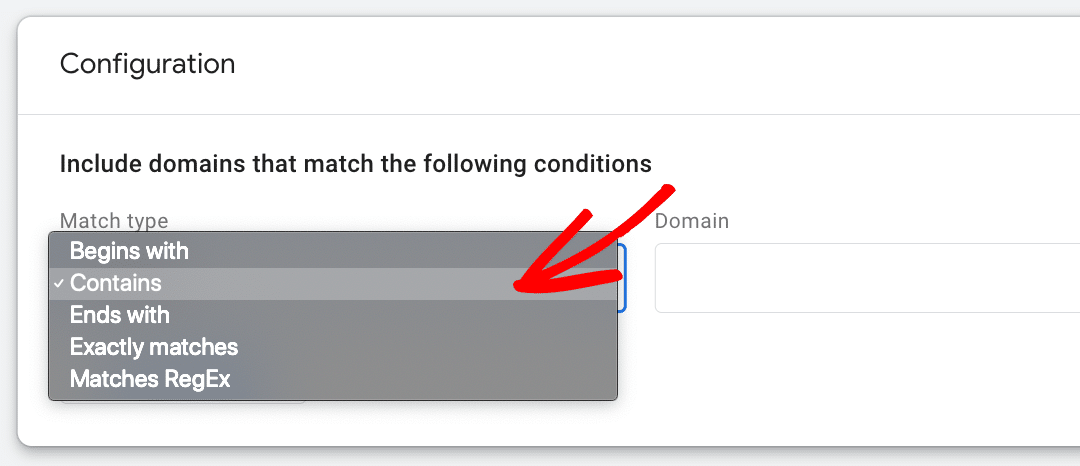
Here’s an example. Suppose you select Contains in the dropdown and type in “mycoolsite” in the Domain input field.
Then, the following domains would be included in your cross-domain tracking:
- www.mycoolsite.com
- mycoolsite.com
- mycoolsite.org
- shop.mycoolsite.com
Step 5: Click the Save button at the upper right of the page.
Step 6: Test that cross-domain is working by opening your main site in an incognito or private browser with no adblockers running. Make sure you’re not logged in as an administrator or editor.
Go to a page that has a link to a site you just included for cross-domain tracking. Click on that link.
Check to see if the URL in the browser address bar has the “_g1” linker parameter. The URL should look like this.
https://www.mycoolsite.com/?_gl=1*1ej46ag*_ga*NjgwOT
If you don’t see the “_g1” parameter, check the following:
- Make sure you don’t have redirect rules that strip out query parameters.
- See if you have custom JavaScript code adding event listeners to your links.
Common Mistakes with Cross-Domain Tracking
A common mistake we see with cross-domain tracking is when customers add the URL of the site the code is installed on as a cross-domain site.
For instance, if your site is example.com, and you include example.com as a site in the cross-domain tracking area, this will cause tracking issues in Google Analytics.
If you see cross-domain issues, please check this first.
That’s it! Now you know how to properly set up cross-domain tracking. Are you interested in tracking your form conversions? Then please see our guide: How to View Your Form Conversion Stats in MonsterInsights.

