Are you interested in tracking user engagement with your website content? With scroll tracking, MonsterInsights will trigger events in Google Analytics as your site visitors scroll down the page.
Now you can easily see when your site visitors scroll 25%, 50%, 75%, and 100% down the page.
Scroll Tracking is automatically enabled when MonsterInsights is installed on your WordPress site if you’re a Plus customer or higher.
This guide will show you how to view your scroll tracking stats in two different areas in Google Analytics.
Before getting started…
- You have purchased MonsterInsights Plus or higher.
- MonsterInsights Premium is installed and activated.
- MonsterInsights is connected to Google Analytics.
- Your version of MonsterInsights is up-to-date. (MonsterInsights version 7.6.0 or later is required.)
With scroll tracking, you can see which of your pages are the most engaging for your site visitors and which pages could use some improvement.
Where to Find Scroll Tracking Depth Results in MonsterInsights
Your scroll tracking stats can be found at the bottom of the MonsterInsights Publishers Report, next to the Interests section.
Go to Insights » Reports » Publishers and scroll down the report.
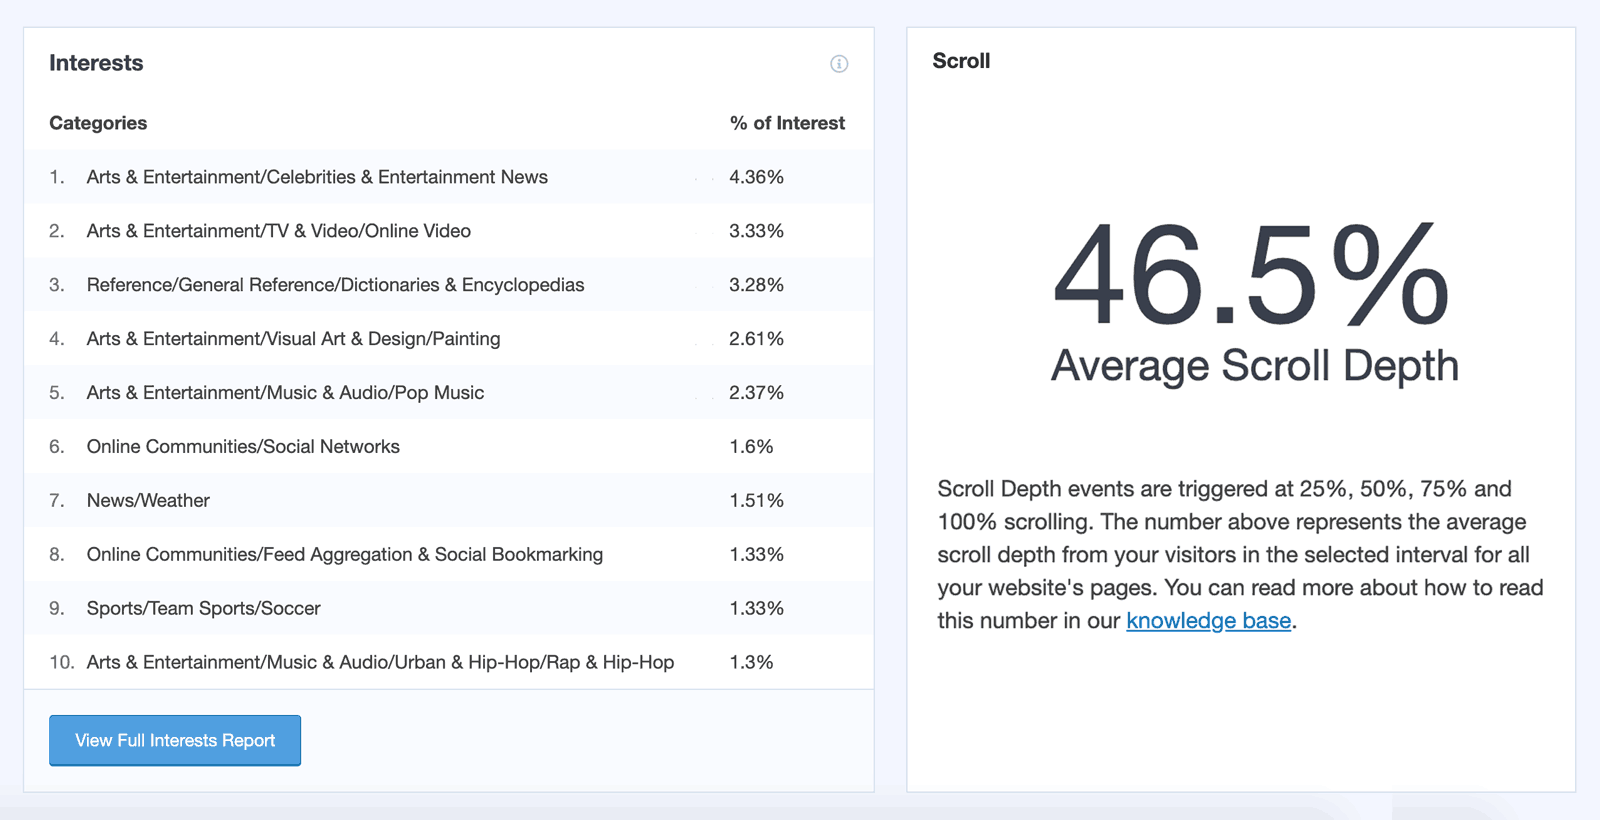
Scroll tracking can not only give you a better picture of how your visitors are interacting with your content, but also help you decide the best place for your important calls to action, ads, and more.
Where to Find Scroll Tracking Depth Results in Real-Time in Google Analytics
Step 1: Navigate to analytics.google.com and log in to the email account that the profile for your site resides in.
Step 2: When you’re logged into Google Analytics, navigate to Reports » Realtime.
Step 3: Open a new incognito window and navigate to your WordPress website and ensure you’re logged out.
Step 4: Navigate to the home page of your site.
Step 5: Scroll down the page 100%.
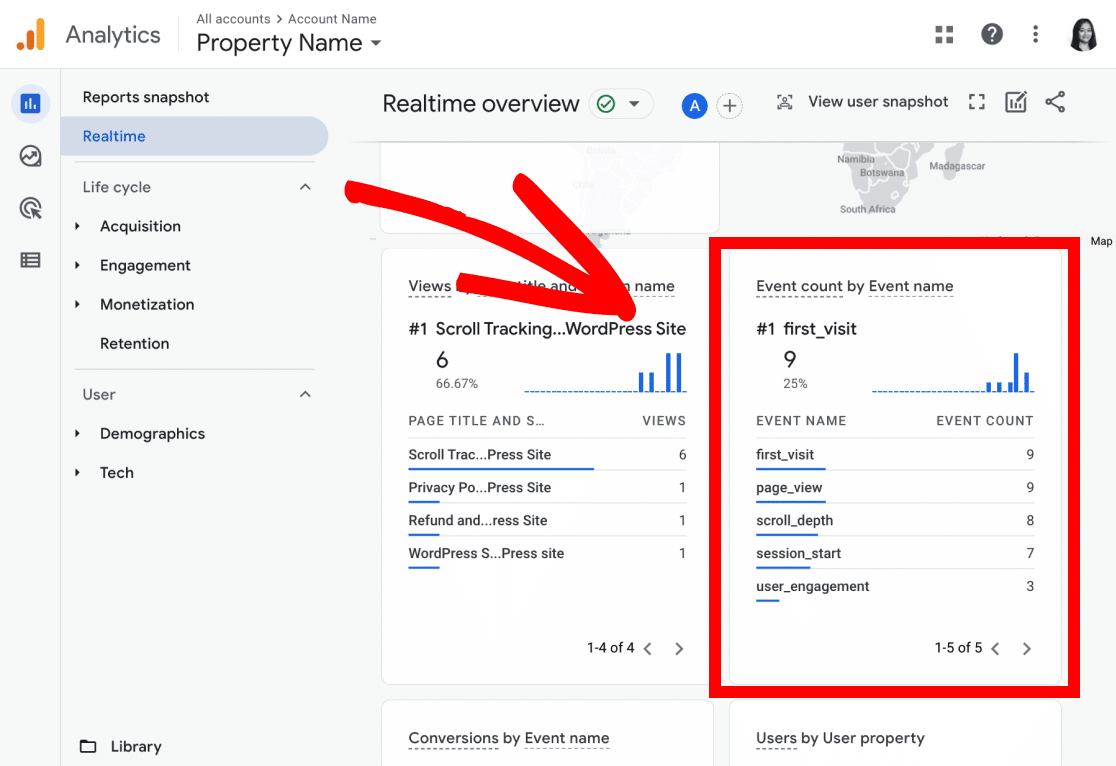
Step 6: Navigate back to the Realtime report. It may take a few minutes but after you’ve waited, you’ll see scroll_depth (the event that you just triggered) under the Event count card:
How to See Your Scroll Tracking Results in Google Analytics Reports
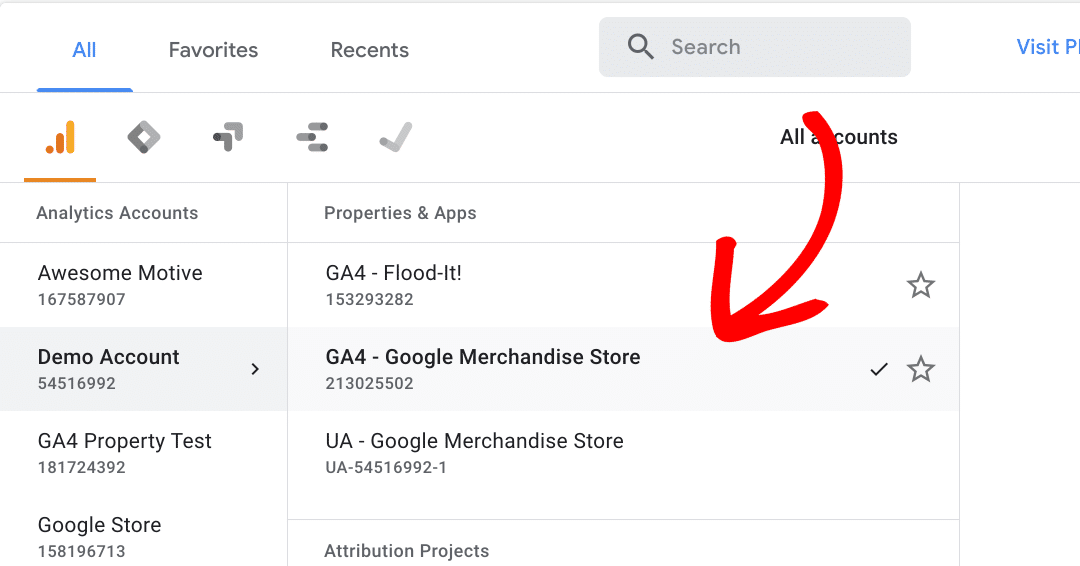
Step 1: Go to analytics.google.com and make sure the correct property is selected.
Step 2: Next, navigate to Reports » Life cycle » Engagement » Events and click on the Event name scroll_depth.
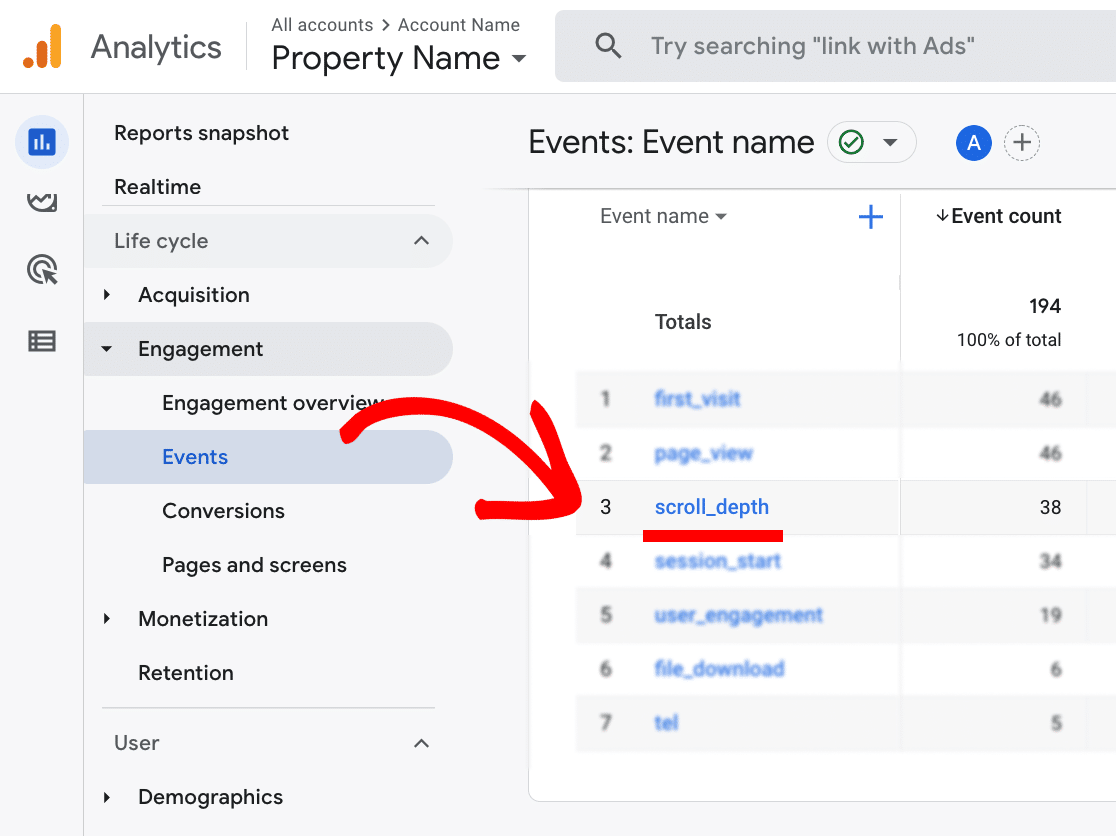
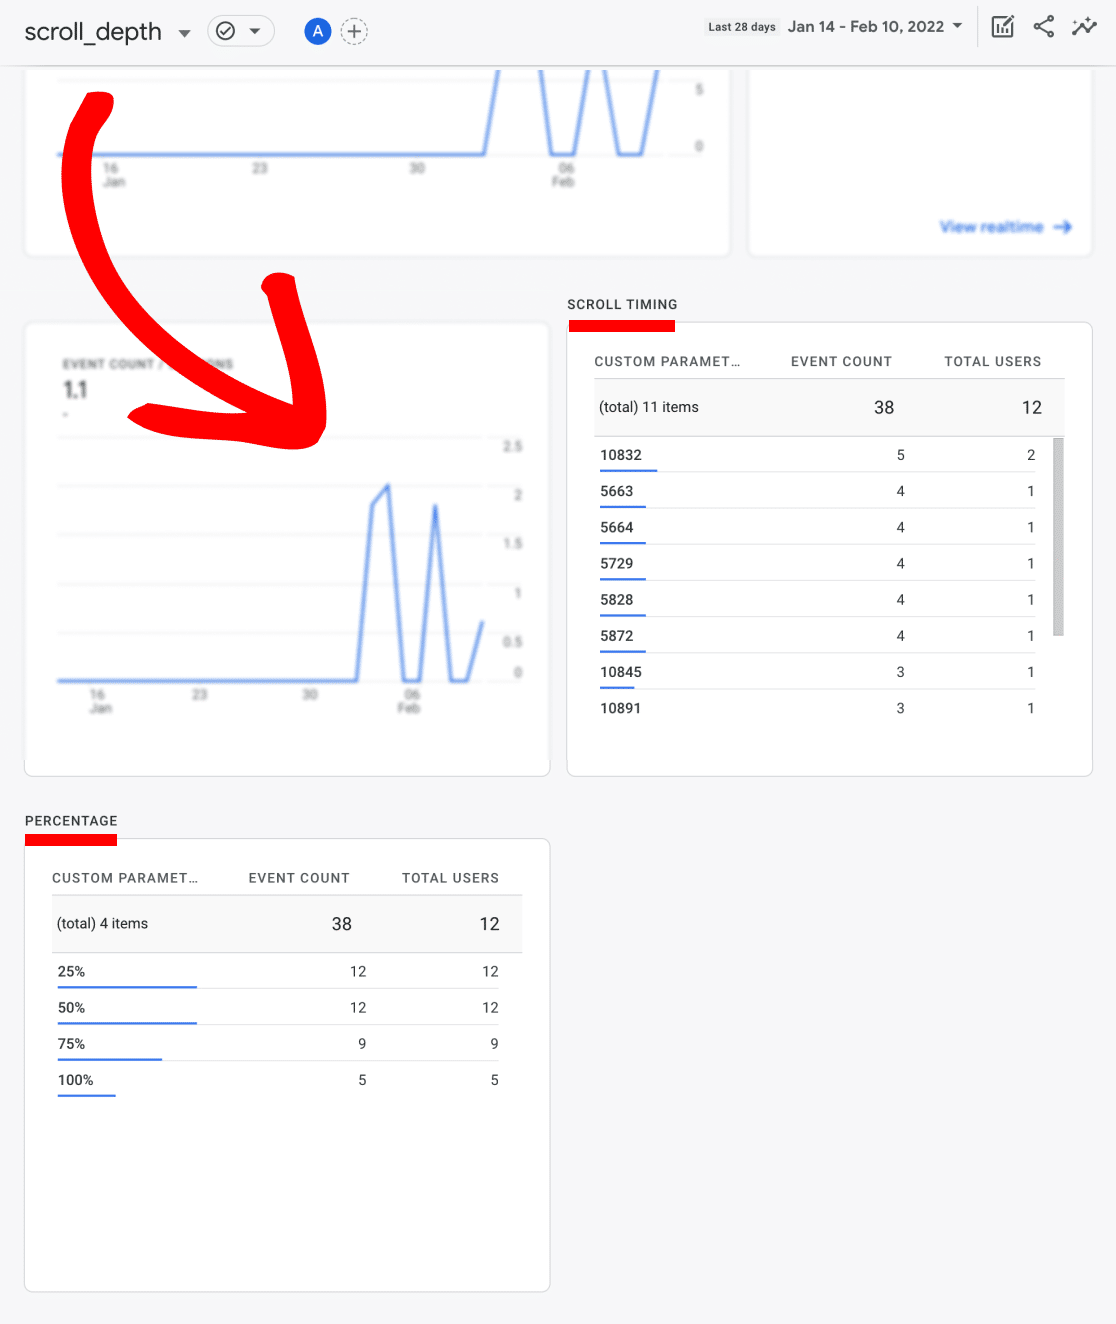
Step 3: In the scroll_depth overview report, you can find Scroll Timing and Percentage reports.
That’s it! Now you know how to set up and view your scroll tracking events.
Are you interested in learning how to make custom link click events?
Then please see our guide: How to Add Custom Link Attribution: Setup Custom Link Categories, Labels, and Actions

