Keeping your MonsterInsights plugin updated to the most current version ensures you have the latest features, fewest bugs, and smoothest experience. This guide will show you how to update the MonsterInsights plugin.
There are three ways to update your premium plugin:
- Using the Plugins Menu
- Using the Updates Menu
- Manually Using FTP
- Enable Autoupdates
The first two options are quick and easy to do right from your WordPress dashboard. You can use the third option in case you’re not able to update the plugin from your dashboard.
1. Using the Plugins Menu
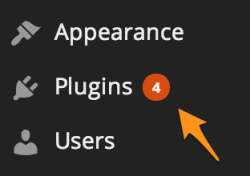
When you login to the admin of your website, you may see a number next to Plugins in the menu. This indicates the number of updates that are available for your installed plugins.

Click on the Plugins menu item and you will see the following text below each plugin with an available update.

By clicking the update now link, your plugin will automatically be updated to the latest available version.
2. Using the Updates Menu
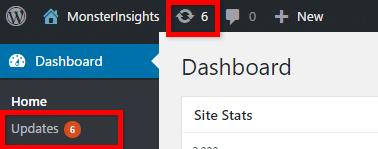
Updating via the updates admin is another way you can update your plugins via the WordPress dashboard. When you log into the admin of your website, you may see a number in the updates section of the admin bar at the top of your site. This indicates the number of updates that are available for your plugins.
You can either click on that icon, or click on Dashboard » Updates in the WordPress menu.

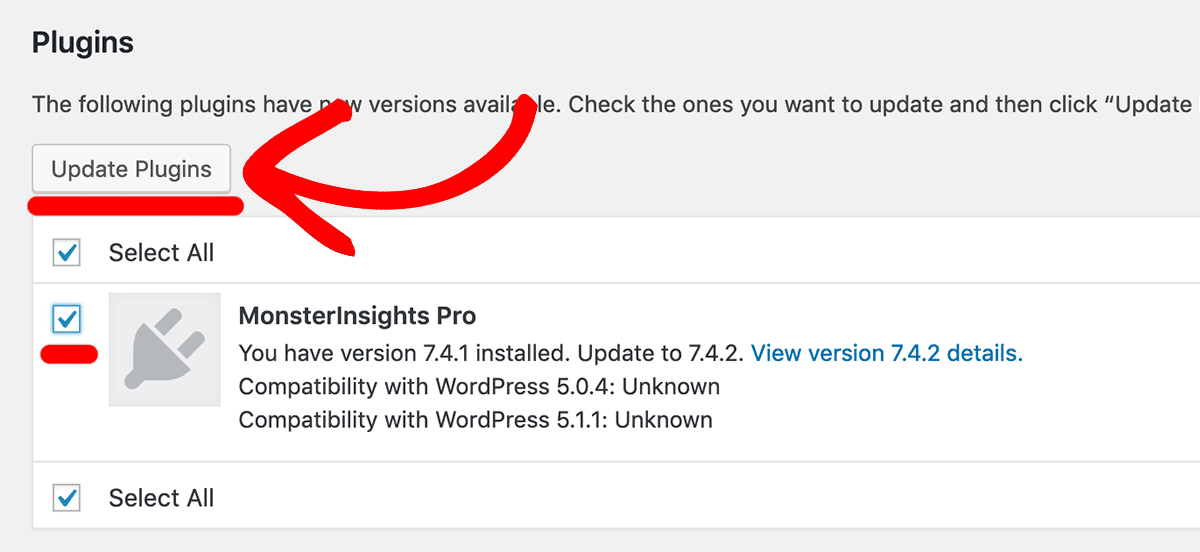
On this page, you will see all of the items that your site has identified as needing updates. Scroll down to the Plugins section and check the box next to the MonsterInsights plugins. Then click Update Plugins.

Now your plugin will automatically be updated to the latest available version.
3. Manually Using FTP
If your WordPress admin doesn’t show the available update or if the automatic update doesn’t work, you may want to manually update your premium plugin.
In order to do this you’ll have to take the following steps:
- Go to your account, click the Downloads tab, and then click the Download link next to the plugin files and save them to your computer.
- Extract the downloaded .zip file.
- With your FTP program, upload the extracted plugin folder to the wp-content/plugins folder in your WordPress directory online. The name of the extracted plugin folder should be equal to the name of the existing plugin-folder online. NOTE: Make sure you overwrite the existing plugin-files.
- Your plugin has been updated!
All settings will be saved, so you will not have to reconfigure or activate the plugin again.
4. Enable Autoupdates
- Navigate to Insights » Settings » Advanced.
- Scroll down the page to Automatic Updates.
- Click to enable Automatic Updates.

For more details on the FTP method, you can see this tutorial on how to use FTP to upload files to WordPress.

