Are you wondering how much money you have to invest in acquiring new customers and retaining existing ones? One of the most important metrics many businesses ignore or don’t measure is customer lifetime value (CLV). It helps you estimate how valuable a customer is for your website.
In this article, we’ll show you what is customer lifetime value and how to calculate it.
What is Customer Lifetime Value?
Customer lifetime value is the average amount of money a customer will spend on your business over a time period. In simple words, it tells you how much profit you can make from a single customer.
CLV is a great indicator of how much money can you make from your buyers overall. It also tells you how many customers you need to attract to your business in order to turn a profit. It’s really an important metric to consider!
Why is Customer Lifetime Value Important?
When it comes to increasing the profitability of your business, the lifetime value of customers plays a huge role.
If you’re a business owner, here’s why you should calculate CLV:
- Focus On the Right Customer Segment – With the help of customer lifetime value, you can focus your customer retention efforts on the segment of users that generates the most revenue
- Estimate the Cost of Acquiring New Users – Getting new visitors is often costly, so it’s important to find out if how much will it cost to acquire them
- Improve User Experience – After calculating CLV, you can find areas on your website and within your processes for improving user experience and maximizing value at different touchpoints
- Create Lasting Relationships – Developing long-term relationships with customers is key to high profits, and CLV can help you see how strong your brand loyalty is
Now, let’s take a deeper look at how to calculate customer lifetime value.
How to Calculate Customer Lifetime Value
In its simplest form, the customer lifetime value formula is multiplying the average purchase value with the number of times a customer buys your products each year and the length of time the customer has a relationship with your brand.
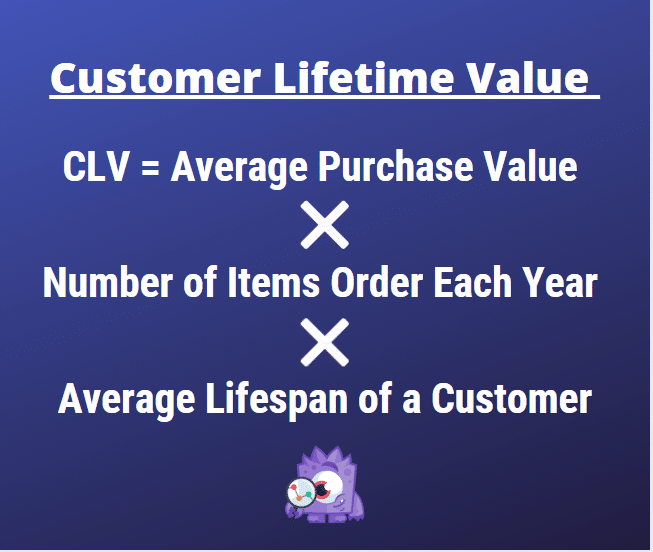
Sounds like a mouthful, doesn’t it? Don’t worry, we’ll explain it with an example.
Let’s say you have an online footwear store and a customer spends $75 each year on 1 pair of sneakers for the next 10 years. So, the lifetime value of the customer would be $750 (75 x 1 x 10).
At the same time, another customer buys 1 pair of leather boots for $150 every year for 10 years as well. Their CLV will come out to be $1,500 (150 x 1 x 10).
If you compare the CLV for both segments of buyers, you’ll see that customers of leather boots are more profitable than sneakers.
While this is a simplified example for how to calculate customer lifetime value, in many large organizations the computation becomes more complicated.
But with the right tools, you can easily figure out each of the components of the formula.
Average Purchase Value
To find out the average purchase value of your website, you can simply divide your total revenue with the total number of orders.
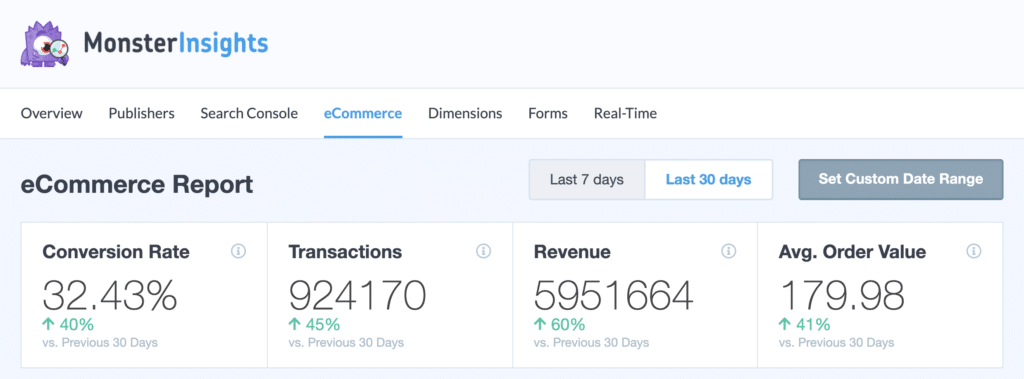
If you’re a WordPress user, you’re in luck! You can use MonsterInsights to easily see your average order value. It lets you properly set up Google Analytics in WordPress and see detailed reports inside your WordPress dashboard.
Using its eCommerce addon, you can view the average order value of your WordPress website or online store. After installing the plugin, go to Insights » Reports and then select eCommerce from the top.
Now select the date range and view your average purchase/order value.
Number of Items Ordered
This one is pretty straightforward — it’s just the total number of items that were ordered within the time period that you’re looking at.
Average Lifespan of a Customer
Now estimating a lifespan of a customer can be a bit tricky. You can use industry benchmarks to calculate the lifespan of a customer to get started. Or if you’re in the business for a long time, you can use past data to come up with a figure.
However, a simpler way of finding out the lifespan is by using the churn rate. It is the annual rate at which customers no longer subscribe or do business with your company.
If you divide 1 by your churn rate, you can estimate the average lifespan of your customers. Once you have the figure, just plug everything into the formula and calculate CLV.
Customer Lifetime Value in Google Analytics 4
Although you can calculate customer lifetime value on your own, you can also use a report in Google Analytics that’ll attempt to calculate a user lifetime value for you. Keep in mind that if you make sales in other ways than just through your website, this report won’t be a comprehensive look at all of your customers.
However, Google Analytics will calculate your user lifetime value for you on a per channel basis, so you can see, for instance, how much a customer who found your site via organic search might generate vs. how much a referral would generate.
To create the report, head to the Explorations tab and scroll over in the templates at the top until you see User lifetime:
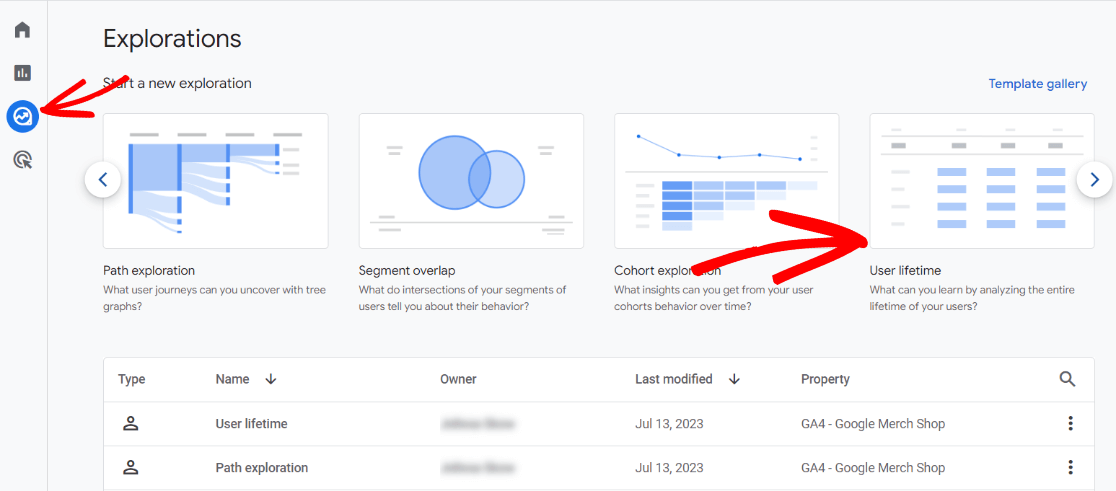
When you click on it, Google Analytics will set up your report for you:
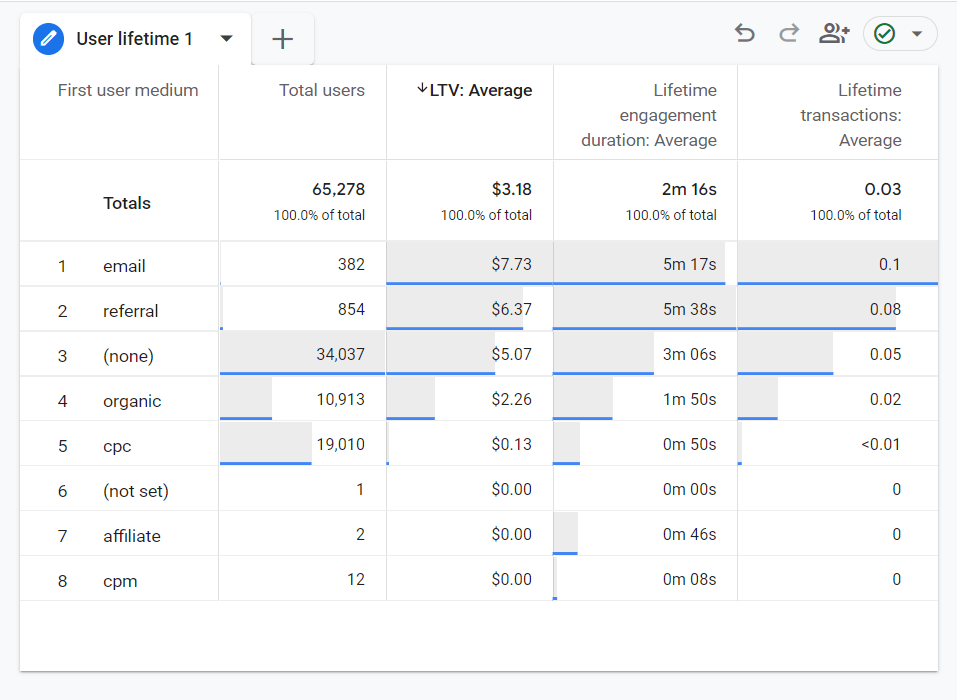
You can change the report to show you lifetime value in different ways. For instance, move a different dimension, like first user source, into the Rows box instead of first user medium.
How to Boost Lifetime Value of a Customer
After you’ve calculated how much profit a customer will generate for your website, here are a few ways of increasing customer lifetime value:
- Increase Returning Visitors – If you can get people to come back to your site, you’ll have a much higher chance of them making a purchase, which means an increase in CLV
- Create Loyalty Programs – You can offer rewards to visitors to get them to buy your products and services again and turn them into loyal customers
- Provide Superior Customer Support – It’s important that you resolve your customers’ questions in a timely manner so they have a great experience with your company
- Stay in Contact with Your Customers – By keeping in contact with your customers, either through an email newsletter, social channels, or any other medium, you remind them that you haven’t forgotten about them and it helps you develop a relationship with your buyers
- Offer Bundles and Upsell Products – You can boost your customer lifetime value by upselling products or offering bundles on products that compliment each other
- Make the Buying Process Easy – Keep the buying process simple and with few steps because many visitors abandon carts due to complicated checkout methods or forms asking for a lot of information
And there you have it, folks!
You now know how valuable are your customers, which should you acquire more, and which segments to retain.
We hope you liked our article on what is customer lifetime value and how to calculate it. You can also go through our WooCommerce conversion tracking.
And don’t forget to follow us on Twitter, Facebook and YouTube for more helpful reviews, tutorials, and Google Analytics tips.
